How To Access Wi-Fi Analyzer on Mac OS X Mavericks

It comes for the Wi-Fi signal to drop on MacBook, MacBook Air, MacBook Pro with Retina display and iMac computer. The best way to fix this is by opening the Wi-Fi scanner and changing the wireless channel your network is using can be a great solution. The process for doing this OS X Mavericks is different from other Mac OSX system and we’ll provide you with the steps required to fix you Wi-Fi problem. Recommended: Free Wi-Fi Analyzer To Find The Best Internet Connection.
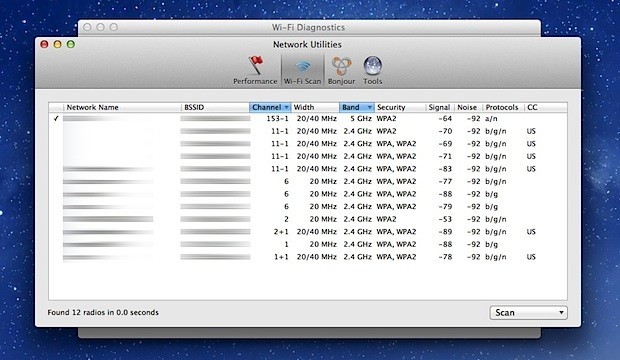
Mac OS X has a native WiFi analyzer tool that has many new features. A great new addition is the free built-in Wi-Fi scanner tool, that also has wifi stumbler to find and discover nearby Wi-Fi networks. You can look at the screenshot below for an example of the free Mac WiFi analyzer.
To find the best wireless channel to use, Mac users would typically use the native Wi-Fi scanner but since the upgrade to OS X Mavericks, it seemingly disappeared from the Wireless Diagnostics Utility and another method is required to get access to the Wireless Diagnostics Utility page. For those running OS X Yosemite, read this guide.
To be able to quickly and easily get access to the Mac’s native Wi-Fi scanner to find the best wireless channel for your network, follow these steps:
- Turn on your Mac computer.
- Find the Wireless Diagnostics Utility by either performing a Spotlight search for “Wireless Diagnostics”, or, hold down the Option key and click on the Wi-Fi icon in the menu bar. You’ll find Open Wireless Diagnostics at the bottom of the drop-down menu.
- When you’ve got the Wireless Diagnostics window open, head over the menu bar. Under Window, go to the Utilities option.
- Finally, once that Utilities window is open, head over to the Wi-Fi Scan tab, click Scan Now and find the best wireless channel for you!


