5 Methods to Fix The VIDEO_DXGKRNL_FATAL_ERROR Blue Screen Error

Are you dealing with the dreaded “VIDEO_DXGKRNL_FATAL_ERROR” error message on your Windows device? There are a few reasons it might happen, but it’s mainly related to graphics issues, like outdated drivers for your graphics card or some sort of file corruption. It’s a very frustrating error, as it causes the “Blue Screen of Death” and crashes your device, often while gaming or running certain apps.
Fortunately, there are ways around it. This guide looks at how to fix “VIDEO_DXGKRNL_FATAL_ERROR.”
Fix 1. Use the Troubleshooter
Windows has a bunch of built-in troubleshooters you can use to identify and fix many problems automatically. The Hardware Troubleshooter is particularly effective at dealing with errors like “VIDEO_DXGKRNL_FATAL_ERROR.”
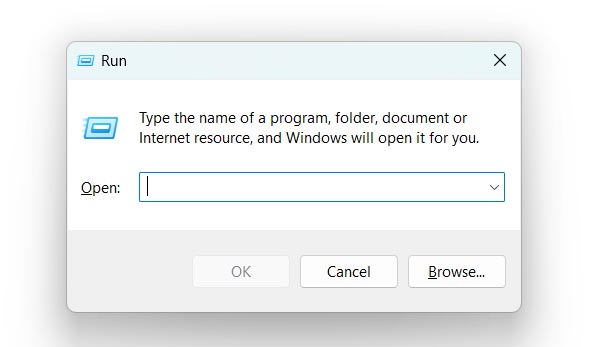
Step 1. Open the “Run” utility by pressing the “Windows” and “R” keys together.
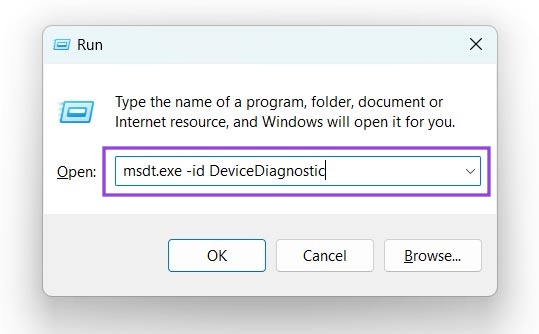
Step 2. Enter this command into the box “msdt.exe -id DeviceDiagnostic” and then hit “Enter.”
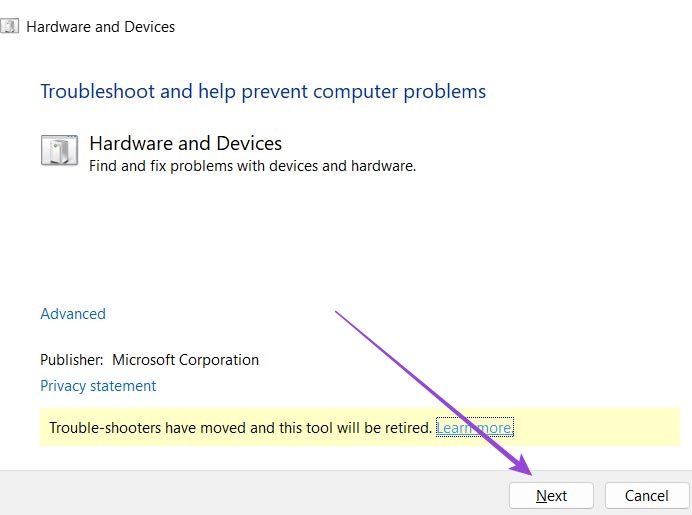
Step 3. A pop-up window should appear with the “Hardware and Devices” troubleshooter. Click “Next” to run the troubleshooter and see if it can fix the issue.
Fix 2. Update or Reinstall Your Graphics Drivers
As touched on earlier, the “VIDEO_DXGKRNL_FATAL_ERROR” issue is often linked with issues with your graphics card and its drivers. There might be some corruption in the drivers causing the error, which can be fixed with a quick reinstall. Or, your drivers might be out of date, so updating them should fix this.
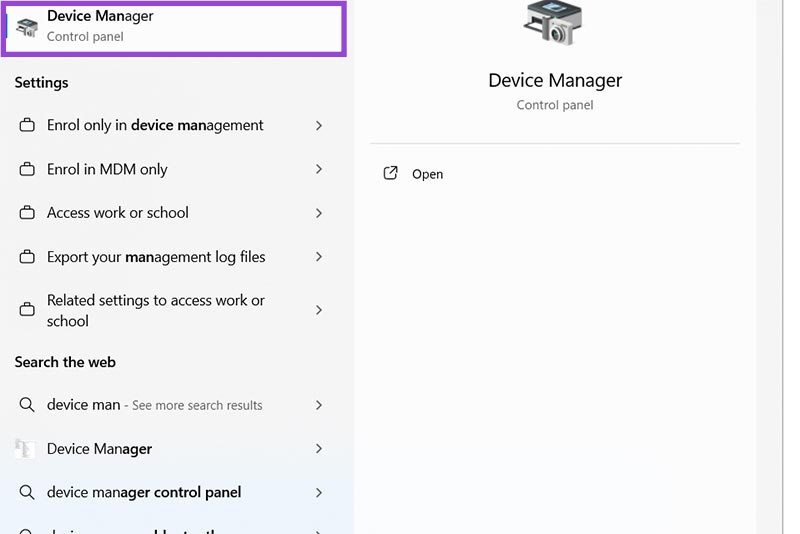
Step 1. Access the “Device Manager” by either right-clicking the “Start” icon and selecting it from the pop-up list, or type “Device manager” into the search bar.
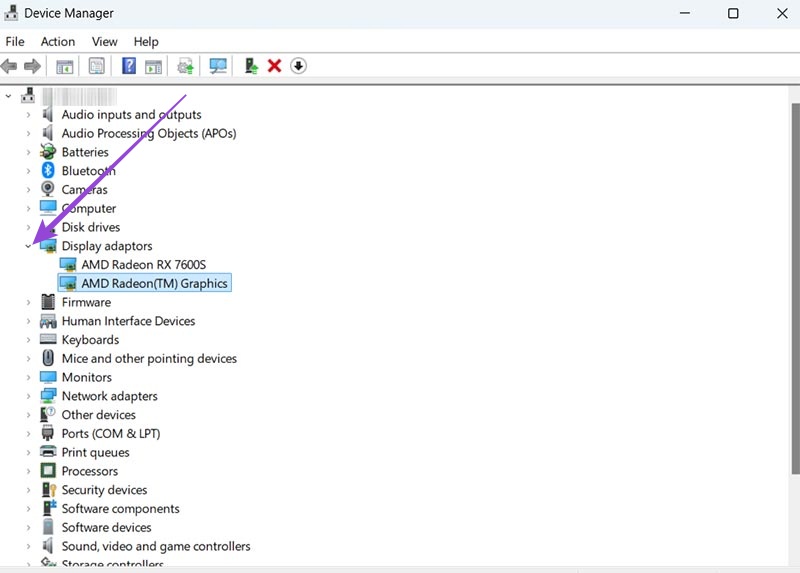
Step 2. Find your graphics card. It’ll be in the “Display adaptors” section, so click the arrow next to that to open it up.
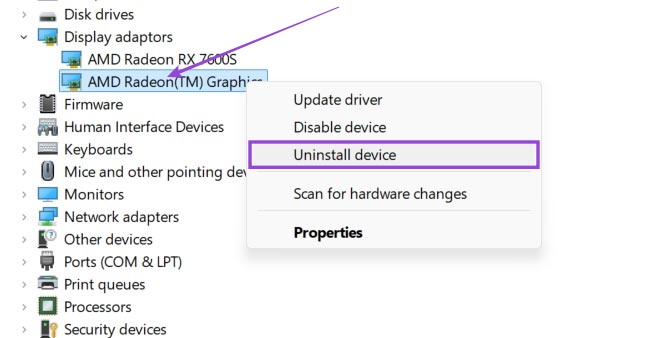
Step 3. For a reinstall, you need to right-click the graphic card and select “Uninstall device.” Then restart your PC and Windows should automatically reinstall the necessary files.
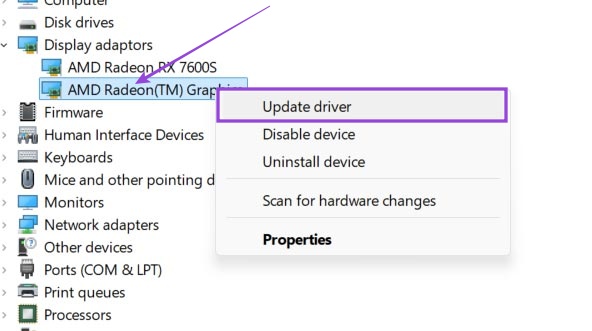
Step 4. Alternatively, click “Update driver” to try updating it to the latest driver files. Then select either “Search automatically for drivers” to let Windows find and install files itself, or “Browse my computer for drivers” if you’ve already downloaded the necessary files (usually from your graphics card manufacturer’s website).
Fix 3. Update Your System
A lot of Windows issues can be fixed by simply updating your system, as new updates bring bug fixes and other crucial improvements.
Step 1. Open the Settings menu by pressing “Windows” and “I” together or using another shortcut.
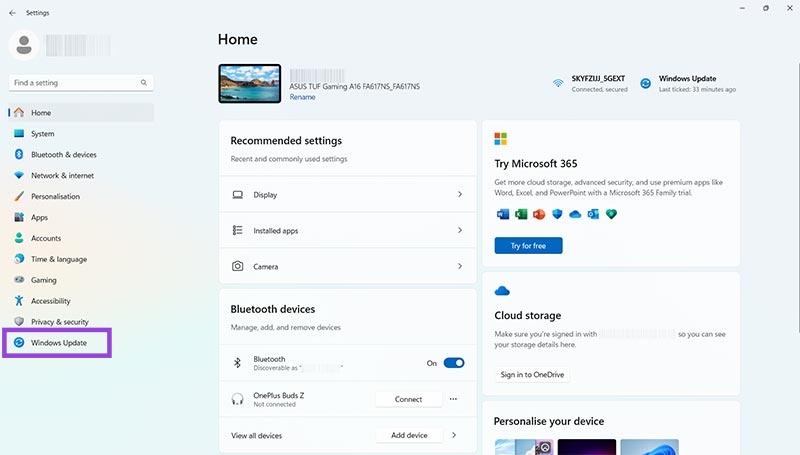
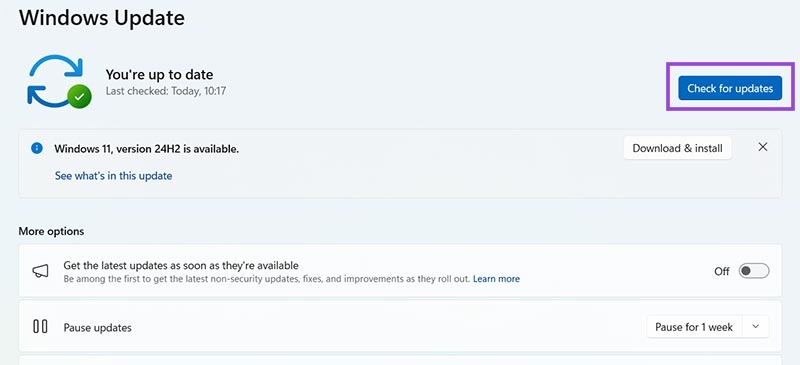
Step 2. Click on “Windows Update” and then the “Check for updates” button. If any updates appear, download and install them, before rebooting your device to see if the error has gone.
Fix 4. Run an SFC Scan
Another built-in Windows utility for resolving common problems like the “VIDEO_DXGKRNL_FATAL_ERROR” issue, is the SFC scan, or System File Checker. This basically scans your device’s files to look for any corruption.
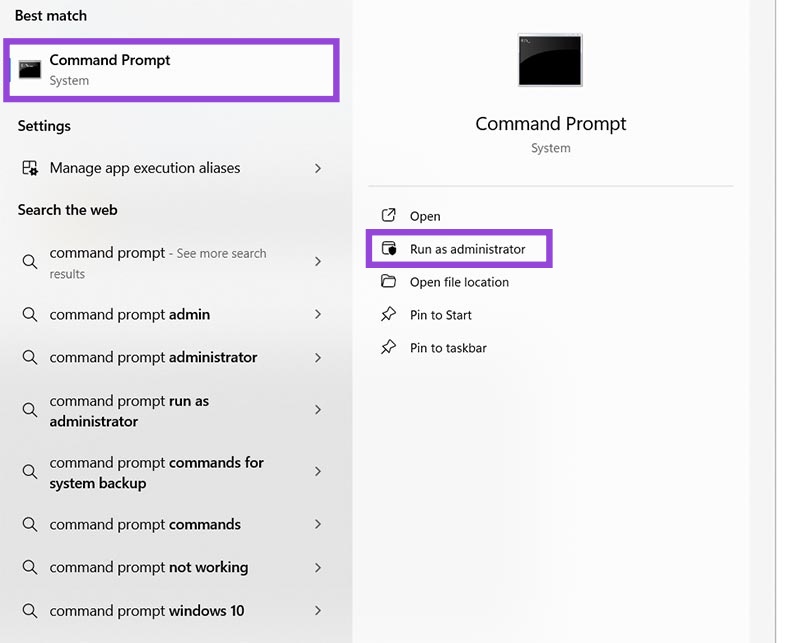
Step 1. Open the “Command Prompt” command as an administrator. You can find it by typing “CMD” into the search bar.
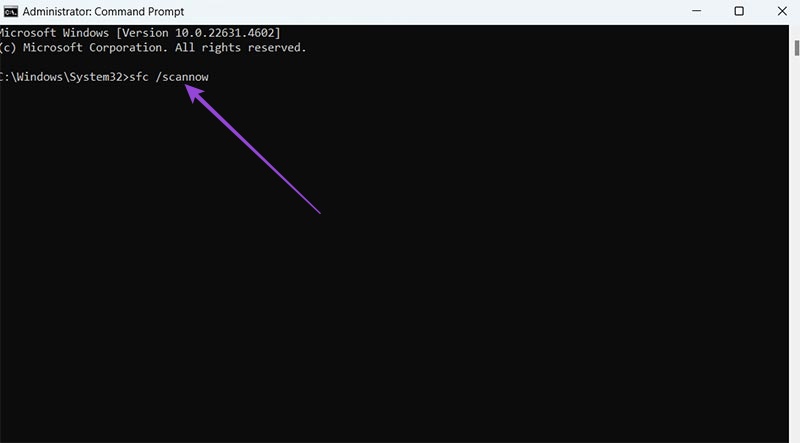
Step 2. Type “sfc /scannow” into the box and hit “Enter.” Then wait for the scan to run and see if it finds anything.
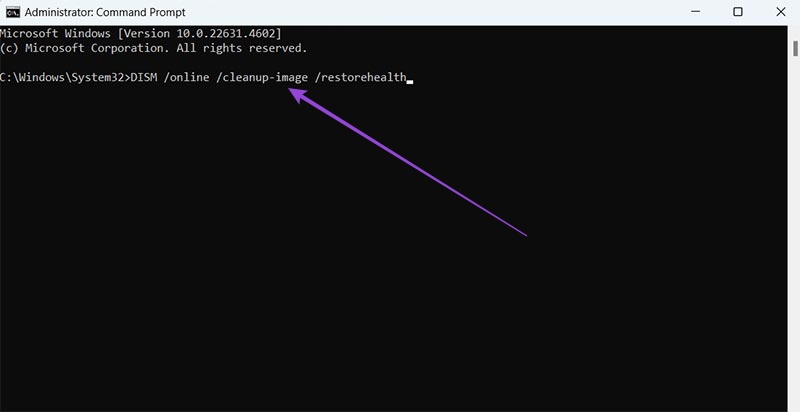
Step 3. You can also run a DISM scan via Command Prompt. Just enter this command: “DISM /online /cleanup-image /restorehealth”.
Fix 5. Reset Your PC
If all else fails and you’re still having the “VIDEO_DXGKRNL_FATAL_ERROR” problem, there’s one last fix to try: resetting your PC. This is the last resort solution, as it’s the most frustrating to deal with. It takes a while and involves uninstalling your apps and resetting your system settings, so you have to reinstall and reconfigure everything when it’s done. But it should fix the problem.
Step 1. Go to the Settings menu via either the Start menu shortcut or by pressing “Windows” and “I” together.
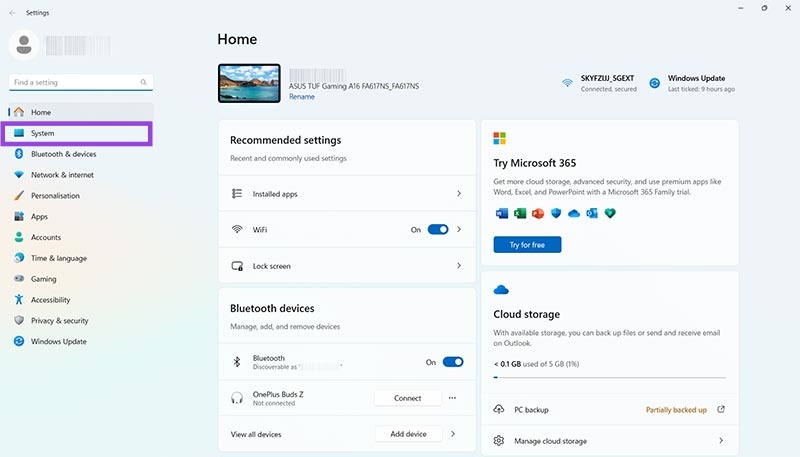
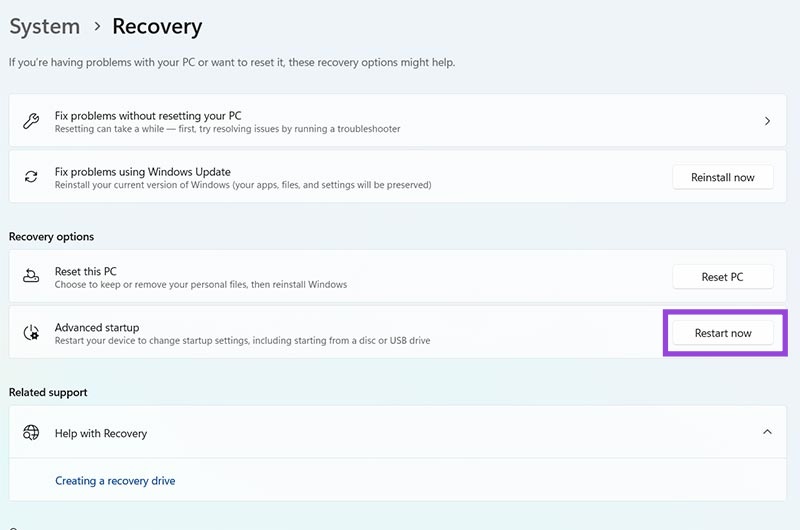
Step 2. Go to “System,” then “Recovery.”

Step 3. Click the button labeled “Reset PC” and follow the on-screen prompts. Your PC will restart during the process.
