How to Add iTunes Track Information to OS X Notification Center
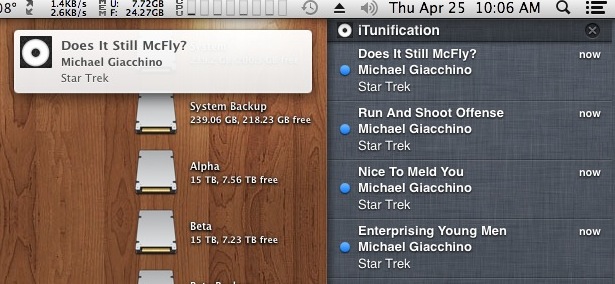
Notification Center is a handy iOS tool brought to the desktop with OS X Mountain Lion that alerts users to various events on their Mac. Apple included built-in Notification Center support for many apps, such as Mail and FaceTime, but oddly neglected iTunes. Thankfully, third party apps can also tie into Notification Center and solve this oversight on Apple’s part.
iTunification is a free app that adds iTunes notifications to Notification Center. When properly configured, users will receive a Notification banner with track, artist, and album information as each new song is played in iTunes. Here’s how to set it up:
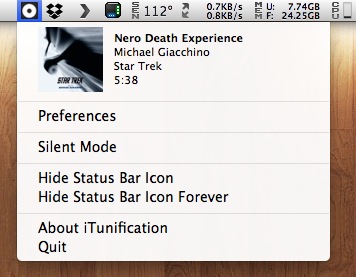
First, download iTunification and copy the app to your Mac’s Application folder. Once copied, launch the app and you’ll see a new menu bar icon appear. Click it to see current iTunes track information and the app’s settings.
Select “Preferences” and click the “General” tab. Here, check the box “Show notifications when music player is active” if you want notifications to appear even if iTunes is the active application, and make sure that “Always use Notification Center” is selected below. You can also choose to load the app at startup as well as keep a history of your songs in Notification Center (by default, only the currently playing track is shown).
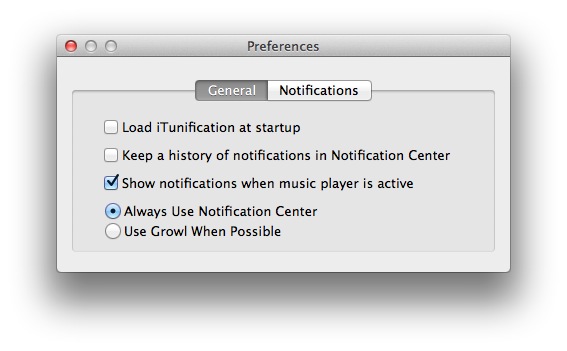
As the app’s preferences indicate, it can also be used with the Growl platform, but today we’re interested only in Apple’s Notification Center. Speaking of that, Notification Center users should pay no attention to the “Notifications” preference tab. Here, you can customize what information is shown in the banner notification when each new track starts. By default, the app displays Track Name, Artist, and Album, but you can also configure it to display a track’s rating, year, and genre. Unfortunately, these changes only work with Growl-based notifications.
Close Preferences and click the app’s menu bar icon again. Now, you’ll have a choice to make: you can leave the menu bar icon visible in order to access the preferences and settings again, or you can hide it, so that only Notification Center messages will be visible. To hide the menu bar icon, click “Hide Status Bar Icon.” This will remove the icon but only until the next reboot (or if you force quit the app with Activity Monitor). Alternatively, you can choose to hide the icon “forever” which will keep it from reappearing upon subsequent launches and reboots.
Nothing in software is truly “forever,” of course, and users who change their mind and want the icon back can delete the com.onible.iTunification.plist file from ~/Library/Preferences. After doing so, force quit and restart the app to see the menu reappear.

Once the app is configured to your liking, start playing tracks with iTunes. As each track starts or changes, you’ll notice a notification appear on your desktop. Clicking or swiping to open the Notification Center sidebar will also reveal the currently playing track (and previous tracks if you’ve configured the app to display them).

Our only issue with the app is that cover art, while visible when using Growl, is not displayed with Notification Center alerts. Only a generic CD icon appears. Unfortunately, this is a limitation of Apple’s Notification Center APIs, and nothing that the developer can currently change.
Leaving iTunes out of Notification Center was a surprising and disappointing move by Apple. Thankfully, iTunification fills the gap. Head over to the app’s website to download it for free, and be sure to use the “Donate” button at the top of the page to send the developer a few bucks if you find it useful.








2 thoughts on “How to Add iTunes Track Information to OS X Notification Center”
http://www.cultofmac.com/186158/put-itunes-now-playing-message-in-your-mountain-lion-notification-center-os-x-tips/