How to Convert and Encode Audio Files with Mac OS X Finder
There are several options for encoding or converting audio files in OS X, including iTunes, QuickTime, and third party software. But OS X also includes a handy AAC encoder built in to Finder. Here’s how to convert your audio files with just two clicks in OS X Lion and beyond.
First, note that this method is somewhat limited compared to other audio converters. It can only accept AIFF, AIFC, Sd2f, CAFF, or WAVE files and can only output to four AAC presets. However, these presets cover a range of uses and should accommodate most Mac users who manage their music in AAC formats.
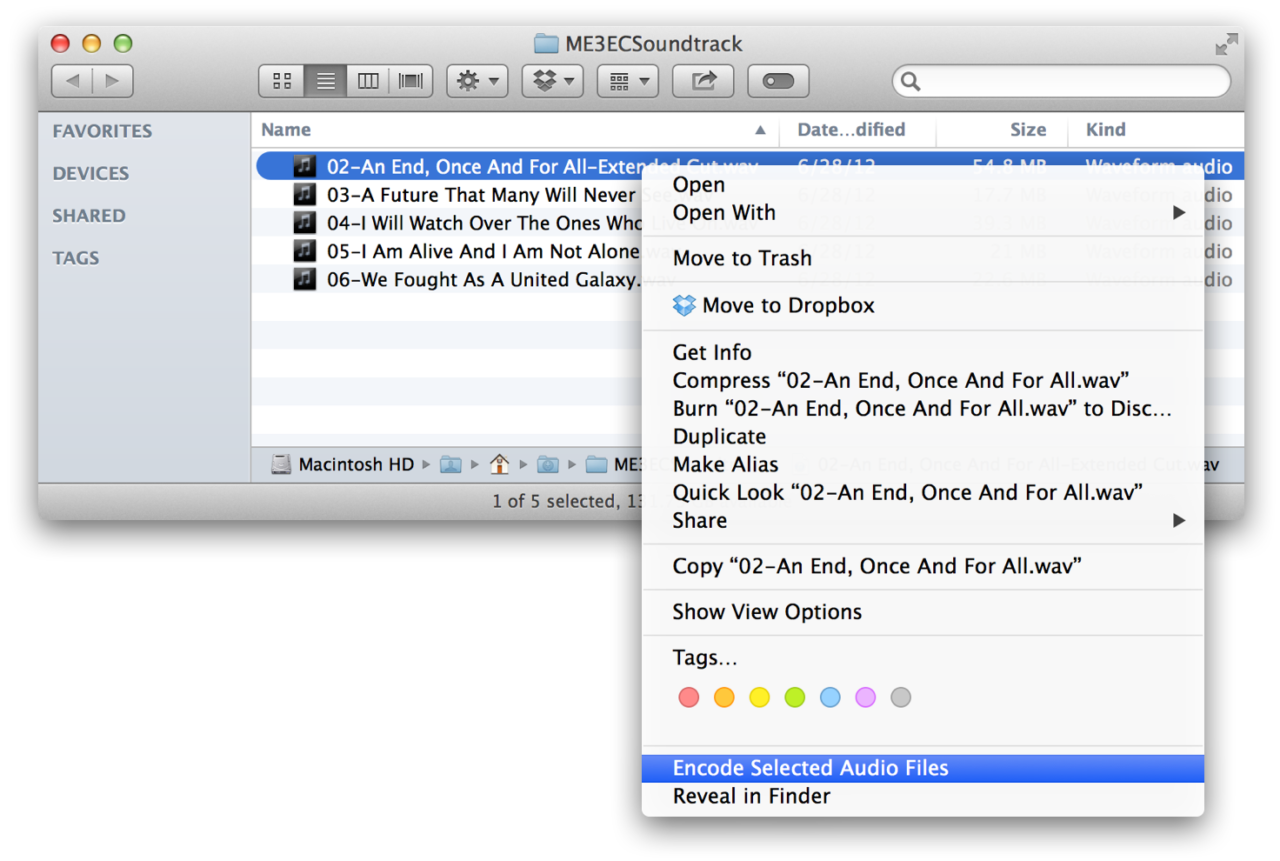
Once you’re ready to proceed, find your audio files in Finder. You can select either a single file or multiple files for a batch conversion. Next, right-click (Command-click) on the selected file(s) and choose Encode Selected Audio Files.
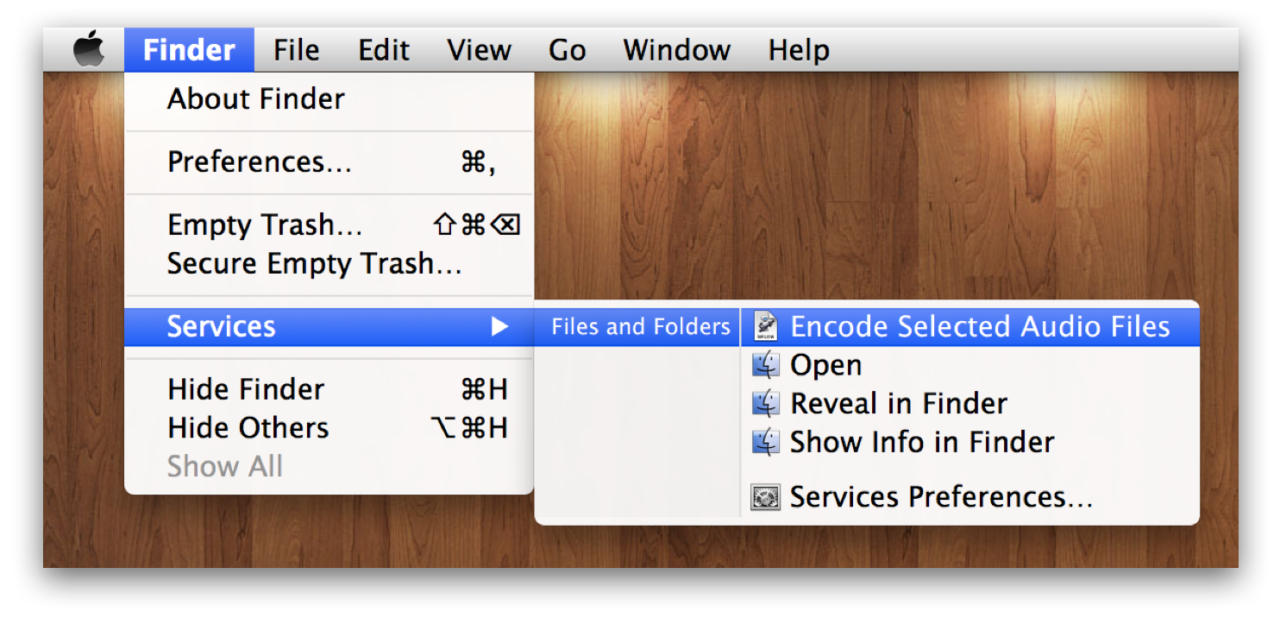
Alternatively, you can select your audio files, then use the Menu Bar to choose Finder > Services > Encode Selected Audio Files.
A window labeled “Encode to MPEG Audio” will appear and present you with a couple of options. Choose from one of four settings: High Quality (128kbps), iTunes Plus (256kbps), Apple Lossless, and Spoken Podcast (variable, about 64kbps for stereo).
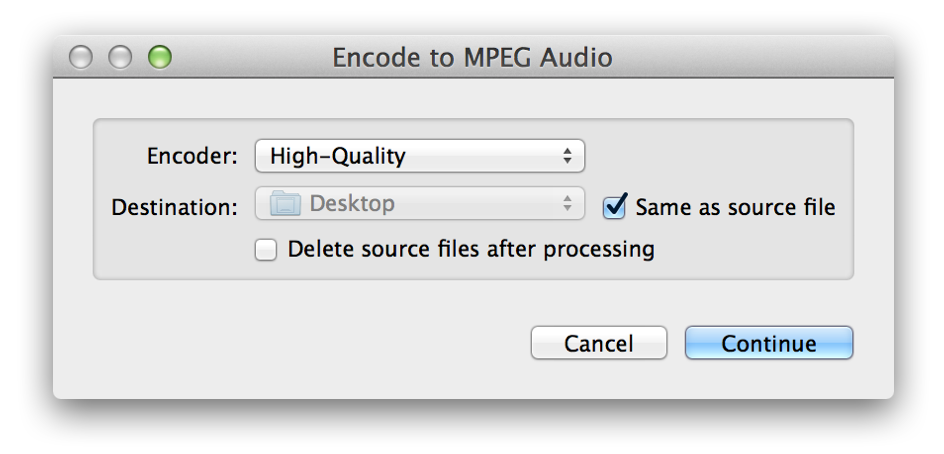
Next, choose where you’d like the converted files to be saved. By default, the encoder will put encoded files in the same directory as the source files. Tip: if you want to add your encoded files to iTunes, enter the following path as your destination and the files will be automatically added to the iTunes database the next time you open the app.
~/Music/iTunes/iTunes Media/Automatically Add to iTunes
Finally, you can choose to have Finder automatically delete the source file after the audio encoding is complete. Press Continue to finalize your settings and begin the encoding process. Most songs of average length will take just a few seconds to encode, and you’ll be left with your desired audio file type without having to launch an app.
The built-in audio conversion feature in OS X isn’t nearly as versatile as other options like QuickTime, but it’s fast, simple, and will likely satisfy the requirements of most users looking for an easy way to get audio into the Apple-friendly AAC format.
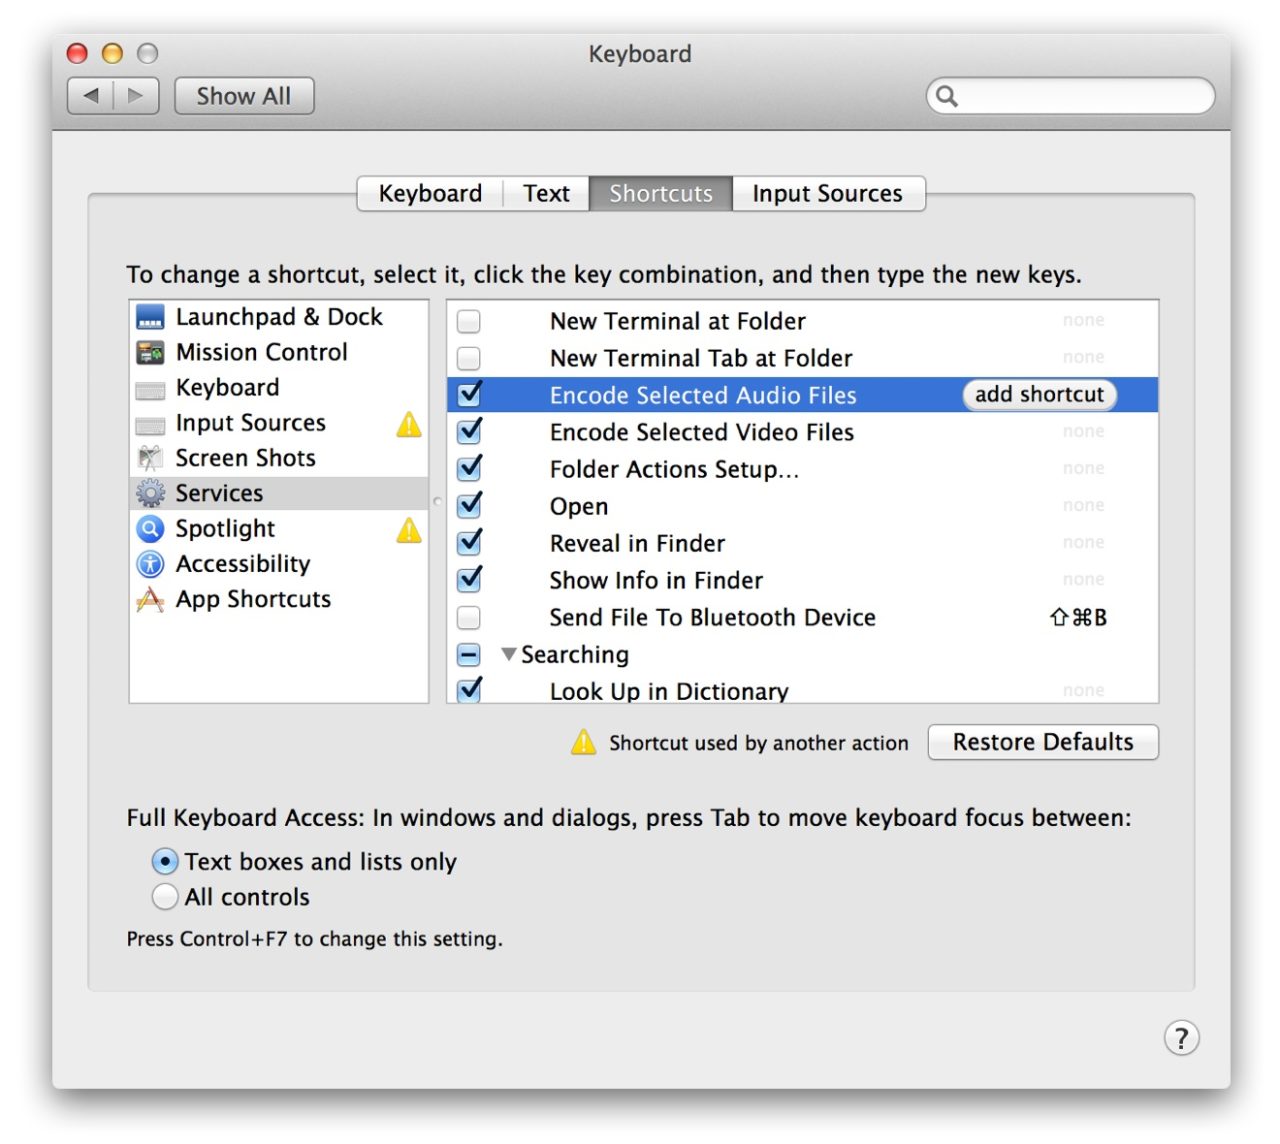
Don’t see an “Encode Selected Audio Files” option in Finder? You may have accidentally disabled the feature. To turn it back on, head to System Preferences > Keyboard > Shortcuts > Services and make sure that “Encode Selected Audio Files” in the list on the right side of the window is checked.







6 thoughts on “How to Convert and Encode Audio Files with Mac OS X Finder”
128 is unusable.
We`re developing WALTR – an app that can convert audio/video files directly to your idevice, it doesn`t require using itunes for sync! WALTR has no limits and supports all video/music formats. Despite being so powerful, it is extremely easy to use.
Look it up to check if it`s true;)