How to Manage Safari Push Notifications in OS X Mavericks

Apple effectively killed RSS integration with the launch of Safari 6 and OS X Mountain Lion in 2012, but the company introduced a new way for users to keep track of content on their favorite websites with the introduction of Safari Push Notifications last year. Introduced as part of Safari 7 in OS X Mavericks, Safari Push Notifications bring the familiar app notifications from iOS to the Web on the Mac, and let users get updates via Notification Center whenever an eligible website posts new content or information.
The feature has proven to be controversial, but many users enjoy it as an easy way to follow a select few sites. Here’s how to configure and manage Safari Push Notifications in Safari 7 and OS X Mavericks.
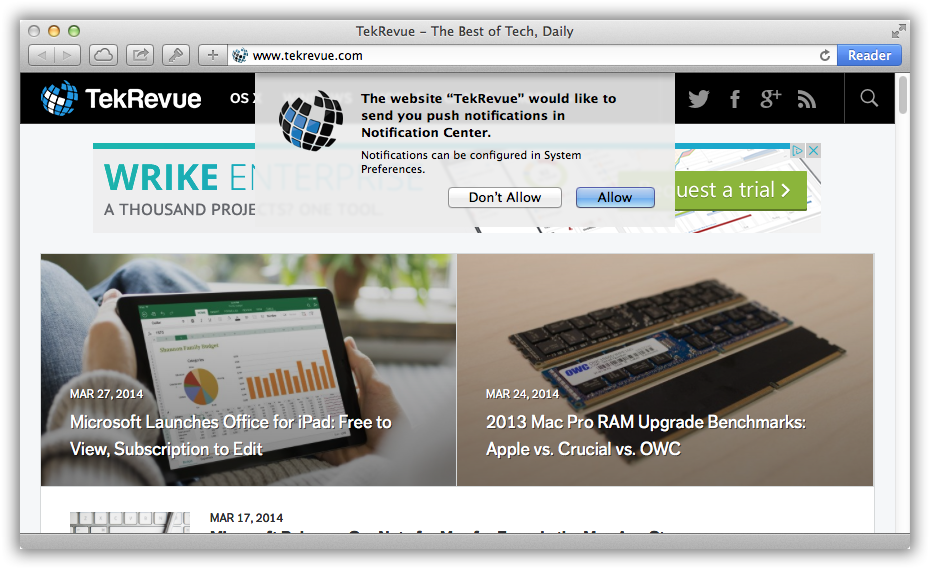
By default, users visiting websites that have enabled Safari Push Notifications, such as TekRevue, will see a banner appear at the top of the window the first time the site is visited. Here, the user can choose whether to allow notifications from the website. These notifications will appear as standard Notification Center alerts whenever the site posts new content or manually sends out a notification, including the appearance of a banner on the top-right of the screen and an entry in Notification Center.
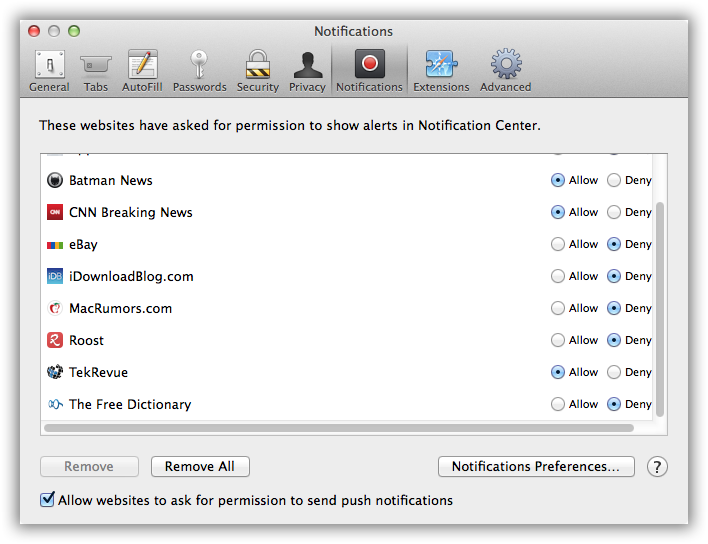
If a user no longer wishes to see notifications for a particular site, or wants to enable notifications for a site which was previously denied, per-site controls can be found in Safari’s Preferences. Head to Safari > Preferences > Notifications.
This window displays a list of all sites visited by the user that sought permission for Safari Push Notifications, along with the current setting to allow or deny the request. Users can individually change each existing site’s preferences or remove one or all of the sites entirely. Doing the latter will trigger a new notification permission request the next time the site is visited.
New in Safari 7.0.3, released April 1st, Apple added a universal option to disable requests for Safari Push Notifications altogether. This new option can be found in the same Safari Preference window referenced above. Simply uncheck the box “Allow websites to ask for permission to send push notifications” and no further requests will be made when visiting sites that support the feature.
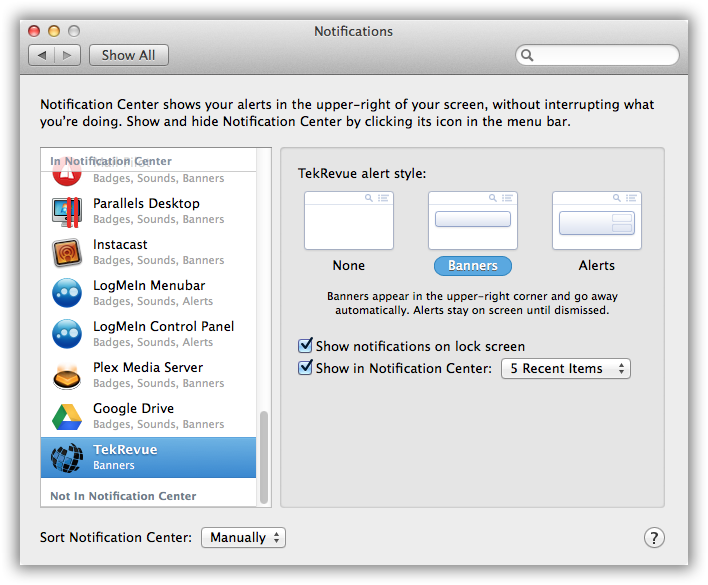
Once Safari Push Notifications are enabled for one or more websites, users can configure how notifications are displayed via the Notifications preference pane. This can be found by clicking on “Notifications Preferences” in the Safari Preference menu, or by going to System Preferences > Notifications.

Here, each website enabled for Safari Push Notifications will be listed alongside OS X apps already configured for Notification Center. Users can individually configure how notifications alerts are displayed (none, banner, or persistent alert), whether notifications for the website should be displayed on the OS X lock screen, and how many recent notifications should display in Notification Center. Once notifications are enabled for websites, they will obey the same rules as app-based notifications, including honoring Do Not Disturb settings.
Apple’s implementation of Safari Push Notifications is far from perfect, and a user’s list of allowed or denied websites in Safari’s preferences is likely to quickly grow unmanageably large. But Apple will also likely continue to improve the service, and hopefully introduce new features such as syncing between iOS and OS X. Until then, Safari Push Notifications can be quite useful when managed properly.


30 thoughts on “How to Manage Safari Push Notifications in OS X Mavericks”
unsubscribe me now. Thank you.
Thank you,
Jeffrey Greenberg