How to Hide Pictures in the Photos App on the Mac
The Mac Photos app is a great way to manage, edit, and show off your pictures. But the Photos app may also be home to our private, perhaps embarrassing, even unsavory images. If you’d rather keep such images away from prying eyes, there’s an easy way to hide pictures in the Photos app. It’s not foolproof, but it will keep someone from seeing your private items if you’re showing them other pictures, for example. So here’s how to hide pictures in Photos on the Mac!
First, launch the Photos app and click to select the image or images you’d like to hide. As you select each photo, a highlighted box will appear around it. To select more than one adjacent image, click the first image, hold down on the Shift key on your keyboard, and then click the last image. To select nonadjacent images, hold the Command key as you click each one.

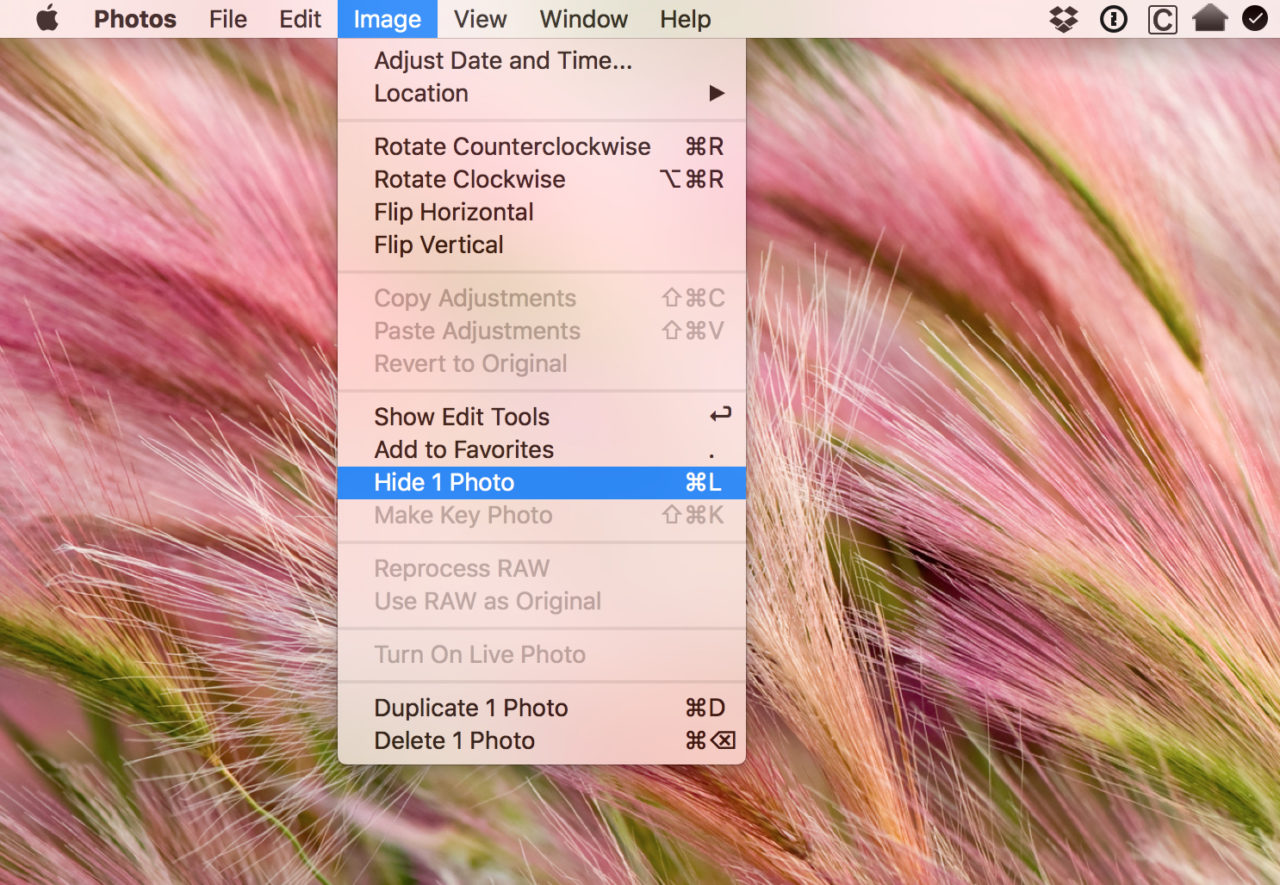
Once you’ve got your stuff selected go up to the Image menu in the Photos menu bar and choose Hide [number of] Photos, or press the keyboard shortcut Command-L.
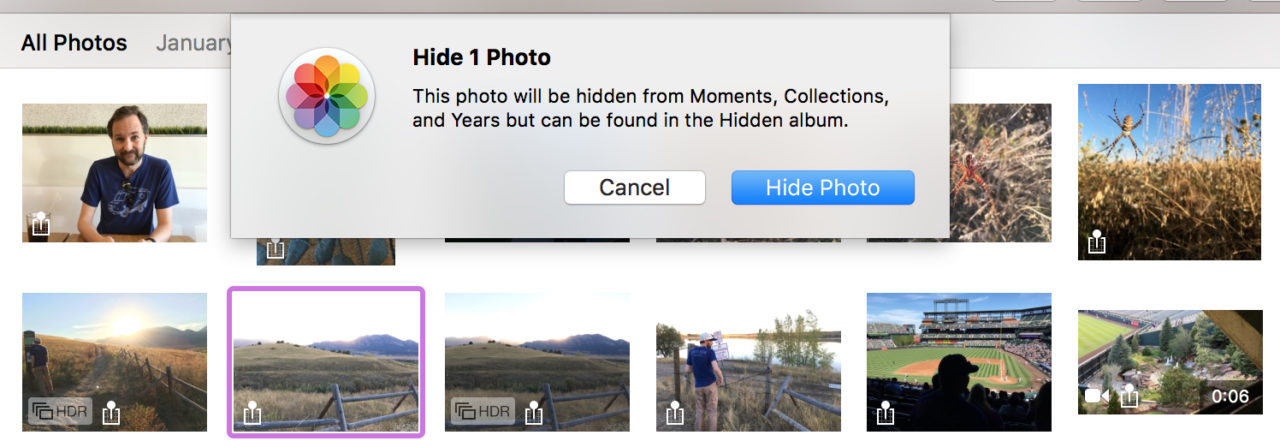
You’ll get a warning dialog telling you what’s about to happen. Click Hide Photo to complete the process.
This will place your images in a special album called “Hidden,” which is, itself, hidden by default. To show or re-hide the Hidden Photo Album, look for that option under Photos’ View menu.
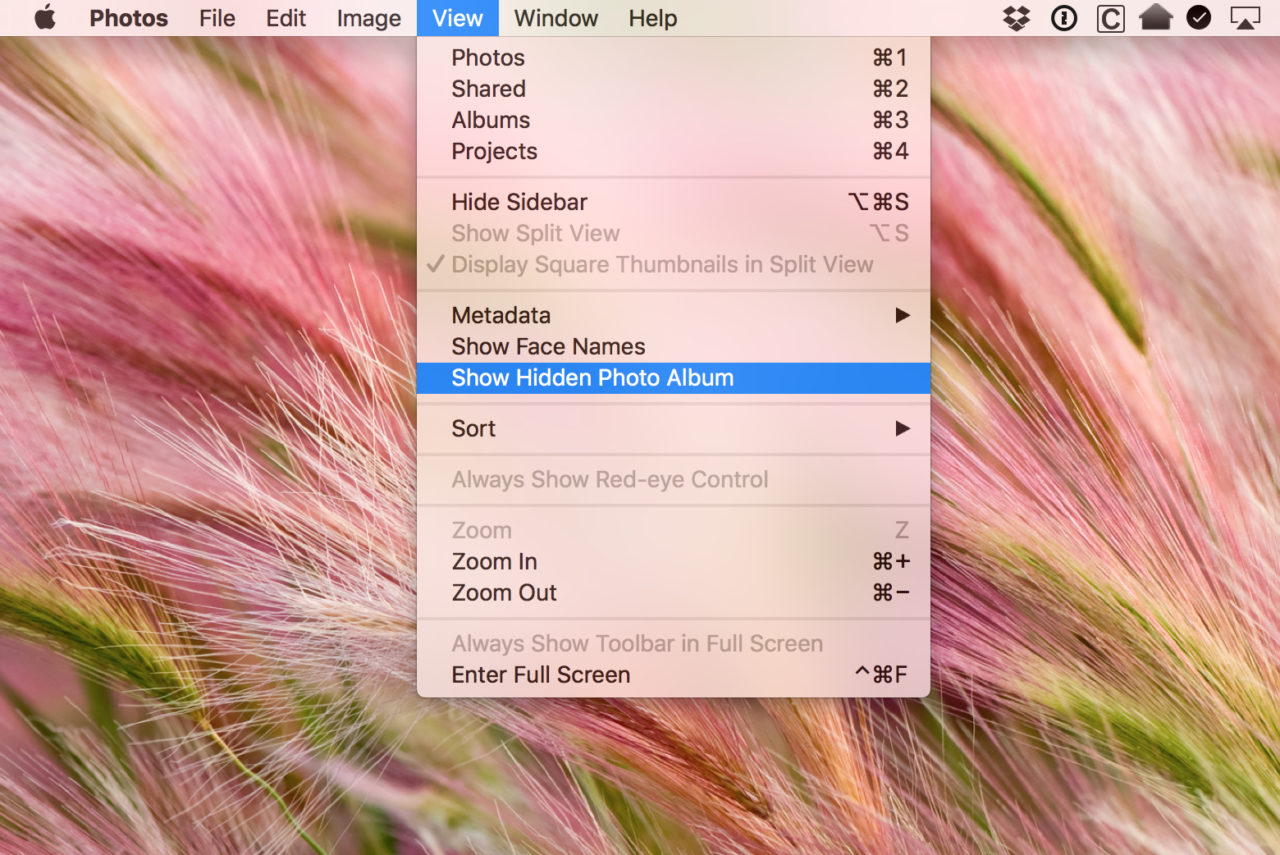
If you choose to show the Hidden album, it will appear in the Albums section of Photos.
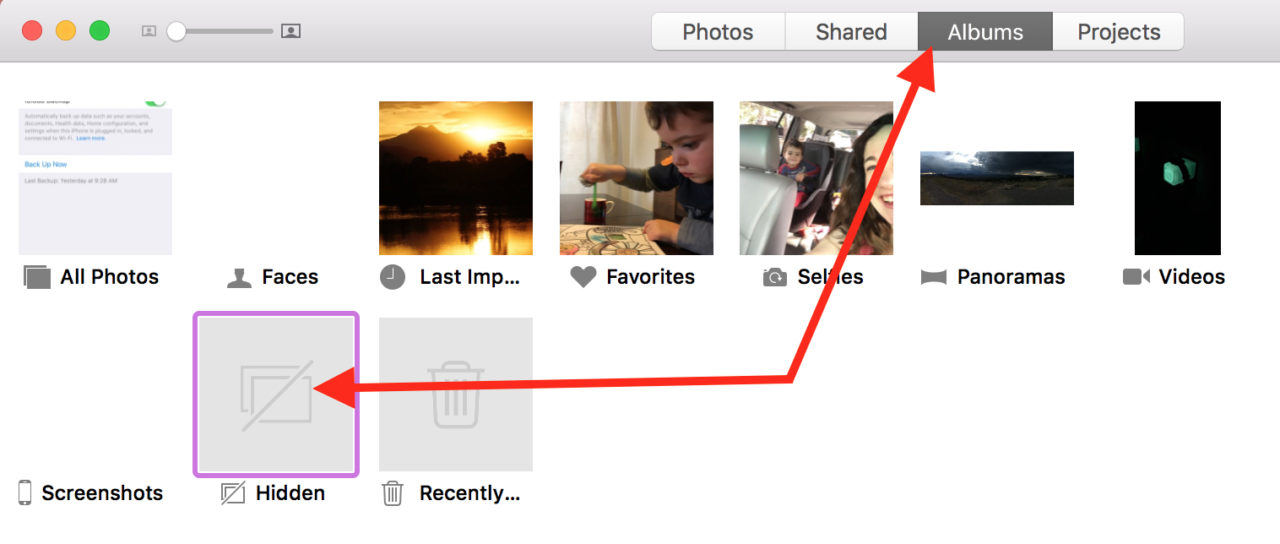
If you have the Photos sidebar enabled (View > Show Sidebar), you’ll find the Hidden album there.
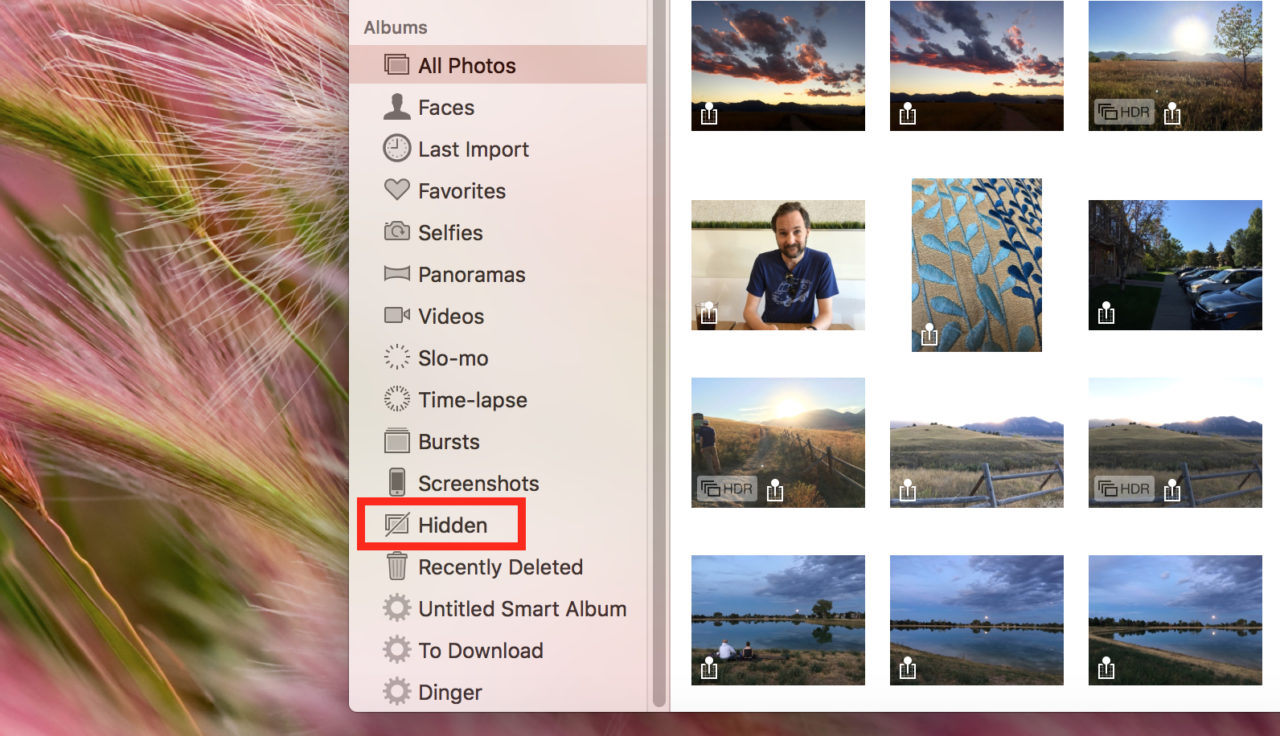
I recommend keeping the Hidden Photo Album out of sight, though. I mean, if you care enough to add pictures to a hidden album, you probably care enough to hide the album too, right? Don’t want anyone seeing those pictures of—uh, the Christmas presents you got them. Yeah, that’s it.


