How to Install Epson Printer on Chromebook

The idea behind the Chromebook is to store and use data that resides in the cloud, instead of on the machine itself. Of course, this doesn’t mean that printing is out of the picture. Here’s how to install an Epson printer on Chromebook.
Wireless vs. USB
Although most Chromebooks can connect to a printer via USB, it is much more convenient to use a wireless printer. For one, Chromebook tablets don’t have USB ports. Workarounds do exist, but a wireless Epson will go a long way in making your life easier. Printing isn’t an overly complex process, as the only piece of information that a printer needs is the file that needs to be printed. These are transferred quickly over Wi-Fi.
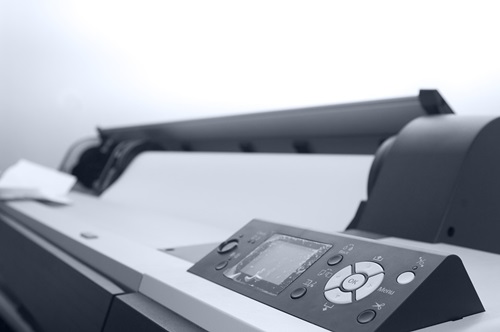
Connecting the Printer
If you have a wireless Epson printer, make sure that it is turned on and connected to the Wi-Fi. You won’t have to do much here if you are using an already set-up printer, or somebody else’s printer. But if your printer is new, you’ll need to set it up properly before continuing.
- Power on the printer. Make sure that it stays turned on while setting it up on its control panel.
- On the printer’s control panel, press Setup if your model has this button. If not, press the Home button and then select Setup and press OK.
- Use the Left and Right arrow buttons to get to the Network Settings Press OK to select it.
- Once in the Network Settings view, use the Up and Down arrows until Wireless LAN Setup is highlighted. Press OK.
- Highlight the Setup Wizard option and press OK.
- In the next view, select the SSID that you want to connect to. The SSID is the network name.
- If your network is secured, enter the security password. If it’s unsecured, select None and press OK.
Chromebook Setup
Once your wireless Epson printer is connected to your wireless network, it’s time to set things up with your Chromebook.

- Start the Chromebook and check the network settings. Your Chromebook must be connected to the same Wi-Fi network as the Epson printer, or the connection between the two devices will be impossible.
- Now, you need your Chromebook to recognize the printer. In Chrome OS, navigate to your account photo and select Settings. Scroll through the settings window until you reach the Advanced option and click it. The Advanced window will display several settings options.
- Find the Printing section and click it.
- In the Printing window, find the Printers or Google Cloud Print The name of this option depends on your Chromebook version.
- Find and select Add Printers (or Manage Cloud Devices, in some versions of the Chrome OS).
- In the next window, you’ll see a list of new devices that your Chromebook has recognized. Find your printer and click Add to add it to your Chromebook.
- The Register button will appear next to your printer, so click on it.
- Click Register on the confirmation screen and look at your product’s LCD screen. It should display a confirmation message.
- Press OK on your product to confirm the Google Cloud Print connection and try printing a test page.
Your printer should be linked to your Google account and accessible through your Chromebook, but also other tablets and smartphones with internet access.
Adding the Printer Manually
If the Add Printer option doesn’t display your printer, you’re going to have to add it manually. This is all done through your Chromebook, but make sure that the printer is properly connected to your Wi-Fi network and, once again, that you’re using the same network for your Chromebook and printer.
- Go to Settings.
- Select Advanced.
- Navigate to the Printing section and select Printers.
- Select Add Printer.
- Select Add Manually.
- Enter your info. Under Name, put any name you want. Under Address, enter your printer’s IP address. Select Protocol: IPP, and then Queue: ipp/print.
- Select Add.
- In the box that pops up, choose your printer’s model and manufacturer. If you aren’t sure about this information, refer to the label located under your printer.
- if you are having problems finding your printer in the list, check the label for its “emulation” or “printer language” and select the option that looks similar.
Epson and Chromebook
Epson printers work remarkably well with Chromebooks and you aren’t likely to experience any issues. Make sure that you consider getting a wireless printer, as these are much more convenient and diverse than the USB ones.
Have you ever set up an Epson printer? Did you experience any issues? How did you solve them? Feel free to discuss in the comment section below.






14 thoughts on “How to Install Epson Printer on Chromebook”
Name: EPSON91932F
Address: 192.168.xx.xx:9100
Protocol: AppSocket (TCP/IP)
URI: socket://192.168.0.x:9100
i cant print customer contracts now which means i stopped working now period!
this printer sucks
My Epson XP 235 was not located by my Lenovo chromebook on my wifi, even though all the other gadgets i Have are eg phone, tablets, laptop. So have used the add manual process with the settings you describe. Now can print but only in colour, regardless of what my printer settings are? Any ideas on why that is?