How to Remove Ring Doorbell Without Any Tools

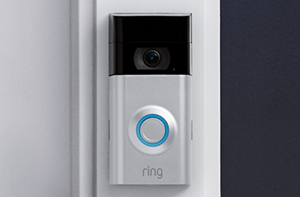
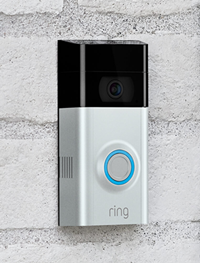
Ring Video Doorbell is a brilliant product that brings your doorstep to your smart device. Essentially, it completely replaces your doorbell and turns it into a speaker/camera/video streaming device. The best part about it is, you don’t even have to be at home in order to use the speaker or video streaming feature that Ring offers. It’s all done through a dedicated smart app that works seamlessly, as long as you have an internet connection.
However, you may want to remove the Ring Video Doorbell at some point, for whatever reason. Here’s how to do it.
Why Would You Ever Remove It?
Well, first and foremost, how does this device work? What is it powered by? It can’t be powered by a battery, that would be ridiculous, right? Well, wrong. Ring Video Doorbell, is, in fact, powered by a battery. This battery, however, can last between six to twelve months, depending on how often the motion sensor is triggered. At some point, the battery is going to run out, and you’re going to need to take it out of the device and recharge it or replace it. To do this, you’ll have to remove the device itself.
Alternatively, you may simply want to move the Ring device to somewhere else, even if it means by only a few inches. It may have been placed too high or too low, you may be moving to a new home, or maybe you want to place it on your backdoor entrance. Whatever the case, you want this process to be as simple as possible.

Removing It with a Screwdriver
In order to realize how big of an issue using the screwdriver for Ring installation can be, let’s go through the removal process. First, you’re going to have to remove the security screws. There should be a tool in the product box that will help you do this. Now, unmount the Ring device from the mounting bracket. You probably had to use a bit of force to mount the thing, so you’re likely going to have to use a bit more force to unmount it. But be careful not to break the mounting bracket.
If you’ve mounted the bracket on vinyl or wood, all that you need to do is remove the screws. Not difficult, but you’re still going to be left with those annoying holes in the wall. Alternatively, if you’ve mounted the bracket on a concrete, brick, or stucco wall, you’ve likely used plastic anchors for the holes. These anchors are somewhat of a nightmare to pull out. The best way to go is unscrewing the screws and then using the screwdriver in a lever position to force the anchors out.

Either way, removing the Ring doorbell with a screwdriver and other tools is definitely not a fun experience. Although the instruction manual wants you to install the device using the screws, it might not be the best way to go.
Removing It Without Any Tools
To learn how to remove the Ring Video Doorbell without using any tools, let’s start with an alternative installation process. The whole initial setup process is pretty much the same – you charge the 6,000 mAh battery, download the dedicated app on your smart device, connect the app to your Wi-Fi, and go through the setup process, as prompted.
At this point, the instruction manual tells you to start making the screw marks and screwing the device into your wall. The trick is using permanent outdoor mounting tape. It will make sure that your device remains safely stuck to your wall. Keep an eye out for things such as your wall paint, material type, etc. and buy the permanent outdoor tape in accordance.
You could glue the Ring device directly onto the wall, without using the mounting bracket, but then you’ll likely have to repeat the wall-mounting process for each battery replacement. Of course, you can still use the provided mounting bracket, which can be very convenient when you need to temporarily remove the device.
So, what’s the benefit of using the mounting tape, compared to the screws? Well, removing the device is much easier with the mounting tape. Additionally, you don’t have to drill any holes in the wall, ruining both the finish and the structure.
What Are the Downsides of Using Tape?
Honestly, there really are none. The first thing that probably comes to mind is the easy-to-remove factor. Wouldn’t a thief be able to remove it easily, too? Well, not exactly. First of all, they won’t suspect that the device is glued to the wall, rather than screwed into it. After all, the tape will take quite an effort to remove.
Additionally, you’ll be notified by the motion sensor. The Ring Video Doorbell device does come with a camera, after all.
So, How Do You Actually Remove It Without Tools?
Even with tape, you should be careful not to damage the device or your wall. It’s recommended that you use the provided mounting bracket for easy access. When removing the whole device, you shouldn’t just grab it by the hand and pull. This may break its casing or ruin your wall. Instead, use a lever with a dull edge and gently and slowly pull it towards yourself. If you do this properly, you’ll leave your wall and your Ring device undamaged.
No Tools, More Ease
The fewer tools you have to use, the easier your life is, that’s the general rule of thumb. In the case of Ring Video Doorbell, the screws don’t really bring anything good to the table, so using the tape is the best way to make sure that you can remove the doorbell with minimum effort, at any time.
Have you tried the permanent tape method? Do you prefer it over the screws? Make sure that you hit the comments section with any questions. Oh, and feel free to suggest any other ways of removing the Ring doorbell without using any tools.


2 thoughts on “How to Remove Ring Doorbell Without Any Tools”