How to Trigger an Email within Google Sheets

Microsoft Excel has been the king of computer spreadsheets for decades, for both personal and business use. While most large businesses will probably stay loyal to Microsoft, others might turn to Google. With Google Sheets you get most of the tools commonly used in Excel, and the app is completely free of charge.
Although Google Sheets might lack in some advanced features Excel readily provides, you’d be surprised how much stuff you can do with Google’s tool. One of the examples is sending e-mails directly from your spreadsheets.
Sending Emails Directly from Google Sheets
If you’ve been searching through the Google Sheets menus to find the email sending option, you’ve probably realized it isn’t there. Although this might seem like a tool spreadsheet software should have, this requirement is a bit more complex. The reason being it requires too many variables that a simple tool just can’t handle.
And this is exactly where Google Sheets gets close to Excel, because it also allows you to write and edit your own scripts. With just a few lines of code, you can make Google Sheets do much more than seems possible at first.
Preparing the Spreadsheet
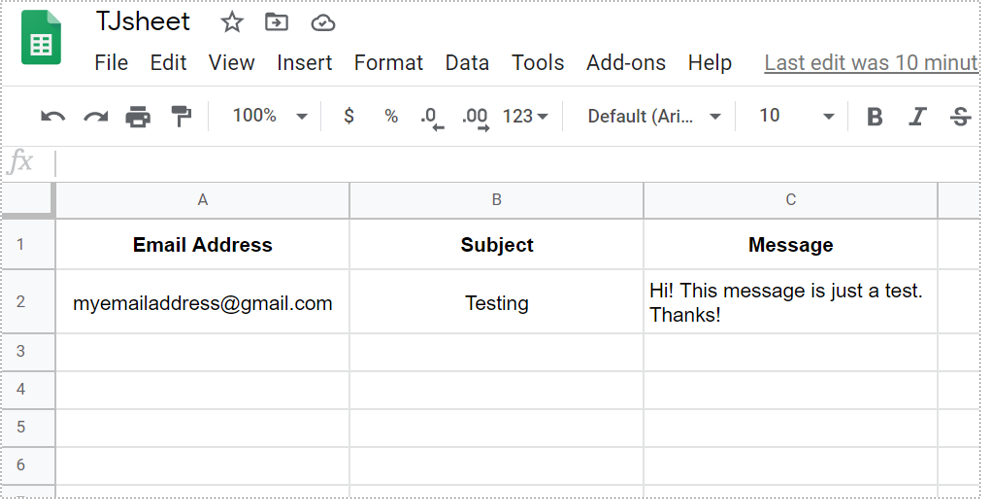
This is the simplest and best scenario to help you understand how Google Sheets coding works. There are three pieces of data you’ll need for this: the email address, email’s subject, and the message text. It’s best to use your own email address here, so you can check whether the script has done its job or not.
To start, first create a spreadsheet that looks like this:
Writing the Script
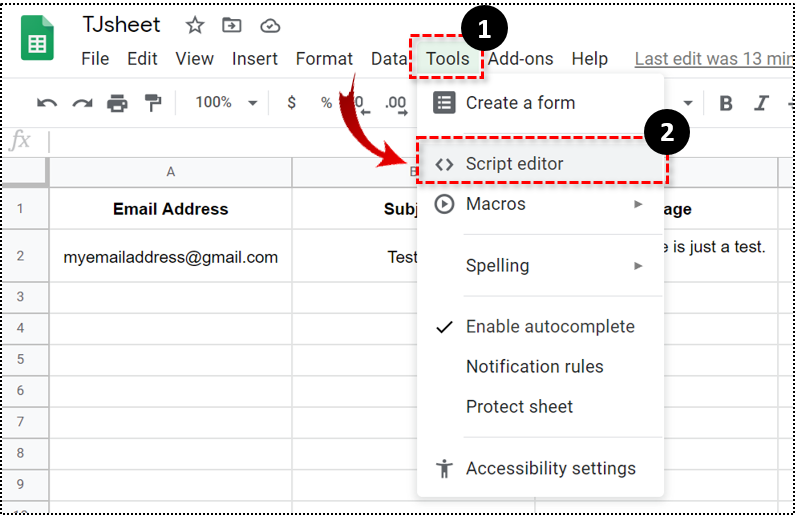
Now it’s time to write the code for that spreadsheet. In the menu at the top of the page, first click the “Tools” tab, and then “Script Editor”. When the editor opens, you’ll see the starting template for coding. It looks like this:
function myFunction () {
}
To make this script your own, you need to change its name. To do so, simply replace the “myFunction” text with “sendEmail” for example. Of course, you can name this function anything you want, just make sure it’s intuitive enough so you know what it does.
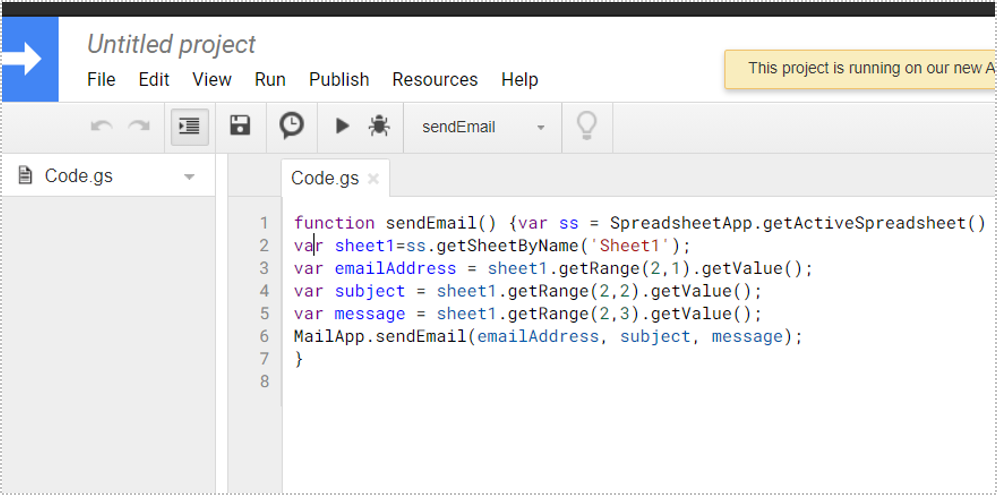
Now that you’ve renamed the function, it’s time to write the code. In this case, it’s enough to copy the code below and paste it between the two curly brackets for your function. The end result should look like this:
function sendEmail () {
var ss = SpreadsheetApp.getActiveSpreadsheet()
var sheet1=ss.getSheetByName(‘Sheet1’);
var emailAddress = sheet1.getRange(2,1).getValue();
var subject = sheet1.getRange(2,2).getValue();
var message = sheet1.getRange(2,3).getValue();
MailApp.sendEmail(emailAddress, subject, message);
}
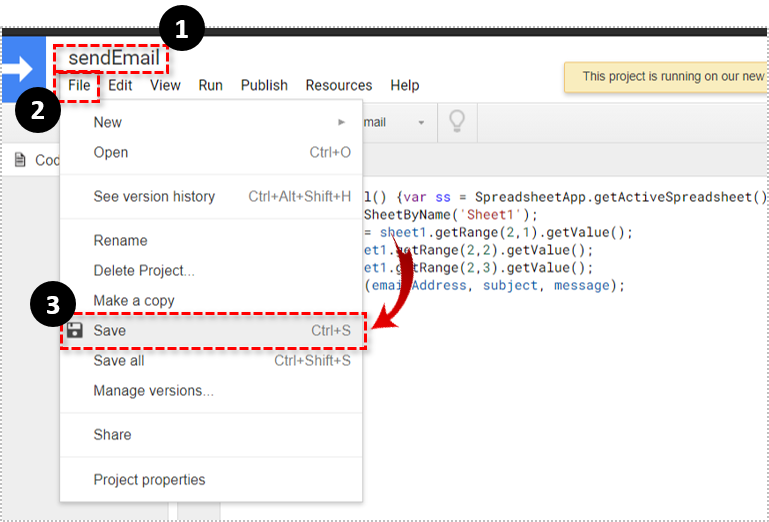
The next step is to save this script. Assign the name to your script by clicking “Untitled project” just above the File tab. For example, you can use the function name for reference, so type “sendEmail”. Click the “File” tab from the top menu, and click “Save”.
Checking the Script
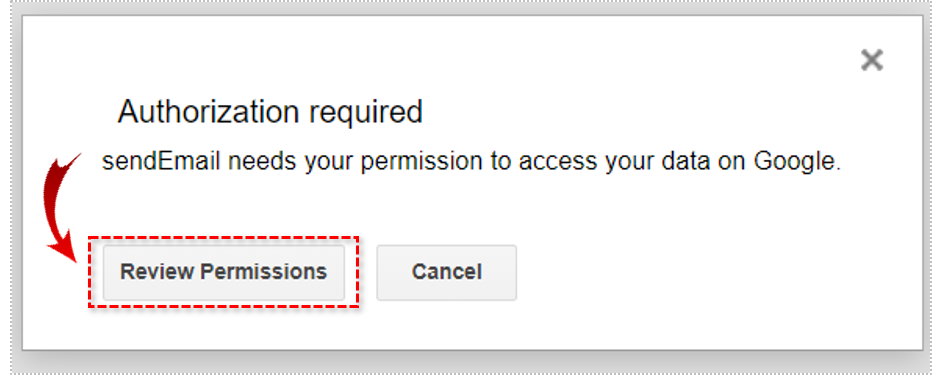
To check the script for errors, click the play button from the toolbar above the Script Editor’s main screen. As a precaution to prevent running malicious scripts, the app will ask you for the permission to run your script. To do so, follow the next few steps:
- Click “Review Permissions”.

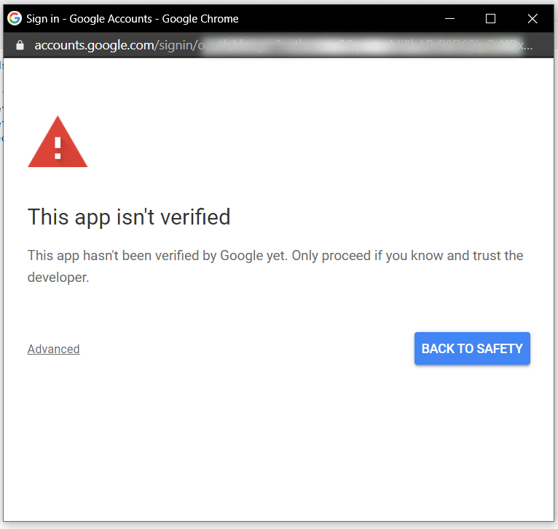
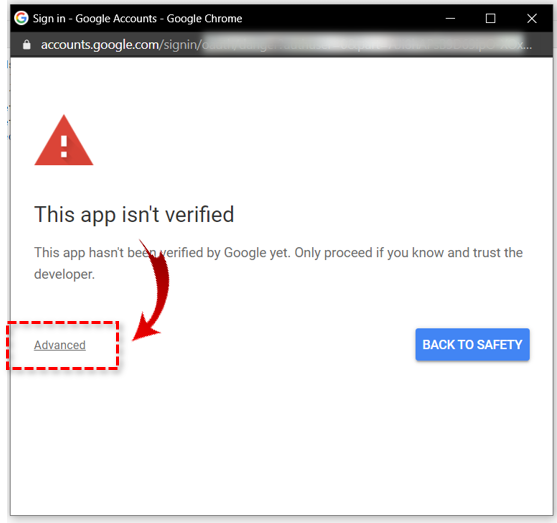
- A warning pops up, notifying you that Google doesn’t recognize the script’s author.

- Since you’re the author of the script and you know it’s ok to run it, click “Advanced”.

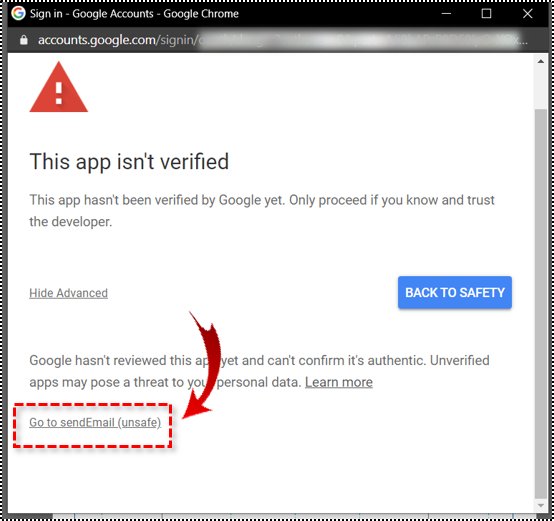
- Scroll down through the options and click “Go to sendEmail”.

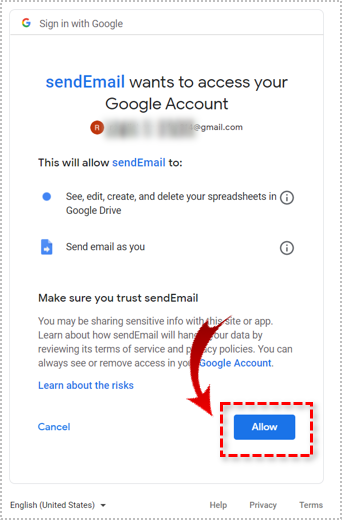
- A confirmation screen should pop up now, so click “Allow”.

With that done, a yellow label will appear at the top of the screen, notifying you that your script is running. When the label disappears, your script has completed its task. Now go to your inbox and check if you’ve received the email. Also, check if both the subject and message text are exactly as you’ve defined it in your spreadsheet.
Creating the Action Button
If everything went well with the test, now you need to add the action button that will allow you to manually trigger the email sending.
- Click the “Insert” tab from the top menu.
- Click “Drawing”.
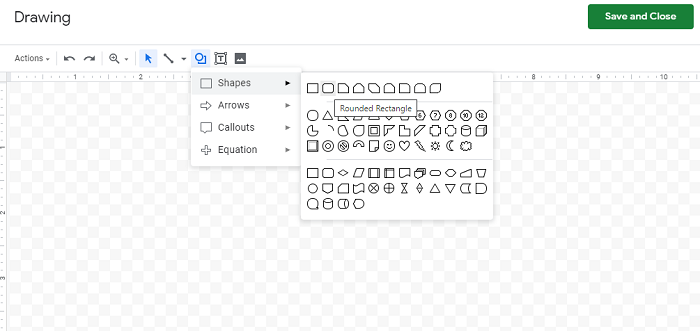
- When the drawing window opens, click the “Shape” button from the window’s menu.
- Click “Shapes”.
- Select the “Rounded Rectangle” option, the second icon from the left.
- Click and drag the rectangle to the size you want your action button to be.
- Now double-click the rectangle to add text. You can type “sendEmail”, like the name of your script.
- With that done, click the “Save and Close” button in the upper right corner of the window.
Now you need to connect your script to this button.
- Click the “sendEmail” button.
- Click the three dots in the upper-right corner of the button.
- Click “Assign script”.
- Type in the name of your function, which in this case is “sendEmail”.
This will finally enable you to manually trigger sending an email to your address anytime you click this button.
From a Spreadsheet to an Email
Although this feature isn’t readily available as one of the menu options, it’s great that there’s a way to make it work. Even if you don’t know how to code, this guide shows you how to generate your own script. Now that you know how to automatically trigger your spreadsheet to send emails, make sure you experiment with this option.
Have you managed to setup your Google Sheets to send emails? How do you use this feature? Please share your thoughts in the comments section below.




One thought on “How to Trigger an Email within Google Sheets”
I am not hugely familiar with scripts, I am a novice!