How to Cancel Your Zoom Subscription From the Web, Google Play, or App Store

Found a Zoom alternative that better suits your needs? Then, it makes sense to cancel your Zoom subscription and save money. After all, what’s the point of paying for Zoom when you don’t need its premium features? Plus, you can resubscribe or reactivate your membership as and when required.
But how to cancel your Zoom subscription? Continue reading as we explore all known ways to cancel your Zoom subscription. But before that, let’s look at the two prerequisites for ending your membership.
Prerequisites for Canceling Your Zoom Subscription
You must fulfill the following conditions to cancel your Zoom subscription:
- You must have purchased the subscription online.
- You must be the account owner or admin.
- If you’ve got a custom role, it should have billing privileges.
How to Cancel Your Zoom Subscription on the Web
Follow these steps to cancel your Zoom subscription on the web portal:
- Visit Zoom.us.
- Sign in to your account by clicking the Sign In option at the top right corner.
- Verify your account using the code sent on your phone or email.
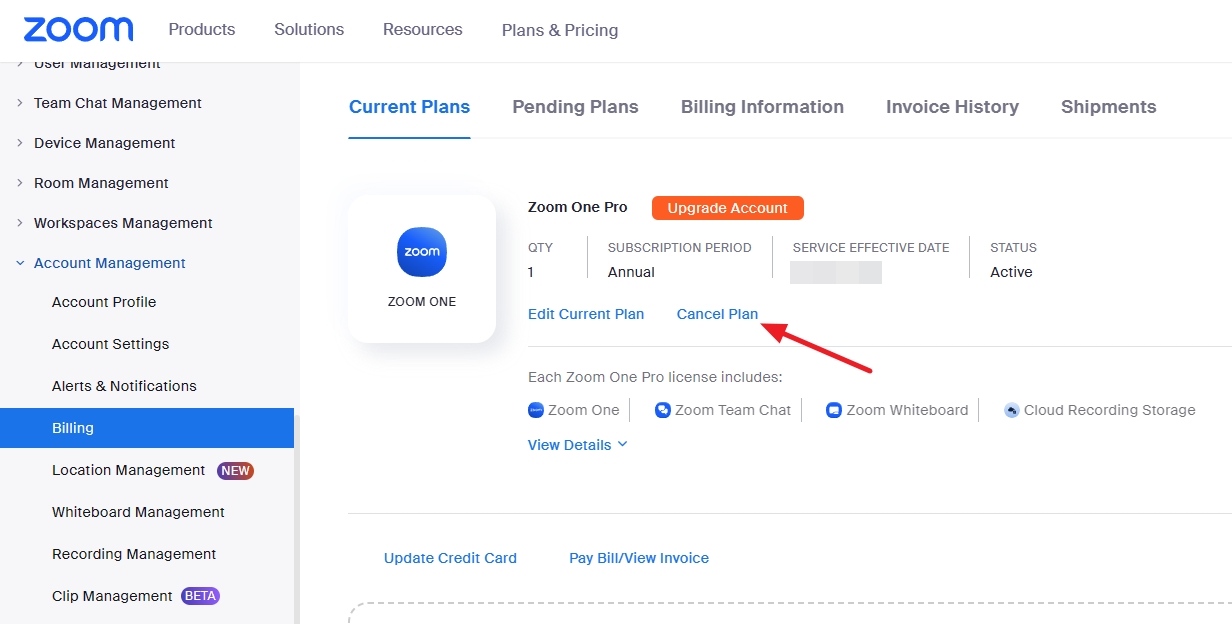
- In the navigation menu on the left, click Account Management. Then, select Billing from the sub-menu that opens.

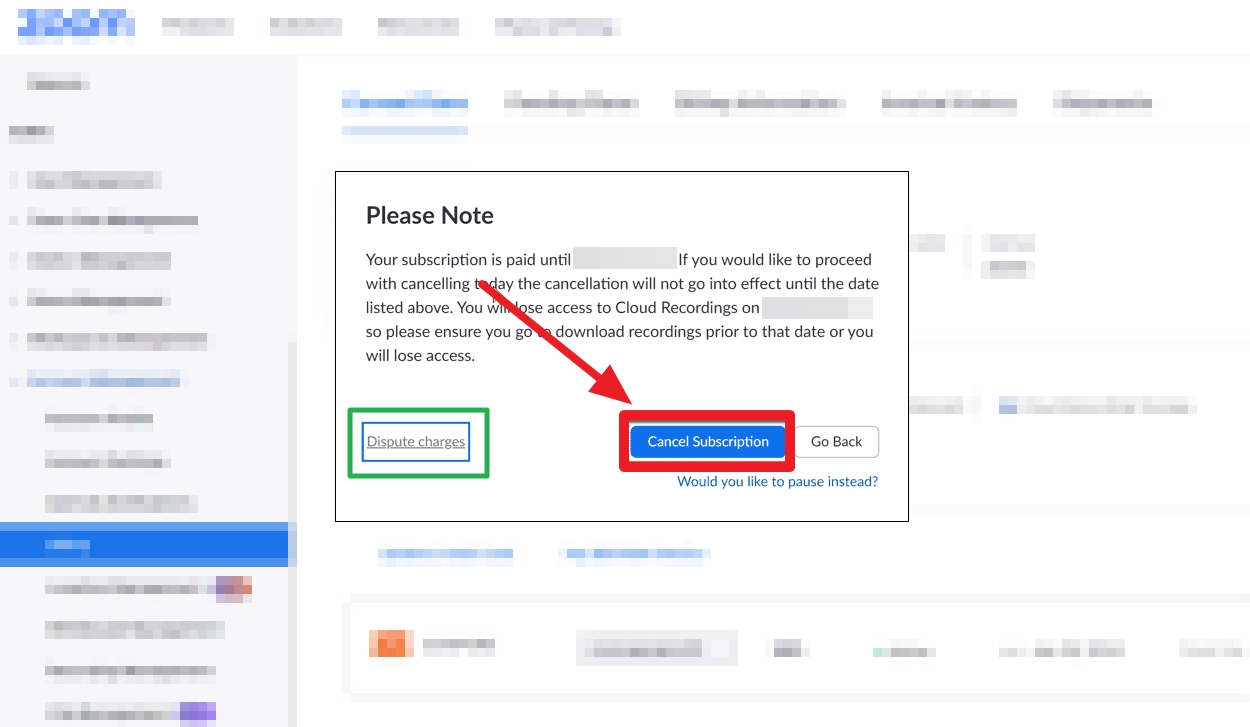
- Under the first tab, i.e., Current Plans, choose the plan you want to cancel and click Cancel Plan. This will stop your subscription’s automatic renewal.
- A confirmation pop-up will appear on your screen. Click Confirm Your Cancelation to confirm your action.
This will successfully end your paid Zoom membership. Also, check your inbox for an email about the same.
It’s worth noting that canceling your Zoom subscription will also make all your cloud recordings inaccessible. They will also get permanently deleted 30 days after cancellation. So save your Zoom recordings before canceling the subscription.
You can change your Zoom name even after canceling your subscription.
How to Cancel Your Zoom Subscription on Android
These steps will help cancel your Zoom subscription on Android if purchased through Google Play:
- Open the Google Play Store on your device. Ensure you’re signed into the same account you used to purchase your Zoom subscription. If not, switch the accounts.
- Tap the Account icon at the top right corner.
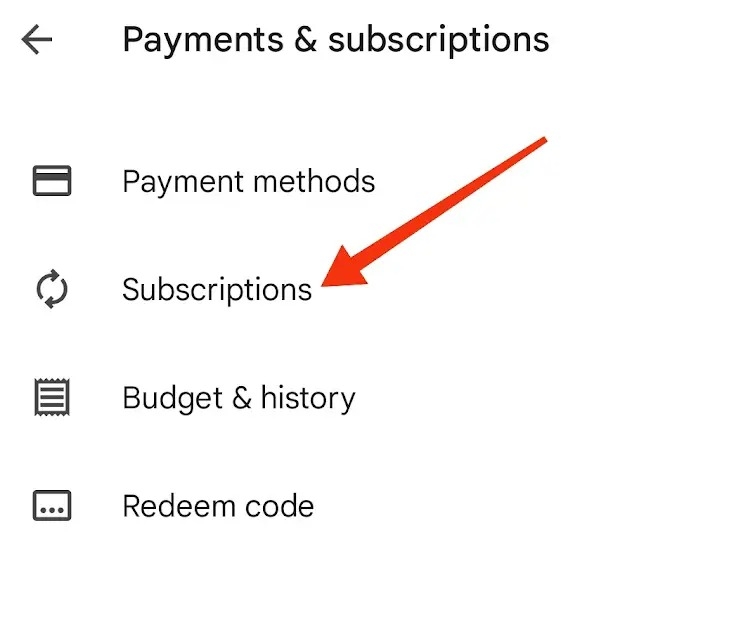
- Go to Payments & subscriptions.
- Under Payments & subscriptions, select Subscriptions.

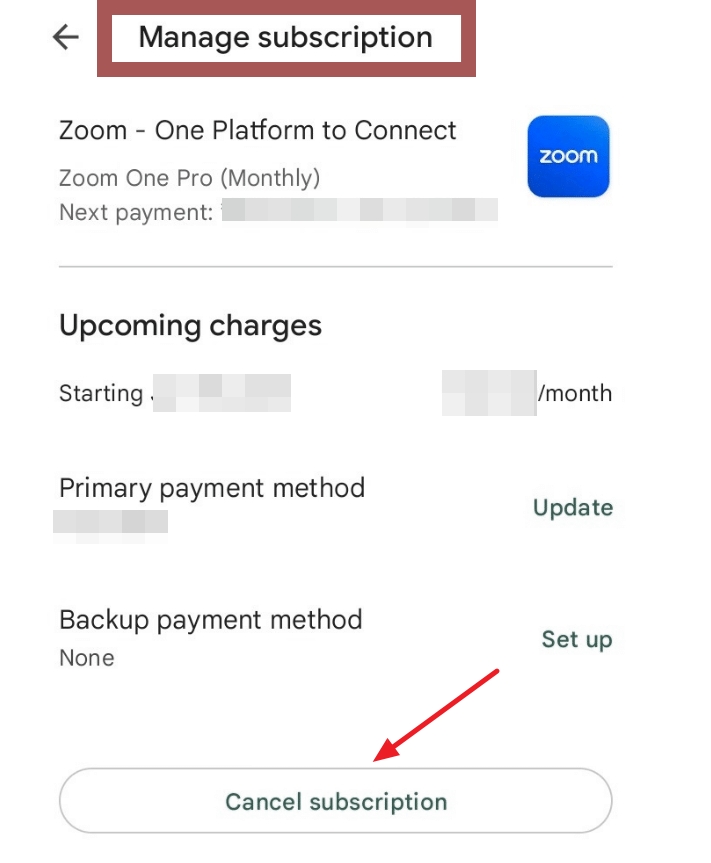
- Find the Zoom subscription from the list.
- Tap Cancel subscription and follow the on-screen instructions.

If you’re asked to choose a reason for your cancellation, select one from the list and tap Continue. Confirm your action by tapping Cancel subscription.
Do note that uninstalling Zoom from your phone won’t cancel your subscription.
How to Cancel Your Zoom Subscription on iOS?
If you’ve subscribed to Zoom directly from your iPhone, you need to cancel the subscription from the App Store.
- Open the Settings of your iPhone.
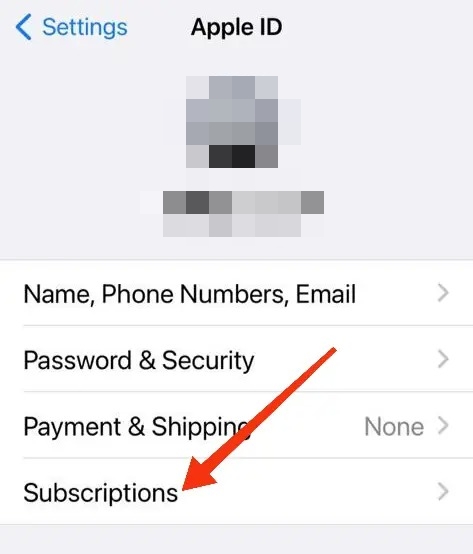
- On the top, tap your name.
- Find and tap on Subscriptions.

- Tap Zoom.
- Finally, choose the Cancel Subscription option.
You can continue enjoying your premium Zoom subscription until the next billing date. At that point, all paid privileges will be removed from your account. You can uninstall Zoom from your Mac after canceling the subscription.
How to Resubscribe or Reactivate Your Zoom Subscription
You must take the following steps before the renewal date to undo, resubscribe, or reactivate your canceled Zoom subscription.
- Go to Zoom.us and sign into your account by clicking the Sign In option at the top right corner.
- Click Account Management from the left navigation menu, and select Billing from the open sub-menu.
- Under Current Plans, find the canceled plan you want to resubscribe or reactivate.
- A dialog box with your plan’s terms and conditions will appear. Please read them carefully or click the Proceed & Activate button.
- Follow the on-screen steps for payment.
How to Get Refunds for Paid Zoom Plans
If there has been no usage on your Zoom paid account in the last billing cycle, you qualify for a refund. To submit a request and know the refund amount, follow these steps:
- Sign into the Zoom web portal.
- Click Account Management and then Billing in the left navigation menu.
- Under Current Plans, find the plan you want to cancel and click Cancel Plan to stop its auto-renewal.
- The Disputed Charges option will appear on the screen if your account is eligible for a refund. Click it.

- In the next window, you’ll find the refund amount.
- Agree to the refund terms, and click Refund.
How to Cancel an Add-On Subscription in Zoom
The steps to cancel an add-on (paid) subscription in Zoom are:
- Sign into the Zoom web portal from your PC.
- In the left navigation menu, click Account Management and then Billing.
- Under Current Plans, click Cancel Plan next to the add-on to cancel its auto-renewal.
- A confirmation pop-up will appear. Confirm your action.
You’ll get an email about canceling the add-on Zoom subscription on your registered email ID.
To Zoom or Not Zoom
Zoom is an expensive video conferencing platform, but it also tucks in many features that suffice everyone’s needs. However, some of us may not want too much and stick to a basic or more than average such as Google Meet.
FAQs
A: You’ll lose access to cloud recordings after canceling your Zoom subscription. To reaccess them, you must subscribe to a plan with cloud recordings within 30 days, after which they will be permanently deleted.
A: The next invoice date of your Zoom subscription can be viewed from the Billing section under Account Management.
A: You can cancel your Zoom subscription at any time. But make sure to do it before the next billing cycle. Otherwise, the subscription will automatically renew.


