How To Embed Google Calendar in a Website
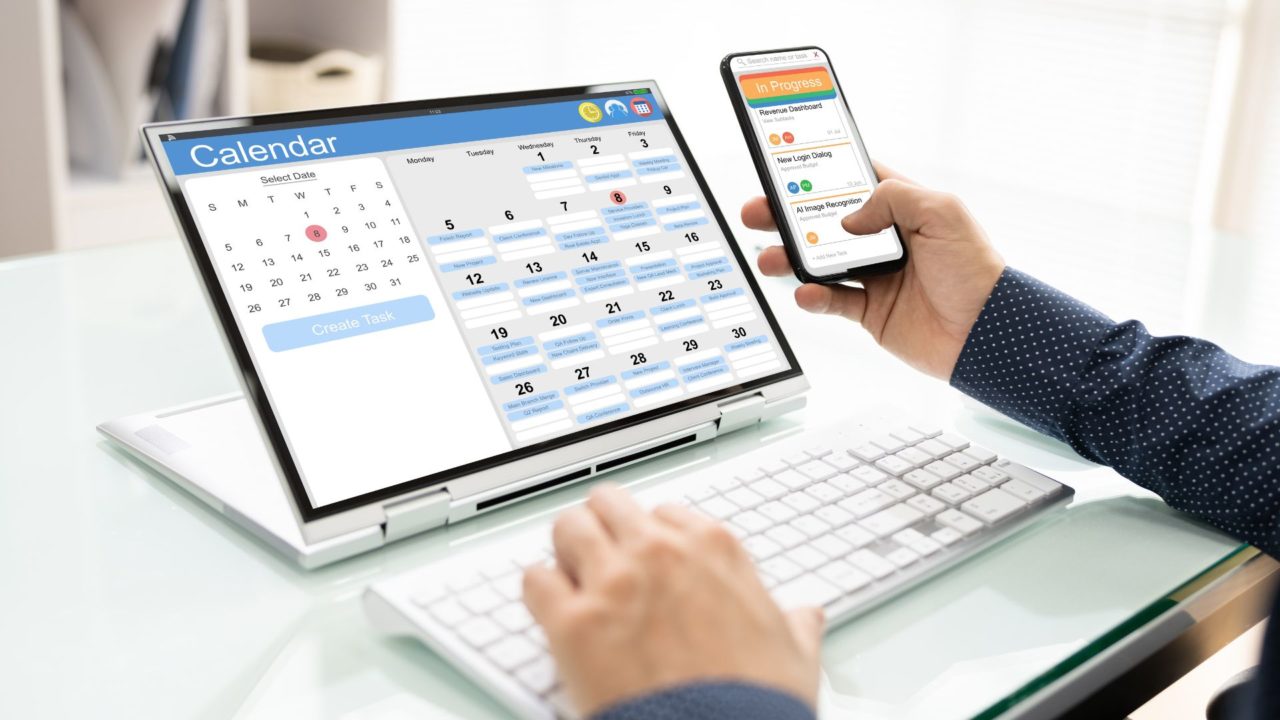
If you have a busy schedule, you should use Google Calendar to manage all your events and appointments. But did you know you can also embed a Google Calendar on your website or organization’s page to provide valuable information to your visitors? Wondering how? Follow this guide to learn how.
Integrating a calendar into your website offers multiple advantages. Firstly, it ensures visitors stay updated about upcoming events, fostering engagement and interest. Secondly, it creates a seamless user experience by allowing individuals to conveniently check your schedule without navigating away from your site.
Additionally, the integration enables users to save particular events to their personal calendars, enhancing their ability to plan and attend. Since it shows the proper dates and times on your website. You don’t have to send people to another page, so everything stays smooth and friendly when they’re checking things out.
Embedding is also better than sharing the Google Calendar with all your site visitors.
How to Embed Google Calendar in a Website
In the below steps, we have shown how to embed Google Calendar into a WordPress site. However, the method will also work on all the websites that support embedding HTML or JavaScript content.
- Visit Google Calendar on the web in your preferred browser.
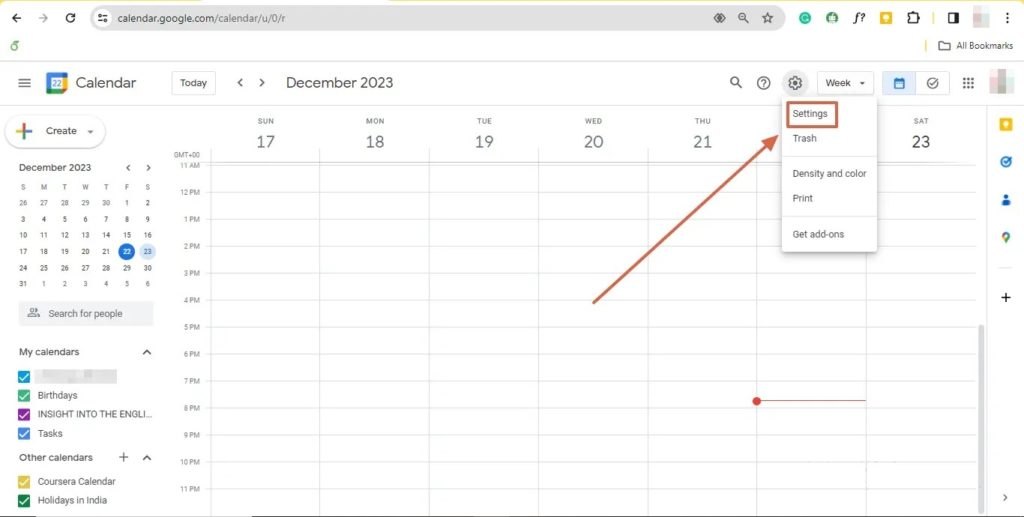
- Click the cog (or gear) icon in the top-right corner of the screen.

- Select Settings.

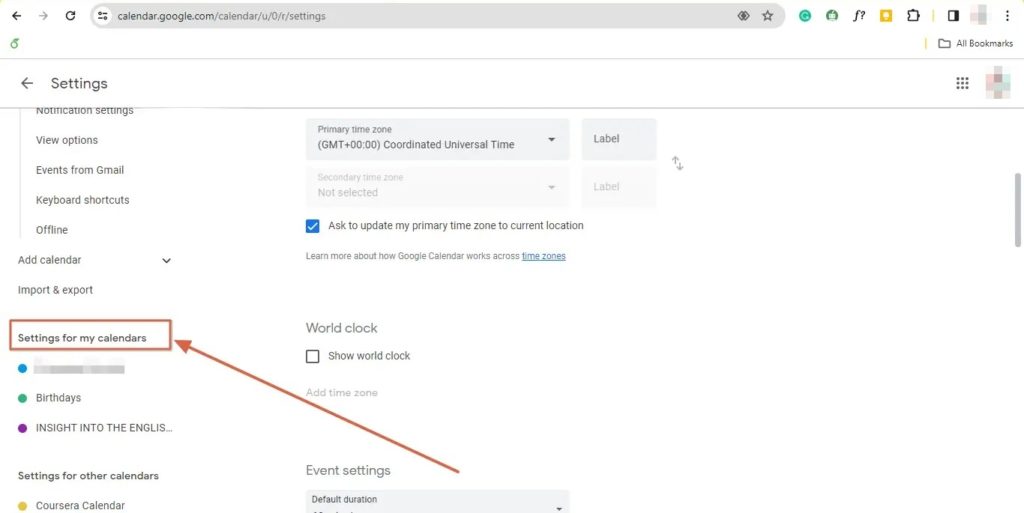
- Please navigate to the Settings for my calendars section using the left sidebar.

- Select the calendar that you want to embed on your website.
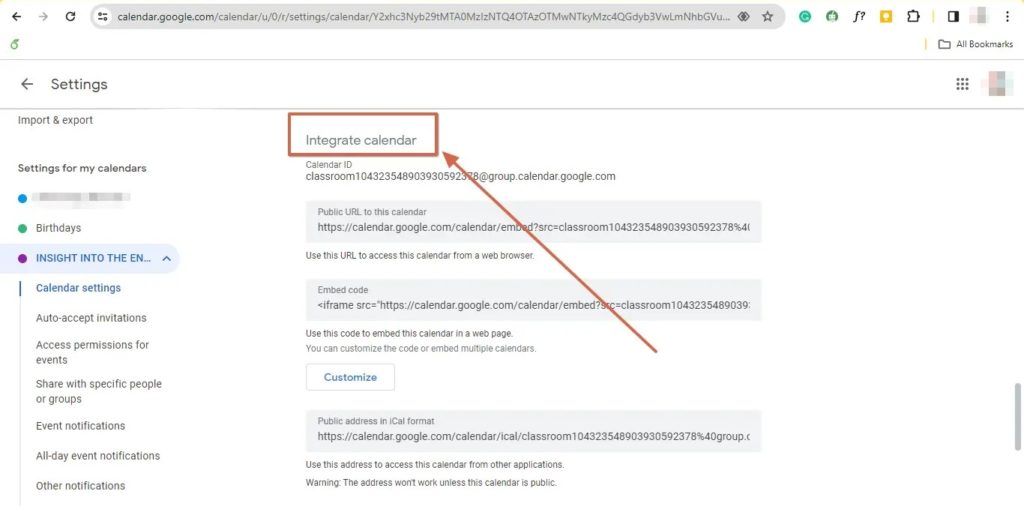
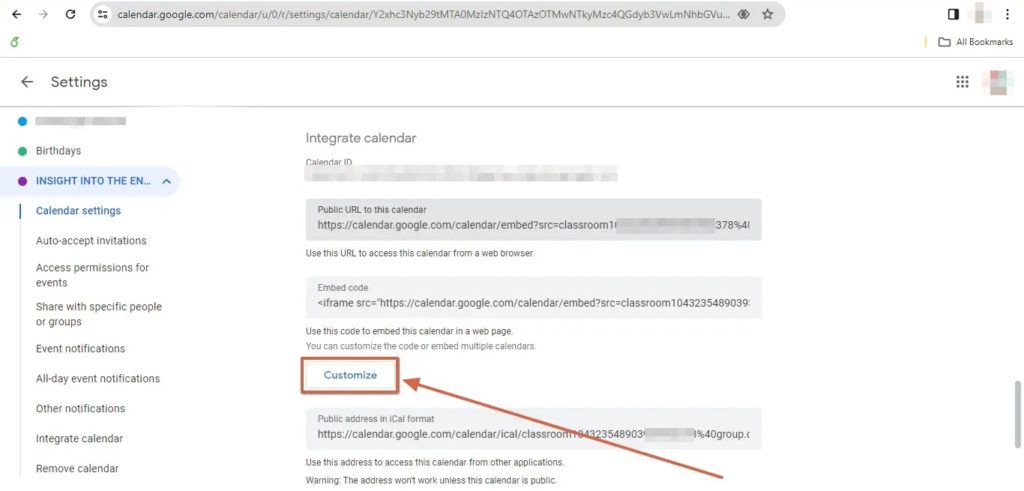
- Scroll down to the Integrate calendar section.

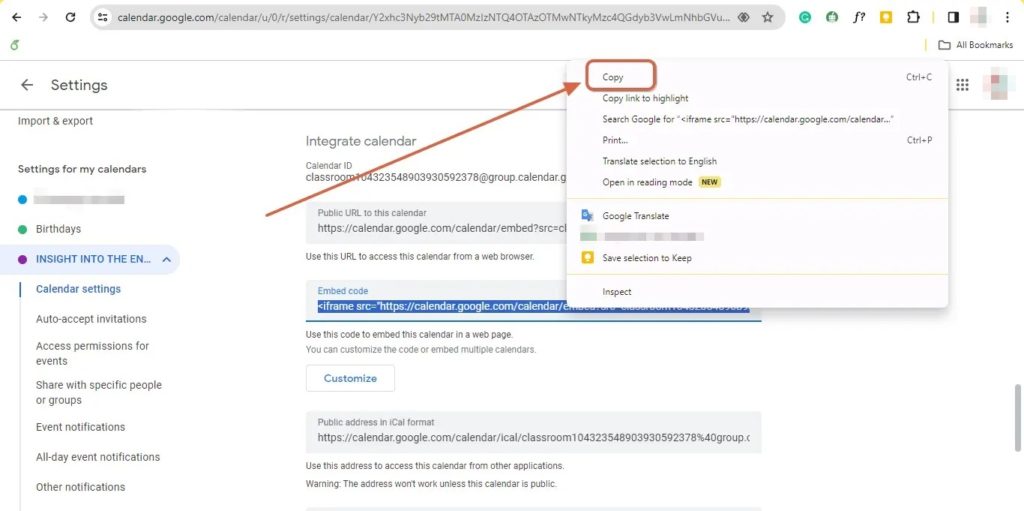
- Select the code under the heading embed code. Proceed to copy it with a right-click or via the keyboard shortcut (Ctrl/Cmd+C).

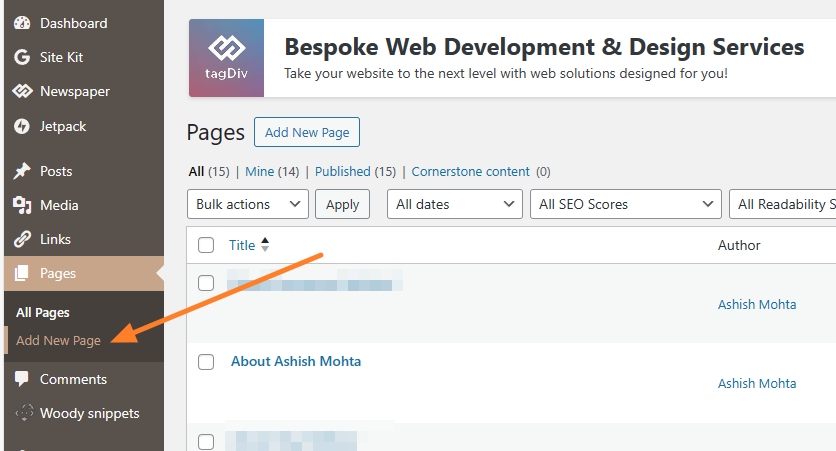
- Create a new page to insert the code in a WordPress Page or Post. Go to Pages > Add New Page

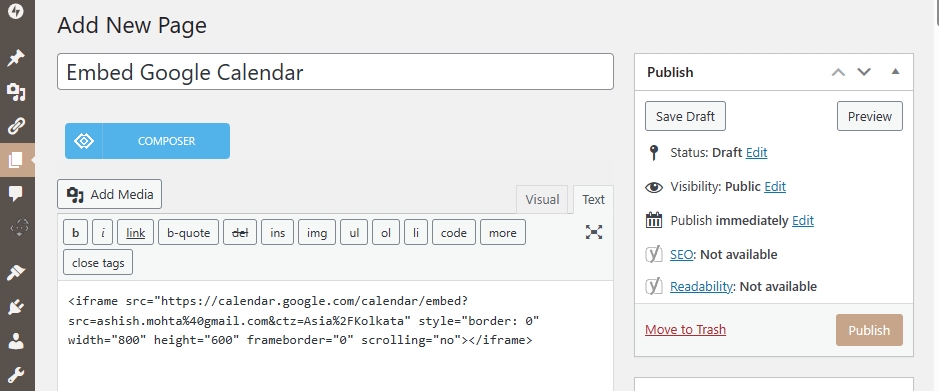
- In the editor, go to the section where you want to display your Google Calendar and switch to Text view.
- Paste the code, and switch back to Visual view. You should see a preview of the calendar.

- Publish or update the page for the changes to take place.
You can navigate to your website and check the page or article where you have embedded the calendar to confirm.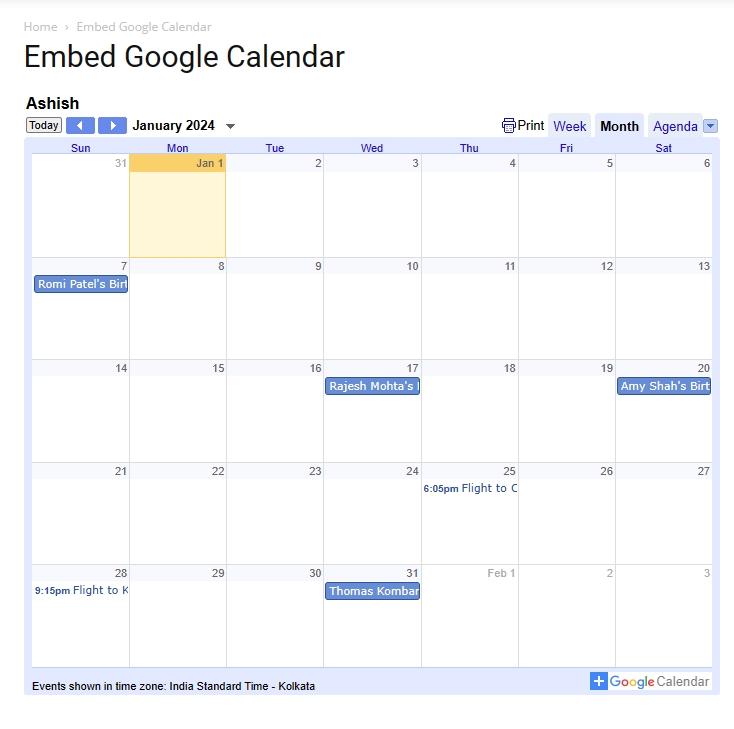
Unfortunately, you can’t get the embed code from Google Calendar’s Android or iPhone app. You must use the web app for this.
It is also possible to embed Google Calendar in Notion if you prefer it as your website’s backend.
How to Customize the Google Calendar Embed
Embedding Google Calendar into your website is easy. But you might also want to customize the calendar’s look to match your site’s overall theme. Fortunately, Google also provides this customization option, letting you fine-tune the calendar’s appearance.
- Open Google Calendar in your browser.
- Click on the cog (or gear) icon at the top-right corner of the calendar.
- Select Settings from the flyout menu.
- Go to the Settings for my calendars section from the left sidebar.
- Find and select the calendar.
- Click the Customize button under the Integrate Calendar section.

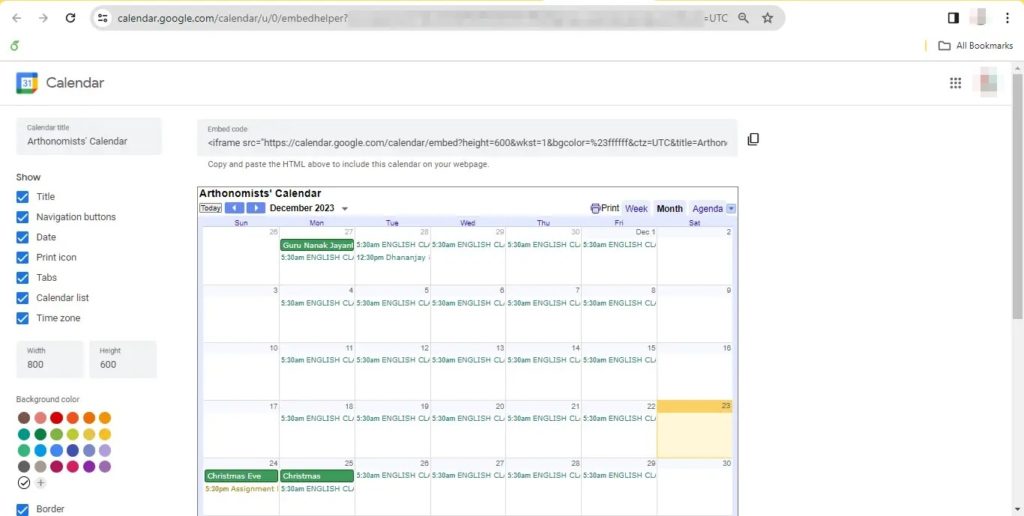
- The customization options should appear.

- Make the changes to the calendar from the left sidebar.
- Once satisfied with the appearance, copy the new code generated under the Embed code section using the copy icon.

Now, you can go ahead and embed the code in your website.
Do note that the customization options are limited to changing the calendar’s background color, enabling/disabling the title, navigation buttons, tabs, width/height, and more. If you use a custom background image in Google Calendar, it won’t appear in the embed.
How to Allow Your Site Visitors to Save a Calendar Event
You may also want your visitors to save important events from the embedded Google Calendar directly to their calendar so that they can receive event notifications. Thankfully, Google Calendar makes this easy as well.
- Go to Google Calendar in your browser.
- Locate and select the cogwheel symbol available at the upper-right corner of your screen.
- Select Settings from the calendar menu.
- Scroll the sidebar and go to the Settings for my calendars section.
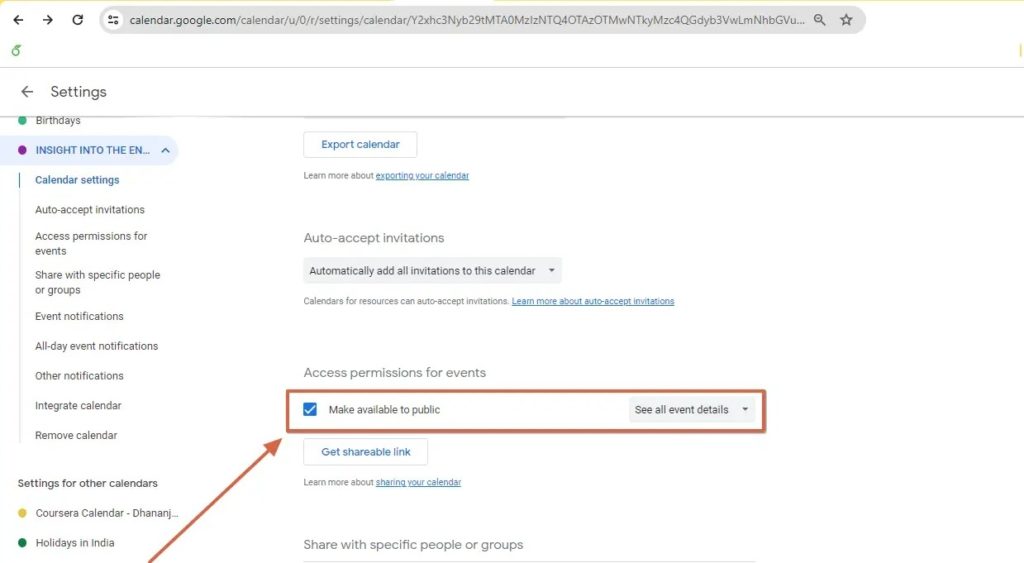
- Scroll down to Access permissions for events section
- Check the box beside Make available to public.

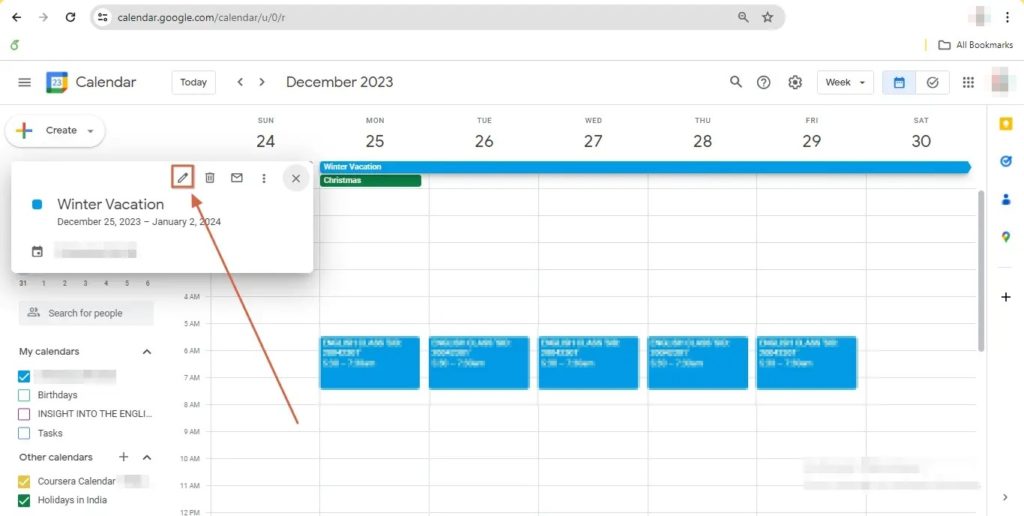
- Get back to the Google Calendar Home View. Select the event that you want to make public.
- Click on the Pencil icon to edit the event. A new dialog box with editing options appears.

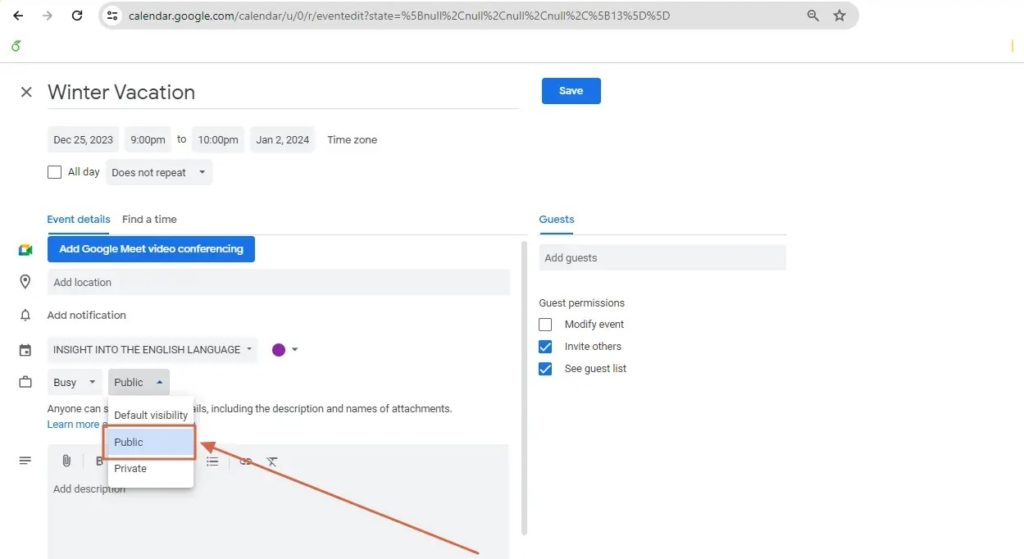
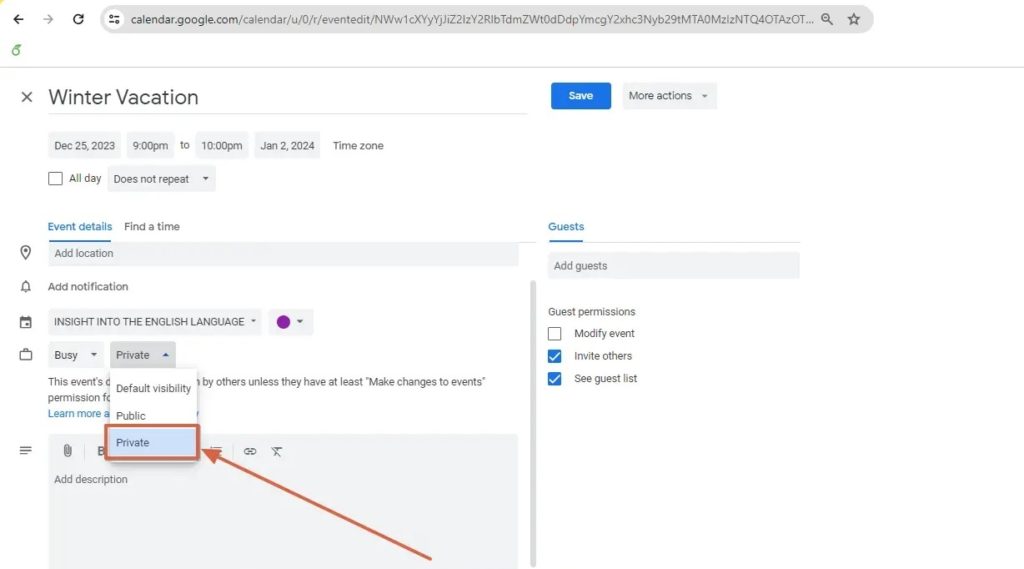
- Change the visibility option from Default visibility to Public using the drop-down menu.

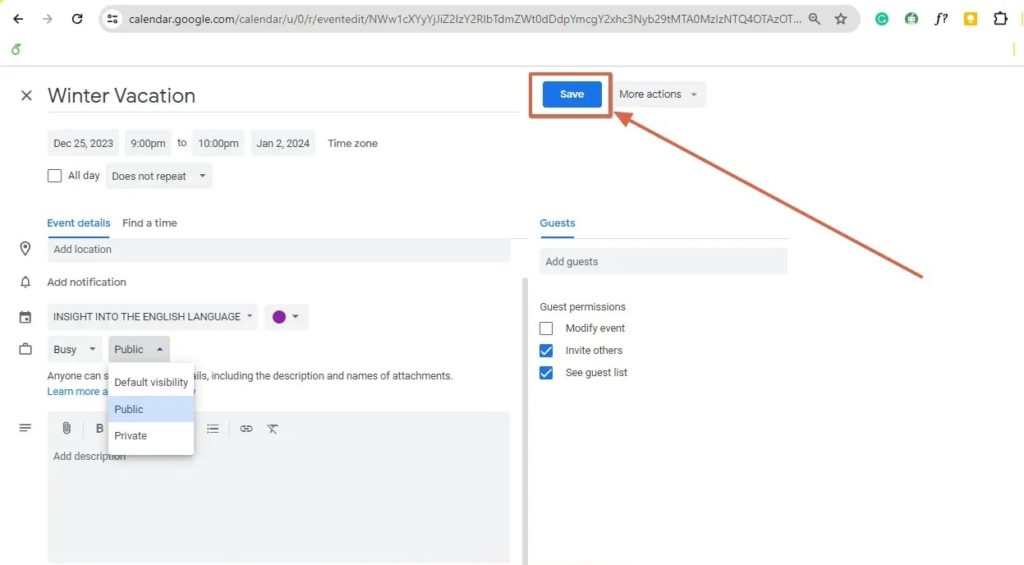
- Use the Save button to apply the changes.

Your website visitors can now save the event you made public.
How to Hide Events From the Embedded Google Calendar
Sometimes, you may not want your audience to access all the events added to the embedded calendar. Some events might be private or invite-only, and you don’t want them in the public domain. In such cases, you can make such events private to hide them from your site visitors and the embedded Google Calendar.
- In Google Calendar, select the event that you want to make private.
- Click the Pencil icon to edit the event.
- Change the visibility option from Default visibility to Private using the drop-down menu.

- Click Save.
Share Your Calendar Events
Embedding Google Calendar on your website isn’t just about showcasing your schedule; it’s also about improving engagement and connecting with your audience on a deeper level. Whether announcing exciting events, scheduling appointments, or simply keeping everyone in the loop, Google Calendar and its unique customization features add a touch of professionalism and transparency to your website or blog and elevate your online presence.
If you are a heavy calendar user, sync Google Calendar with Outlook for easy access to your appointments and schedules.
FAQs
A: To import a Google Calendar into a URL, open Google Calendar on the web. Click the Cog (Gear) icon > Select Settings > Select a particular calendar from the left sidebar > Under the Public URL to this calendar section, select the URL.
A: Direct embedding of Google Calendar within emails is not supported. But you can still share your calendar via email by adding the calendar URL.


