What Is the 0x100000EA Error Code? – What It Means and How to Fix It
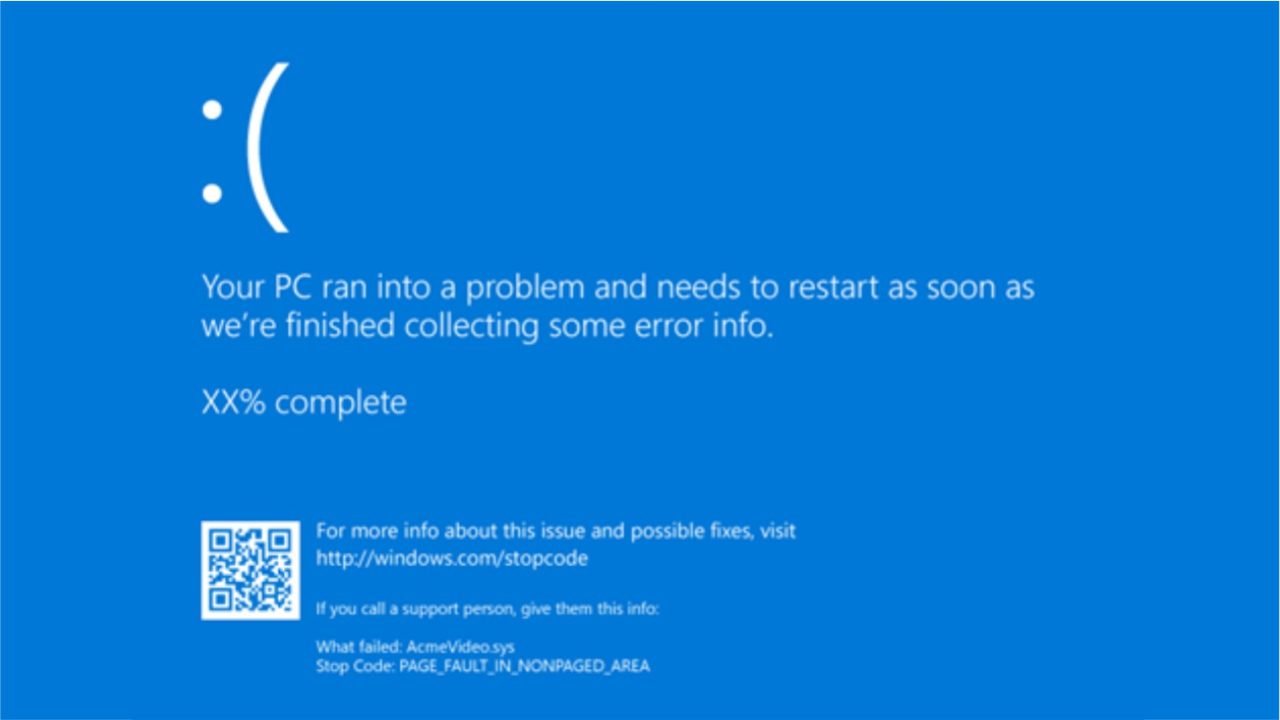
The Blue Screen of Death, or BSOD – it’s the bane of every PC user’s life, guaranteed to put a damper on your day. However, not every blue screen is caused by the same problem.
The key lies in the error code.
If you are faced with a 0x100000EA error code, it means your PC has a driver issue, usually related to graphics. This article will guide you through a few ways to resolve this issue and save your sanity.
What Is the 0x100000EA Error Code?
To help users and technicians troubleshoot the cause of a BSOD on a PC, Microsoft provides certain codes on the screen itself, known as Stop Codes. In earlier versions of Windows, these codes were provided on the blue screen. However, newer versions of the operating system are more user-friendly, listing the error name along with its Stop Code.
The 0x100000EA error code refers to THREAD_STUCK_IN_DEVICE_DRIVER. This means that a driver has become stuck in an infinite loop while it waits in vain for the affected hardware to respond.
Major Causes
The root cause of a 0x100000EA THREAD_STUCK_IN_DEVICE_DRIVER error code is usually a graphics issue, which can stem from either hardware or software problems. Here are a few of the major causes:
- The drivers for a graphics card are faulty or outdated.
- Graphics intensive programs may be conflicting with older drivers.
- A new Windows update has introduced some compatibility issues. Some updates to Windows 11 are known to cause this particular BSOD error.
- Pushing a graphics card to its limit (overclocking) increases performance but leads to overheating and instability, resulting in this error.
- There may be driver conflict between multiple devices running at the same time.
- Your graphics card is nearing the end of its life.
Troubleshooting the THREAD_STUCK_IN_DEVICE_DRIVER Error
Though the problem is usually to do with graphics, issues with any driver can cause this BSOD. The key to troubleshooting the error is taking a structured approach. Go through the following steps one by one to try and resolve the issue.
Restart
This is generally the first step to take when trying to resolve any PC problem. Restarting your PC resets caches and reboots drivers. Sometimes this step is all that’s required to solve problems caused by hardware that has been running for a long time.
Check for Windows Updates
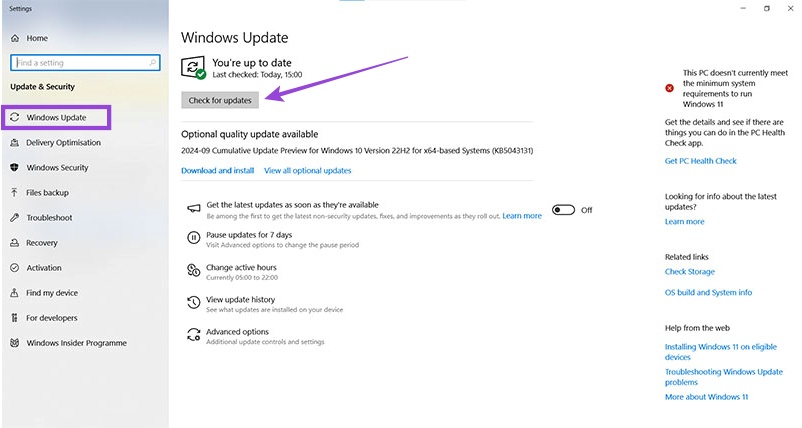
If the error started appearing right after a Windows update, then the chances are that update is to blame. Hotfixes are sometimes released to patch some of the more egregious errors. To check if Windows updates are the culprit:
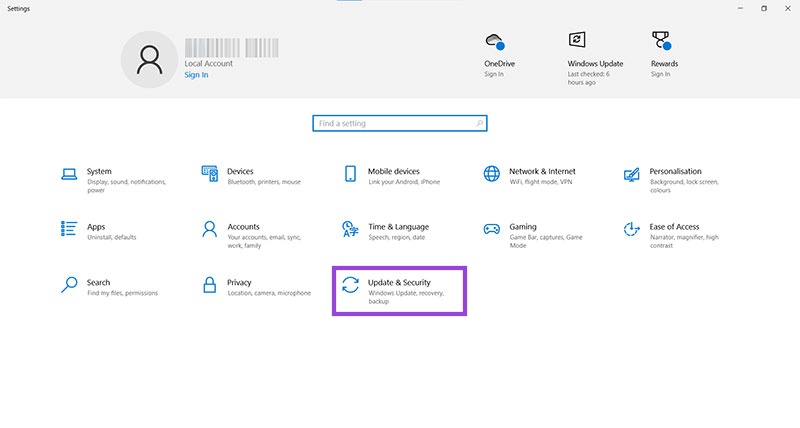
- Open the Settings menu.

- Click on Windows Update and check whether you’re up to date, or if any patches can be installed.

You’ll need to restart your computer after applying any updates or patches in order for them to be properly installed.
Update or Roll Back Graphics Drivers
Sometimes new drivers can cause issues with older graphics cards, or newer versions of programs may require updated drivers. To check your drivers:
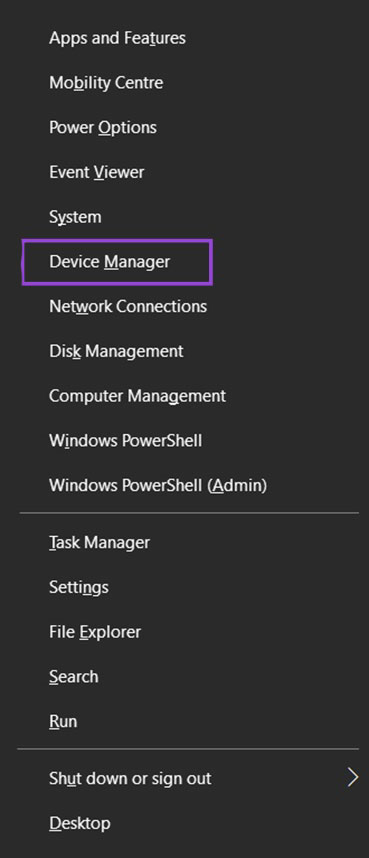
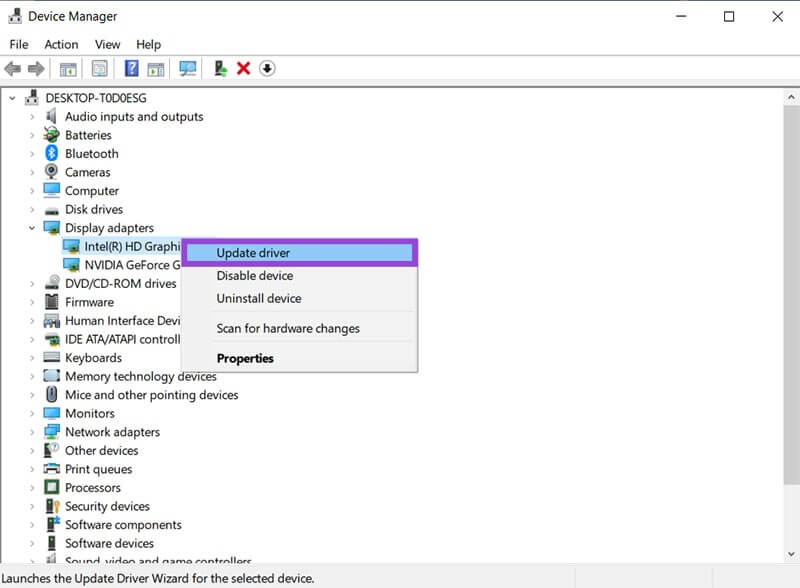
- Right click the Start Button (or press Win+X) and select Device Manager.

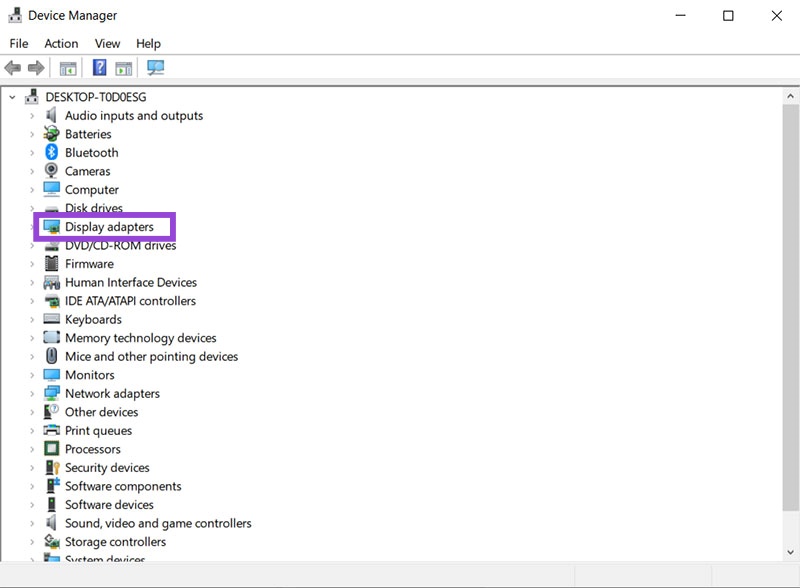
- Click “Display Adapters” to view the graphics card(s) on your machine.

- Right click the graphics card and select “Update driver”.

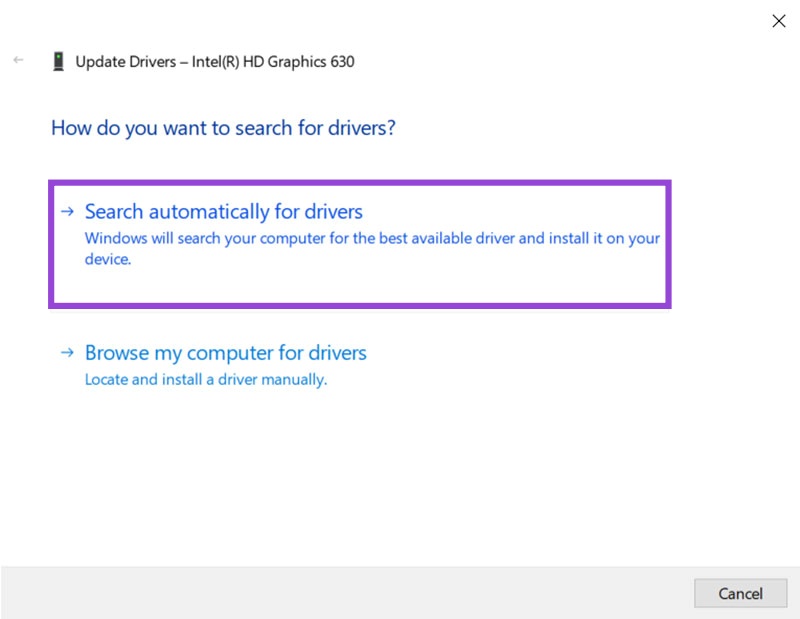
- In the window that appears, select the option to search automatically for the drivers.

- If you have multiple cards, repeat this process for each of them
If updating your drivers doesn’t work, right click your graphics card to uninstall all drivers. Then restart your machine and Windows will automatically search for new drivers.
If a driver update is causing issues, you can roll it back to an older, more stable release as follows:
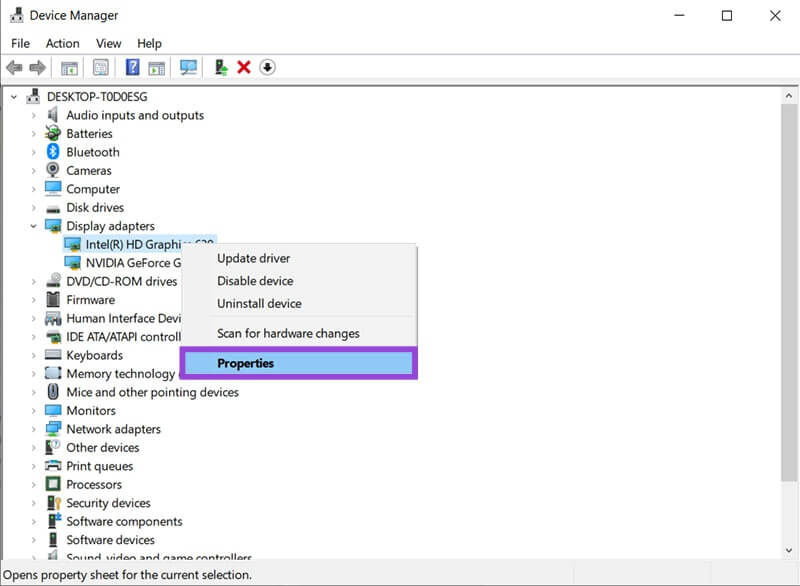
- Right click the graphics card in Device Manager and select “Properties”.

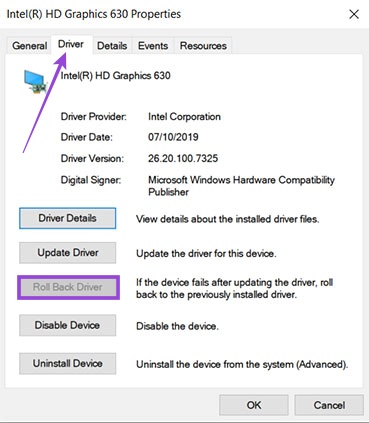
- In the “Driver” tab, click the “Roll Back Driver” button.

- A restart will probably be required.
You can use this approach for any number of drivers on the Device Manager screen. Don’t be afraid to update all of them if necessary.
Find the Source of the Problem (Advanced)
Every time the BSOD appears, your PC collects data about the crash. You can analyze this data and pinpoint the cause, provided you have the right program for the job. In this case, Microsoft’s Windows Driver Kit (WDK) is the group of programs you need, specifically the Windows Debugging Tool (WinDBG). Follow the instructions to install the software, and then run it.
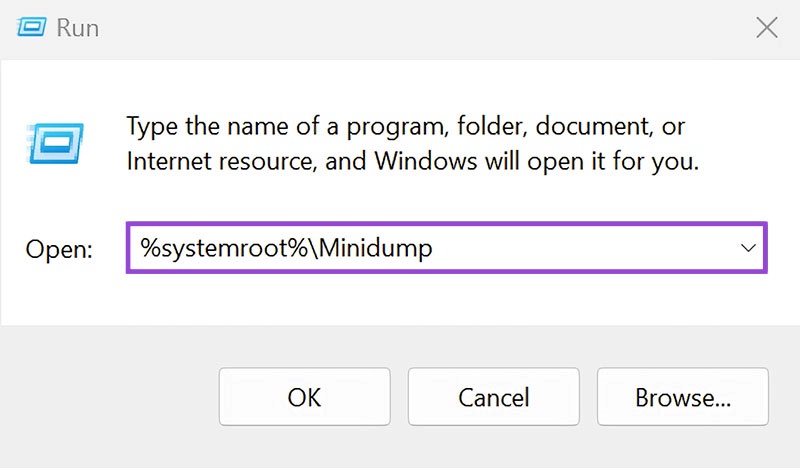
The crash files will be located in %systemroot%\Minidump. To open this location:
- Press Win+R to open the Run application.
- Enter “
%systemroot%\Minidump” and click OK.
- You’ll need Administrator permission to view the dump files.
- Open WinDBG and select the dump file for inspection.
Lower Graphics Settings
Overclocking could be the cause of the BSOD. You can often lower your graphics card’s speeds using its dedicated software. You can also disable overclocking by entering your PC’s BIOS. Simply press F12 during startup to open the BIOS menu.
Check Your Graphics Card
A poorly connected or aging graphics card might also be the cause of your woes. Check that your card is properly connected and free from any dust or debris. If the fans seem to be running too hot and/or whirring too loudly, then it may be time to give it a clean or replace it entirely.


