How to Fix Windows 11 Update Issues
Microsoft updates its Windows operating systems very regularly – every month, in fact. Each update brings the likes of bug fixes, security improvements, and even new features. They’re all worth installing to keep your device up-to-speed with the latest changes.
But you might have issues when trying to update Windows 11. This guide explores how to fix Windows 11 update issues.
Fix 1. Make Sure You’ve Got Enough Free Space
This may seem an obvious fix, but it’s one that’s worth mentioning, all the same. Windows updates are sometimes quite large files – several gigabytes in some cases. If you don’t have enough room on your computer, you might be unable to download or install them.
Step 1. Open the “File Explorer” and click on “This PC.”
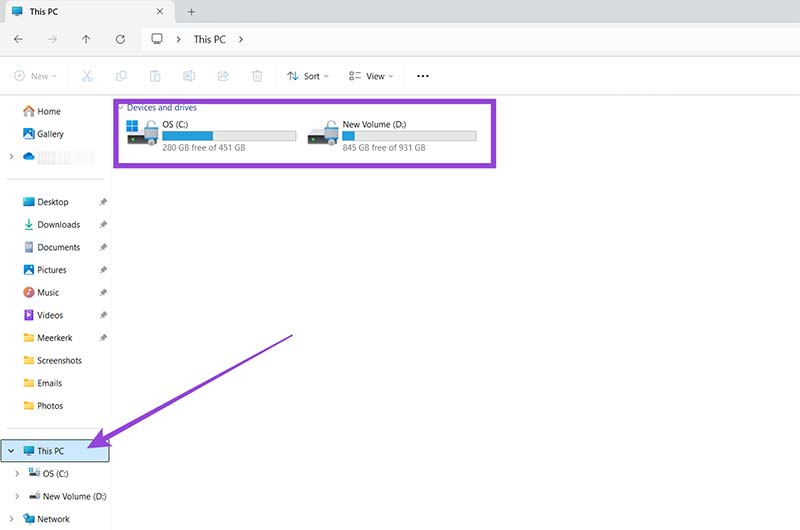
Step 2. Make sure there’s 15-20GB free, minimum. If there’s not, use space-saving measures, like uninstalling apps you never use or deleting/moving big files off your C drive.
Fix 2. Use the Windows Update Troubleshooter
Windows comes with several built-in troubleshooting tools and repair solutions, including one that’s entirely dedicated to updates.
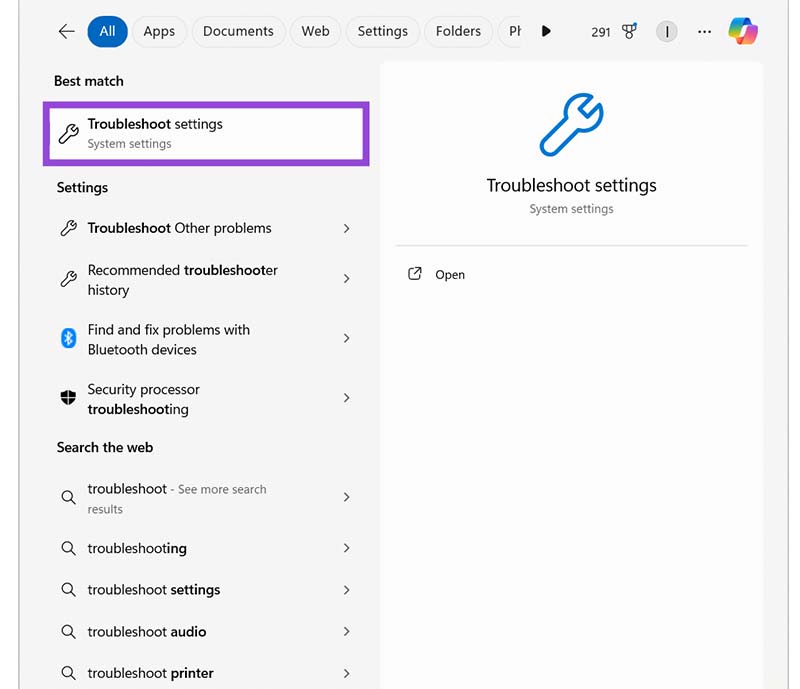
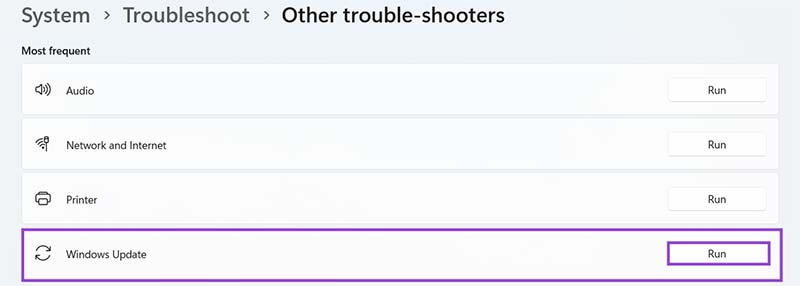
Step 1. Type “troubleshoot” into your search bar. The “Best Match” at the top of the list should be labeled “Troubleshoot settings.” Click that to access the troubleshooting menu.
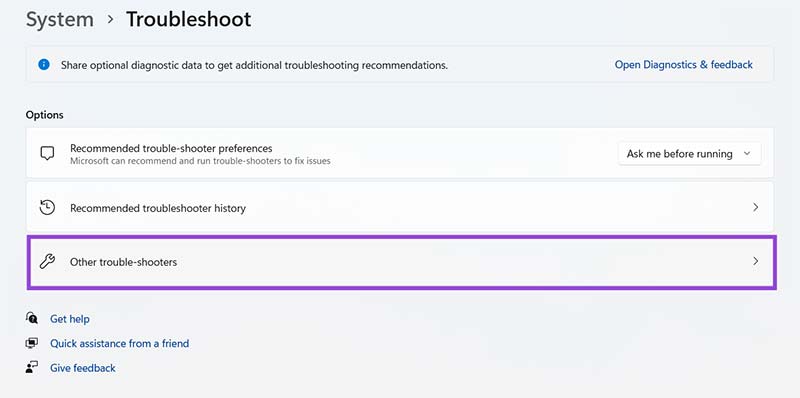
Step 2. Click “Other trouble-shooters.”
Step 3. Click the “Run” button beside the “Windows Update” troubleshoot tool. Let it run. Hopefully, it will find and fix whatever’s up with your updates.
Fix 3. Restart the Windows Update Service
Another way to fix Windows 11 update errors is to reset the whole update service.
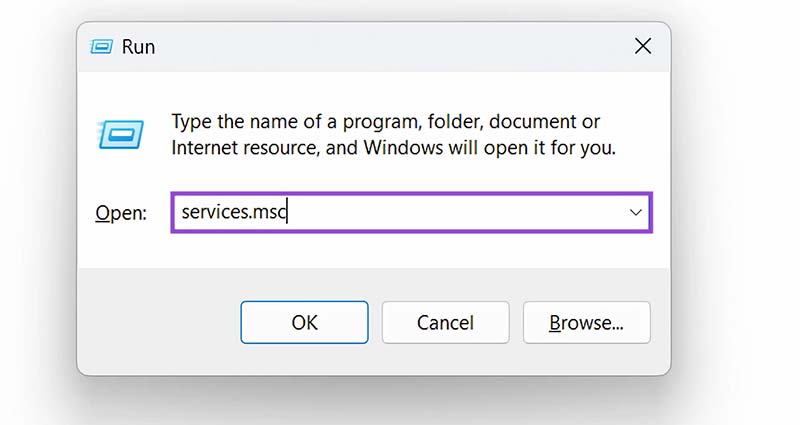
Step 1. Press “Windows” and “R” keys together. That will launch the “Run” command, and a little box will appear. Type “services.msc” into the box and press “Enter.”
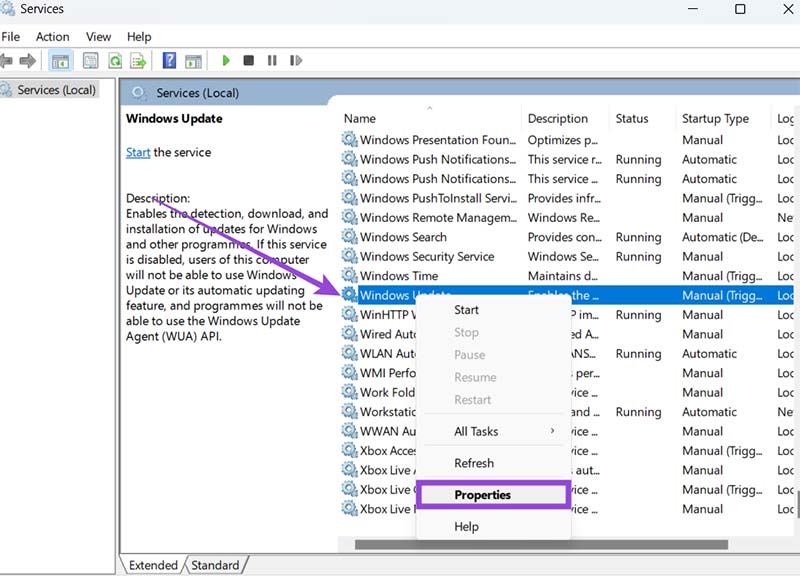
Step 2. Scroll down to find “Windows Update” in the list. Right-click on it and select “Properties.”
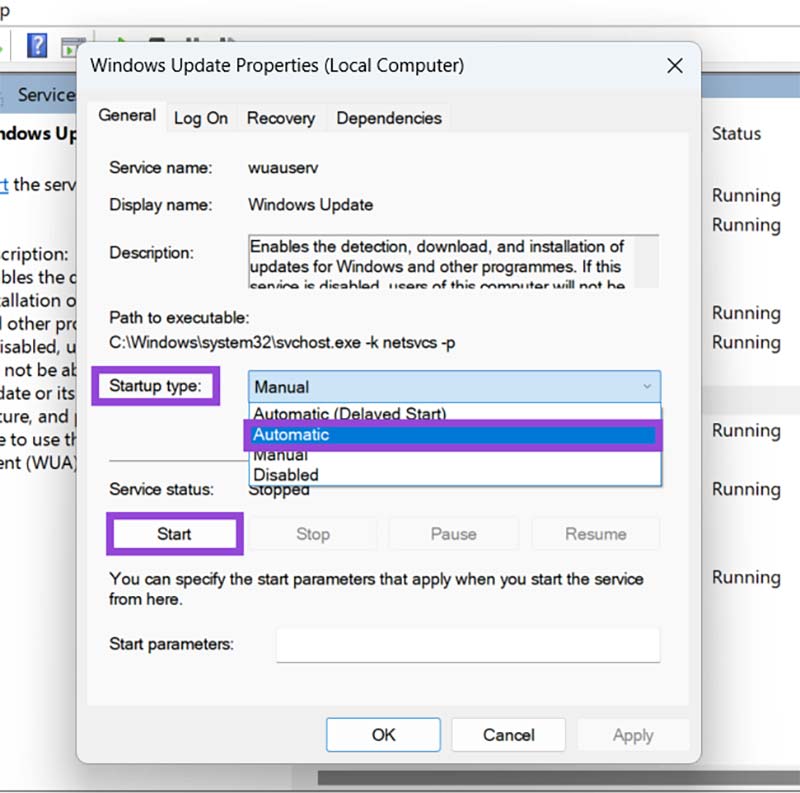
Step 3. Click on the drop-down menu for “Startup type” and select “Automatic.” After that, click “Start” to get the update service started, and press “OK” to confirm everything.
Fix 4. Use the System File Checker
Windows’ files sometimes get corrupted, one way or another. That corruption interferes with numerous processes, including updates. You can use a “System File Checker” scan to spot corruption and weed it out of your system in no time.
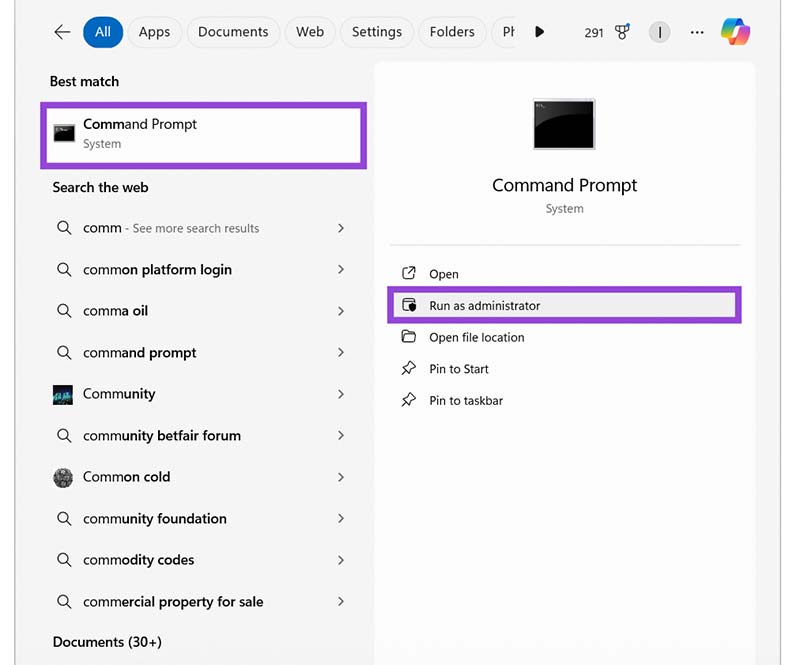
Step 1. Type “cmd” into the search bar. The “Command prompt” tool should appear as the “Best Match.” Click to “Run as administrator.”
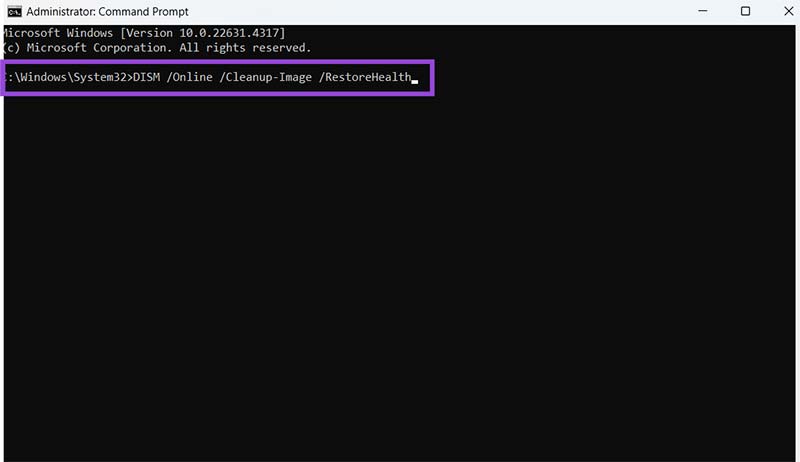
Step 2. Type “DISM /Online /Cleanup-Image /RestoreHealth” into the box and hit “Enter.” Wait for that process to complete. Then, as a secondary measure, type “sfc /scannow” in the box and hit “Enter.” Wait for the scan to finish.
Fix 5. Try a System Reset
If all else fails, a full system reset might be the last and potentially the only way to fix your Windows 11 update problems.
Step 1. Access the “Settings” menu. You can get there by either typing “settings” into your search bar and clicking the best match or pressing the “Windows” and “I” keys at the same time.
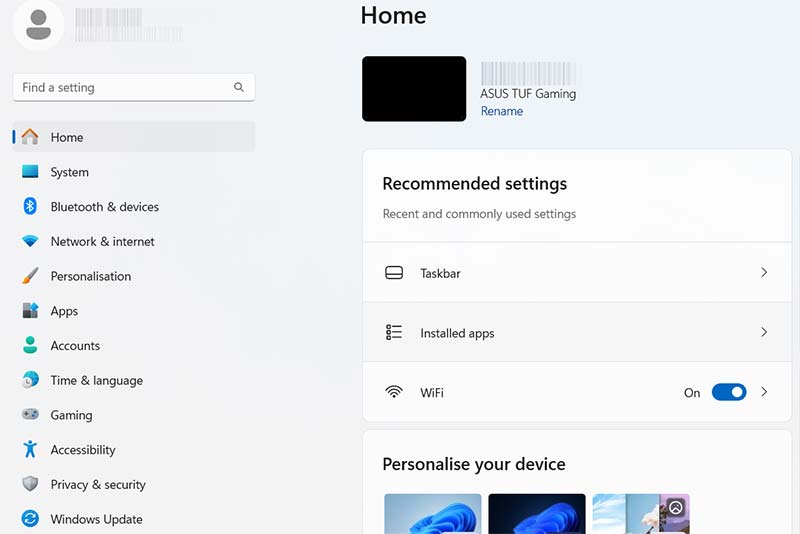
Step 2. Go to “System” and then “Recovery.”
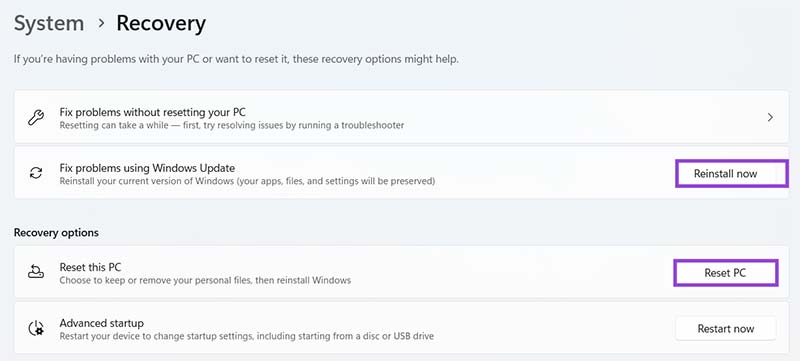
Step 3. You can try the “Reinstall now” button to reinstall your existing Windows version and see if that fixes the issue, or click “Reset PC” to carry out a full system reset.Note that this might take a while, so it’s best to do it when you’ve got some free time and don’t need to use your PC or laptop.


