How to Enable BitLocker on Windows
Wouldn’t it be great if you could secure your hard drive? Encryption is the key – scrambling your data so nobody but you can read it prevents hackers from seeing what you have stored. Microsoft came up with a solution for that. It’s called BitLocker, and we’re going to explain how to enable BitLocker on Windows 11.
It Starts With TPM Support
Before you can even think about enabling BitLocker, you need to check if your version of Windows is compatible with the Trusted Platform Module (TPM). This is a hardware component that makes several security features – including BitLocker – accessible.
Here’s how to check.
Step 1: Press the “Windows” key plus “R” on your keyboard to open the “Run” dialog box.

Step 2: Type “tpm.msc” into the text box next to the word “Open” and hit “OK” to open your device’s TPM Management console.

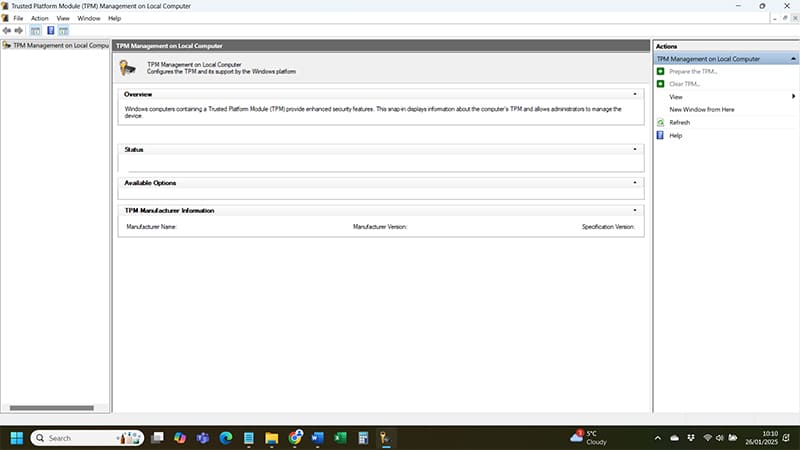
Your device should display a message about your current TPM version and whether your device supports TPM in the first place. If it doesn’t, you’ll see the message “Compatible TPM cannot be found.” You’re looking for version 1.2 or higher, which you should see on the right side under “TPM Manufacturer Information.”
How to Enable BitLocker – Two Methods
Assuming you’re good to go with your TPM settings, you have two ways to enable BitLocker – one for a fixed data drive (such as an internal hard drive) and another to enable the feature on your Windows system drive.
Enable BitLocker on System Drive
When you enable BitLocker on your system drive, you encrypt your operating system and its most vital files. Here’s how:
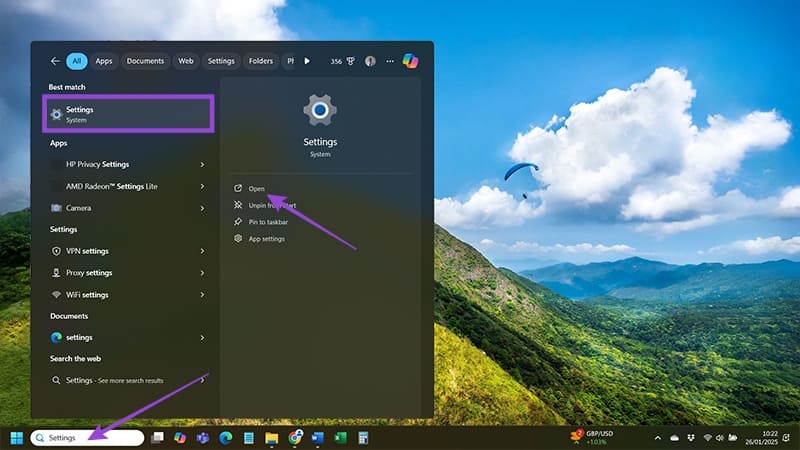
Step 1: Make sure you’re signed into Windows on an administrator account and type “Settings” into the “Search” bar at the bottom of your screen. Open the “Settings” application that appears.
Step 2: Head to “Privacy & Security,” followed by “Device Encryption.”
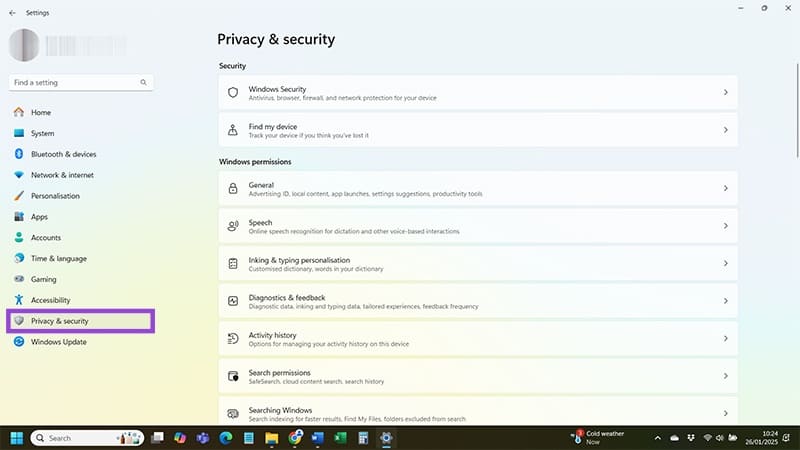
Step 3: You should see a toggle button next to the “Device Encryption” section. Just switch that toggle “On” and voila – you’ve just enabled BitLocker across your entire device.
Enable BitLocker on a Fixed Data Drive
Let’s take BitLocker a little deeper now and encrypt your fixed data drive. For most people, that’s their internal hard drive onto which they store their personal information. You want to ensure no malicious parties can get their hands on that data if they somehow access your hard drive – this is how to do it.
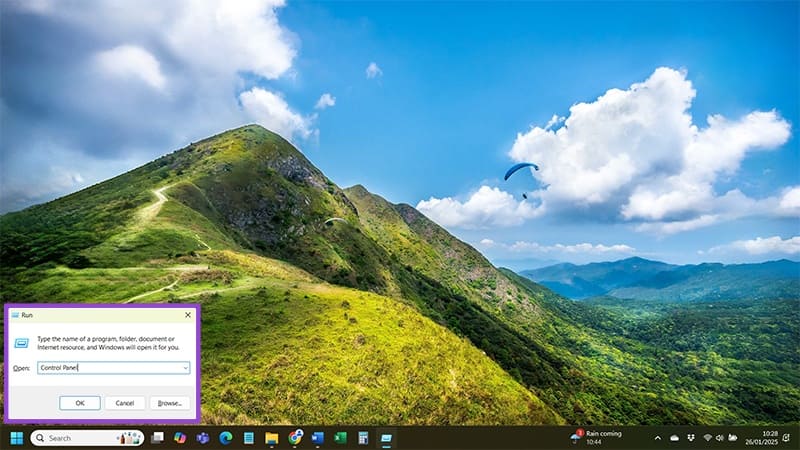
Step 1: Use “Windows + R” to open the Run console and type “Control Panel.” Hit “OK” (or press “Enter” on your keyboard) to open your Control Panel.
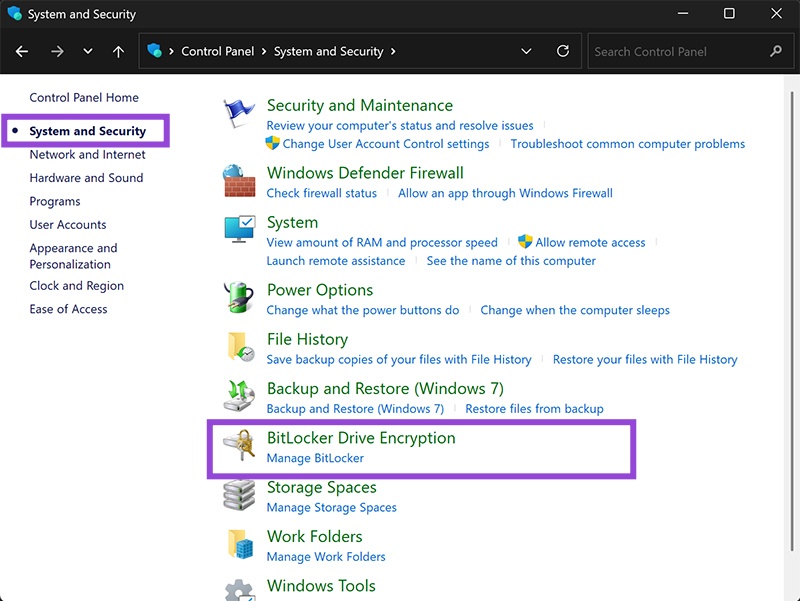
Step 2: Head to “System & Security” and navigate to “BitLocker Drive Encryption.” If you don’t see it, that means BitLocker isn’t enabled for your device. Sign in to an administrator account and try again.
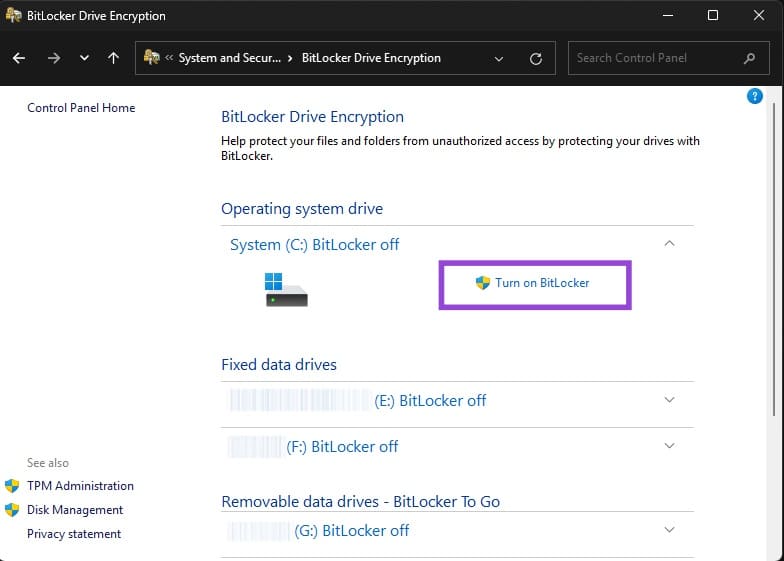
Step 3: You should see a section entitled “Operating System Drive.” Click “Turn on BitLocker” there.
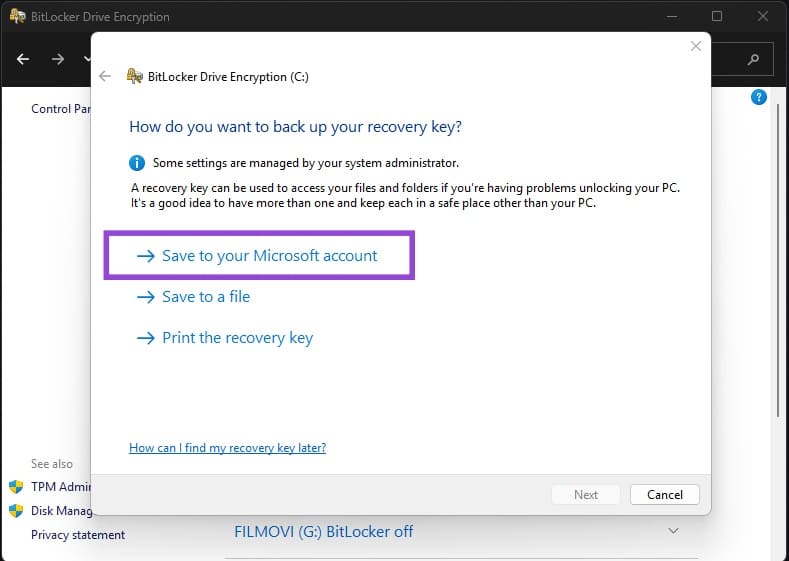
Step 4: Save the recovery key (and print it if you’d like to have a physical copy). It’s also a good option to save that key to your Microsoft account so you have it available as a backup.
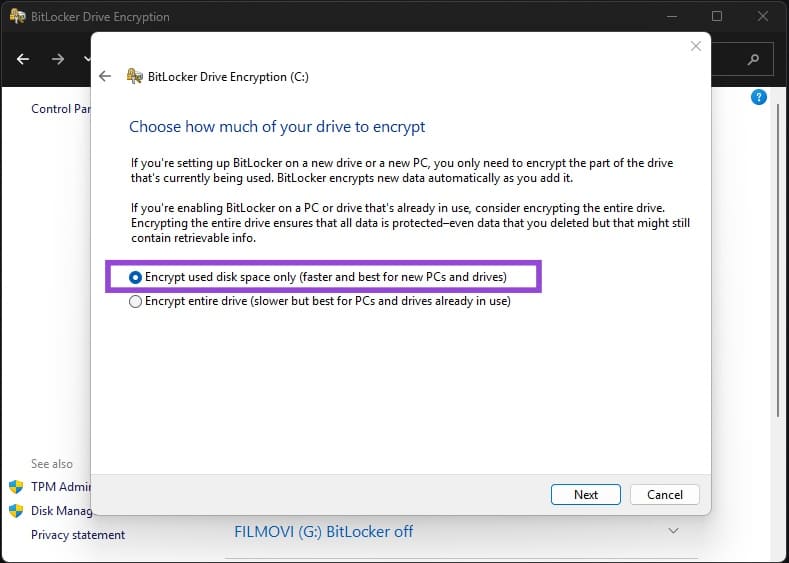
Step 5: Hit “Next” and check the box next to “Encrypt used disk space only.”
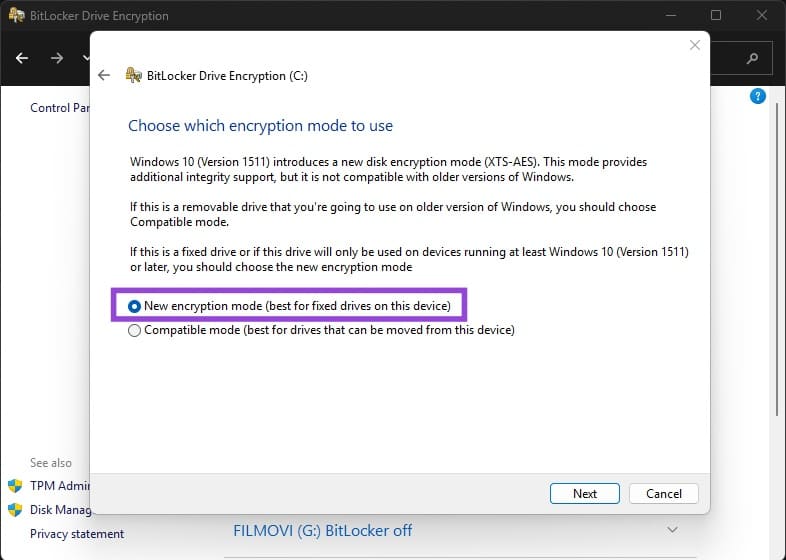
Step 6: Press “Next” again and select “New Encryption Mode” from the options.
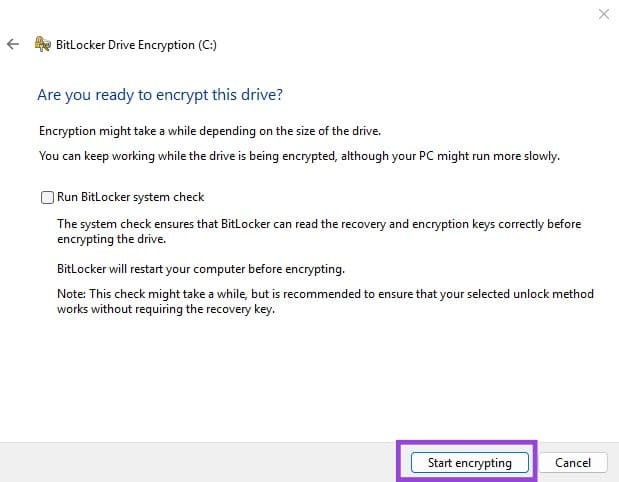
Step 7: Another click of “Next” takes you to that “Start encrypting” button. Hit that, wait, and then select “Close” once encryption is complete.