Two Ways to Manage and Disable the Charms Bar in Windows 8
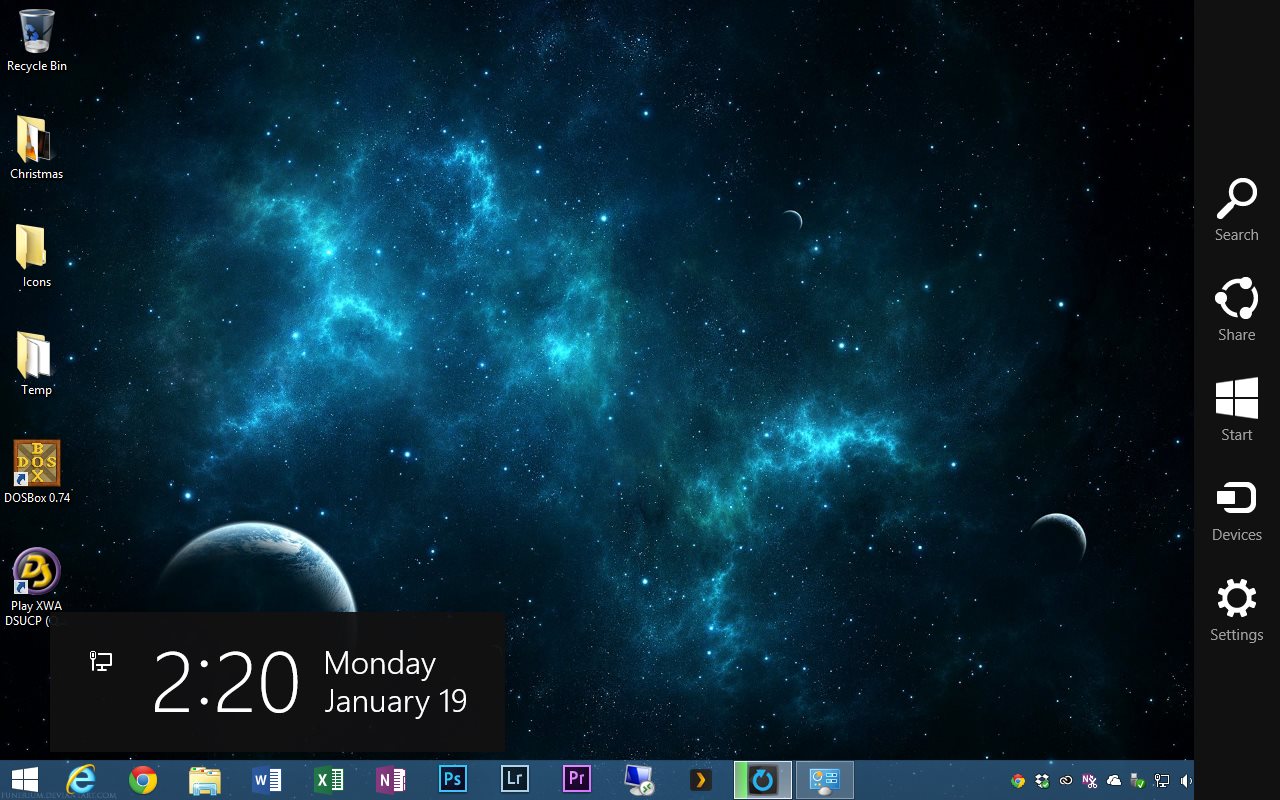
The Charms Bar in Windows 8 is the bar of icons that slides in from the right side of the screen when swiping on a touch device, or when clicking in the lower-right or upper-right corners of the screen while using a mouse. This bar houses important functions such as app settings, PC settings, device control, sharing options, and the ability to search your PC or your current app.

On Windows 8 touch devices, the Charms Bar is generally very useful, but those who use Windows 8 primarily on a desktop with a mouse and keyboard may find it distracting, and may be frustrated by inadvertently triggering the bar when the mouse is moved to the right corners of the screen. To avoid these issues, here are two ways to manage and disable the Charms Bar in Windows 8.1.
Disable the Upper-Right Charms Bar Hot Corner
Some Windows 8 users may want to keep the Charms Bar but just limit the chances of accidentally triggering it with the mouse. To do this, Microsoft provides a user option to disable the hot corner Charms Bar trigger when you move your mouse cursor into the top-right corner of your screen.
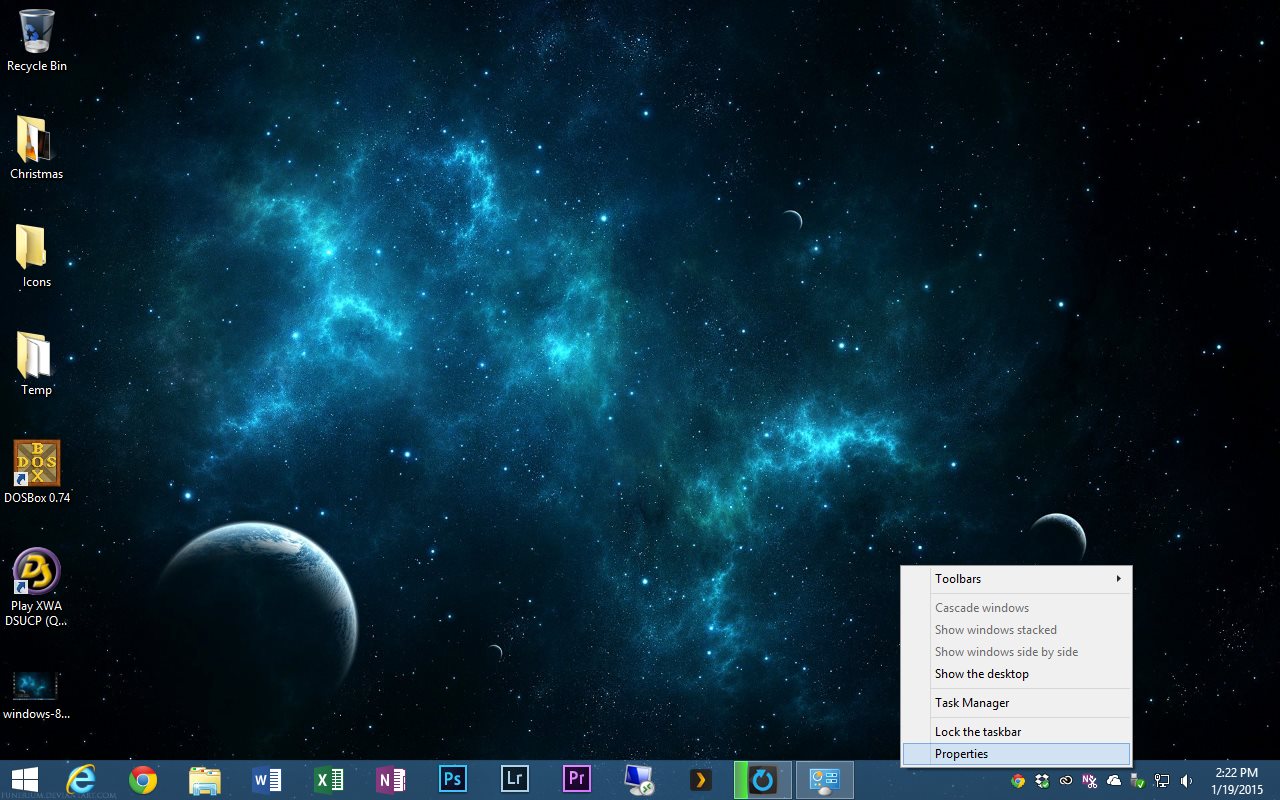
Head to your Desktop, right-click on the Taskbar, and choose Properties. In the Taskbar and Navigation Properties window, click on the Navigation tab and uncheck the box labeled “When I point to the upper-right corner, show the charms.”
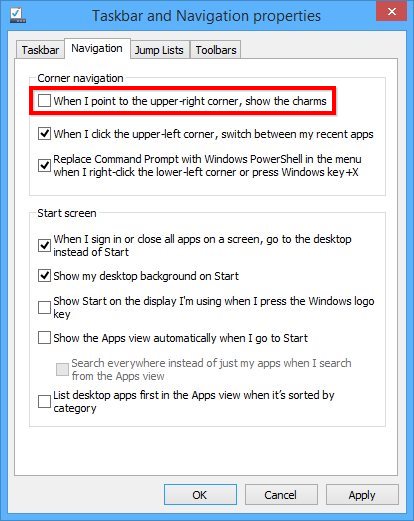
Click Apply to save your change and move your mouse cursor to the upper-right corner of your screen. You’ll notice that the Charms Bar no longer appears, but you can still access it by moving your mouse to the lower-right corner of the screen. This configuration provides a compromise that allows a user to still access the important functions of the Charms Bar while minimizing the frustration of accidentally triggering it when the mouse cursor moves to the top-right corner of the screen.
Disable the Charms Bar Completely
Other Windows 8 users may just want to kill the Charms Bar completely, at least on the Desktop. There’s no end-user Windows setting that enables this, but you can get this functionality (and more) with a cheap third party app called Start8 ($5). Start8 was originally conceived to bring the Start Menu back to Windows 8, but it also has options that let you disable or control the Charms Bar interface.
Download and install Start8 (there’s a free 30-day trial if you want to check it out first) and open the Start8 Configuration window. This window will automatically launch after installation or you can manually launch it from File Explorer:
C:Program Files (x86)StardockStart8Start8Config.exe
In the Start8 Configuration window, go to the Desktop section and find and check the option labeled “Disable all Windows 8 hot corners when at the Desktop.” There’s no reboot required; your change will be applied as soon as you check the box.
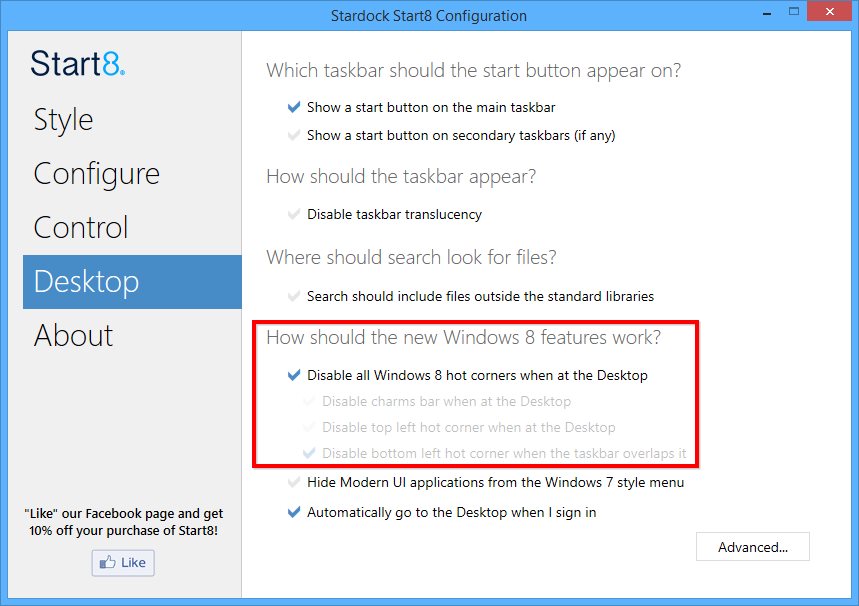
As its name implies, this disables all hot corner functionality on the Desktop, including the fast app switcher (upper-left corner of the screen) in addition to both the upper- and lower-right corner Charms Bar triggers. With this option enabled, you can move your mouse around all edges of the Windows 8 Desktop without triggering a menu, bar, or option.
If you’d like more fine-tuned control, you can modify the sub-options in Start8 to only disable the Charms Bar but leave the app switcher enabled, or vice versa. No change is permanent, and you can revert to the default settings at any time by going back into the Start8 options and unchecking the desired box.
The beauty of Start8’s approach is that these options only kill the Charms Bar on the Desktop. When using the Windows 8 Start Screen or a Modern Metro app, the Charms Bar — which is far more useful, and even required in some cases — is still accessible. And, on top of the ability to kill the Charms Bar on the Desktop, users can take advantage of Start8’s primary purpose, which is to reintroduce the Desktop Start Menu.
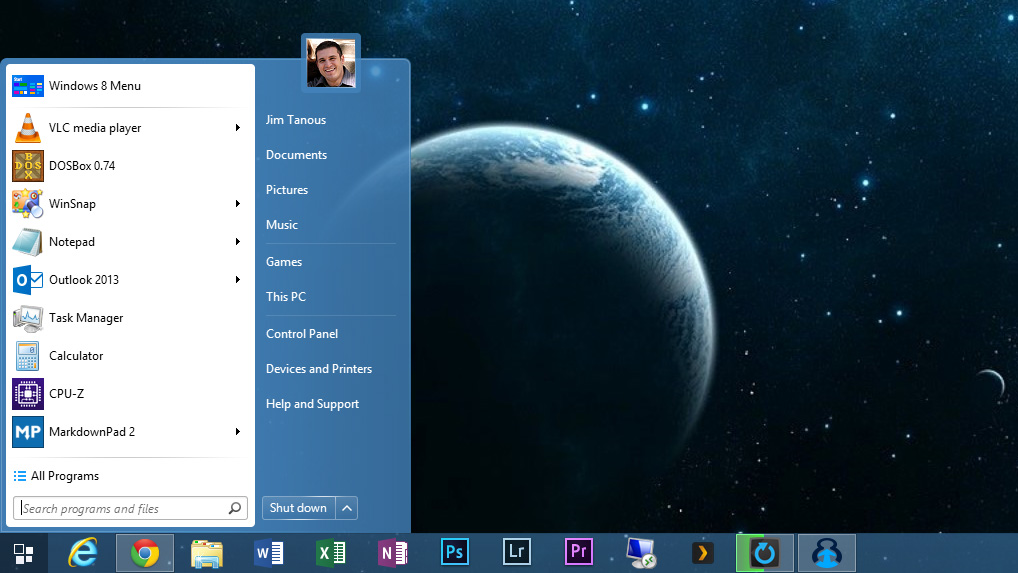
Many would rightly argue that users shouldn’t have to find third party workarounds to make Windows 8 work the way they want it to, and the company appears to be taking this feedback to heart with the development of the upcoming Windows 10. Until Windows 10 launches in the second half of 2015, however, desktop Windows 8 users can at least make their operating system a bit less frustrating with these two methods of managing or disabling the Charms Bar.


8 thoughts on “Two Ways to Manage and Disable the Charms Bar in Windows 8”
If microsoft wants me to buy any of their products in the future, they need to make it where charm bar, and other such things that are intended for some users be set so they can be disabled or removed. When writing programs in Basic, C, Pascal, Ada, and all other languages that I have used it is always quite easy to remove features by commenting them out, or add them by UN-commenting that line.
I would modify the binary file myself if I were able to figure out what one, but installing Linux makes more sense at that point, as I would have the control over the computer so it is not doing thing that waste time enough so that I forget what I was working on, and after a while really do not care.
Is there any way to permanently remove those annoying pop-up border menus (from a classic screen, not the modern apps screen) without shelling out more money?
Is there anybody with an answer out there? thanks for anything.
Chris N.
I’m an engineer, and think of the charm bar much like someone getting herpes. Once they get it they can’t get rid of it as it keeps comming back. I wish I were as careful with what operating system is on this computer as I am sexually…
I’m sure that MS has fired everyone of the gazillion programmers
involved with setting/managing the properties that actually
can be set… j