Zooper Widget – How To Use Effectively
![]() Google’s mobile platform Android is undoubtedly the best system of its kind in the market today. This impressive feat has been attained mainly by its innovative features such as the ability to customize nearly all visual elements in the platform. A few years ago, before some of the niceties that we are used to such as theme and icon packs, interactive live wallpapers and custom launchers, Android allowed its users to personalize their phone using widgets.
Google’s mobile platform Android is undoubtedly the best system of its kind in the market today. This impressive feat has been attained mainly by its innovative features such as the ability to customize nearly all visual elements in the platform. A few years ago, before some of the niceties that we are used to such as theme and icon packs, interactive live wallpapers and custom launchers, Android allowed its users to personalize their phone using widgets.
A widget is an element that you can place on your Android device’s home screen. You can resize it to suit your aesthetic preferences. Besides their visual appeal, widgets can also serve a functional role, such as the Facebook widget. It quickly directs you to your Facebook account as well as doing a few other useful minor tasks such as displaying alerts without you having to check your main account.
Available in Free and Pro Versions
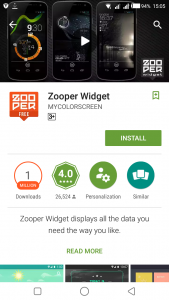
 Fortunately, you can create and customize your own widget that suits your needs. This is possible via an app known as Zooper Widget. The app is available on the Play Store for free, though an advanced version, aptly named Zooper Widget Pro, can be purchased for $2.99. The pro version of the Zooper Widget helps you exploit the app’s full potential. For example, you can save and load your templates from an SD card, embed an action to the widget (think of it as an app being launched when you tap the widget) and other nice features. Moreover, unlike the free one, the pro version is devoid of annoying ads and can support diverse APK themes.
Zooper Widget develops designs from six elements such as icon sets, progress bars, and text. Once you install it, you will be presented with a directory of different presets, which appear in form of icon spaces ranging in sizes of “1×1” up to “4×4”. You can use these icon spaces in their basic form, but if you want to add some flair, you can edit the position of the items, font or the color. You can also select what kind of data you wish to display on the widget, for example, weather, time or date as well as your phone’s battery level.
Zooper Widget Tutorial
Zooper Widget gives you plenty of freedom, though you will need plenty of time and experience to master the app to ensure your widget looks and works just fine. Don’t panic, no coding is required!
Step 1: Install the App
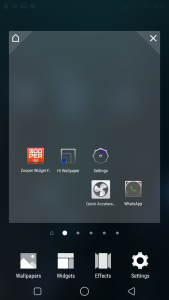
Download and install the Zooper Widget. Next, long tap your Android device’s home screen and click “Add Widget”. If the add widget option is not available like in certain modified Android operating systems such as HTC Sense or HiOS, select “Widget”. Scroll sideways until you see the Zooper Widget and click it. It will present you with widgets of varying sizes as shown on the image. Select the size that you want to work on.

Once you select the widget, it will embed a black box on your home screen and request you to tap to launch. Once you do so, it opens the Zooper Widget and then prompts you to select from the different presets (widget templates) that are available as shown below.

Step 2: Customize your Widget
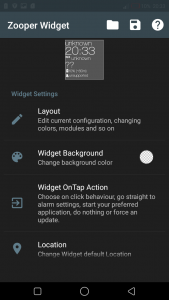
Once you select your widget template, it will launch the customization screen. Here, you can edit everything you want to do so about the widget. Any changes you make in the widget will be displayed instantly at the top. 
You can play with different values such as the layout of the widget or its background color and so on. If you have any time to spare, keep tweaking these values until you learn how to master the different widget settings. This enables you to create your own customized widgets that blend in well with your current wallpaper or home screen.


