How to Make a Dropdown List in Google Sheets
Google Sheets is a free online version of Excel that is very useful for sharing, editing on the fly, and light spreadsheet work. Sheets work much the same as in Excel and look remarkably similar. This is good news for anyone more familiar with Excel and getting to grips with Google Sheets won’t take long at all. For example, if you want to make a dropdown list in Google Sheets and already know how to do it in Excel, the process is almost identical.

One of the more powerful spreadsheet tools is the dropdown box. You can turn a simple spreadsheet into an interactive questionnaire, customer feedback form, or whatever you like with dropdown boxes as they allow dynamic input from whoever you allow access to.
Make a dropdown list in Google Sheets
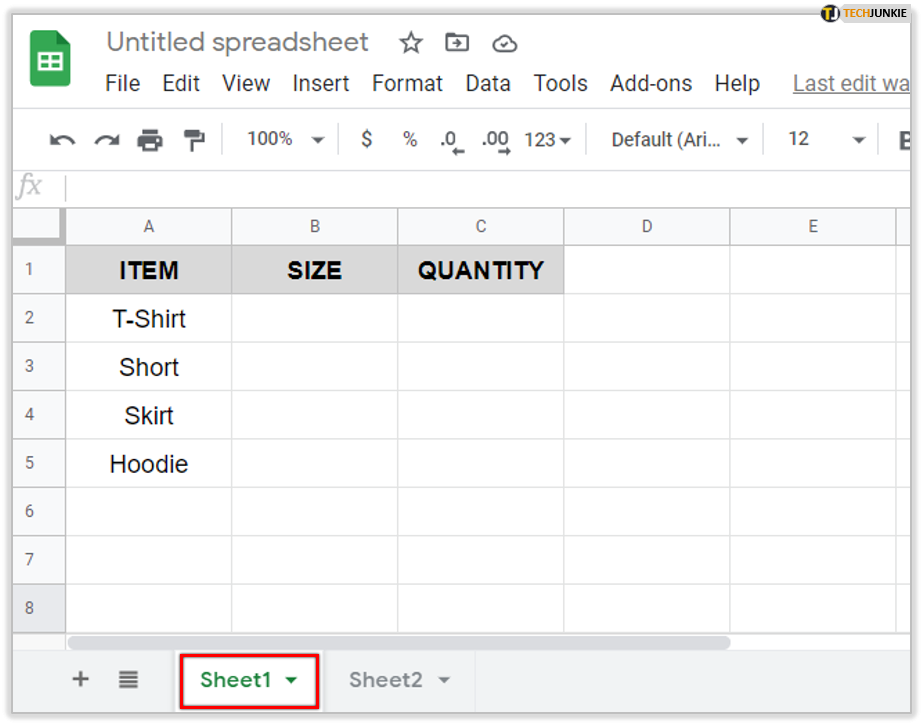
Create a Sheet containing whatever data you need it to include. Then:
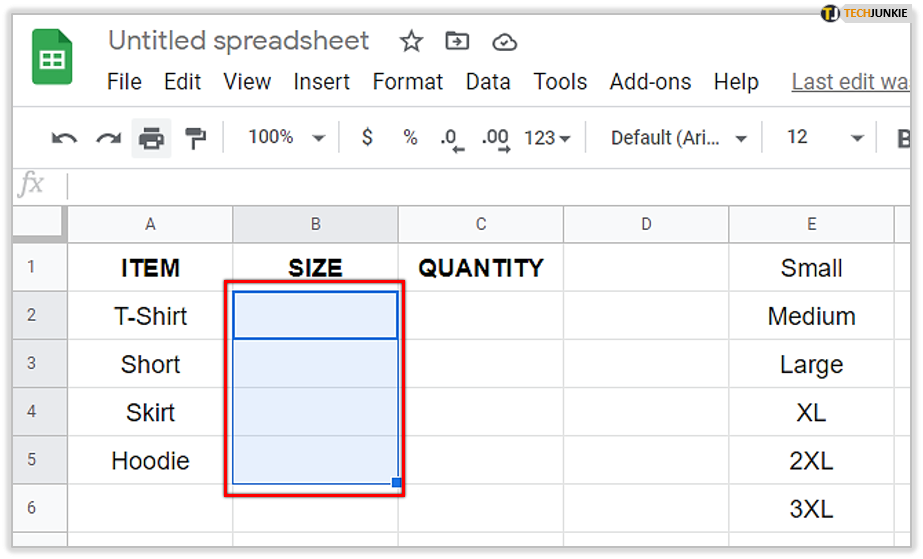
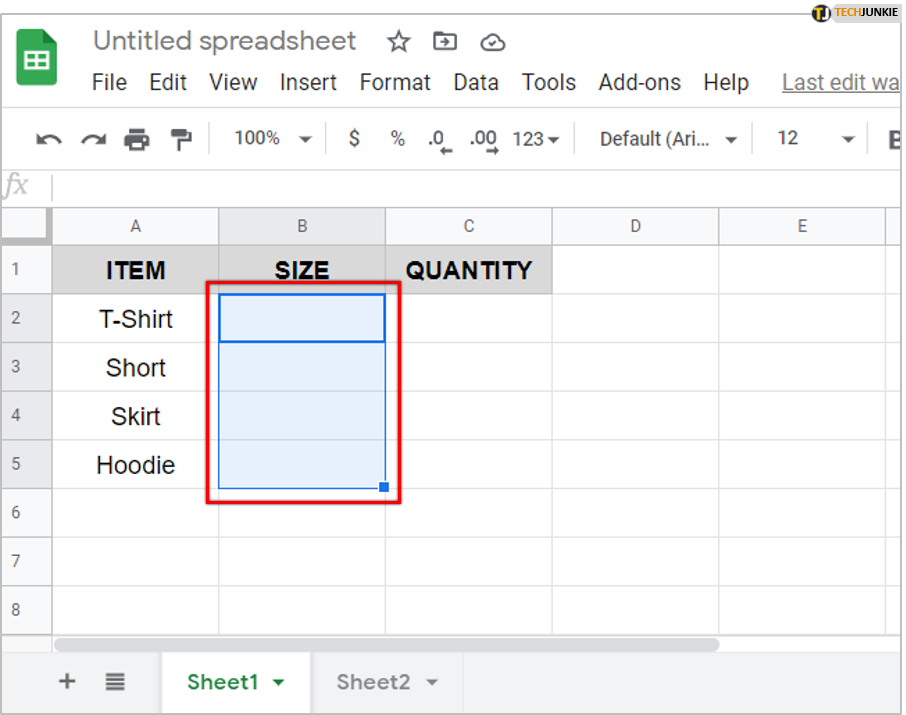
- Highlight the cells you want to include in the dropdown list by dragging the mouse or using Shift or Ctrl keys. If you’d like to make the dropdown list in a single column or role; click on the heading (Column A or Row 1 for example) and the entire section will become highlighted.

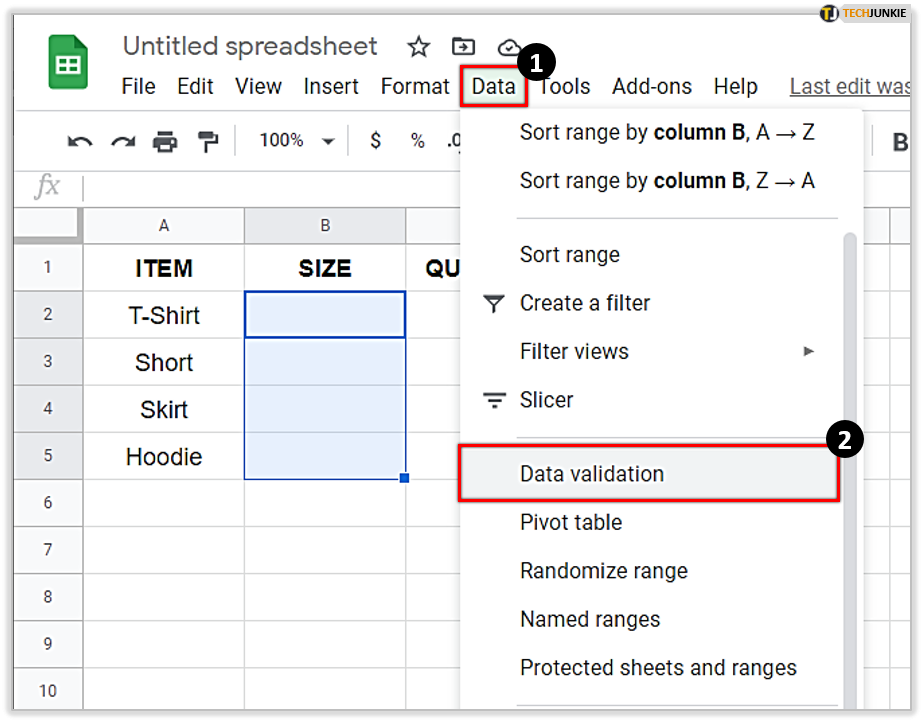
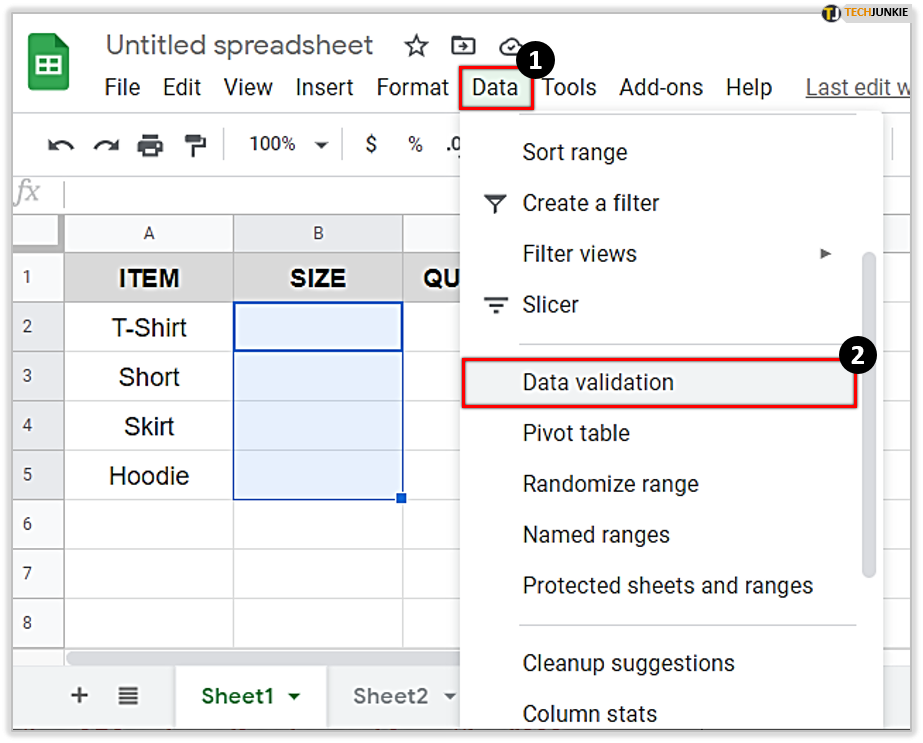
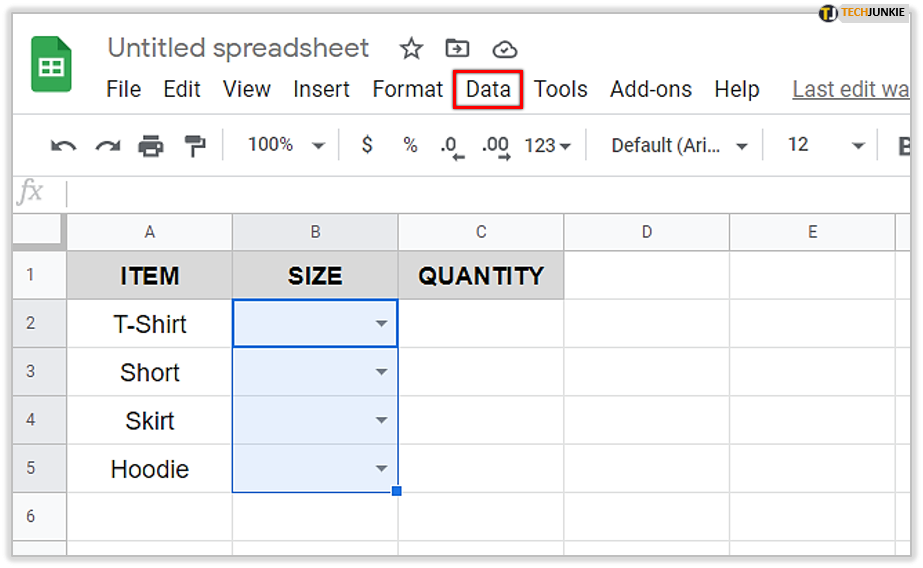
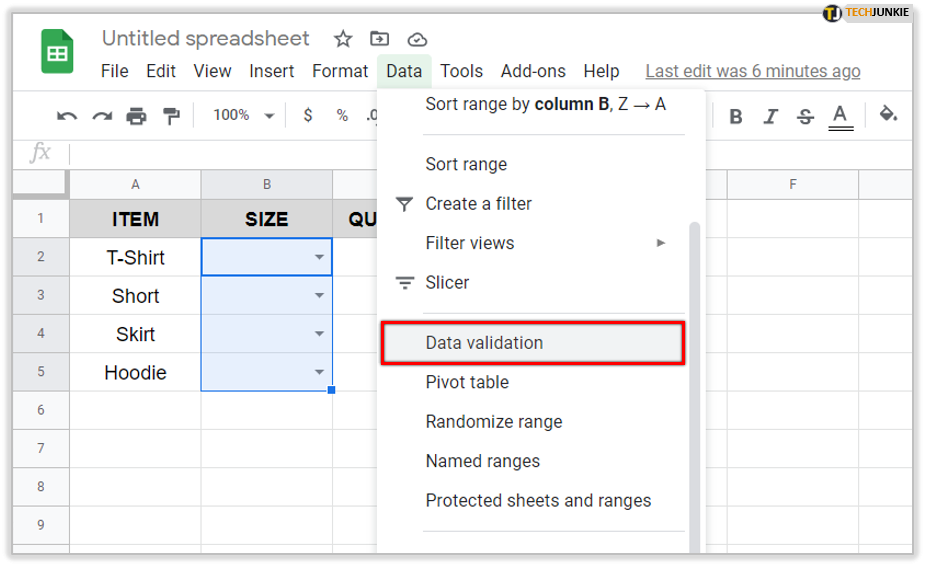
- Click the Data tab and then Data validation, or right-click the selected cells and click Data validation.

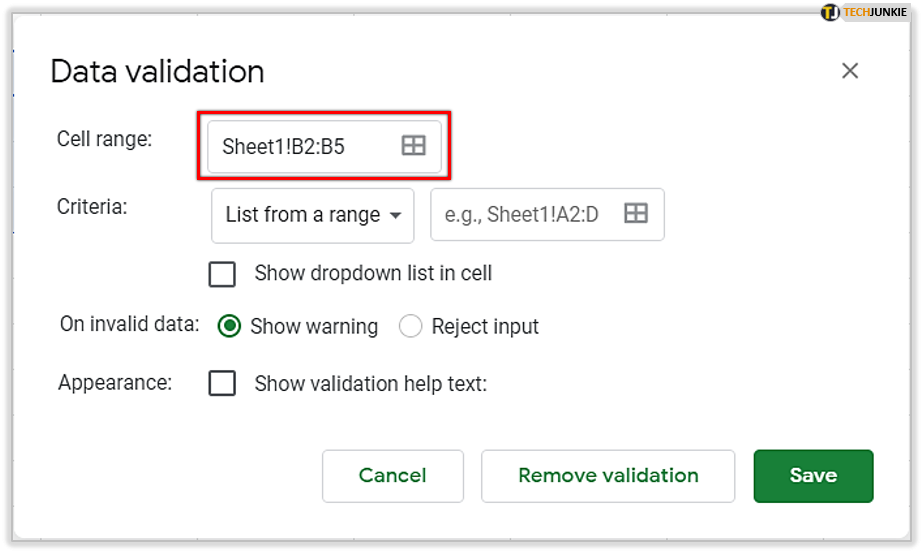
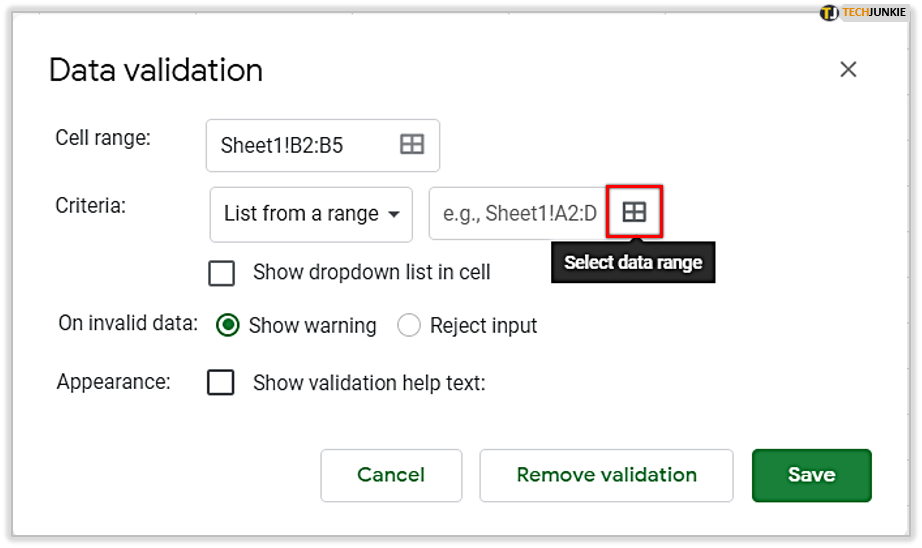
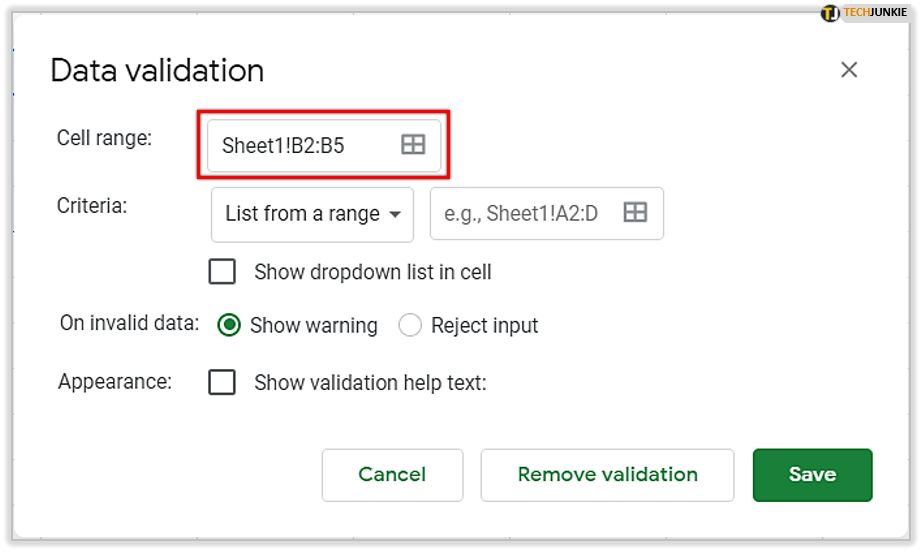
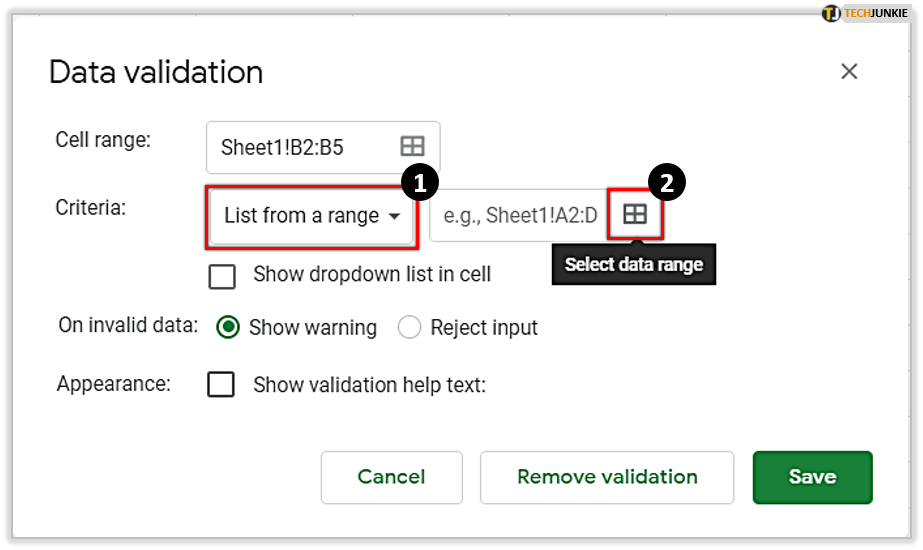
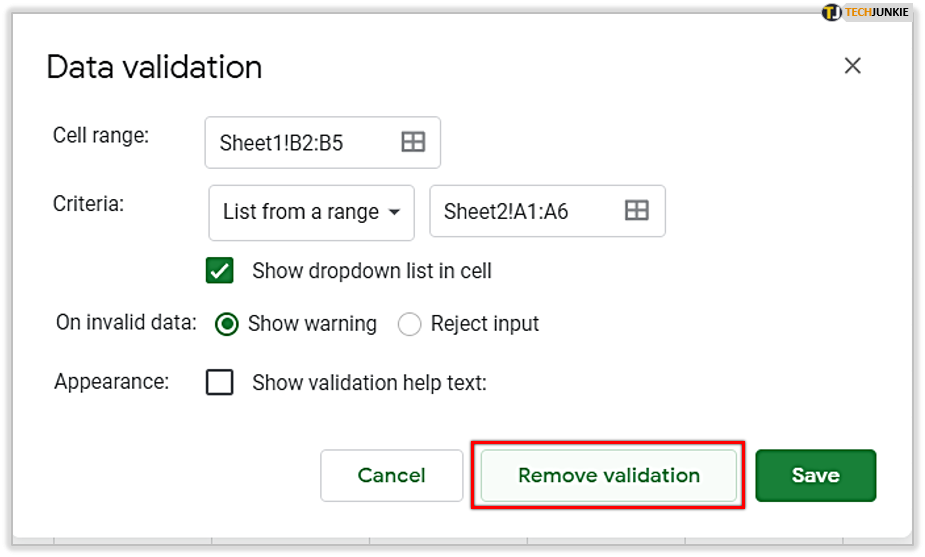
- If you’ve highlighted the appropriate cell range; this should automatically populate in the cell range section. You can change the range here if you need to.

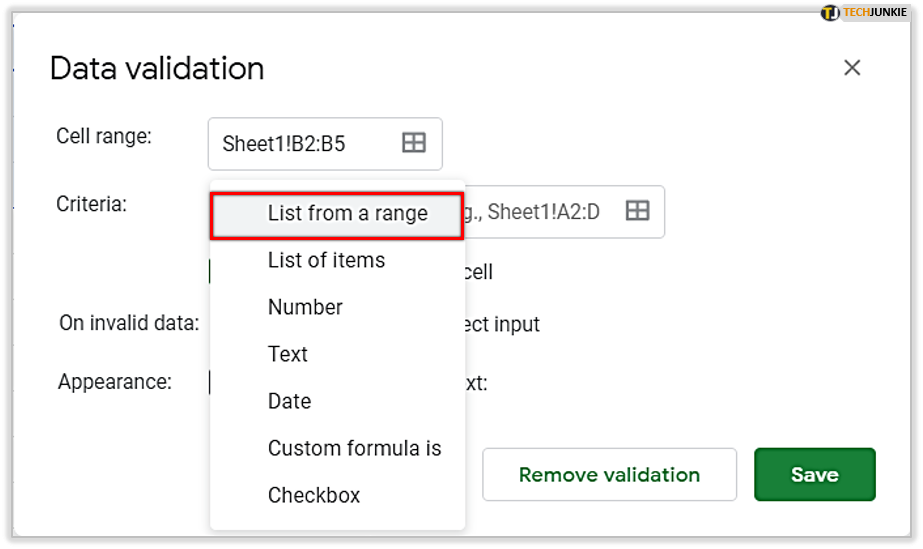
- Next to “Criteria”, you can filter “List from a range” and other options like

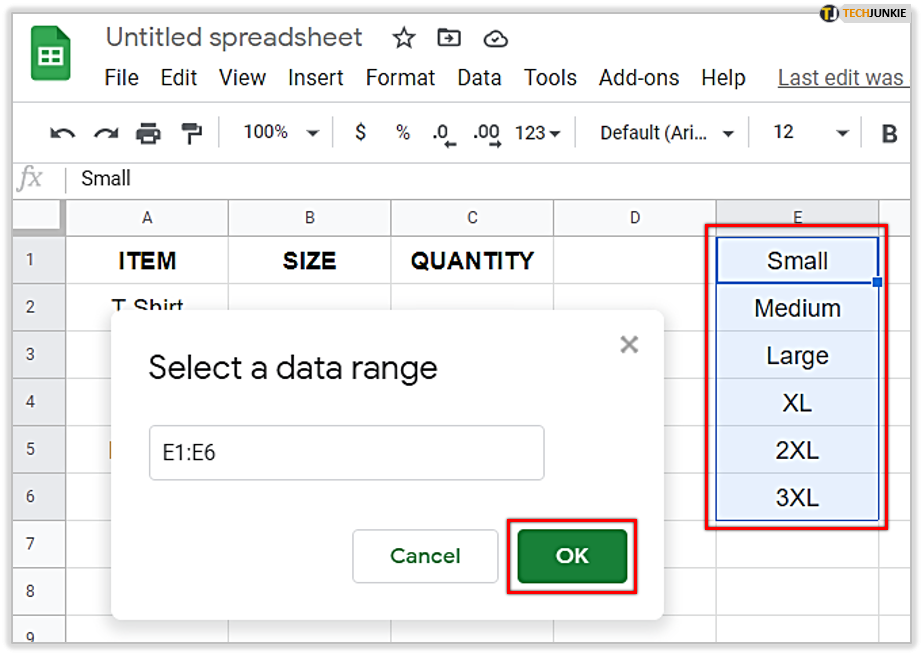
- Click on “Select data range” or the little box icon to choose a range of cells.

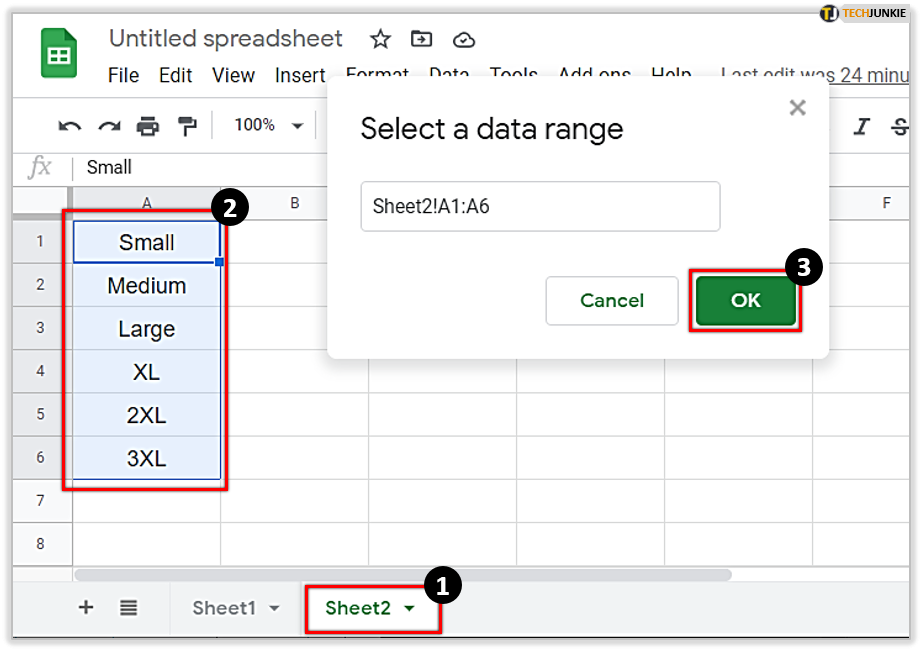
- Manually select the data you want to appear inside the dropdown list here and click “OK”.

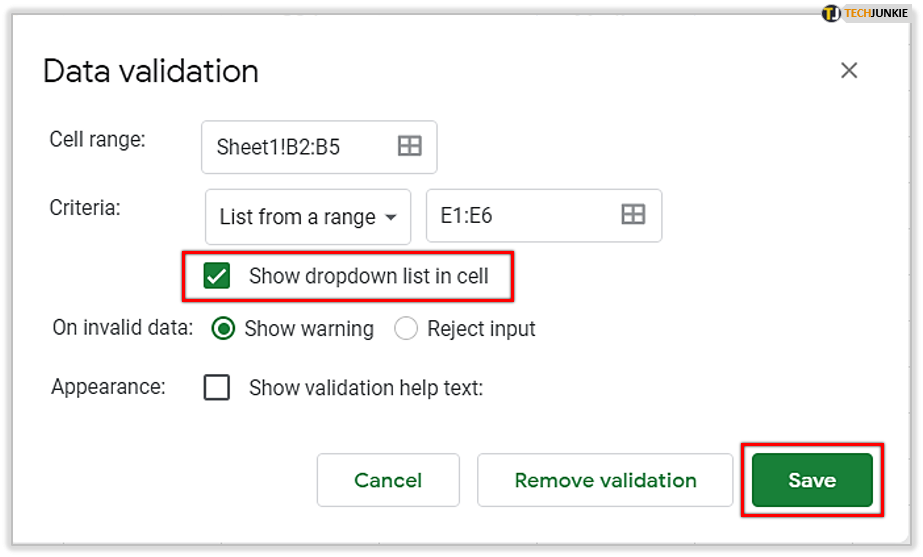
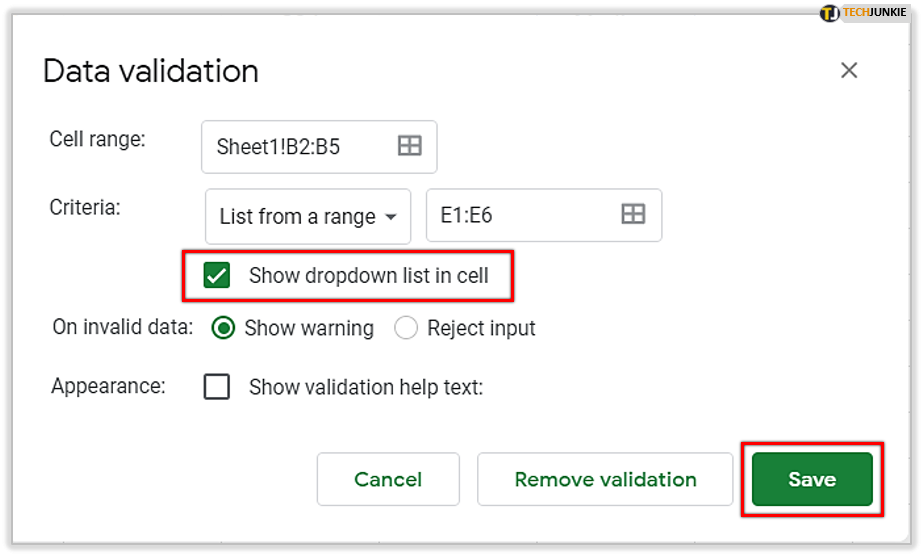
- Make sure that “Show dropdown list in cell” is checked. Add Help text and error information if you like and click “Save”.

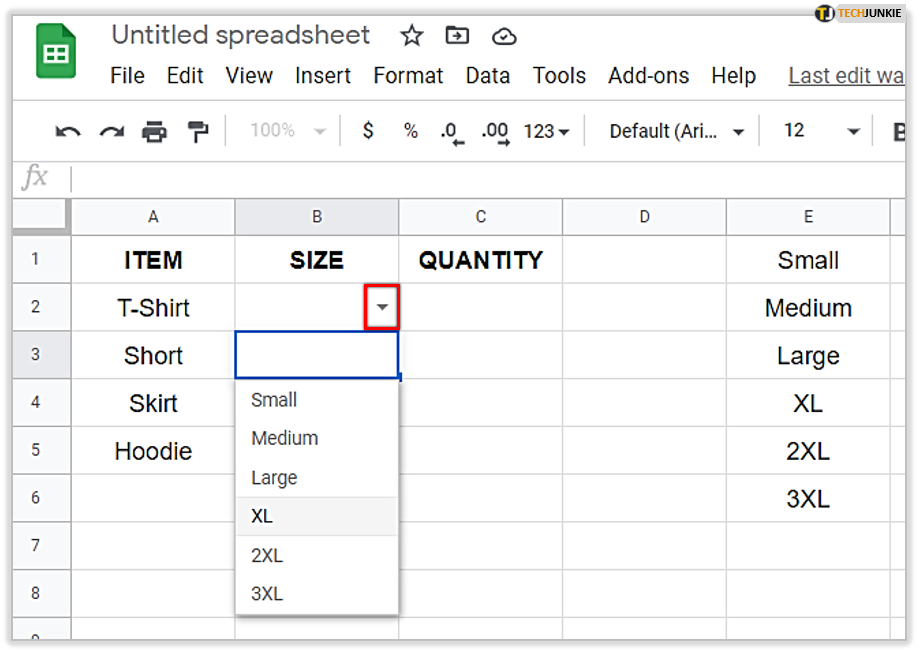
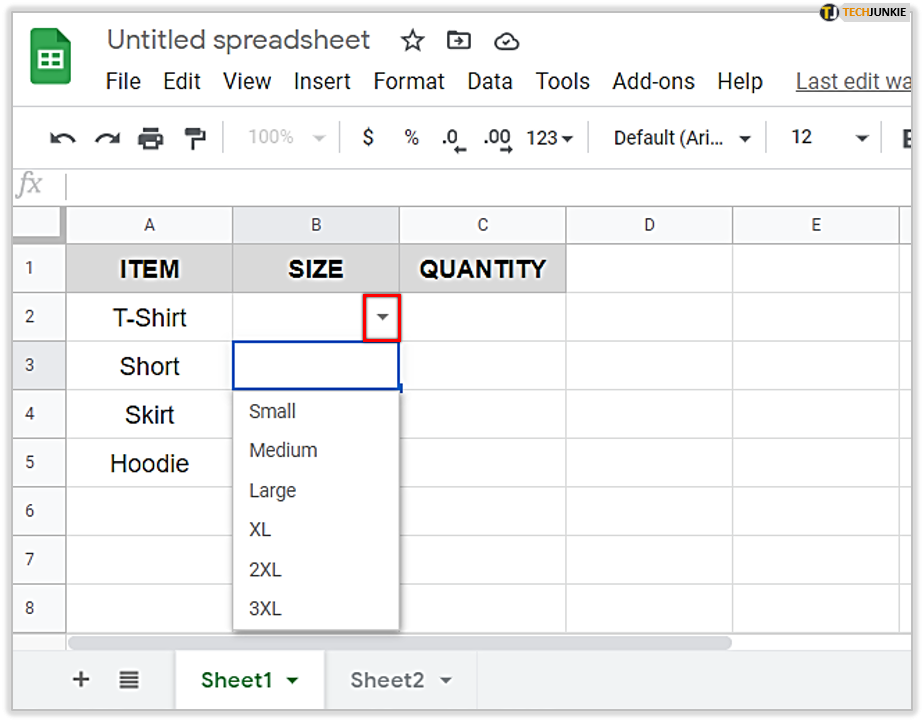
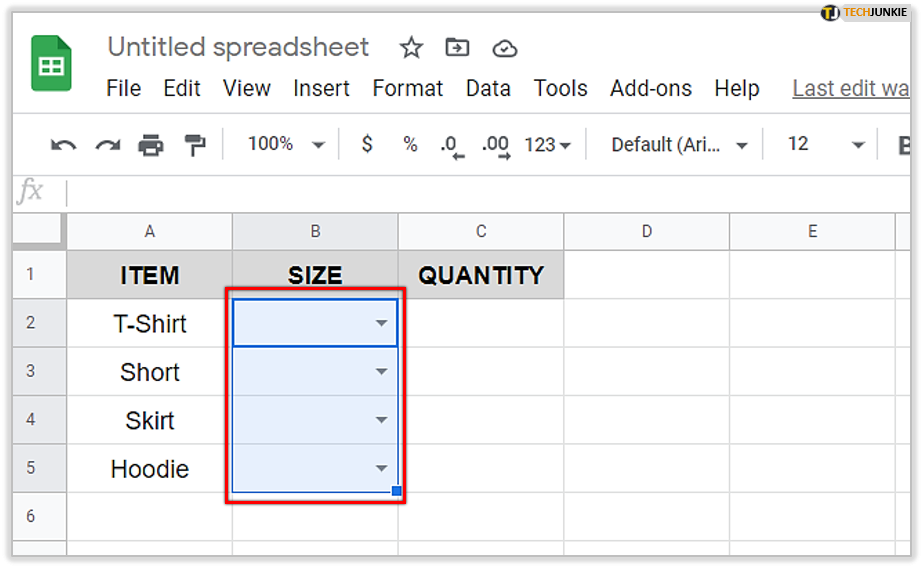
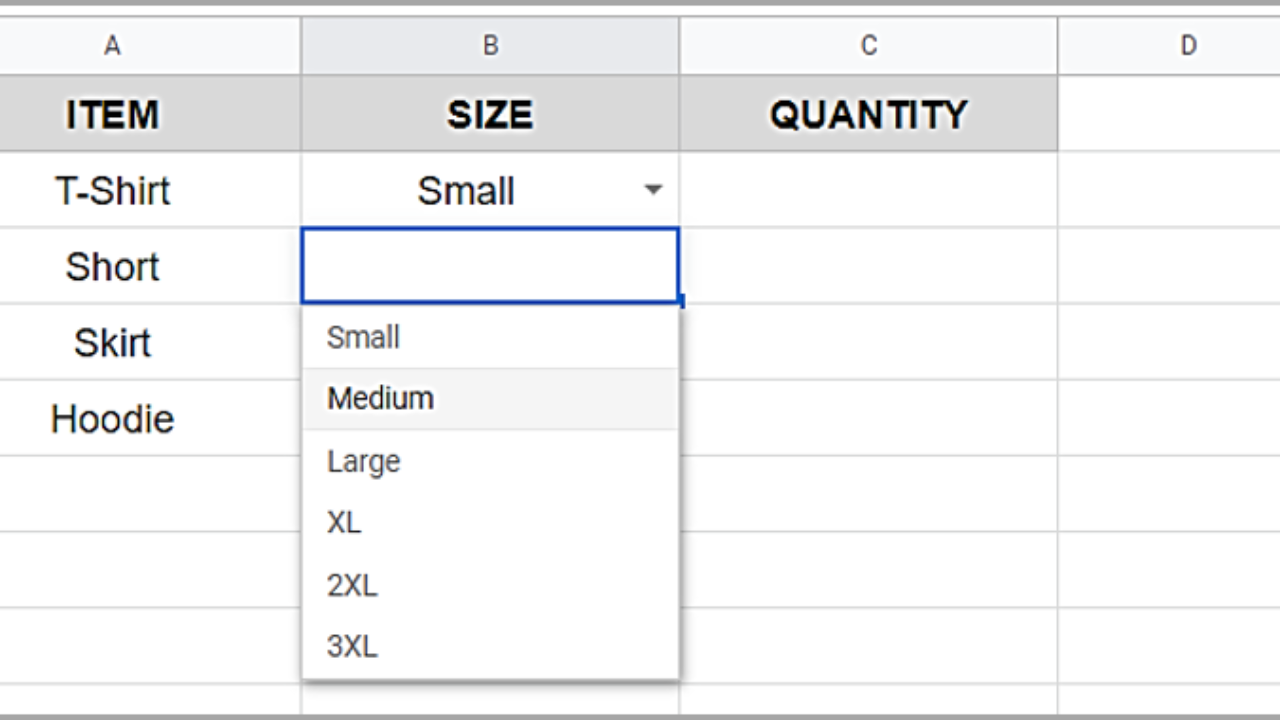
- The dropdown list should appear in the cell you entered in step 3. This appears as a small arrow icon.

As you can see, creating a dropdown list in Google Sheets is much easier than in Excel!
If you’re creating a customer-facing Sheet, it might be useful to create a second sheet that contains the data you want to include in the dropdown list. This keeps the main sheet clean and tidy and separates the user from the data as much as possible.
- Create your customer-facing Sheet 1 and another Sheet 2 for data.

- Highlight the cells you want to include in the dropdown list by dragging the mouse or using shift or Ctrl keys on Sheet 1.

- Click the Data tab and then Data validation, or right-click the selected cells and click Data validation.

- If you’ve highlighted the appropriate cell range; this should automatically populate in the cell range section. You can change the range here if you need to.

- Select List from range and then the little cell box next to it.

- Click on Sheet2 and manually select the data you want to appear inside the dropdown list here. Once done click “OK”.

- Make sure that “Show dropdown list in cell” is checked. Add Help text and error information if you like and click Save.

- The dropdown list should appear in the cell on Sheet 1 you entered in step 3.

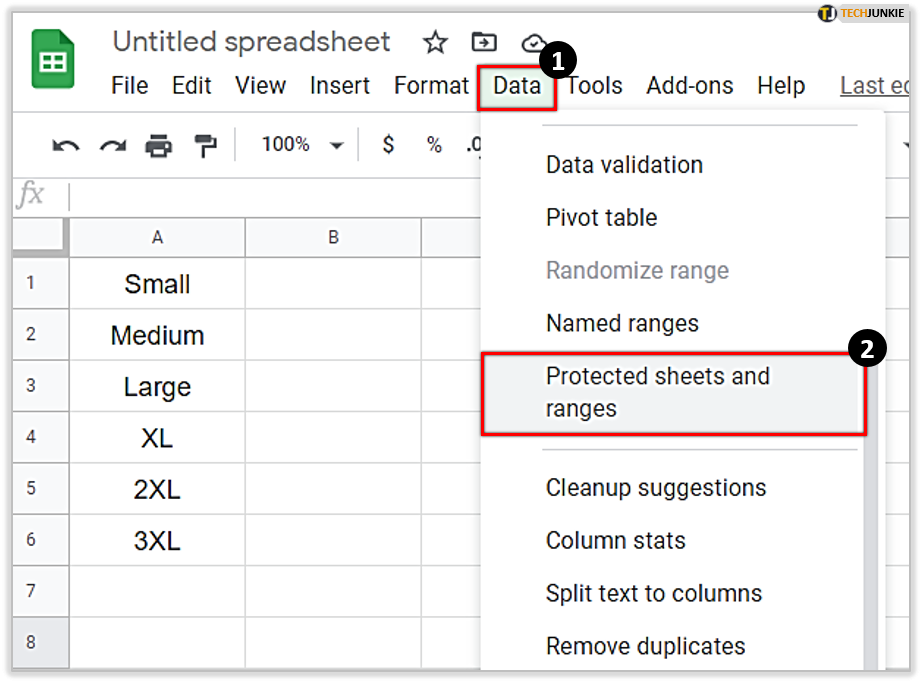
- Protect Sheet 2 by selecting Data and then Protected sheets and ranges.

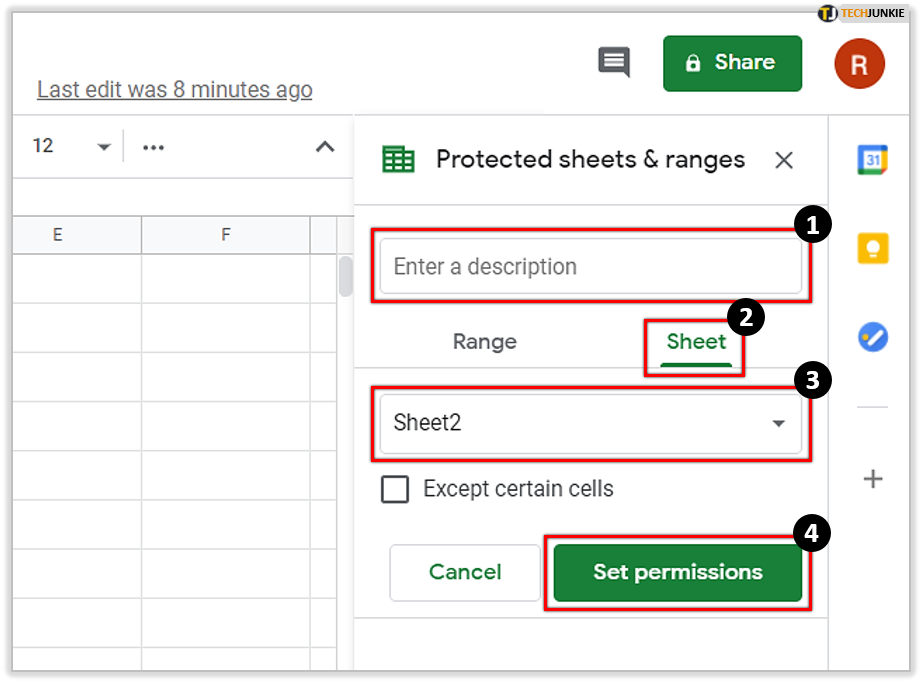
- Fill in the form on the right by giving it a name, select Sheet 2 by selecting Sheet instead of Range and Sheet 2 from the dropdown box. Then Set permissions and click Done.

Adding Color to the Dropdown List
One of the great things about Google Sheets is the ability to customize your spreadsheet. For example; if something is urgent you can color code the cells in red. To do this with a dropdown follow these steps:
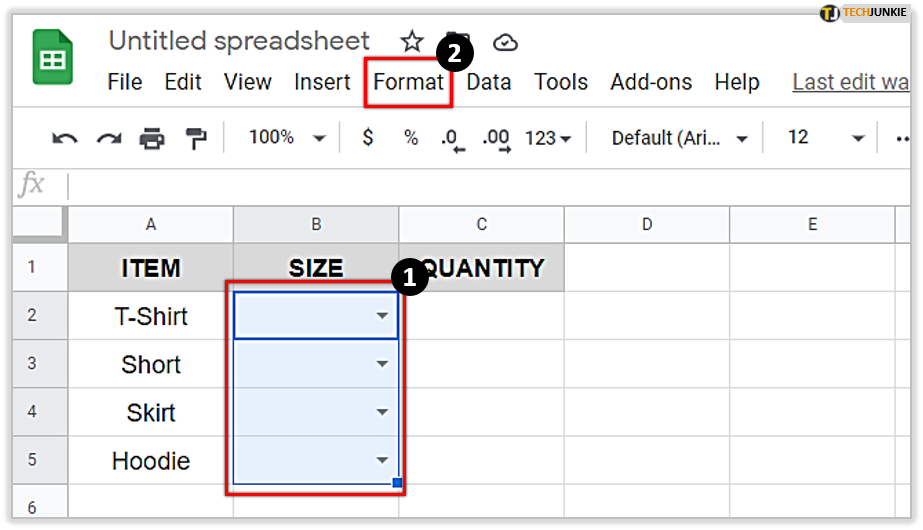
- Highlight the cells with a dropdown list and select Format tab.

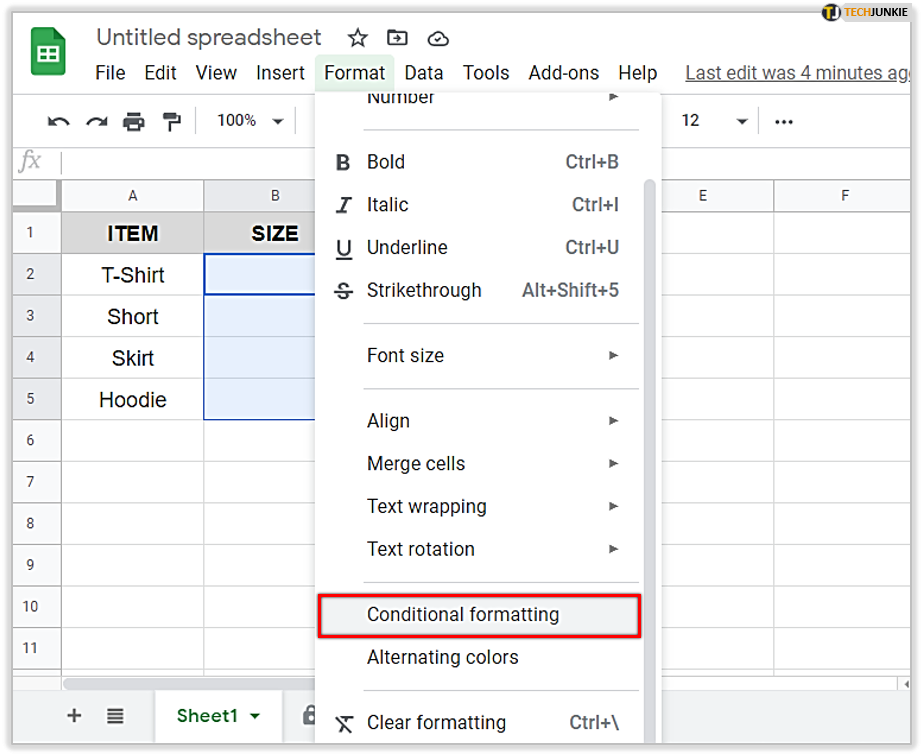
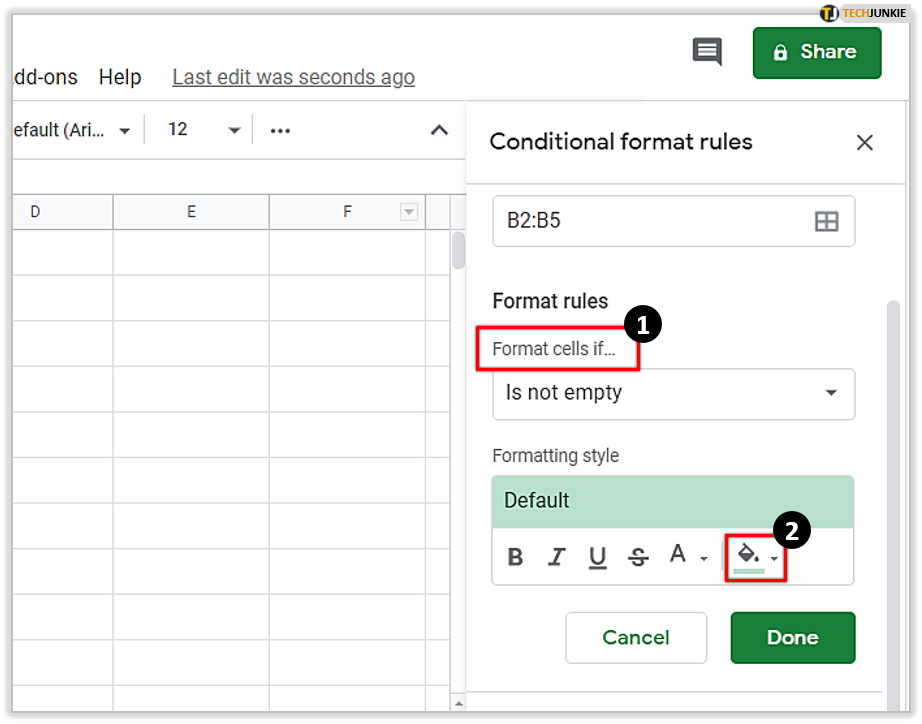
- From the menu that appears; scroll down and select “Conditional formatting.”

- A popup will appear on the right-hand side of Google Sheets. Choose formatting condition in “Format cells if..” In the lower right-hand corner you will see a paint bucket icon; click on that.

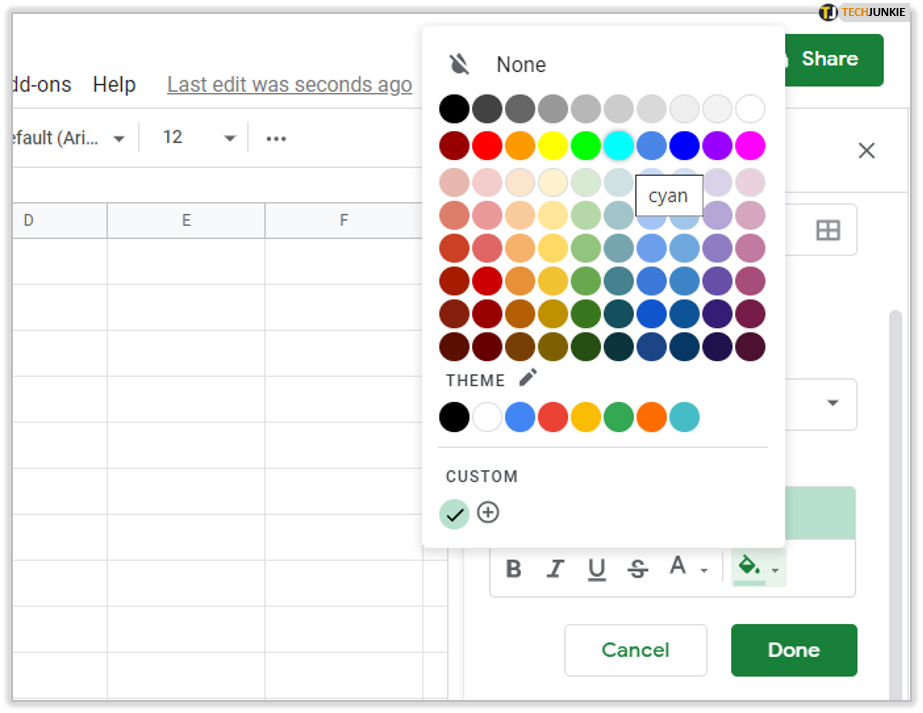
- Choose from the available color options.

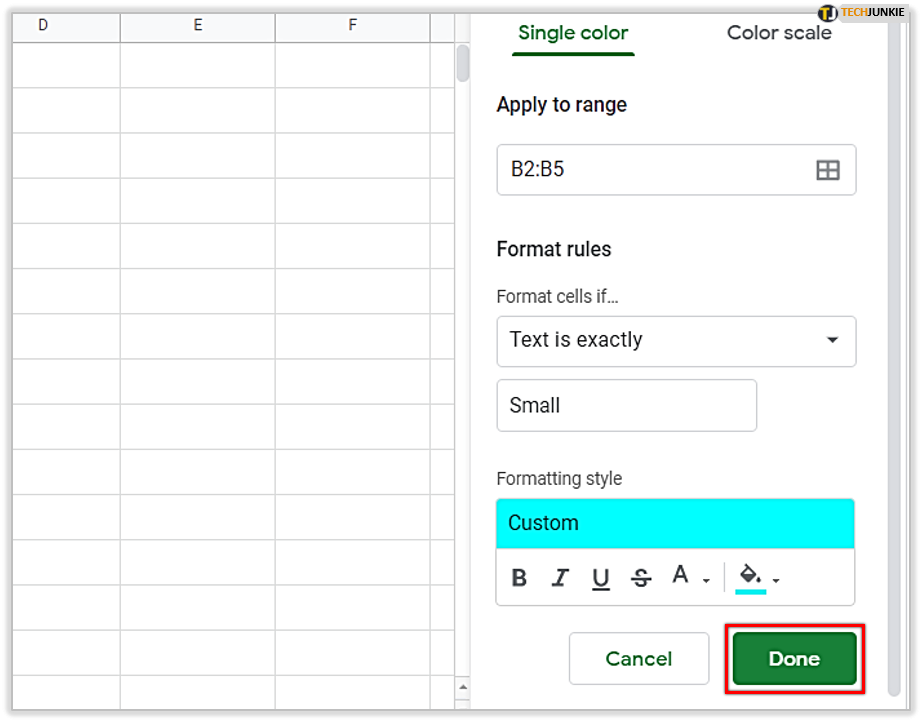
- Click “Done”

This menu also gives you a few other features such as; Bold, Italics, and Underlined text. You can also add another rule or choose a color scale if you’d like.
Deleting or Editing an Existing Dropdown
If you’d like to update the dropdown or delete it, you can follow these instructions:
- Highlight the correlating cells or columns.

- Click “Data”

- Click “Data validation”

- Make edits or click “Remove validation” to remove the dropdown.

Your Google Sheets may be an ever-evolving document so having this option makes it easy to update your dropdown lists.
Google Sheets Troubleshooting
Some users have experienced issues with the Google Sheets dropdown menus. There are various reasons for this. When you’re sharing a Google document with someone else there are a few rules and guidelines to ensure the recipient can interact with your dropdowns.
Read Only
Google Sheets will not allow another person to interact with the document if it is in a “Read Only” status. This means they aren’t able to make any edits. To ensure others can use your dropdowns follow these instructions:
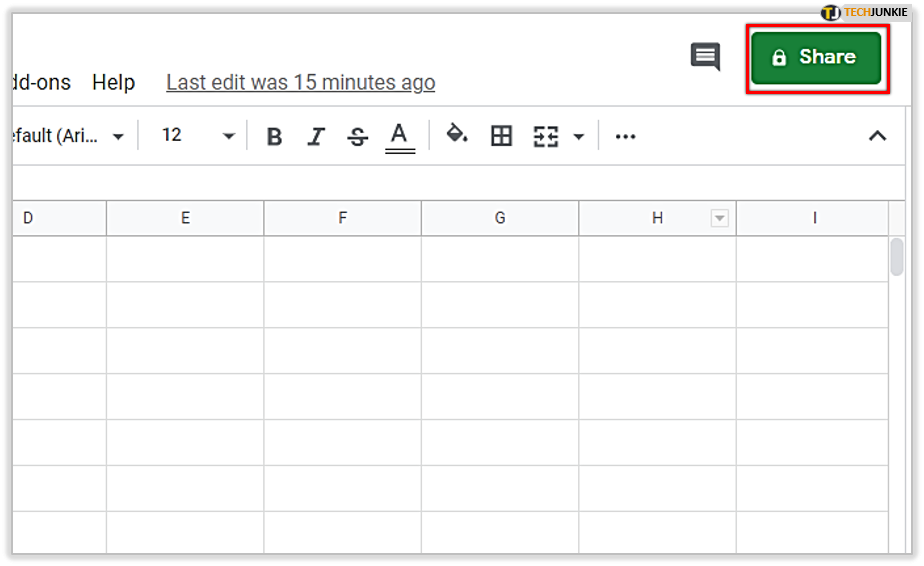
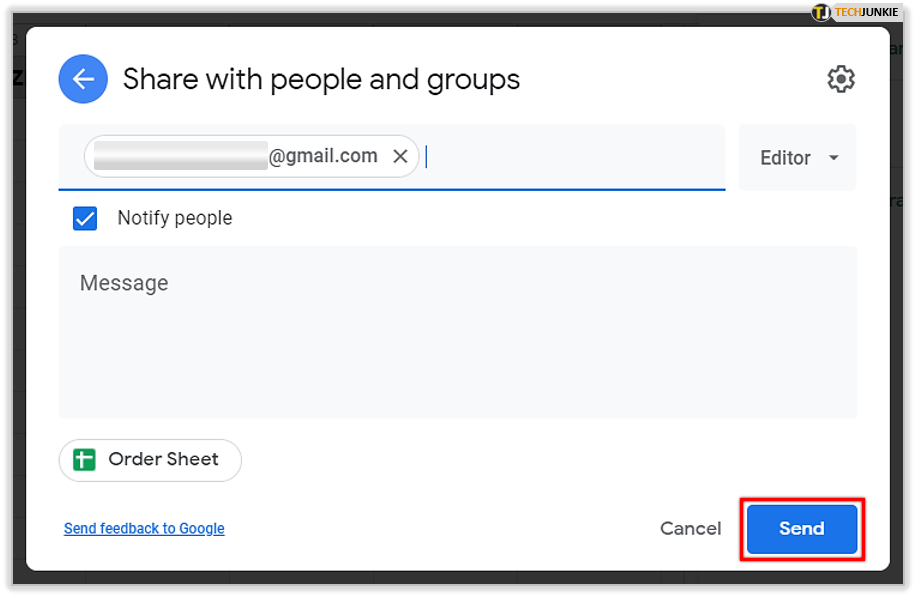
- Click “Share” in the upper right-hand corner.

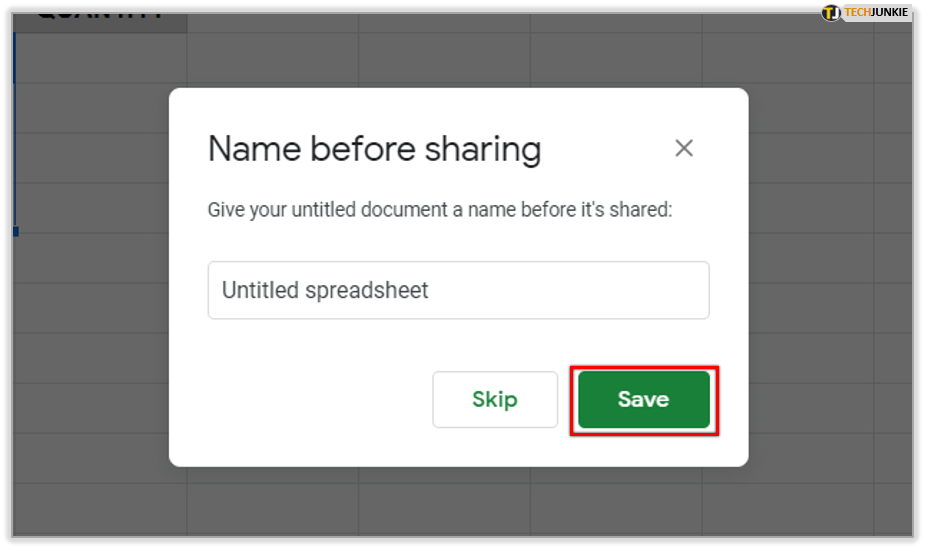
- Name your sheet if prompted and click “Save” located in the lower right-hand corner of the popup.

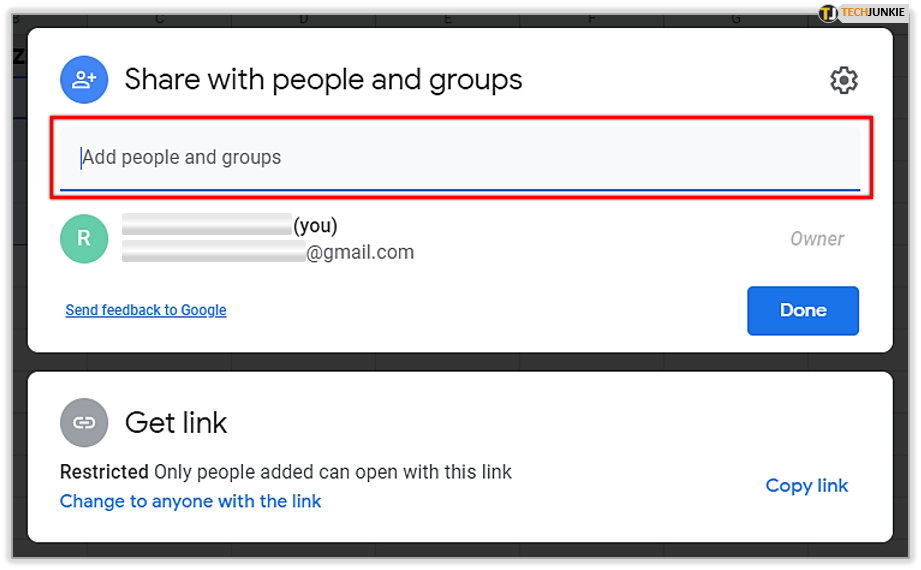
- Input the contact information for those who you’re sharing the document with.

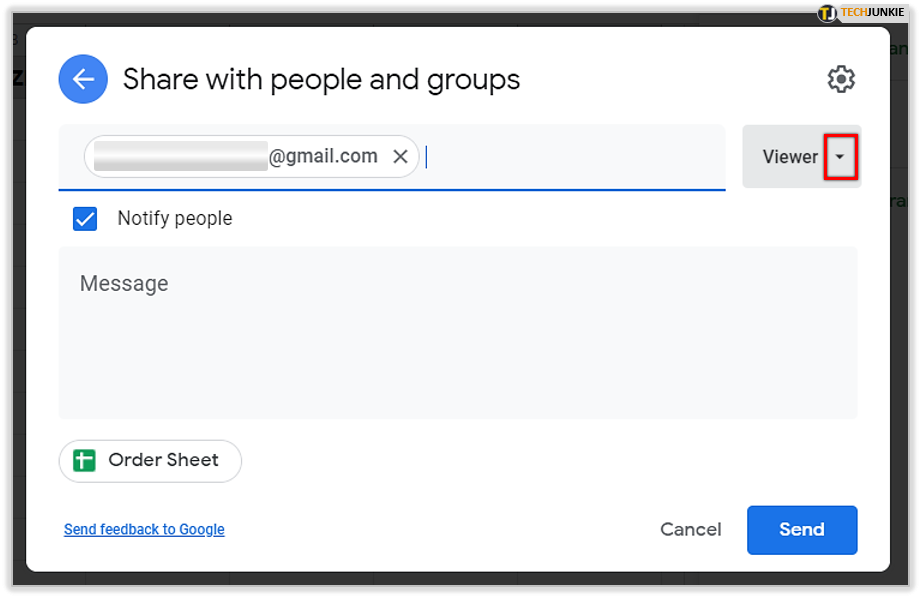
- Click the dropdown located to the right.

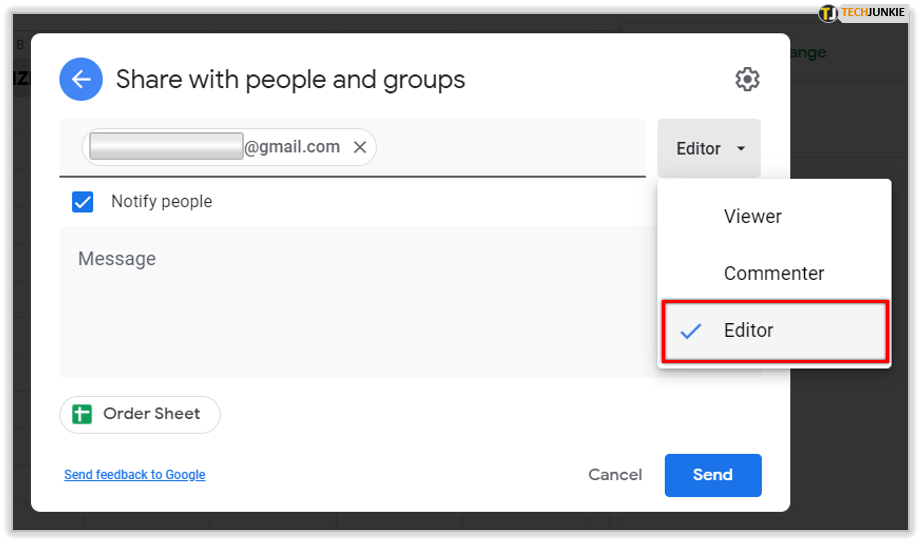
- Choose “Editor” from the menu.

- Click “Send.”

This is the most common issue with sharing Google Sheets. Performing this short series of steps should ensure that your recipients have full access to the document and its features.
More help for Google Sheets can be found on the Docs editors help website here.


