How to Activate a 3rd Generation Amazon Echo Dot
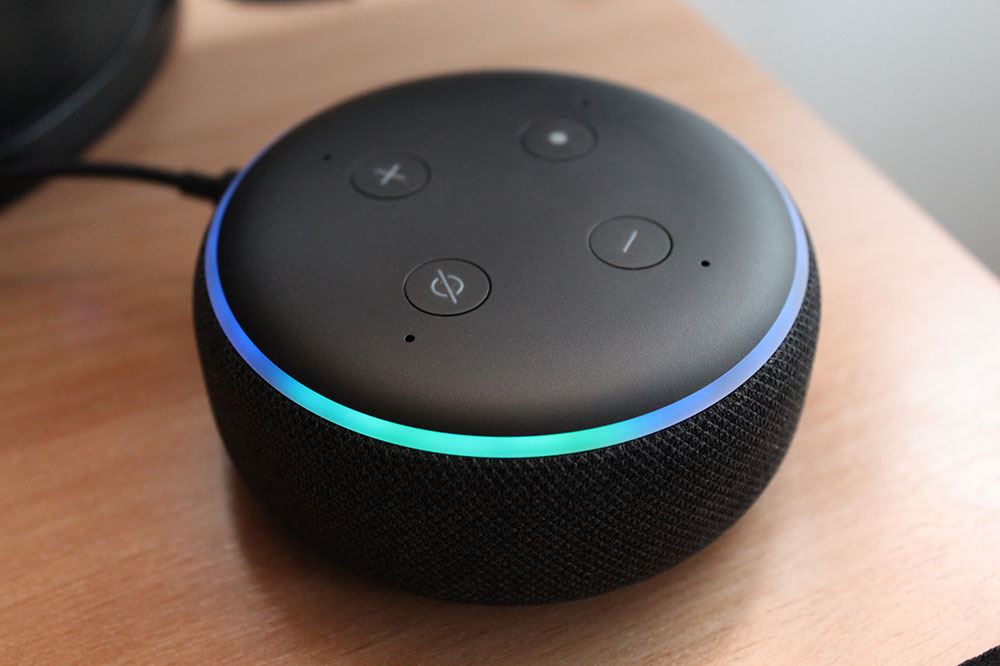
With the release of the third generation Echo Dot, Amazon’s ingenious little device is still the most affordable way to make your home smart. As basically a smart speaker, Echo Dot delivers a pretty remarkable sound for its size.
The great thing about Amazon’s Echo devices is that they’re so simple to use. Thanks to the intuitive voice commands, it’s really easy to learn how to interact with them. With just a few basic phrases, you’ll get communication down with your Alexa assistant in no time at all. But before you can enjoy all the benefits, you need to know how to activate your Echo Dot.
Before you proceed with the setup, make sure that you have everything you need:
- Amazon Echo Dot device.
- The power charger that came with it.
- A smartphone or a tablet. It can be an Android, iOS, or a Windows device, as well as one of Amazon’s Fire tablets.
- Your home Wi-Fi network connected to the internet.
With everything ready, you can begin with the setup.
1. Preparing Alexa
Echo Dot doesn’t have the visual interface of its own. That’s why you’ll need the Alexa app to set it up and manage it. To install the app to your smartphone or tablet, find it on the app store. Depending on the device you have, go to Google Play, Apple, Microsoft, or Amazon Appstore.
When you’ve finished installing the Alexa app, follow these steps to initiate the pairing with the Echo Dot.
- Open the app and tap the “Devices” icon in the lower right corner.
- Tap the “Plus” sign in the top right corner.
- Tap “Add Device”.
- Tap the “Amazon Echo” icon.
- Tap “Echo Dot”.
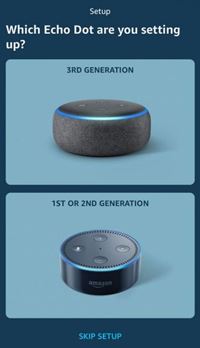
- Tap “3rd Generation Echo Dot” icon.

2. Preparing Echo Dot
Now take your Echo Dot and connect it to the wall charger that came with it. Plug the other end of the charger to a power outlet. Echo Dot will power up and you’ll see its light ring glow blue.
Wait until the device enters the Setup Mode. You’ll know it has when the blue light ring turns orange and Echo Dots plays the initial greeting message. If it didn’t enter the Setup Mode automatically, you can initiate that manually. Just press and hold the “action button” for five seconds.
3. Connecting Echo Dot to Alexa
With both Alexa app and Echo Dot ready, it’s time to pair them. When Dot enters the Setup Mode, you should see the device’s image popping up on your smartphone or tablet. Tap the image.
Next, you need to connect to your Echo Dot. Go to the Wi-Fi settings on your smartphone and switch the network to “Amazon-XXX”, where the triple X is a combination of three letters and numbers.
4. Final Steps
Once you’ve established the connection between the app and the device, go back to Alexa to tell Echo Dot which is your home network:
- The app should be showing the “Continue Echo Dot Setup” message.
- Tap “Continue”.
- In the in-app Wi-Fi setup menu, you‘ll see the list of all available networks.
- Tap the Wi-Fi network your Echo Dot should connect to.
- If prompted, enter the Wi-Fi password.
The app will also ask you if you’re planning to use an external speaker with your Echo Dot. You can skip this step if you’re relying on its integrated speaker for now.
The final step is to select one of the rooms listed for your household, where you’ll place the Echo Dot. If needed, you can also create a new room from this menu.
When the setup has been completed, the light ring on the device will turn off. When you go to the “Settings” menu, you should see that your Echo Dot is listed as “Online”.
A Great Little Device
Being a rather small device with an attractive design, Echo Dot will surely be a welcome addition to your home. When you connect it to other smart devices, you’ll see the real benefit of having access to the Alexa assistant. You might even consider getting a few more Echo Dots to place all over your house.
What’s your experience with Amazon’s Echo devices? Have you turned your home into a smart one already? If not, do you plan to? Please share your thoughts and experiences in the comments section below.


