How to Add Kindle Fire to My Amazon Account

When you first set up your Kindle Fire device, you’ll need to enter your Amazon account credentials so you can register the account to the cloud. If you don’t, you won’t be able to purchase new content or use the Appstore.
You may have left the Amazon account empty, or another user may have been registered to the Kindle Fire. In any case, you’ll need to add your account so you can fully experience the device.
Fortunately, you can easily add your Kindle Fire to the Amazon account manually. This article will explain the process.
Adding Kindle Fire to Amazon Account
If you didn’t set up an Amazon account when you first set up your Kindle Fire device, you can do the process manually. Keep in mind that the process is a bit different depending on your Kindle Fire version and that you need to connect the device to the stable internet connection.
If you own the first generation of the Kindle Fire, follow these steps:
- Tap ‘Settings’ (gear icon) at the top-right of the screen.
- Select ‘More’ from the dropdown menu.
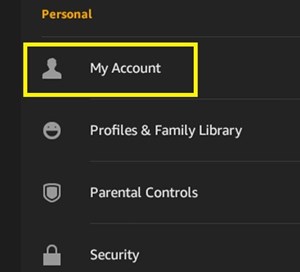
- Choose ‘My Account’.

- Select ‘Register’.
- Enter your Amazon account credentials.
If you own a second-generation (HD) and third-generation (HDX) Kindle Fire, do the following:
- Swipe down from the top of the home screen to reveal the quick access bar.
- Select ‘More’ (2nd generation) or ‘Settings’ (3rd generation).
- Tap ‘My account’.
- Select ‘Register’.
- Type your Amazon account user name and password.
- Select ‘Register’ again.
When you register an account, it will automatically appear on the ‘My Devices’ tab on your Amazon’s profile page. You can then download all the purchased content from your account to the device or purchase new things directly from the device.
Replacing an Existing Kindle Fire Account
On some occasions, you may want to replace one Kindle Fire account with another. This can happen if you bought a used Kindle Fire or got it as a gift, for example. Regardless of the story, you can easily deregister an account and add your own.
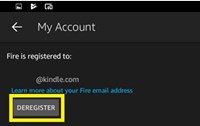
If you want to deregister the account, simply follow the steps 1-3 from the previous section. Instead of ‘Register’, select ‘Deregister’. This will remove the account. Then proceed with the next steps.

Note: When you deregister the account, it will automatically remove all the data connected to the account from the device. This includes all downloaded books, audiobooks, apps, and other content that belong to the previous account. However, the content will remain on the Cloud so when that account registers to another Kindle Fire, all the files can be downloaded again.
How to Check Your Amazon Account Devices
If you want to confirm that the Kindle Fire is registered to your account, you can check it on the official website. Here’s how to do this:
- Go to Amazon’s web page.
- Click ‘Hello, Sign In’ at the top-right of the page.

- Click ‘Sign In’.
- Enter your credentials.
- Click ‘Manage Your Content and Devices’.
- Tap the ‘Devices’ tab at the top of the screen.
- See if your Kindle Fire appears on the list of devices.

Your Content Is in a Safe Place
If you ever want to upgrade to a better version of Kindle Fire, or if you want to switch to some of the recent Fire OS devices, you don’t have to worry that you’ll lose the content.
Thanks to your Amazon account, everything that you’ve purchased stays on the Cloud, and you can easily transfer it to a different device. So even if you’re planning on changing the devices soon, don’t let that stop you from purchasing new books and audio. You’ll enjoy it on your new Fire, too.
Which version of Kindle Fire do you have? Did you plan to upgrade it? Share your opinions in the comments section below.


One thought on “How to Add Kindle Fire to My Amazon Account”