How to Automatically Insert Date in Word

We usually list Microsoft Office as one of our skills when writing a resume or applying for a job. Some of us even claim to be proficient at it. But is it really true?
Knowing your way around Word, for example, doesn’t necessarily mean the ability to type like a stenographer! It means you know how to adjust the document so that it suits your needs and how to format it and create different types of texts, including ones with images, charts, tables, and so on. Do you know how to do it all?
For instance, do you know how to automatically insert date in a Word document? You’re about to find out.
How to Insert Date and Time in Word
Sometimes you’ll need to insert the current date and time as soon as you open a new Word document and start typing. You can do it without typing it yourself if you use the Insert Date and Time option.
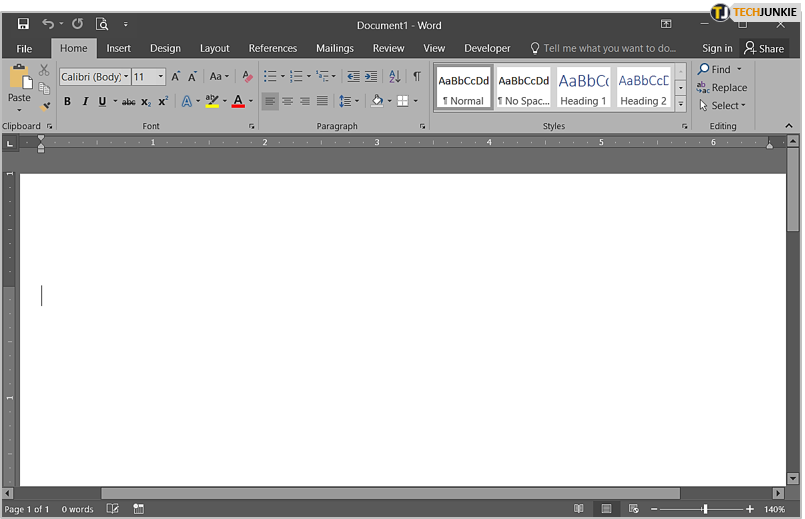
- Open a Word document.

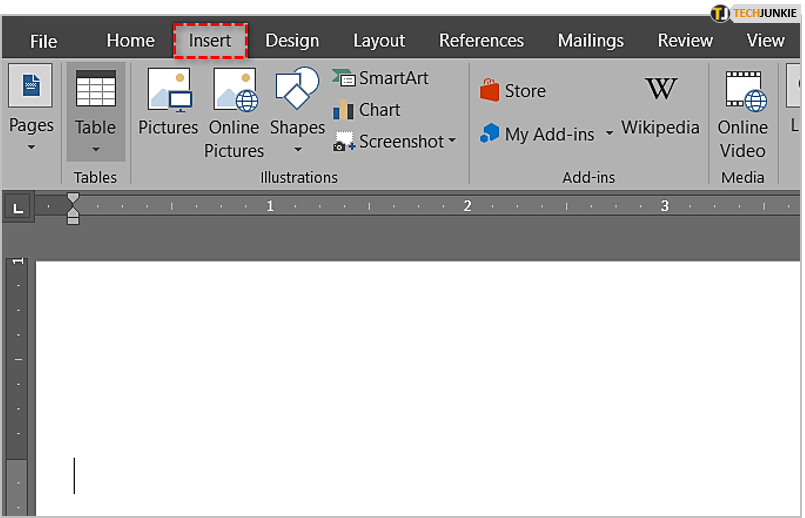
- Go to the Quick Access Toolbar and click on Insert – it’s the third tab, right after File and Home.

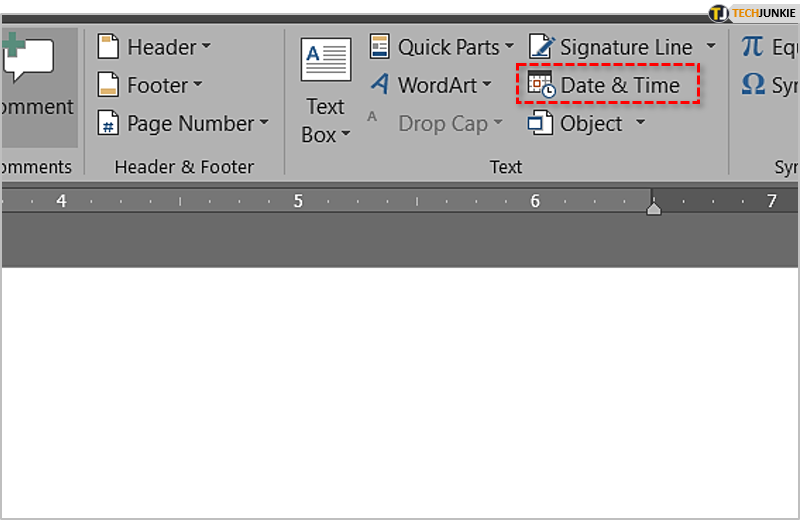
- In the Text section, choose Date & Time.

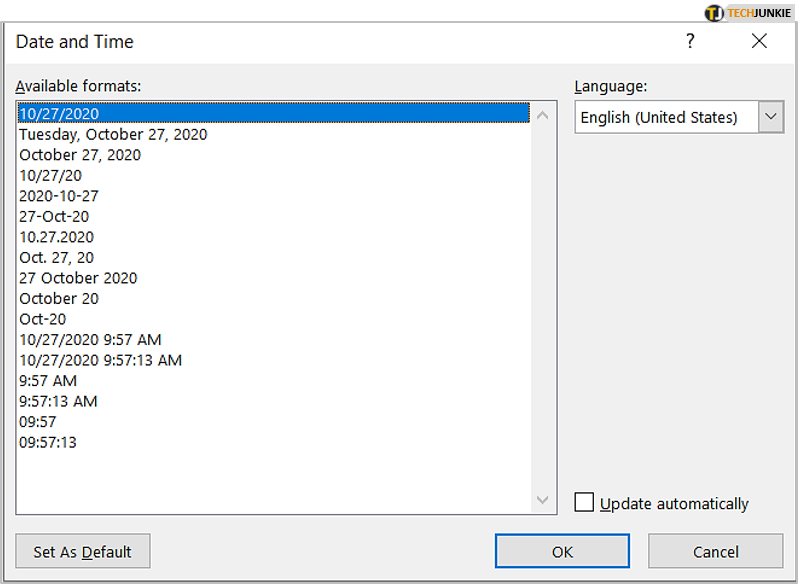
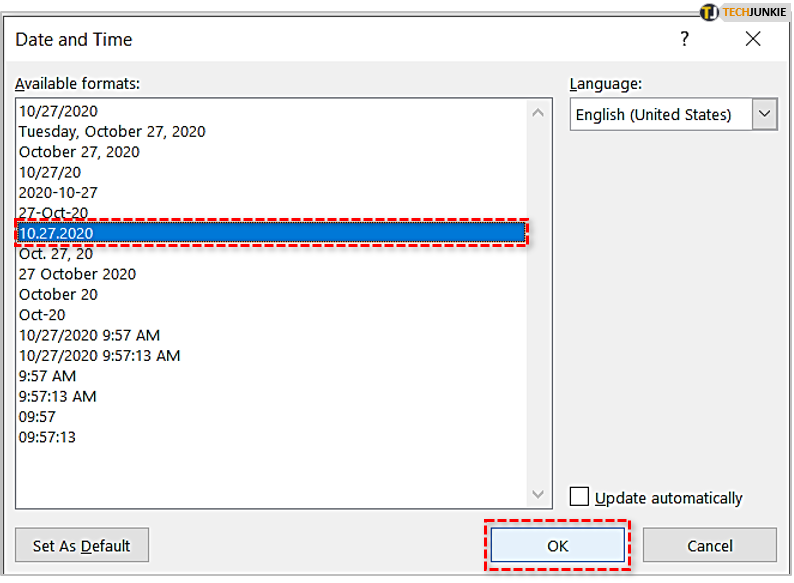
- A new dialogue box will open, showing you different date and time formats.

- Choose the one you want and confirm by clicking OK at the bottom.

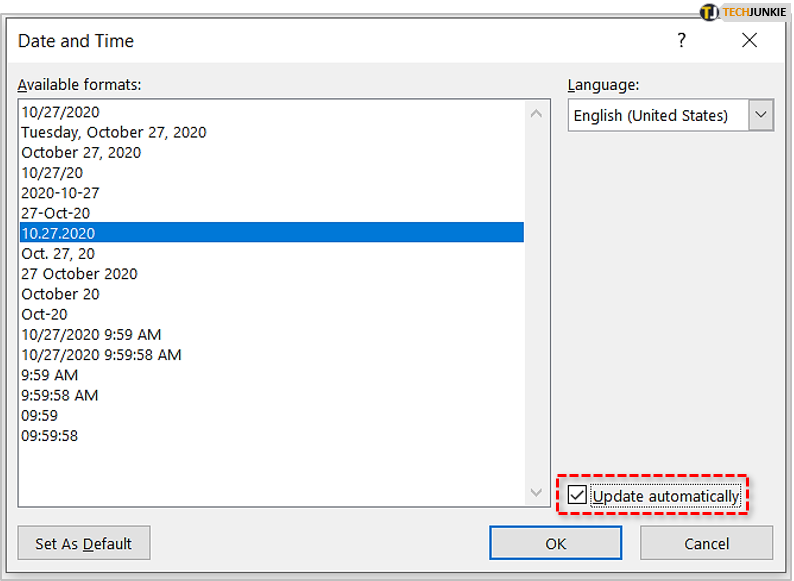
The current date (and time) will be inserted as text. Inserting them as a field makes it possible to have them update every time the document is opened. To do this, add one step to the previous process as follows.
- After the dialogue box with date and time formats opens, check the Update automatically box right above the OK button.

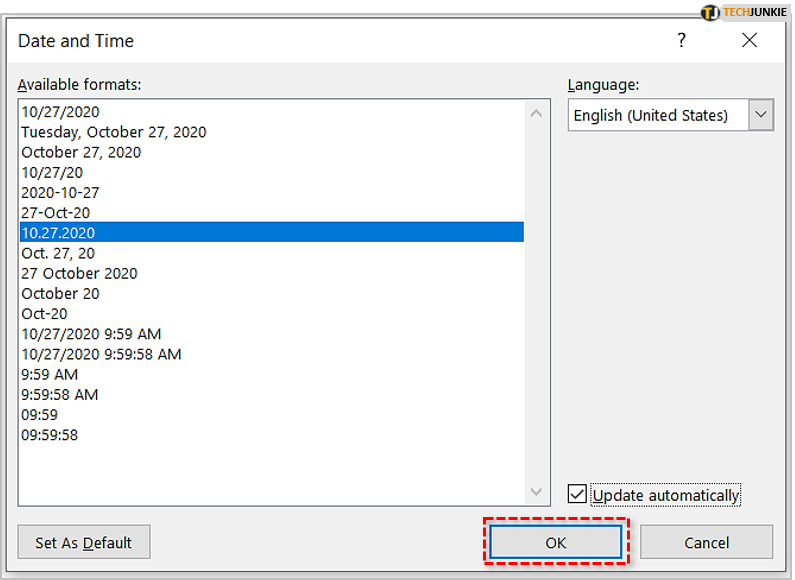
- Click OK to save your choice.

Note that you’ll be able to change this field manually. When you point the cursor over the date, it will become gray – to edit it, just click on the gray field and type in the new date.
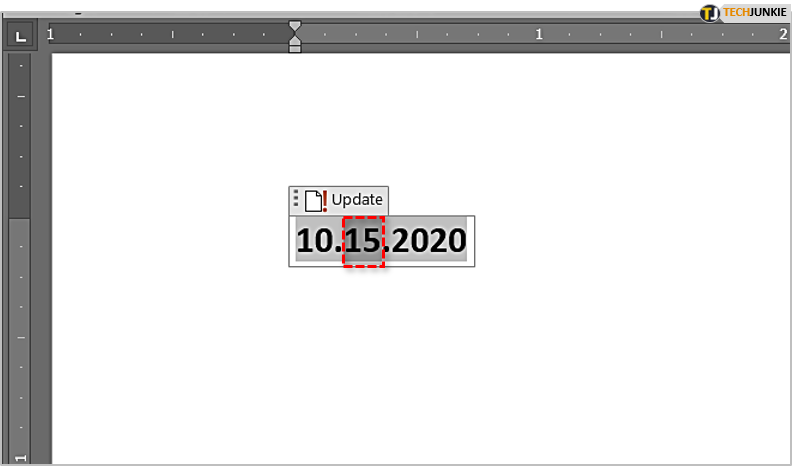
If you change your mind and want to set it back to the current date, click on the box and choose the Update option that appears above.
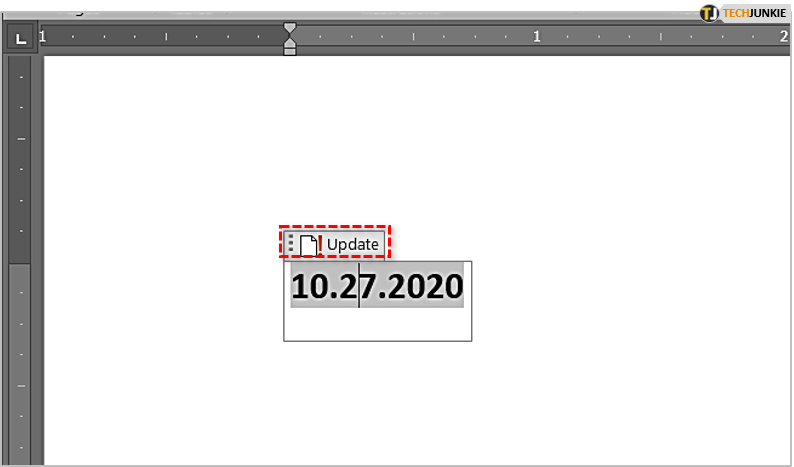
If you save and close the document after typing in a new date, you’ll see the current date in the box when you reopen it.
Tip: To save time, try inserting date and time in your Word document by using keyboard shortcuts. To insert the date only, use Alt+Shift+D. To insert the time as well, use Alt+Shift+T.
Other Ways to Insert Date and Time in Word
This is the easiest way to insert date and time into your document’s body.
You can also add the date to headers or footers or use the PrintDate field.
1. Headers and Footers
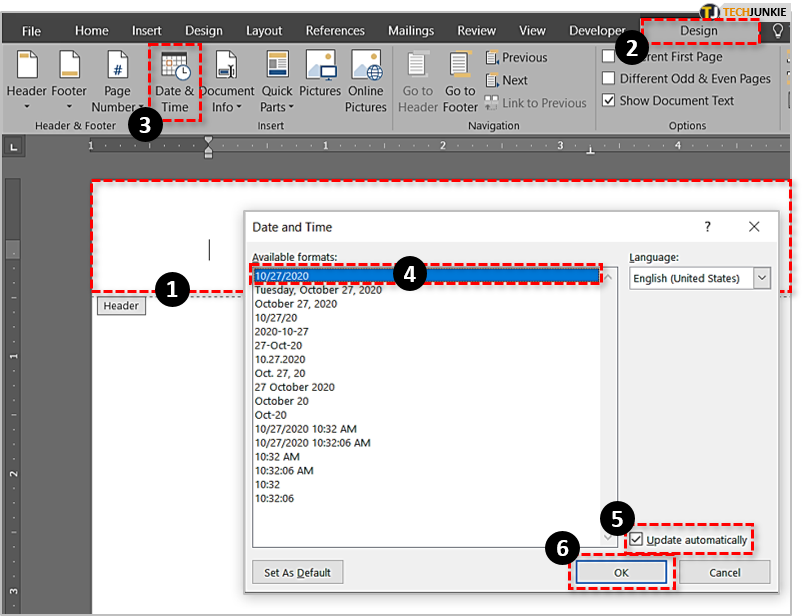
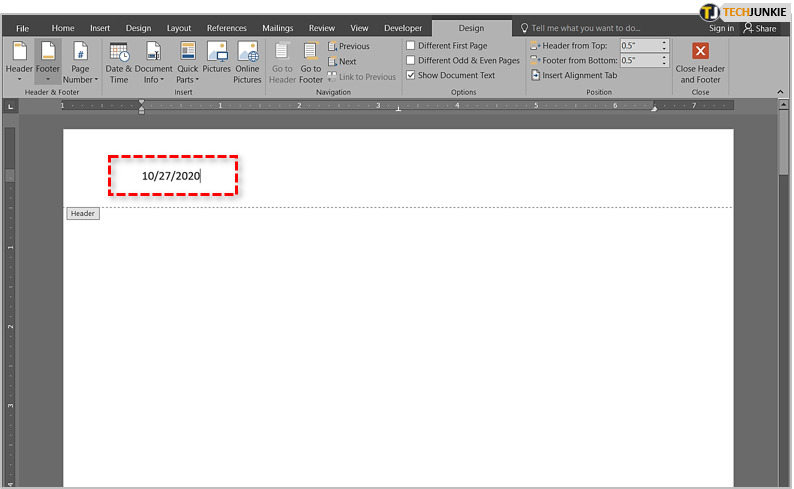
If you’d rather put the date and time in the headers or footers of your document, you should:
- Double-click on a header or footer. This will open Header & Footer Tools.
- Click on the Design tab.
- Find the Date & Time button and click.
- As the Date and Time dialogue box appears, you’ll be able to choose a format, check the Update automatically box if desired, and click OK to save and close.

The chosen date and time format will display in the header or footer of the document.
2. PrintDate Field
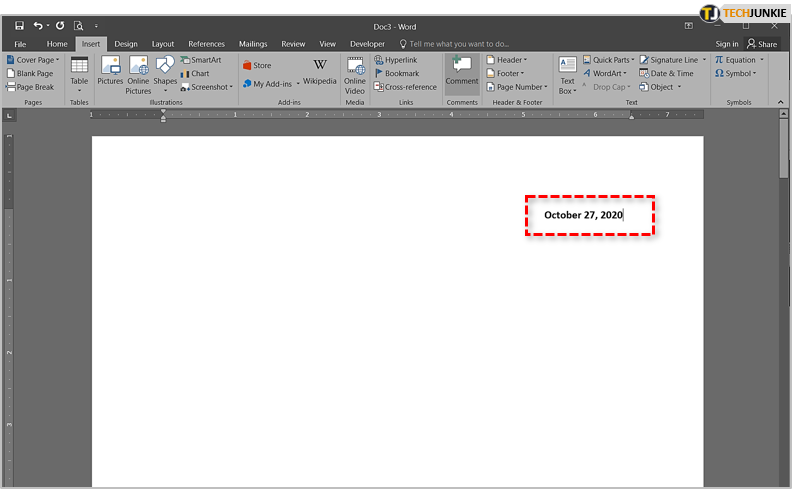
The latest versions of Microsoft Office added a new feature for inserting the date. If you find it too boring to update the date manually every time, or perhaps you’re afraid that you might forget to do it (or maybe even the date!), here’s another way for Word to do it automatically.
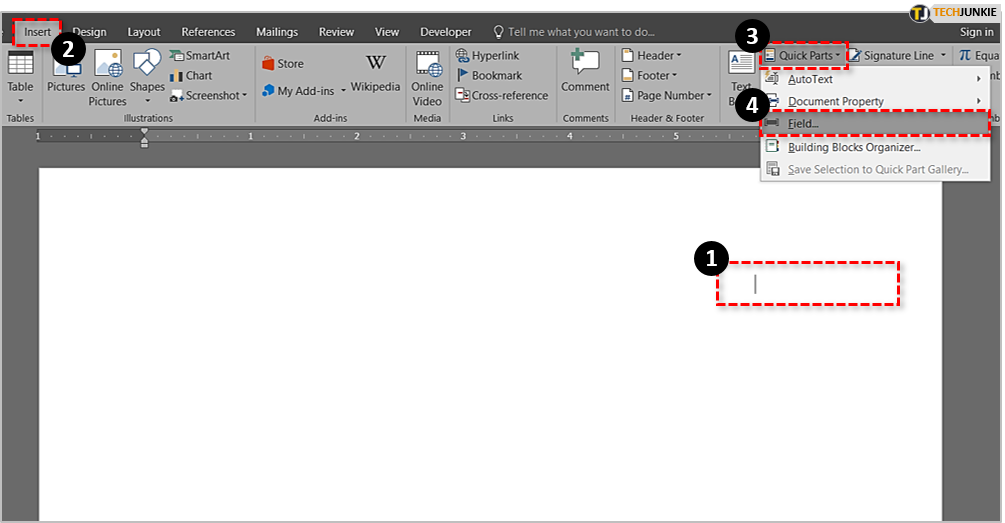
- Click on where you’d like to insert the date.
- Go to the Insert tab.
- Find Quick parts in the Text section and click.
- Click on Field.

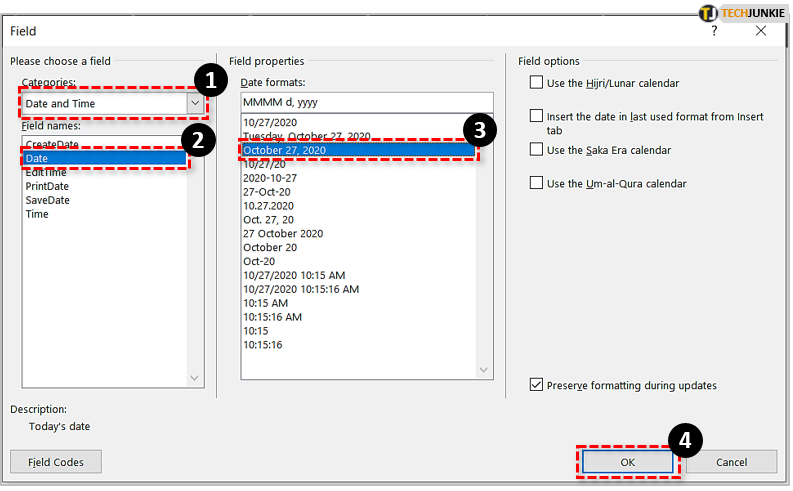
- A new dialogue box will open, showing you different options – select Date and time in Categories.
- Under Field names, you’ll find multiple options, such as CreateDate, PrintDate, and SaveDate.
- Select the date you want to use and click OK when you’re done.

Note that you’ll still be able to update the date field manually if needed.
Add the Date & Save Some Time
As you can see, there are multiple ways to insert and update the date and time in your Word document. Sometimes it’s quite useful to insert the CreateDate field, just in case it slips your mind.
From this day onward, may you not have to waste your time updating the date ever again, we hope.
Which one of these options do you prefer? Where do you usually put the date? Share with the community in the comments below!


