How to Batch Rename Multiple Files in OS X Yosemite

As our digital libraries continue to grow, so too has the importance of efficiently managing our data. To this end, Apple has introduced several features in OS X to help users corral their pictures, documents, and other files, such as Spotlight metadata and Finder Tags. Sometimes, however, nothing beats a good file naming scheme. A consistent file name structure, including information such as the date, project, and description, can often be the best way to properly organize and locate digital data. But if you haven’t been applying such a file naming strategy from the get-go, you’ll likely find yourself faced with the daunting task of renaming large numbers of existing files. Thankfully, Apple has recently introduced a new feature in OS X that makes this process much easier.
Prior to OS X Yosemite, Mac users looking to batch rename files in the OS X Finder would have to turn to third party tools. Renaming single files was simple enough, but if you had to rename multiple files, you’d need apps like Renamer or NameChanger.
With OS X Yosemite, however, Apple has integrated basic batch renaming capabilities directly into Finder. To use it, simply highlight or select multiple files in a Finder window, right-click (or Control-click) on the selected items, and choose Rename. Here’s an example to illustrate this process.
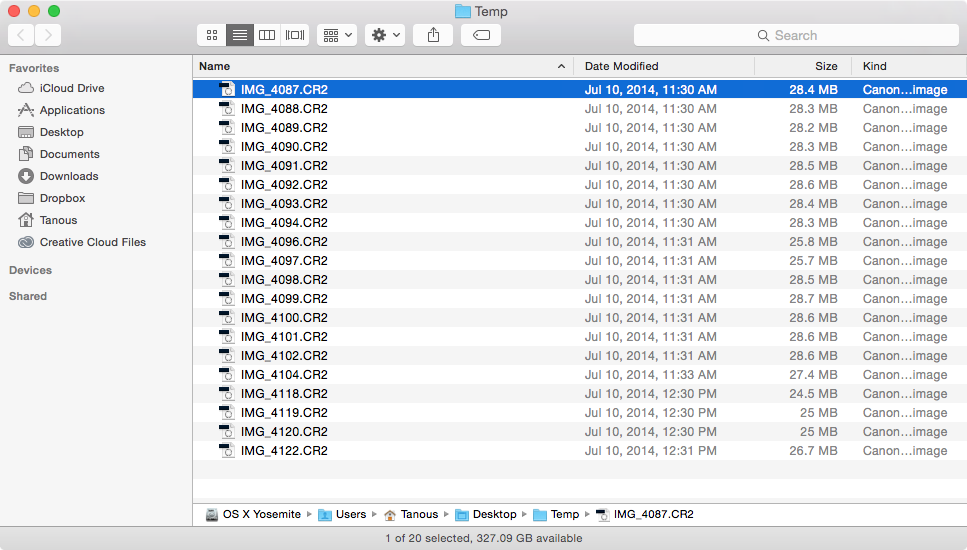
Above, we have a Finder folder with 20 image files, all named with the original camera naming scheme (IMG_4087, IMG_4088, etc.). That’s not very helpful, and we’d like to rename them with a file name that includes the date they were shot and a brief description. Now, we could always go through and rename each one individually, but that would take a good bit of time, especially for lists of files much larger than the 20 we’re dealing with here.
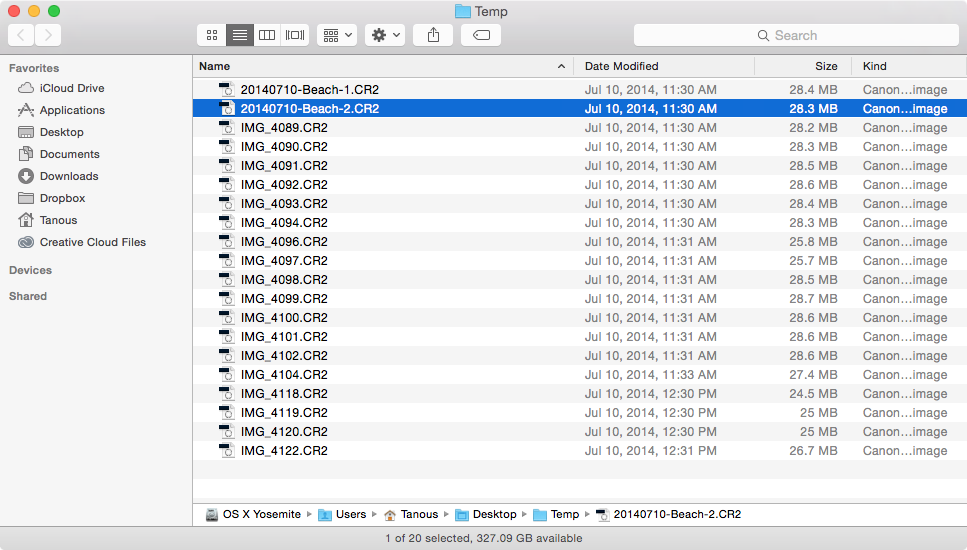
Instead, let’s try the new Batch Rename feature in OS X Yosemite. First, we’ll select all of the files we want to rename, which in this case is all of them. Then, right-click (or Control-click) on the selected files and choose Rename 20 Items (the number of items in the context menu will obviously change depending on how many files you’re working with).
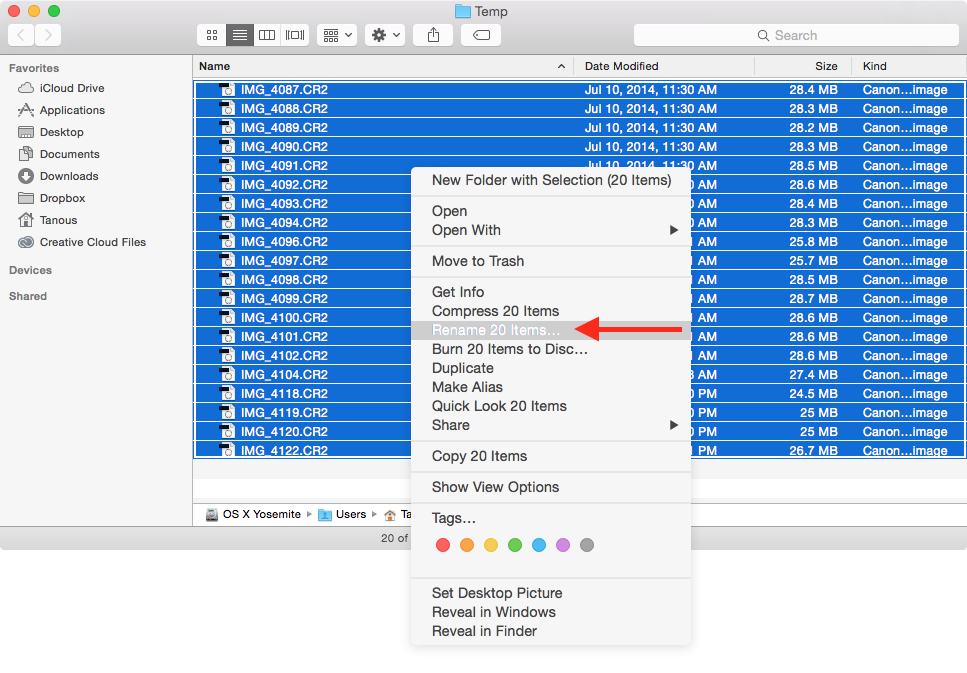
A new window will appear offering some basic options for batch renaming your files. Here’s a brief explanation of each option.
Replace Text: allows you to find and replace only certain parts of an existing filename. In our example, let’s say we wanted to keep the camera’s numbering scheme, but replace the “IMG” prefix with a description of where the images were shot. We’d therefore enter “IMG” into the Find box, and “Beach” into the Replace with box.
Add Text: allows you to add text to the beginning or end of the existing file name. Again returning to our example, we could keep the existing camera file name, but just add the date at end. We’d therefore enter 20140710 in the text filed and select after name from the drop-down menu.
Format: this is what most people envision when they think about batch file renaming. This option lets you get rid of the original file name entirely and replace it with your own. Options include creating a custom name with a numbered sequence (Name and Index), a custom name with a counter (Name and Counter), and a custom name with the date (Name and Date). In each case, you can choose to place the counter, sequence, or date before or after the custom name.
In our case, we’d like the date, but don’t want the timestamp that accompanies the automatic date application in the Name and Date option. So we’ll choose Name and Index, which lets us put the date in manually in the exact desired format.
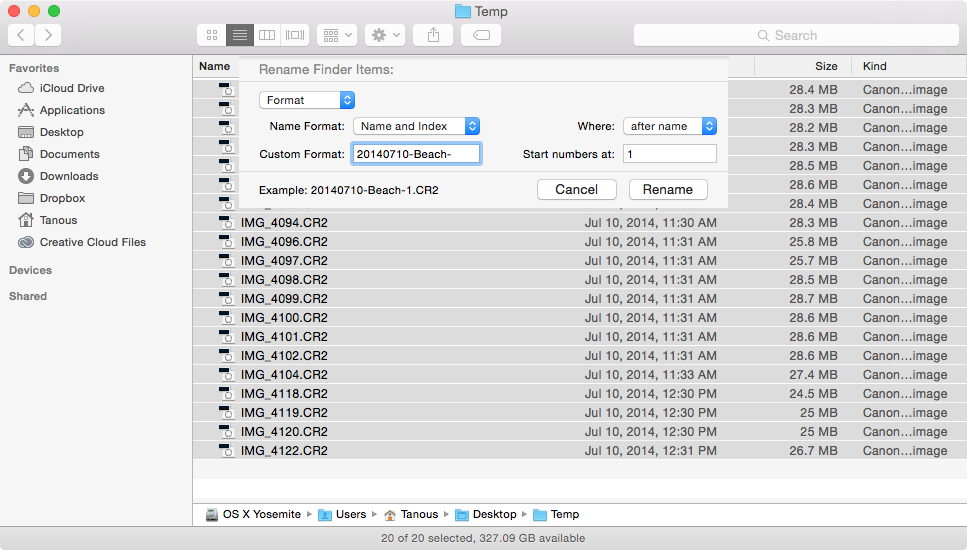
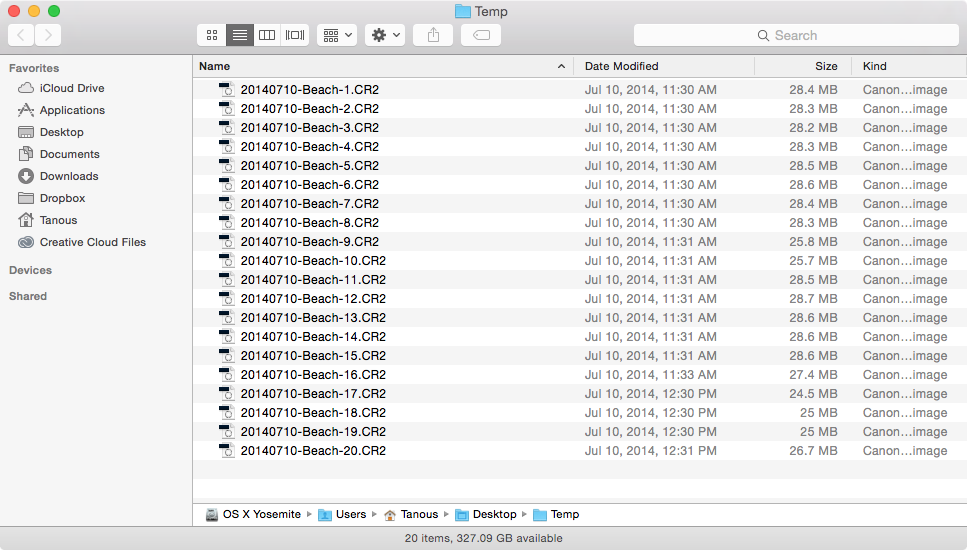
That means that we’ll enter “20140710-Beach-” in the Custom Format box, and tell Finder to append the index number after the file name. Note that we include the extra dash after “Beach” in our custom name so that the index number is separated from the description. Without it, the number would be appended directly after “Beach.” You can also use spaces in the same way by simply including an extra space at the end of your custom name. As you fiddle with your naming scheme, Finder will helpfully show you an example preview of what the files will look like at the bottom of the window.
When you’re all set with your desired batch rename, just click Rename to apply the changes. You’ll now find that all of your files have the new name and sequence, saving you the time and hassle of renaming them by one-by-one.
Longtime users of third party batch renaming tools will recognize that the new batch rename features in OS X Yosemite are relatively basic. Third party tools still offer more features and capabilities, and power users will likely want to stick with existing renaming solutions offered by the Terminal and Automator. But for everyone else with basic renaming needs, OS X Yosemite and Finder are all you need.


18 thoughts on “How to Batch Rename Multiple Files in OS X Yosemite”
change this
img_0001_HELLO.png
img_0002_hi.png
to be just
HELLO.png
hi.png
Adobe Lightroom has similar functionality built in.