Add a New Snipping Tool to Windows 10
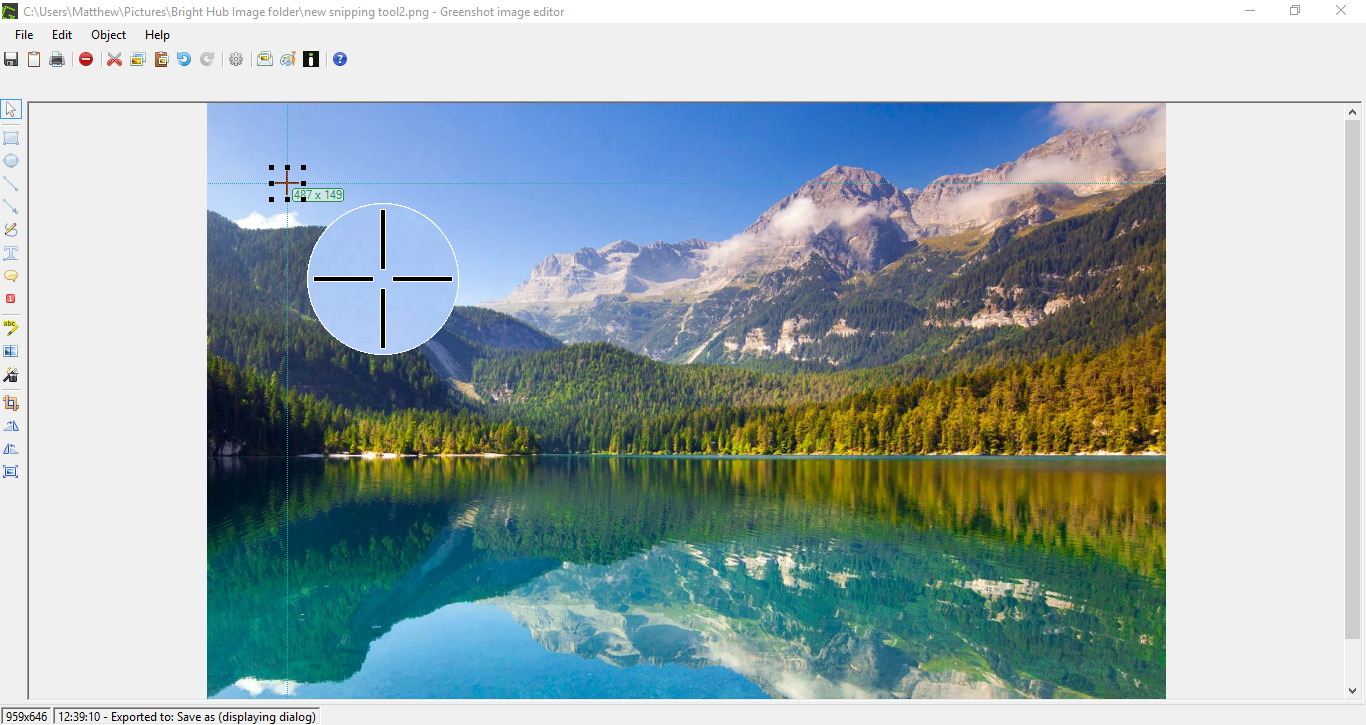
If you need to take lots of software snapshots, the Snipping Tool is an essential Windows 10 accessory. This TechJunkie article told you how to capture shots with that tool, but it has fairly limited options. So why not add a better Snipping Tool to Windows 10? These are some of the best alternative Snipping Tools you can add to the platform.
The Greenshot Snipping Tool
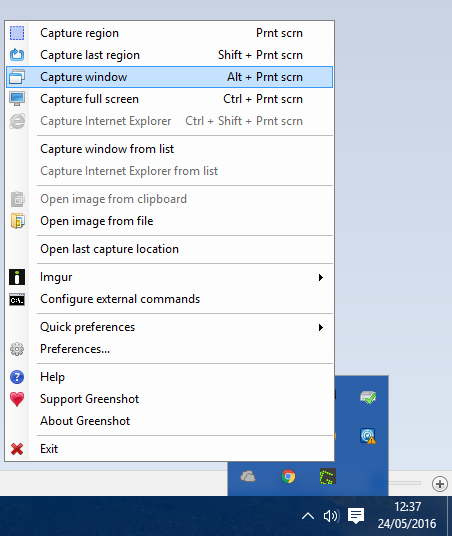
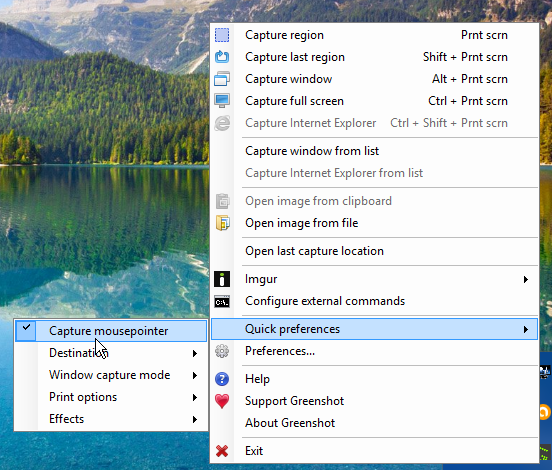
First, you could add the freeware Greenshot to Windows 10 by pressing the Download button on this Web page. Run through the installer to add it to your software library. When it’s running, you’ll find a Greenshot icon in the system tray. Right-clicking that icon opens the menu shown directly below.
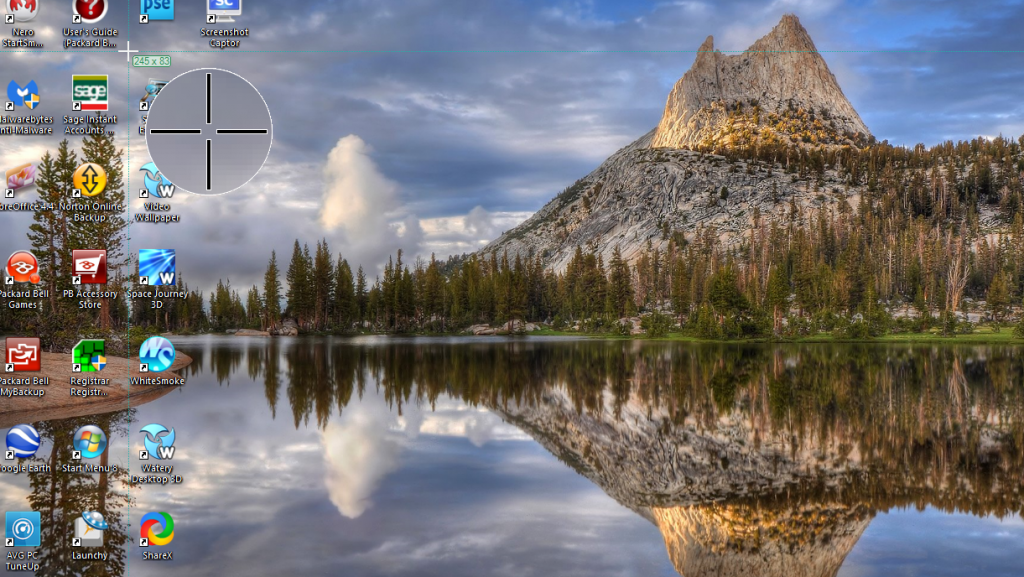
To capture a more specific region in the snapshot, select the Capture region option from that menu. You can also press the PrtScn hotkey to open the Greenshot snip tool. That will open the grid and magnifier shown in the shot directly below, and you can capture snapshots much the same as the standard Snipping Tool by holding the left mouse button and dragging cursor to expand the rectangle.
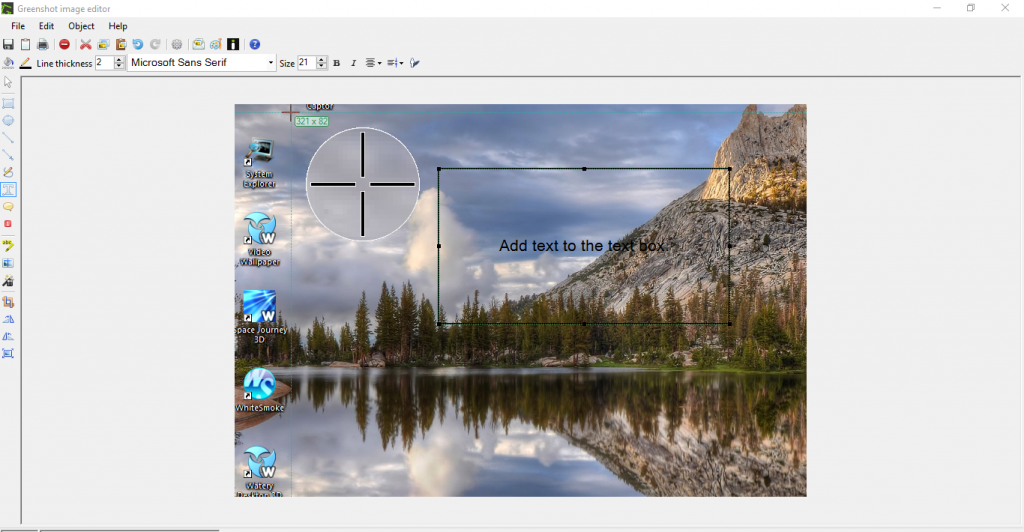
Click the Open in image editor option from the menu to open the screenshot output in the Greenshot editor. This editor is what really sets Greenshot apart from the Snipping Tool in Windows 10. It includes 15 editing options on its toolbar, and the only two there included in the Snipping Tool are the highlighter and freehand draw (otherwise Pen).

You can add text to the shot by clicking the Add textbox button on toolbar. Then drag the text box to expand it, click the Fill color button and press Transparent > Apply to add transparency to the box. Then you can also select alternative fonts from the drop-down menu and add bold and italic formatting by pressing the B and I buttons.
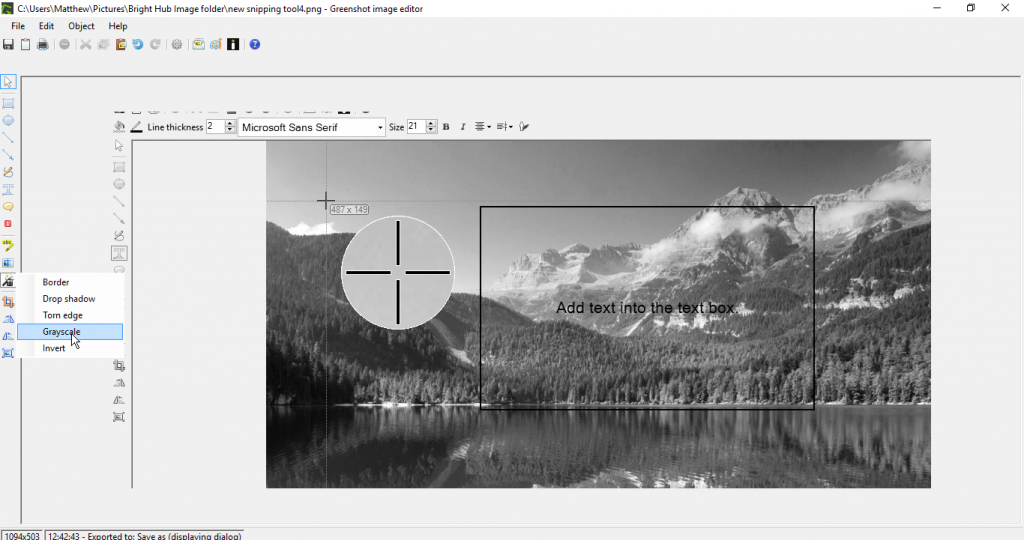
Click the Effects button on the toolbar to open a small menu with some extra editing effects. For example, you can select Greyscale from there to add black and white to the snapshot as below. The Torn edge option adds a torn edge border to the picture, and you can configure that further from the Torn edges settings window.
You can also select some extra options by clicking Quick preferences on the Greenshot system tray icon menu shown below. For example, from there you can select Capture mousepointer. Then the screenshot will include the cursor in it.
The Screenshot Captor Snipping Tool
Screenshot Captor is a freeware screenshot utility you can add to Windows 10 from the software’s website. Click Download v4.16.1 to save its setup wizard and install it. Note that you’ll also need to get a free license key from the software’s website by clicking Get Free License Key. Then sign up on the forum to get a free license key to copy and paste. Alternatively, you can get a shorter 60-day license by clicking Generate license key for Screenshot Captor on this page.
When you have Screenshot Captor up and running, you can select its options from the toolbar in the shot below. Alternatively, you can right-click its icon in the system tray to open the software’s menu. Click the Grab selected Region button on the toolbar to capture a smaller snapshot with its rectangular snip tool.

When you’ve captured the shot, select Save image and show from the Screenshot Captor – New Screenshot window. That will open the editor shown below and save the image to a Screenshots subfolder. This window has more extensive editing options than the Greenshot editor as you can select clipart, image caption and frame options.
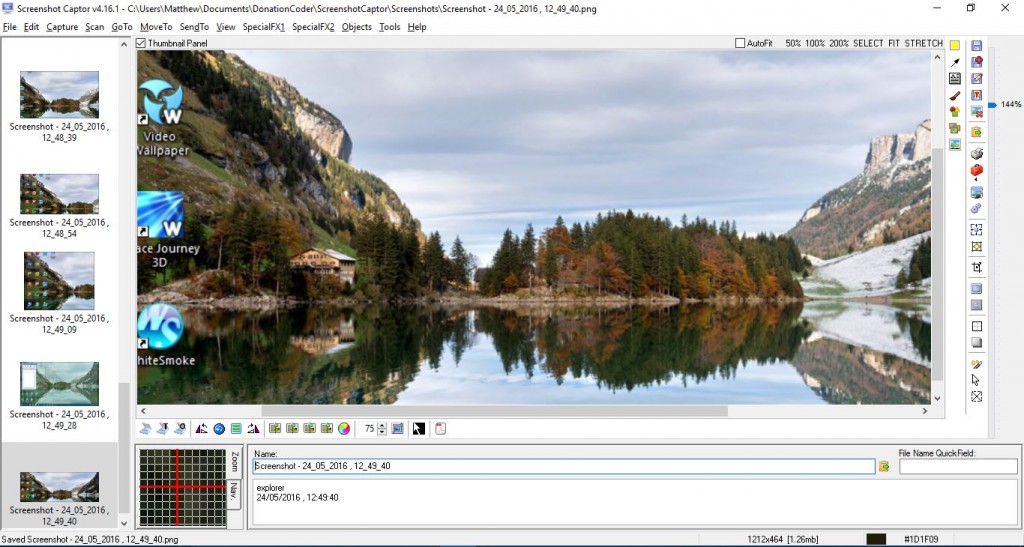
You can crop the snapshots in various ways by selecting Selection modes from the toolbar. Select Lasso selection for freehand cropping. Draw out an area of the image to crop with that tool, and then click the Crop image to selection option on the toolbar.
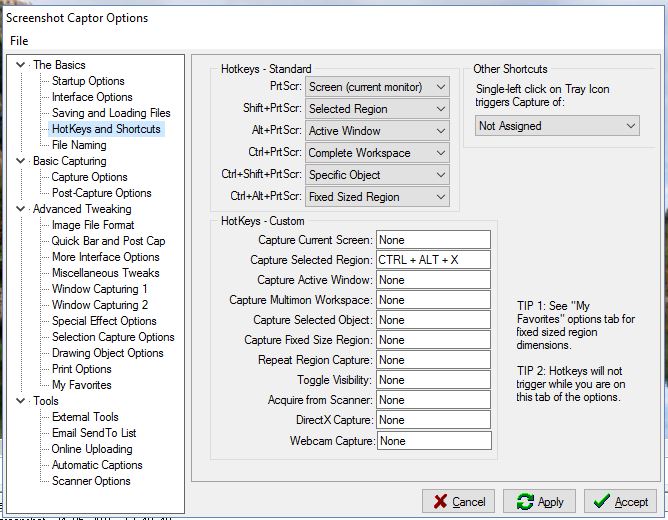
Click the Configure button on the editor’s toolbar to open the window below. There you can select numerous Screenshot Captor options. For example, to configure the keyboard shortcuts select Hotkeys and Shortcuts. That will open the keyboard customization settings below from which you can enter new custom hotkeys in the text boxes. Press Apply and Accept to save the selected hotkey settings.
The ShareX Snipping Tool
ShareX is an open source software package packed with options to take the perfect snapshot. Add it to Windows 10 by pressing the Download button on the ShareX website. Then install it with the setup wizard, and right-click the ShareX system tray icon to open the menu below.
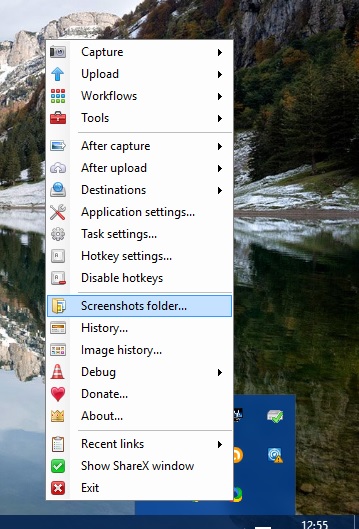
Select Capture to take a snapshot with ShareX. It includes a wider variety of screenshot options than the others with 15 capturing modes. For example, you can select Region, Region (Annotate), Polygon, Freehand, Region (Transparent), Website capture and it also has a Screen recording option. So there’s lots to select here, and to do a more basic rectangular snip select Region.
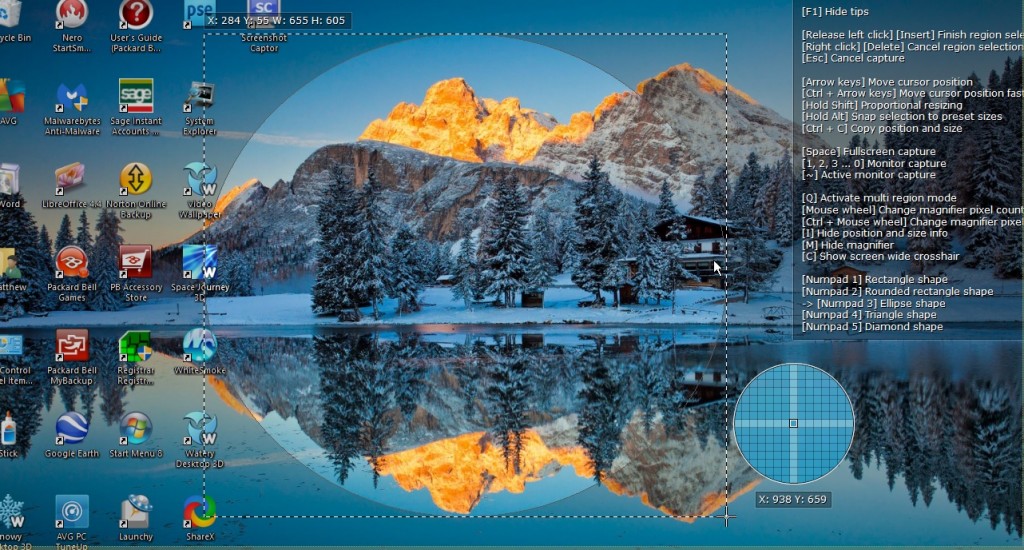
This Region option has a few shapes you can select with the Numpad number keys one to five. Press two to select a rounded rectangle shape to snip with. Or you can press three to switch to a circle as in the snapshot below. Pressing four switches the rectangle to a triangle, and five selects a diamond snip shape. Then drag the shape by holding the left mouse button to snip out an area to capture in the snapshot.
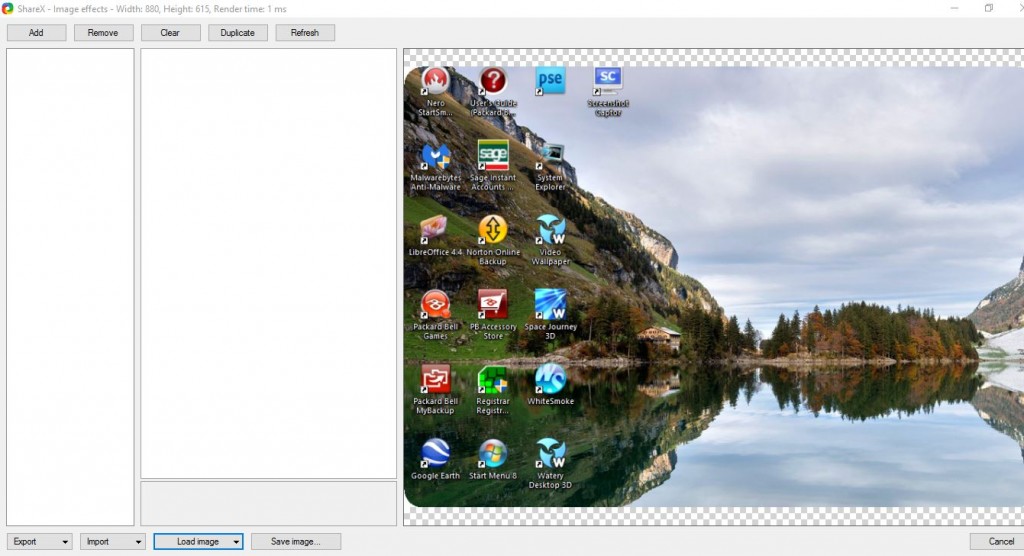
Select Tools > Image effects to open the window shown directly below. Click the Load image button and select From clipboard to open the snapshot you just took. Then you can press the Add button to add a variety of image effects to the shot.
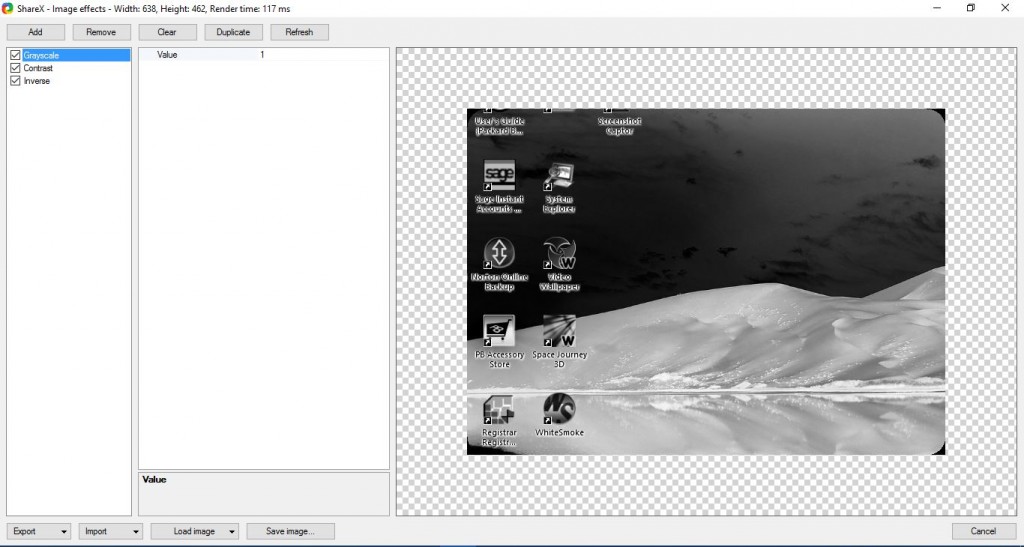
When you select an editing effect to add, click its check box to open more options for it as shown below. Then you can further configure the effects by altering the numerical values. Press the Save image… button to save the edited snapshot.
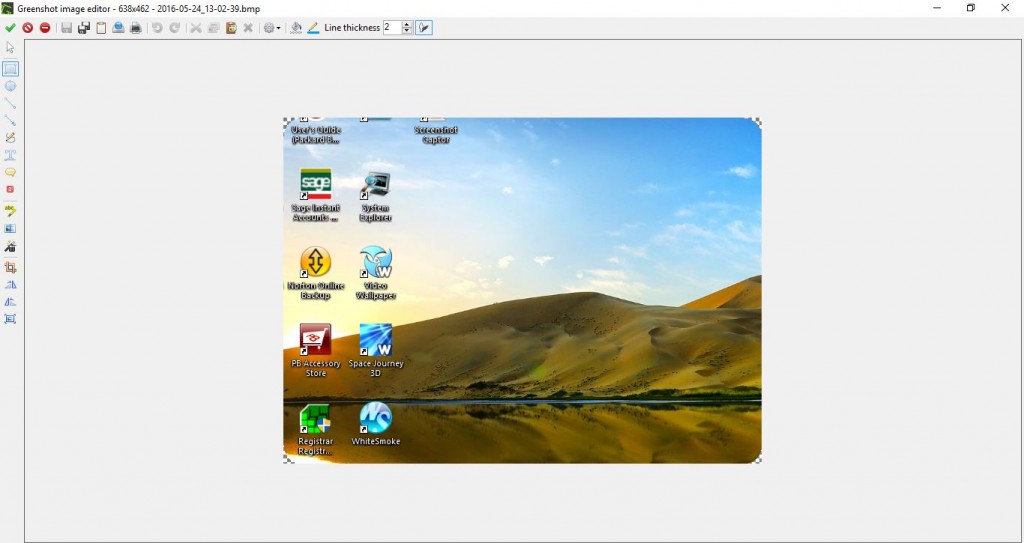
Select Tools > Image editor and Yes to open the image copied to the Clipboard in the editing window shown below. This is the Greenshot image editor incorporated into ShareX. So ShareX has all the Greenshot editing options for adding text boxes, arrows, shapes and highlighting.
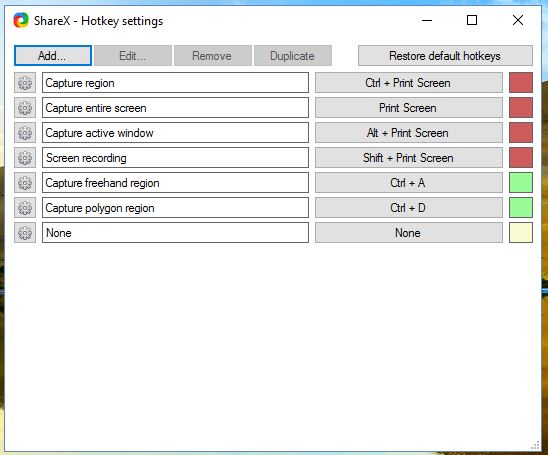
ShareX also has hotkeys you can customize by selecting Hotkey settings from the menu. That opens the Hotkey settings shown below. There you can configure the four default keyboard shortcuts, or you can add new ones by pressing Add. Click the Task: None drop-down menu on the new window that opens to select a screen capture, screen record or other tool for the hotkey to activate. Then click the None button and press a keyboard shortcut to give it a hotkey.
All three of these screen capture utilities have plenty of options for software snapshots. There editors alone have loads more options for editing the images than Windows 10’s Snipping Tool. To get an enhanced Windows 10 Clipboard to copy the snapshots to, check out this TechJunkie guide.


2 thoughts on “Add a New Snipping Tool to Windows 10”
I reinstalled it, now ok.
Thanks
Ken
Thanks for the really helpful article.
I’ve installed Greenshot, in Windows 10.
I’m stuck because try as I may, I cannot find the Greenshot icon.
Your screenshot seems to show you clicked on ‘Show hidden icons.’
It’s not there on mine.
Any ideas what’s happened?
Thanks
Ken