How to Change Categories in BigCommerce

As a favorite of many e-commerce entrepreneurs, BigCommerce offers many features that can enhance your online store’s appearance and usability.
If you want to know more about changing categories on BigCommerce and similar, you’ll find in this article the answers to your burning questions about BigCommerce.
More About Categories
Grouping your products by category makes it easy for shoppers to find what they’re looking for. Be it the type, attribute, color, or material, every time you add a new product, you can mark all the relevant categories or create new ones. Plus, the order of the categories can be rearranged by a simple drag and drop.
How to Change Categories in BigCommerce
You don’t want to overwhelm your customers with too many categories or take the easy way out and cram all your products into two general ones. With subcategories, you can guide your customers toward whatever products they’re looking for.
If you want to change categories on your site, you can create new categories and reassign products to them, and if necessary, hide or delete the old categories.
But if you want to change the category of a specific product, here’s how you can do it:
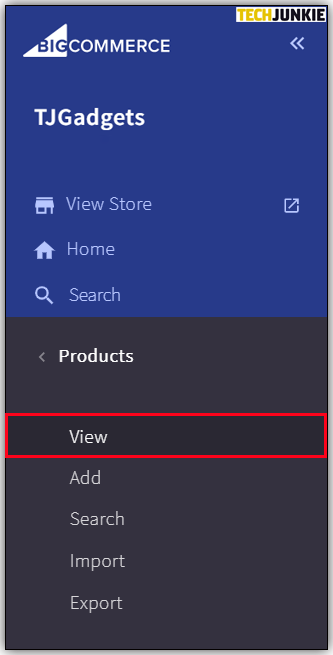
- Open “Products” and select “View.”

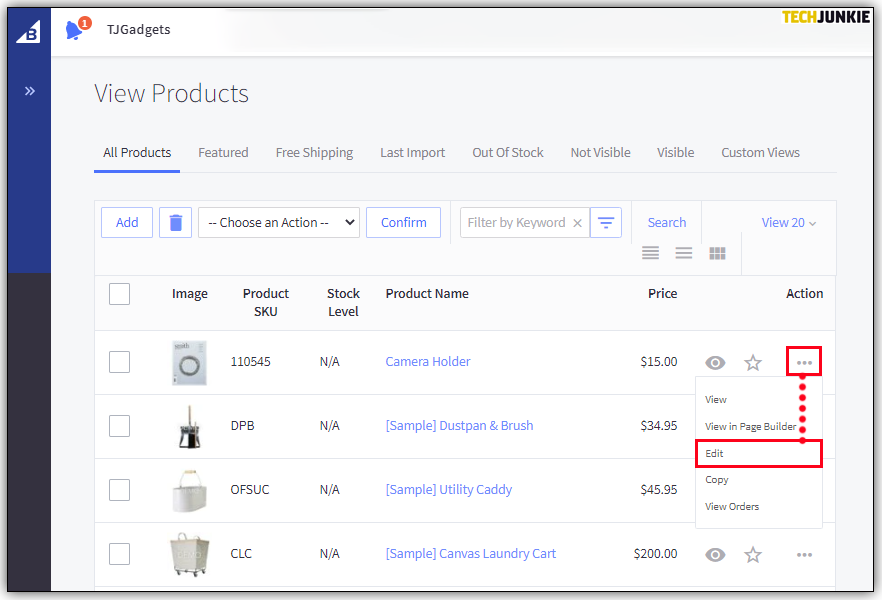
- Find a product and click on the three-dot icon to edit it.

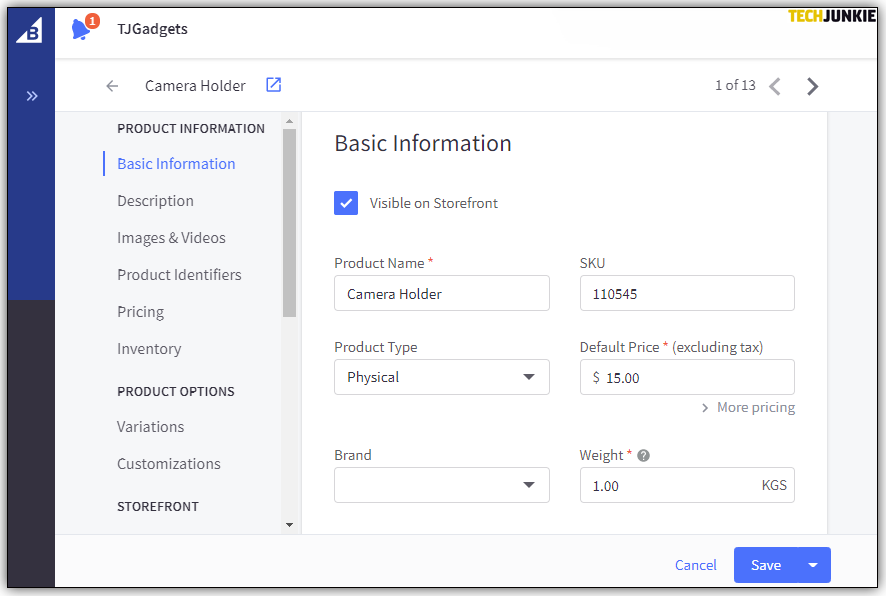
- Now you can change the product’s category alongside a number of other details.

How to Create Categories in Product Categories with BigCommerce
As said, categories and subcategories make it easy for shoppers to find what they’re looking for. Should you want to create a new category, here’s what you need to do:
- Open your BigCommerce backend.
- Click on “Products”>”Product Categories.”

- In the upper left corner, you’ll see the “Create a Category” button.

- Click on the button to create a new category and name it.

- Add URL of the category.

- Write a detailed description.

- Click “Save & Exit” if that’s the only category you wish to create.

- Click “Save & Add Another” to add more.
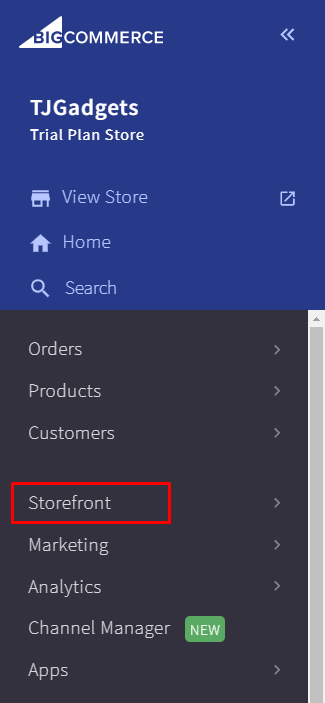
Besides changing the order mentioned above, you can also disable categories and review the products within a category. In the Storefront screen, rearrange categories, make old ones invisible, or change to subcategories with a few drags and drop.
How to Add a Webpage to BigCommerce
One of the best ways to showcase your products or company is with webpages on your online store. If you want to create a new About Us page or FAQ, for example, you can do that with the WYSIWYG (what you see is what you get) editor. Create and upload any page in a few simple steps:
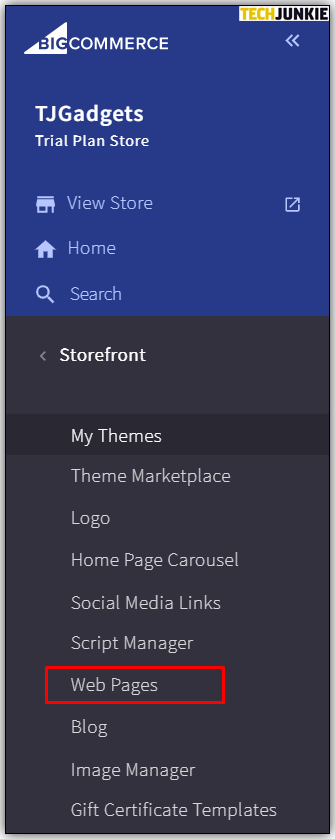
- Open your Storefront.

- Click on “Webpages.”

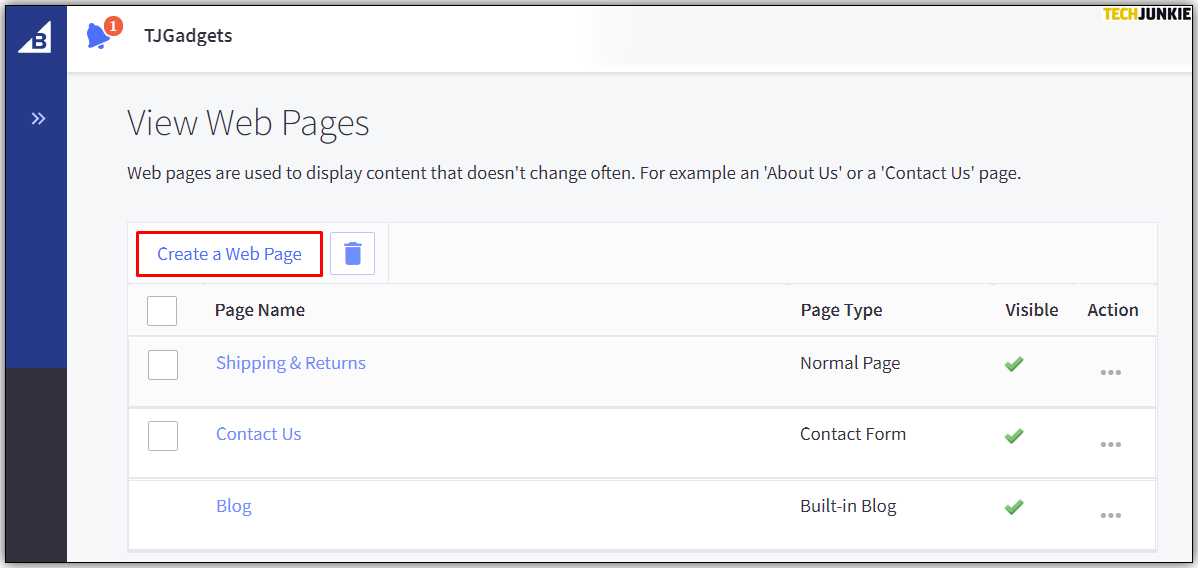
- In the upper left corner, you’ll notice a “Create a Web Page” button. Click on it.

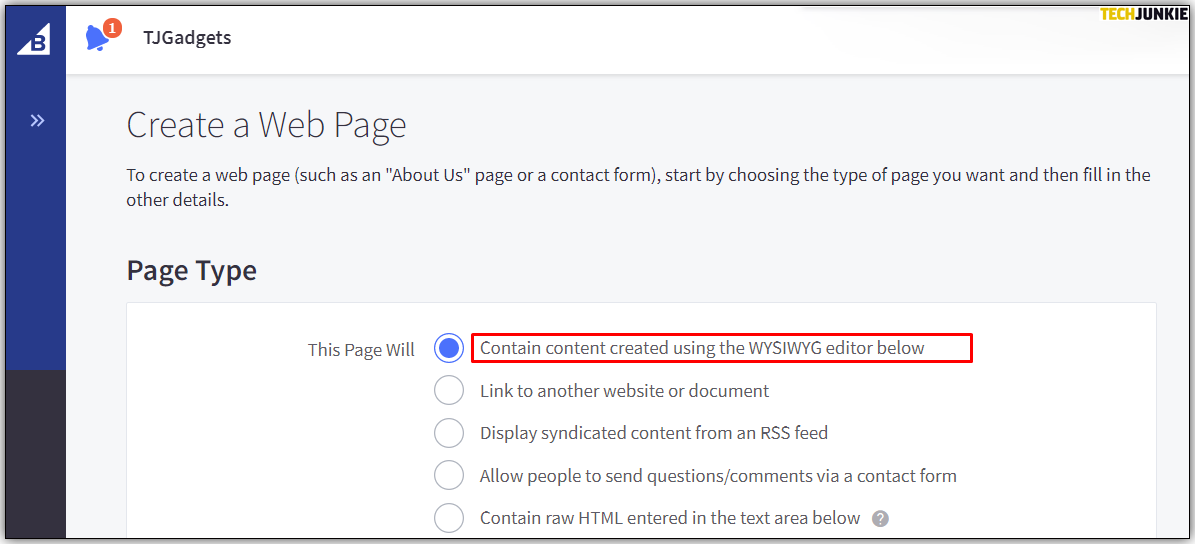
- In the “Web Site Link” section, choose the first option, “Contain Content Create Using the WYSIWYG Editor Below.”

- Enter the page name that you’ll find in the menu.

- Add new page content like images and other information.
- Click “Save” to confirm all the changes made.


How to Link Out on BigCommerce
You can also link to other sites and pages for more information about the brands and products you carry. These can be your own blog, manufacturer sites, anything really. This is how it works:
- Open your store on BigCommerce.
- Open “Website Link.”
- Choose “Link to Another Website or Document.”
- Type in a name for use in the navigation.
- Add the URL.
- Click “Save” to confirm.
Another way is to input the HTML code. If you’d like to transfer all webpage content to be displayed on your site, this is how to do it.
How to Add Content to a Category Page on BigCommerce
You can add content in two places: the category description and the bottom of the page. The description is whatever you’d like to tell shoppers about the category, perhaps something about the products that can be found in that category.
You can also add banners to the bottom of the category page to showcase products or add additional information. It’s a free marketing tool that can help you attract customers with promotions.
How to Add Meta Tags to BigCommerce
Meta tags may help you optimize your pages for search engines. Not visible to site visitors, the meta tags of a webpage are snippets of what’s on the page.
BigCommerce allows you to add meta tags to your site’s pages (including your home page). To add meta tags to a page, here’s what you should do:
- Open your store on BigCommerce.
- Go to “Store Setup.”

- Select “Store Settings” and “Advanced Options.”

- Here, you can add a Page title, Meta keywords, Meta tag, and search keywords.

How to Add Meta Tags to Your Homepage on BigCommerce
As described above, you can add meta tags to any page, including the homepage. The procedure is the same:
- Open BigCommerce.
- Go to “Store Setup.”

- Select “Store Settings” and “Advanced Options.”

- Under your homepage, add a Page title, Meta keywords, Meta tags, and search keywords.

What to Include in Your BigCommerce Title Tags

As shown under meta tags, you can also add a title tag for search engine optimization. Search engines use the tag to know more about your page and decide what to show users. It has to be between 50 and 60 characters, and you can use keywords to connect to that specific page.
Doing It Right
If you want to grow your e-commerce business, BigCommerce provides you with some of the best growth tools around. Besides the basic ability to build your online store, create categories, and add products, the sky is the limit with BigCommerce.
Now that we’ve shown you how to change categories and write SEO optimized tags, you can start creating your pages. What’s your favorite BigCommerce feature thus far? Would you recommend the platform to other entrepreneurs?
Share your thoughts in the comments section below.


