Captions Not Showing Up in Adobe Premiere – What to Do?

If you’re using Adobe Premiere, adding captions to videos isn’t a straightforward process. It will take some to get used to. You might also run into problems along the way.
With this in mind, here’s how to troubleshoot problems with captions that refuse to display in Premiere.
Check Your Version of Premiere
If you’re having issues seeing open captions, it might be because you’re running an outdated version. Although you don’t have to have the most recent Premiere update, you need to be running PR CC 2015.3 or higher. Before this version, Premiere didn’t feature open captions.
You can still use closed captions 608 or 607 on older versions of the software.
Workspace Issue
The Workspace feature is an excellent way to customize your Premiere layout. You can use one of the presets that come available with Premiere automatically, or you can design one.
Unfortunately, in some instances, the custom Workspace may cause issues with captions. To access different Workspaces and switch back to default, navigate to the Chevron icon, click it, and use the Overflow menu to choose the default Workspace option. Finally, check to see if the problem with the captions persists.

Program Monitor
The Program Monitor feature is used for playing back the clips that you’re currently working on. If you want to take a look at your progress, you can exclude captions in the preview. This option is there because some users prefer looking at their videos without captions.
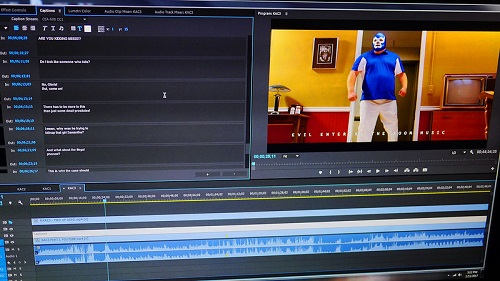
That commonly happens with closed captions, so, if you’re using closed captions and can’t see them in the preview, try enabling them in the Program Monitor. Right-click on the preview and select Closed Captions Display from the drop-down menu. Then, select Enable from the menu that pops up to the right.
If this doesn’t help, select Settings under Enable and select the matching option (either CEA-608 or CEA-708).
Adding Captions Again
Sometimes, Premiere may encounter errors that might not be strictly visible. It happens with most programs. Captions settings are no exception here. If you’re experiencing issues with captions, you can try starting from the top. Create a new caption file, format the captions, export them, the whole nine yards.
Extra Premiere Tips
As a bonus, here are some cool Premiere tips that will completely change how you use this video editing software.
Creative Timeline Nesting
If you master creative timeline nesting, your videos will catch people’s eyes. Nesting essentially enables you to place your sequences into different sequences. It’s a powerful trick, as it keeps your timeline clean while helping with rendering and processing.
Cherry Pick That Timeline
Whenever you start a new Premiere project, everyone knows that reviewing the footage in its entirety is the first step. That goes especially for projects with a lot of material. Make the most out of this reviewing time by cherry-picking the timeline as you review the video. It will help you pull out a range of shots and catalog them, making the editing process that comes later much easier.
Speed Ramping and Remapping
If you want to create cool-looking, modern videos, use speed-ramped shots. The best way to do this is to use a unique technique called Time Remapping.
Here’s the outline of the steps involved:
- Record video at a high frame rate.
- Apply the speed/duration effect.
- Alter frame information.
- Apply keyframe and speed ramping.

Premiere and Captions
Hopefully, the outlined solutions will help you find what was wrong with your captions and help you out. As a last resort, try setting them up from the beginning. Did you solve your captions problem in Premiere? Which solution worked for you? Feel free to ask any questions you have in the comment section below.


One thought on “Captions Not Showing Up in Adobe Premiere – What to Do?”
Everytime I render my timeline with captions, the captions are not visible. I can only see them if I don’t render. But I’ve got to render to view my footage properly. Any suggestions?