How to Change the Dropbox Folder Location on the Mac
I’ve been using Dropbox—a file-sharing, storage, and syncing service—for a really long time now. Years! And I appreciate not just its ease of use but how consistent and stable its app is on the Mac. In fact, I can’t recall the last time I had to troubleshoot any big issues with it for either myself or my clients. Which is high praise from me considering how much I have to troubleshoot issues from pretty much every other service and app on the planet.
If you use the Dropbox app, you probably know that its files are, by default, stored on the Mac in what’s called your Home folder, and a shortcut to your Dropbox is usually added to the sidebar of the Finder.
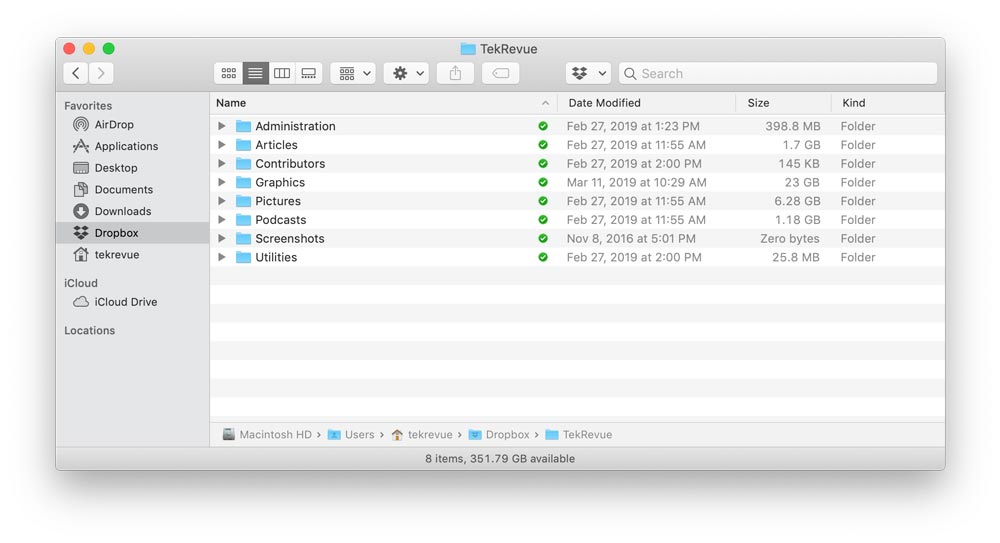
Alternatively, of course, you can access your synced Dropbox files by selecting the program’s menu bar icon at the top of your screen and clicking the folder icon.
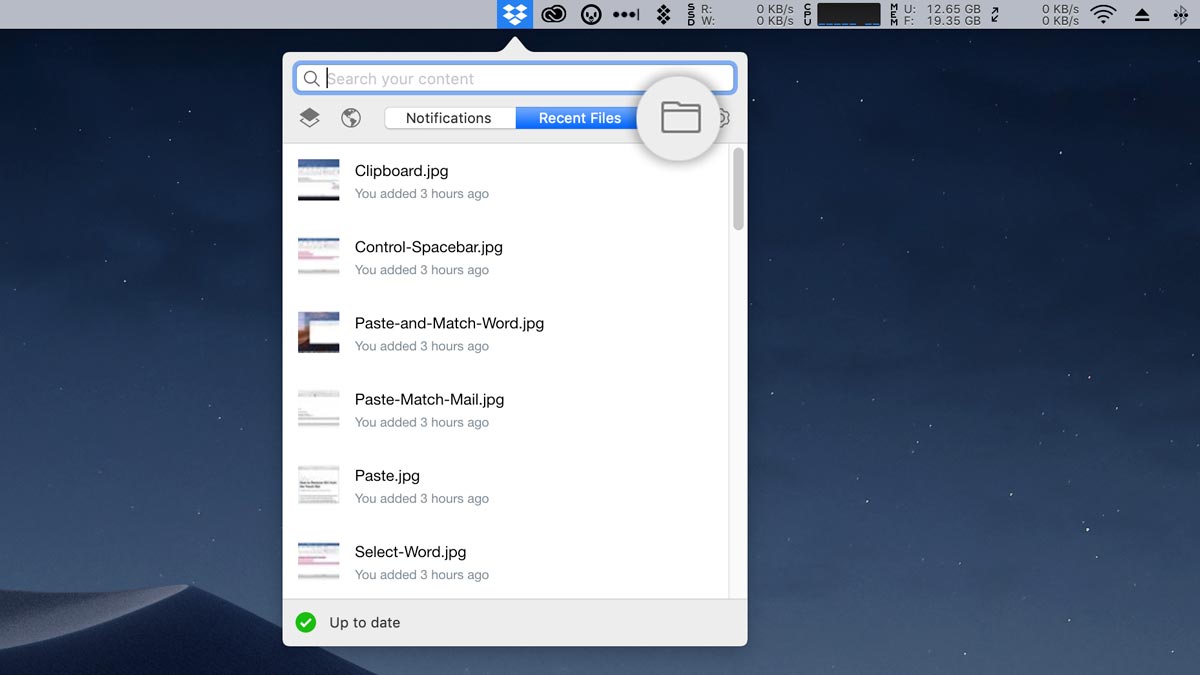
If you’d like to change the location of your Dropbox folder, though, how do you go about it? Well, you can’t just go around moving the folder all willy-nilly, so these are the steps you’ll follow if you want to change your Dropbox folder location!
Change Dropbox Folder Location in macOS
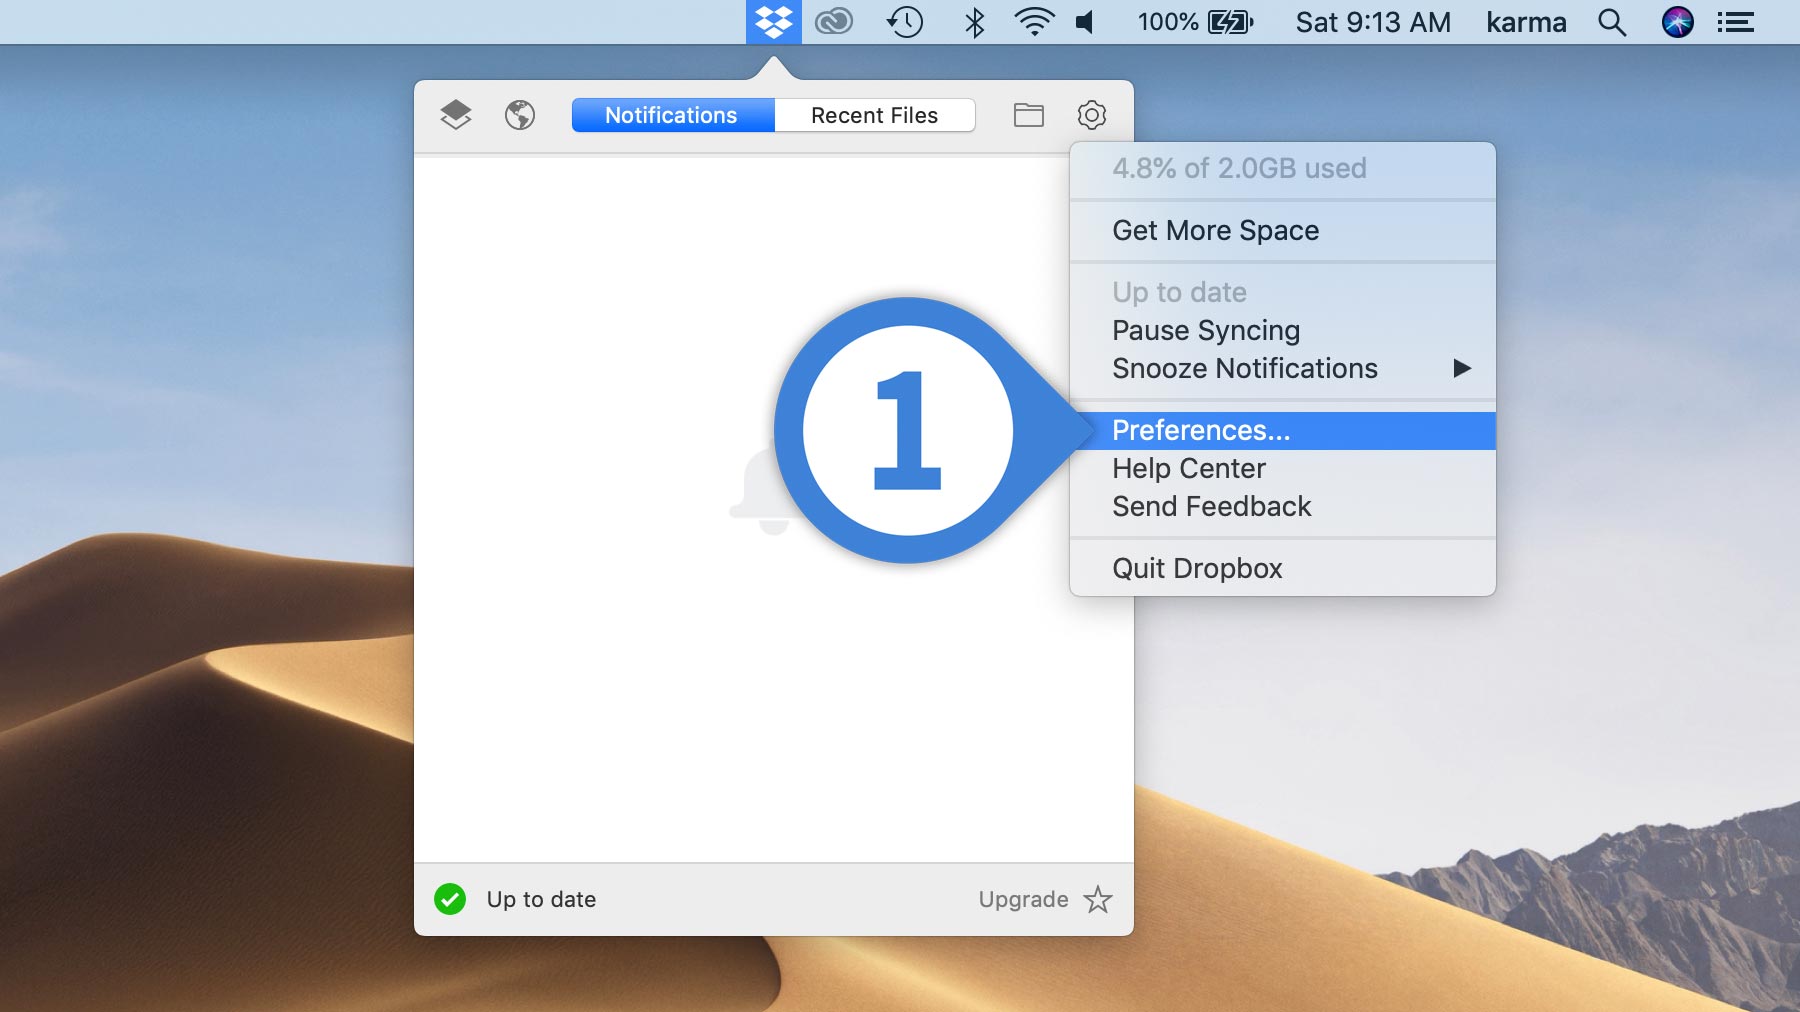
- Click on Dropbox’s menu bar icon as I mentioned above, then pick the small gear you’ll find there and choose Preferences.
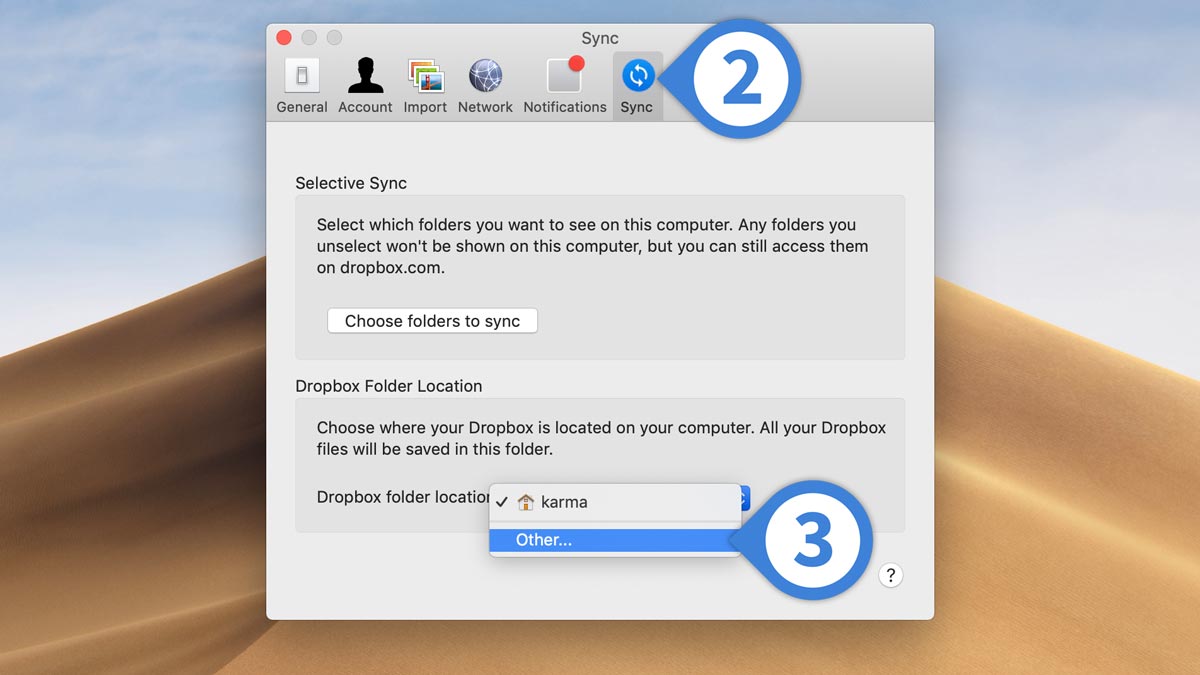
- When the Preferences window opens, select the Sync tab.
- Click on the Dropbox folder location drop-down menu and choose Other.
- Your Mac will then bring up the familiar file-picker box, from which you can choose where you’d like to move your folder. Navigate to the desired location, click Select, and then click Move to confirm.
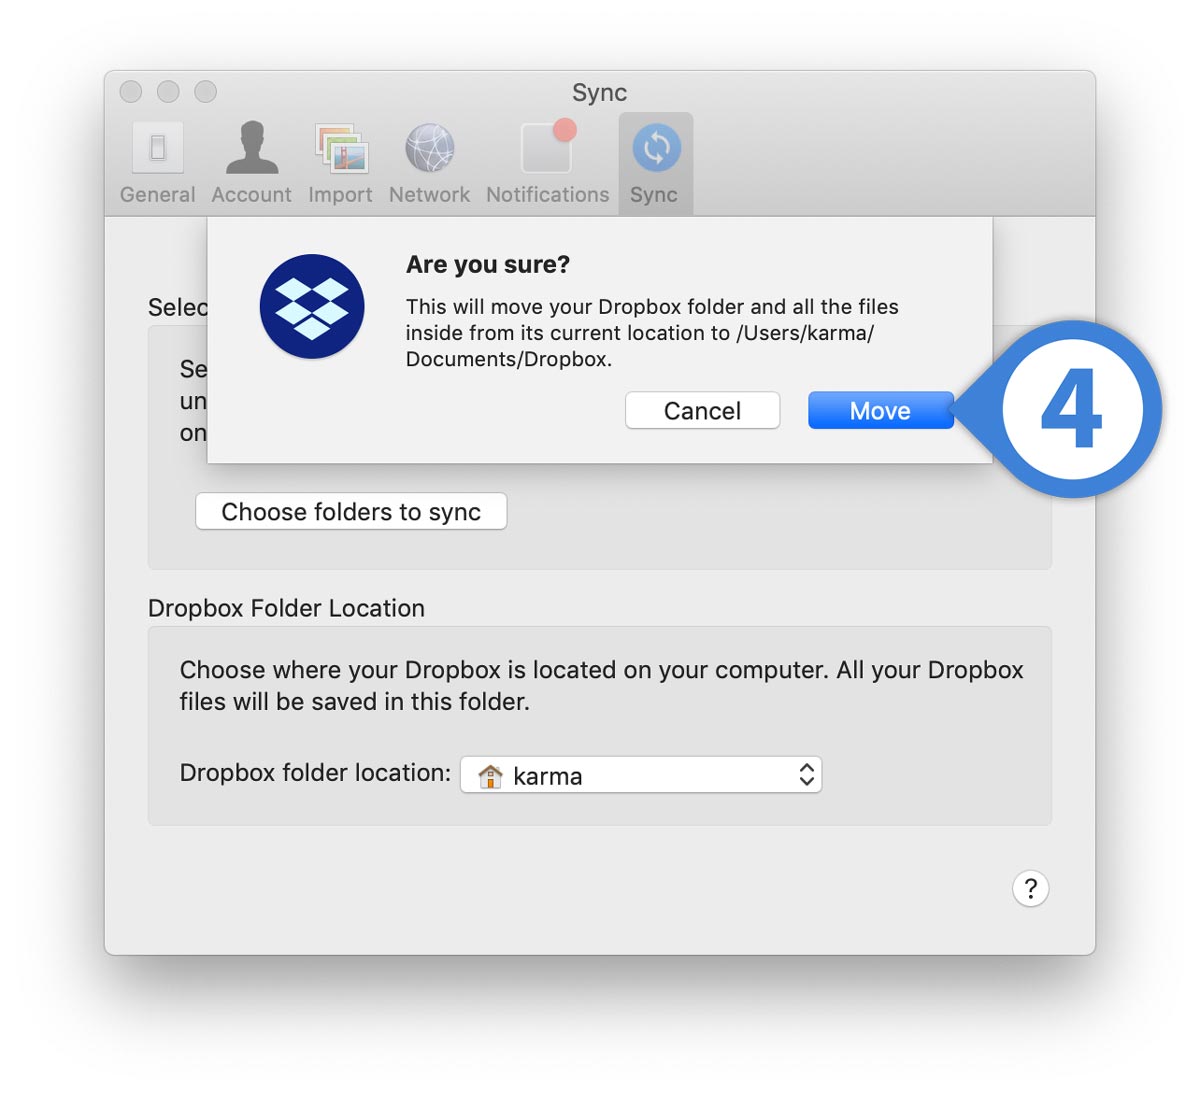
Now, if you read the boxes in my screenshots above, you’ll note that this is a move, not a copy; your Dropbox folder will be removed from its original location and added to the new one, and all of its original sharing settings should still be intact.
There are a few notes and caveats here, though. First of all, you could theoretically save space by using this to store your Dropbox files on an external drive; you’d do that by picking a connected disk from Finder in step four above. You can only use certain types of storage media, though, and if a device you’ve plugged in won’t work, the app will tell you that it can’t move your folder.
However, Dropbox doesn’t really recommend doing this anyway, as it means you have to keep that drive plugged in at all times when the program is running. If you eject the drive, Dropbox will give you a scary warning when it tries to access the folder:
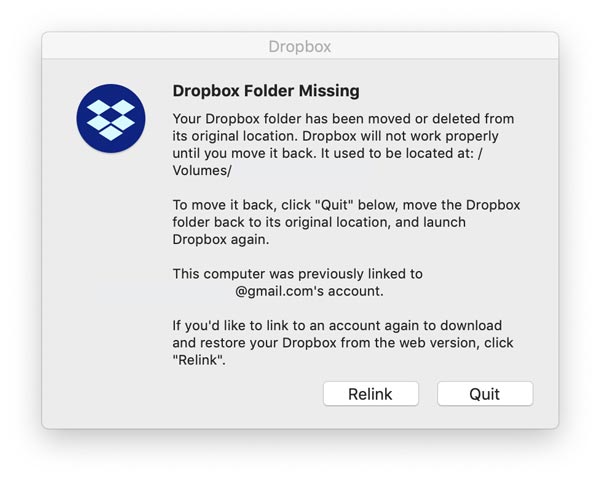
If that happened, you’d want to pick “Quit,” plug in the drive that contains your Dropbox data, and then either reboot your Mac or relaunch the program from your Applications folder.
Finally, there is one more big stinking worry about storing Dropbox files on an external drive. Dropbox says this on its support pages:
If the external drive is disconnected from the computer while Dropbox is running, there’s a small—but real—chance that the app will start deleting files before realizing that the entire drive has been removed.
So, yeah. I get that some of us have to roll with smaller drives in our Macs, but if you offload your Dropbox stuff, just be really careful! And make sure you’re backing up the external drive that contains those files. In fact, please make sure you’re backing up everything you care about, forever. Trust me. I see the worst-case scenarios, and I don’t want that to be any of you!


