How To Create A Bootable USB Drive With Rufus

Have you ever wanted to install a new operating system through a USB stick? Well, it’s not as easy as it sounds, as you need to create a bootable USB disk to do that. But, that’s just what we’re going to show you how to do today: Creating a bootable USB disk with a Windows program called Rufus. If you don’t already have Rufus, you can download it for free here.
Creating A Bootable USB Drive
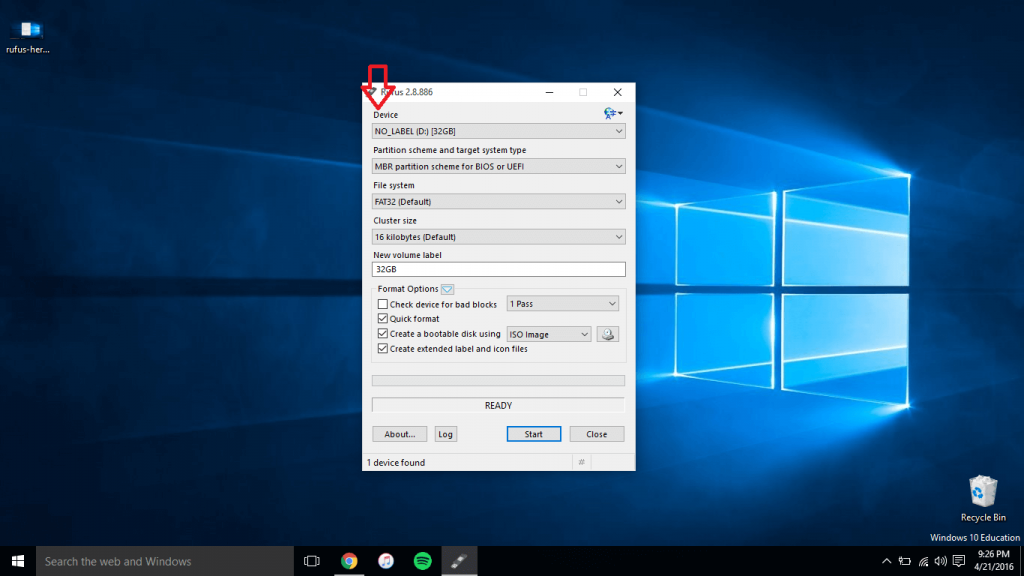
With Rufus, it’s actually quite easy to create a bootable USB drive. First up, plug your USB drive into your PC, and then select the drive under the “Device” tab in Rufus. Every other setting before “Format Options” you can leave as default.
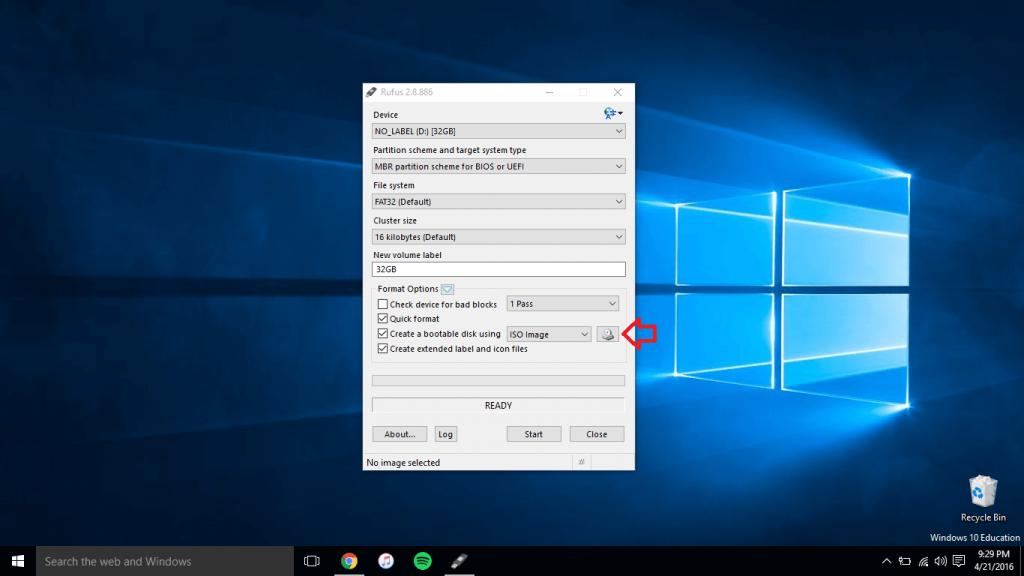
Next, you’ll want to press the button next to the ISO Image tab to load the ISO. The file explorer will pop up. Once it does that, search for the chosen ISO you want to load. In my case, I loaded an Ubuntu ISO to install the new OS on my computer at a later date.
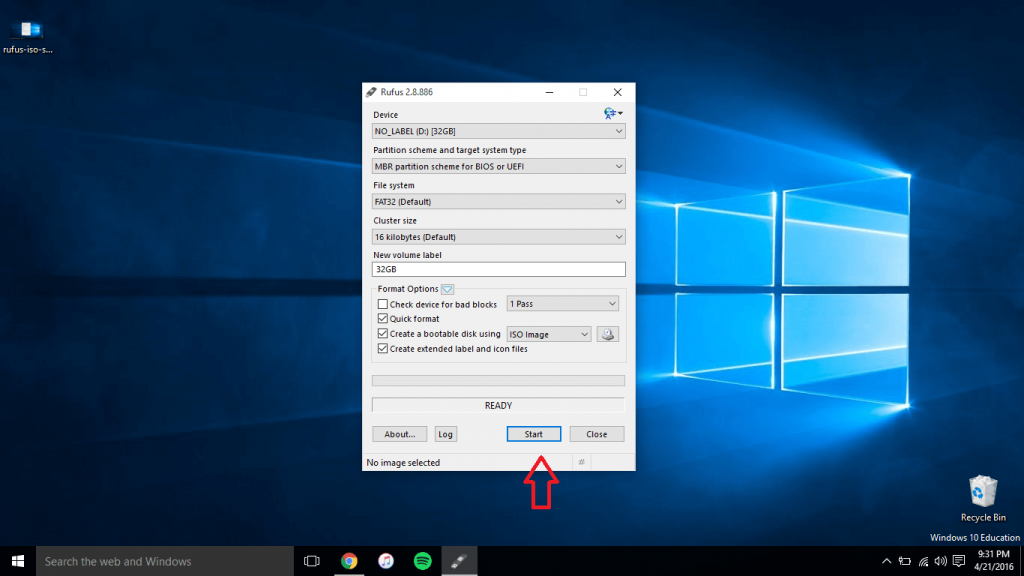
Once you’re happy with all of your settings, press “Start,” and Rufus will create the bootable USB disk. Keep in mind that before pressing Start, doing this will destroy and delete all of the current data on your flash drive, replacing it with the needed files to create that bootable disk.
After you press Start, Rufus will go through the process of making your USB drive bootable. This could take a few minutes, though your mileage will vary.
And there you have it, you can now boot off of this USB disk to install a new operating system!








One thought on “How To Create A Bootable USB Drive With Rufus”