How to Create a Google Photos Folder in Google Drive

Google has a wide range of apps, and they’re constantly being updated and refined., Sometimes, a new app may overlap with an old one, making it tricky to keep track of what works with what, and how.
Google Photos and Google Drive are a good example. Until early July 2019, the two services were linked, and shared free cloud storage space. This meant that if you changed something in your Google Photos folder in Google Drive, then the change would be visible when you logged in to Google Photos, and vice versa.
Splitting the Difference
However, the two services got separated in July 2019, meaning that they no longer sync their content. It also means that you don’t have to take up all of your Google Drive storage space with pictures that you’ve uploaded to Google Photos. In effect, your free storage doubled from a total of 15GB to 15GB for Drive and 15GB for Photos. Not too shabby, really.
Despite the separation of the services, files that were previously synced between Photos and Drive will remain in the folders that they were saved into. However, there is no longer automatic syncing between the two, meaning that if you want to back up from one service to the other, you’ll have to do it yourself.

Add Photos from Google Drive to Google Photos
If you’ve got pictures on Google Drive that you want to save to Google Photos, here’s how to do it:
- Open your web browser.
- Enter google.com into the browser bar, or click that link.
- Click on the Upload button to the right of the search bar at the top of the window.
- Click on the Google Drive option.
- Select the images that you want to save to Google Photos.
- Click UPLOAD at the bottom right of the screen.
How to Back up Pictures from Google Photos to Google Drive
If you want to back up your images from Google Photos to Google Drive, unfortunately it’s a pretty complicated process that isn’t able to automatically sync them directly from Google Photos. At the very least, you’ll have to download the pictures in question to your computer, and then either upload them yourself to Google Drive, or use Google Backup and Sync to save them to Google Drive automatically once they’re downloaded.

Download and Set up Backup and Sync
Here’s how to backup downloaded photos to Google Drive.
- Create a new folder on your computer called Google Drive Photos (or whatever name works for you).
- Open your web browser.
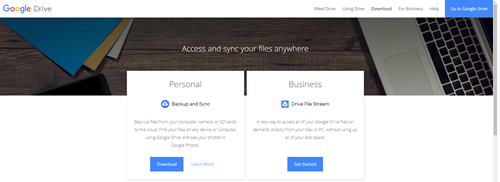
- Enter com/drive/download into the browser bar, or click that link.
- Under Personal, click the blue Download button.
- Click on Agree and Download.
- Once the file has finished downloading, open it.
- If you see a window asking for permission to make changes on your computer, allow it.
- If it asks you to restart your computer, do that.
- Open Backup and Sync.
- Sign in with your Google Account.
- Click on the More button (three dots stacked vertically).
- Click on Preferences.
- If your Google Drive Photos folder is there, click on it. Otherwise, click on Choose folder.
- Find the folder with your pictures in, click on it, then click OK.
Download the Photos
Now you just need to download the images that you want to upload to Google Drive onto your computer. Here’s what to do.
- Go to google.com in your web browser.
- Hover your cursor over the first image you want.
- Click on the small check mark to the top left of the image.
- Repeat this for all the pictures that you want to download.
- Click on the three horizontal dots at the top right of the window.
- Click on Download. It will save them as a .zip archive named Photos.zip.
- Navigate to your default download location on your computer.
- Right click on Photos.zip.
- Click on Cut.
- Navigate to the Google Drive Photos folder you created earlier.
- Right click in an empty space and click on Paste.
- Once the archive has been pasted into the folder, right click on it.
- Click on Extract all.
- If you want them to stay in a folder together, you can either rename it here by changing the last word in the text bar to your preferred name for the folder. If you just want all the pictures to be directly in your Google Drive Photos folder, delete \Photos.
Run Backup and Sync and these images will be uploaded to your Google Drive storage. If you have more pictures in the future that you want to save to Google Drive, you’ll have to repeat this process.
Let’s Go Round the Houses
It’s not as quick and easy as it used to be, but it’s still possible to transfer your images from Google Photos to Google Drive, using this method. It’s easier to do it the other way around, though, for some reason. If you’ve managed to find a different method to get your photos from Google Photos to Google Drive, we’d love to hear about it in the comments section below.


One thought on “How to Create a Google Photos Folder in Google Drive”