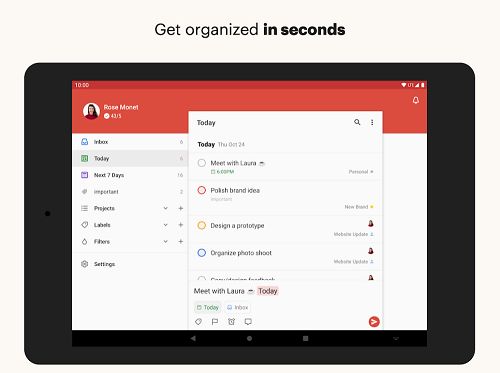
How to Create a Subproject in Todoist

The cloud-based Todoist is equally suitable for big and small teams all over the world. The features are intuitive and strive to improve productivity and workflow, especially compared to other apps on the market.
If you’re wondering how to make a subproject on Todoist – we’ve got you covered. Let’s tackle subproject creation and management to help you navigate the excellent organization app.
Creating a Subproject on Todoist
Creating a project and subprojects on the Todoist app is a straightforward process. If you’re wondering how to turn a project into a subproject, here’s what you need to do:
- Long press a project and drag it to the left or right to change its indent level.
- To add a subproject, right-click on an existing project and select “Add below indented.”
It is currently possible to move subprojects through three indent levels and set its right place in the weekly plan.
How to Make a Sub-Task?
If you’re looking to add new tasks or sub-tasks in a Todoist project, follow these simple steps if you’re using it in Windows:
- Open the task.
- Tap the right click and add a sub-task.
- Tap on “Add task below.”
- Press “Alt + Shift + →” to transform task into a sub-task.
- Type the name of the task and other details that might be important.
- Find an “Add Task” option or simply press “Enter”.
- Now your task is saved.

On iOS, this is what you need to do:
- Open the task.
- Right click and add a sub-task.
- Find option “Add task below.”
- Press “Ctrl + →” to transform a task into a sub-task.
- Type the name of the task and other key details.
- Tap “Add Task” or simply tap enter “Enter”.
- Your changes have been saved.
How to Turn an Existing Task Into a Sub-Task?
Some of the tasks that we’ve created are often better off as sub-tasks. That’s why Todoist users often need to reallocate tasks or create several sub-tasks to make sure everything runs smoothly.
If you’re using Todoist on Windows, all it takes is to drag a task left to the right to adjust its sub-level status. On the other hand, if you’re using it on iOS, you should hover over the task’s name, click the gray handle sign, and drag it from left to right.
How to Complete a Task?
For some people, completing tasks is one of the most satisfying things you can do if you have them written on a list. Todoist allows you to complete your tasks efficiently, or if the whole task needs to go back to one of your projects, you can do that, too. You complete tasks on Todoist by clicking on the circle next to the task that you wish to mark as completed.

Moreover, there’s also a way to select multiple tasks and mark them as completed simultaneously.
- Press “Ctrl” (for Windows users) or “Cmd” (for iOS users) and click on all tasks you want to select.
- From the menu that appears on the top, you can find the action you wish to perform.
How to Unexecute a Task?
At times, it might happen that you accidentally mark a task as complete, or maybe you’ve just realized that there’s more work to be done. If you need to unexecute a task, this is how you do it:
- While on your project’s page, click the three dots icon in the top right corner and select “Show completed Tasks.”
- Find the task you’d like to unexecute and click on the circle where you checked it.
- After this, the task will automatically go back to the list of active tasks.
How to View Completed Tasks?
Tasks are the core of the Todoist platform as they are the anatomy of every project. Consequently, it’s very important to know which ones you’ve finished and where to find them should you ever need to prepare for a review.
You can find all your tasks in three places:
Inside Your Projects
Inside every individual project, you can find a list of all project’s tasks that have been completed. You access this list by tapping on the three dots icon at the top right of your screen and select the “Show completed tasks” option.
In the Activity Log (For Premium and Business Users Only)
The activity log shows all completed and recurring tasks for the opened projects. To open the list, you need to click the gear icon and select the “View activity log.” After that, you’ll see the “All actions” option, and once you click on it you can choose “Completed tasks.” There you’ll have an overview of everything you’ve finalized on that day.
In the Task View
When you open a parent task, you’ll see an information icon right next to it. Once you click on it, you’ll see if there are any completed sub-tasks in a “Sub-tasks” tab.

Plan Your Way Forward
Now that you’re familiar with creating subprojects and managing them in Todoist, you’ll be able to maximize your team’s efficiency, hopefully. With a set plan, all your ideas can come to fruition, and you’ll know exactly how and when it happened.
Do you use Todoist for projects outside of work? Did you find it useful?
Let us know in the comments section below!


