Disable Aero Shake to Stop Your Windows From Automatically Minimizing
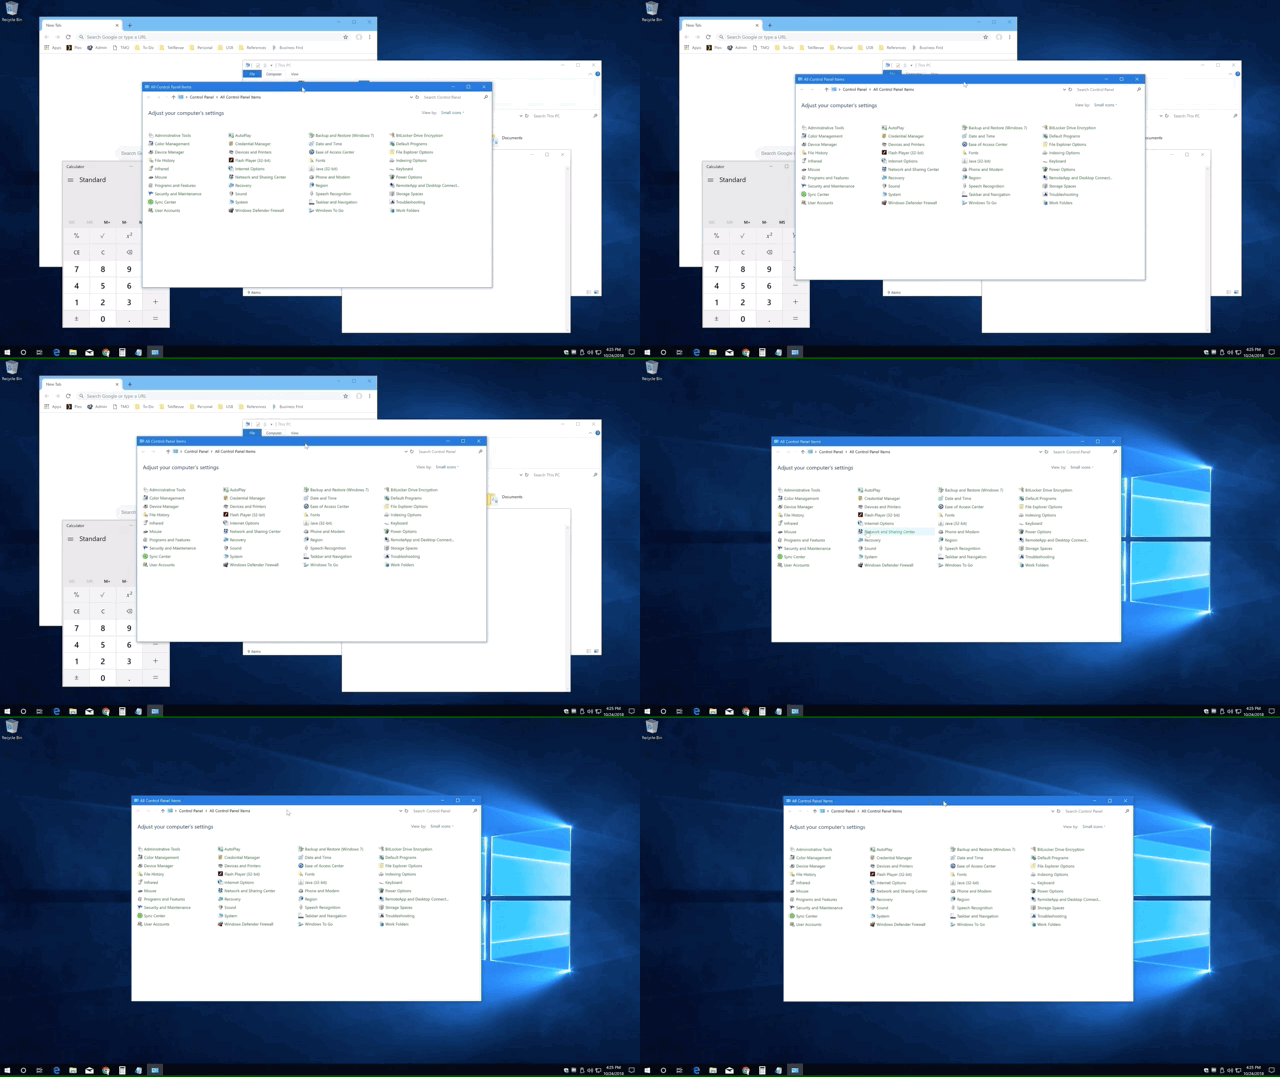
For the past several versions of the operating system, Windows has included a feature called Aero Shake. When a user clicks, holds, and shakes the title bar of an application window, Aero Shake automatically minimizes all other windows on the screen.
Grabbing and shaking the window again restores the minimized windows. This lets users quickly dismiss any unnecessary application windows to better focus on the task at hand. Unfortunately, many users who don’t know about Aero Shake accidentally activate it, leaving them wondering why all of their windows were suddenly minimized.
Thankfully, Aero Shake can be turned off, although the method for doing so depends on your version of Windows. With Aero Shake disabled, your application windows will no longer minimize regardless of how much you move or shake the active application. Here’s how it works.
Disable Aero Shake in Windows 10 Pro
If you’re running Windows 10 Pro (or Enterprise), you can use the Group Policy Editor to turn off Aero Shake. Other versions of Windows 10, such as Windows 10 Home, do not include the Group Policy Editor and so they must use the Registry method described in the next section.
To turn off Aero Shake via the Group Policy Editor, open your Start Menu and search for gpedit.msc. Open the corresponding search result which will launch the Group Policy Editor. Using the sidebar on the left, navigate to User Configuration > Administrative Templates > Desktop.
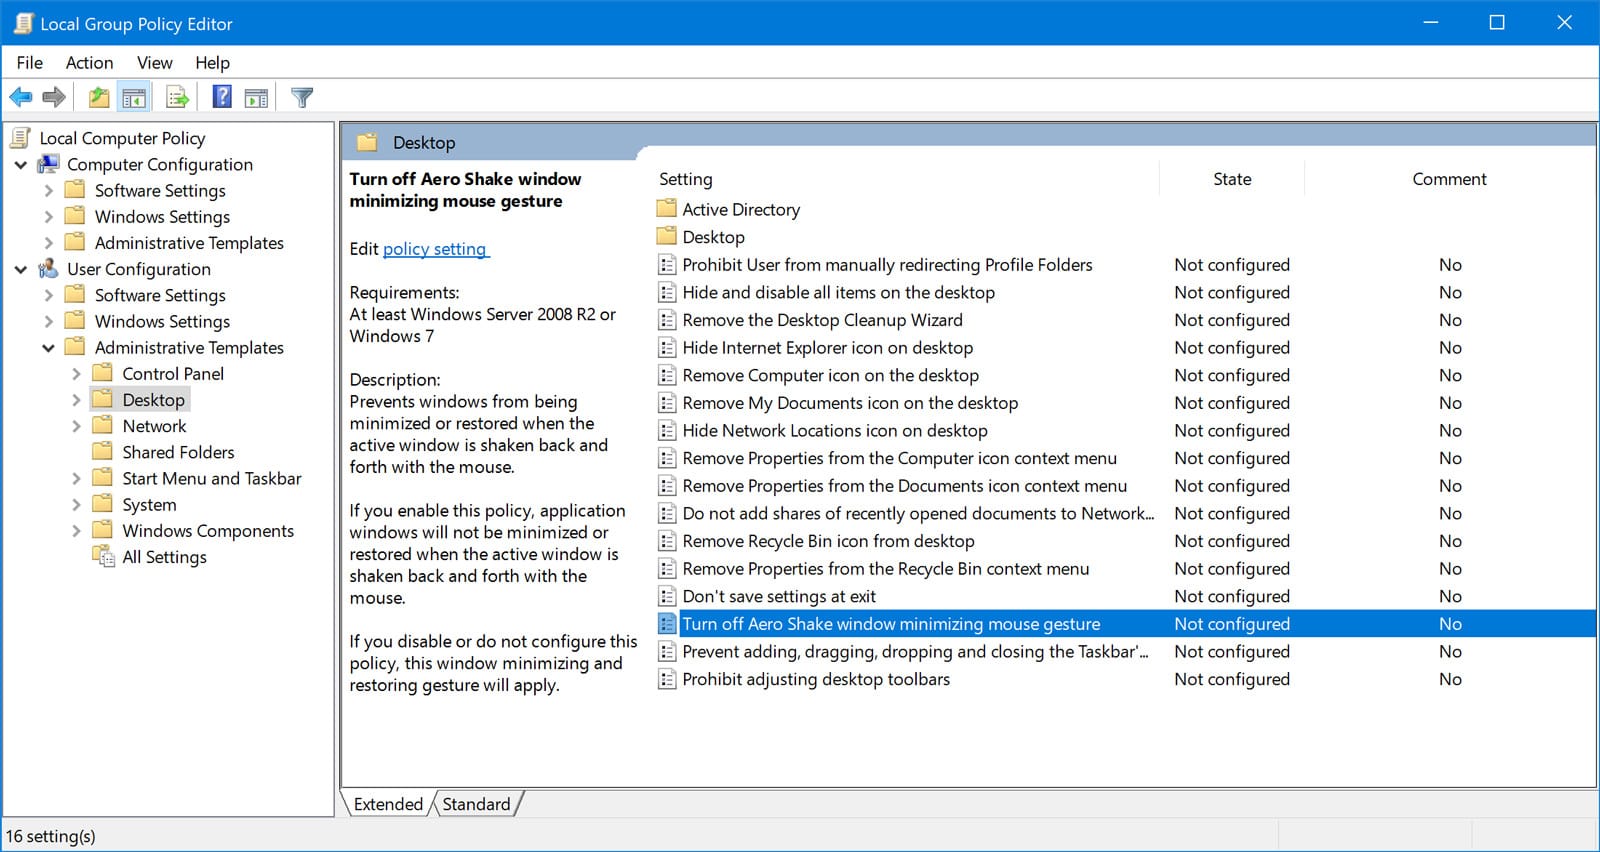
With Desktop selected on the left, look on the right side of the window and find the entry labeled Turn off Aero Shake window minimizing mouse gesture. Double-click to open its configuration window and select Enabled in the upper-left corner. Finally, click OK to save the change and close the window.
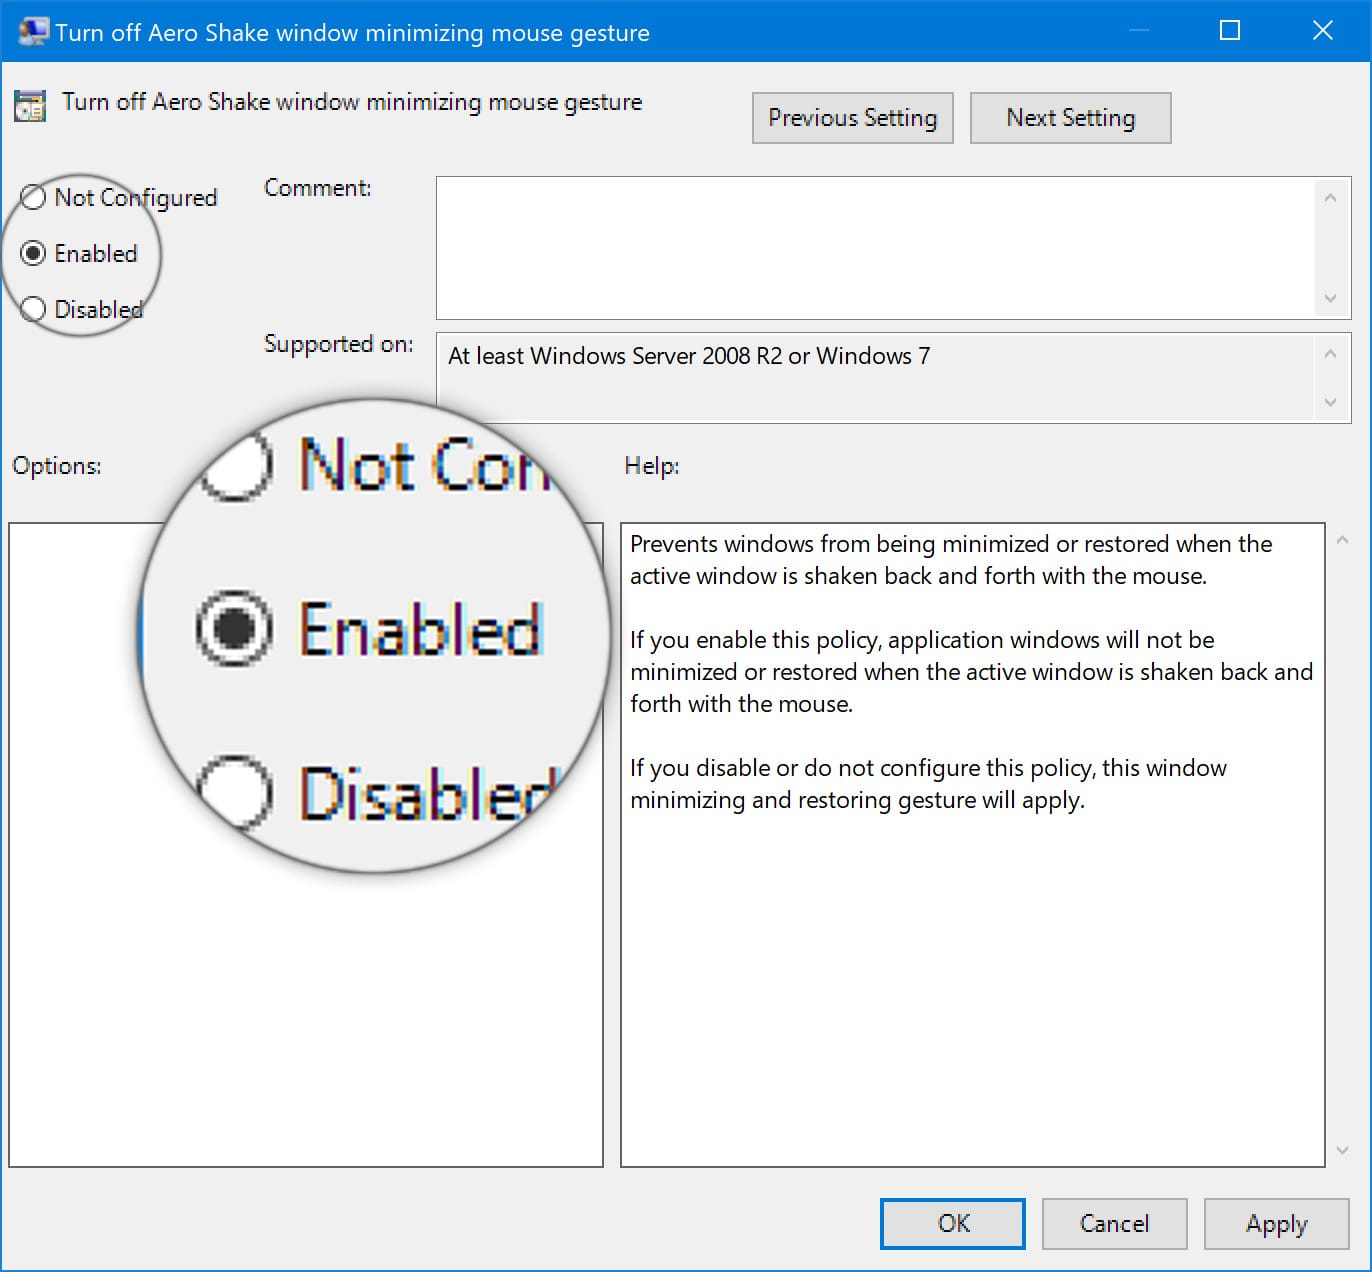
You can now exit the Group Policy Editor. The change to disable Aero Shake will take effect immediately so no reboot or log out is required. To test it, open a few application windows and then grab and shake one. With the feature disabled, your background windows should remain unaffected.
To undo this change and reenable Aero Shake, repeat the steps above but this time select Disabled in the policy configuration window. Again, the change will happen immediately.
Disable Aero Shake in All Versions of Windows 10 via the Registry
Unlike the previous method which relies on the Group Policy Editor and is therefore limited to Windows 10 Pro, this method to disable Aero Shake via the Registry works with any Windows version. To get started, open the Start Menu and search for regedit. Select and open the corresponding result to launch the Windows Registry Editor.
In the Registry Editor, navigate to the following location using the sidebar on the left or by copying and pasting this location into the location bar at the top of the window:
HKEY_CURRENT_USERSOFTWAREMicrosoftWindowsCurrentVersionExplorerAdvanced
With the Advanced key selected on the left side of the window, right-click in an empty space on the right side of the window and select New > DWORD (32-bit) Value. Name the DWORD DisallowShaking and then double-click on it to edit its properties. Change its Value data field from 0 (zero) to 1 and click OK.
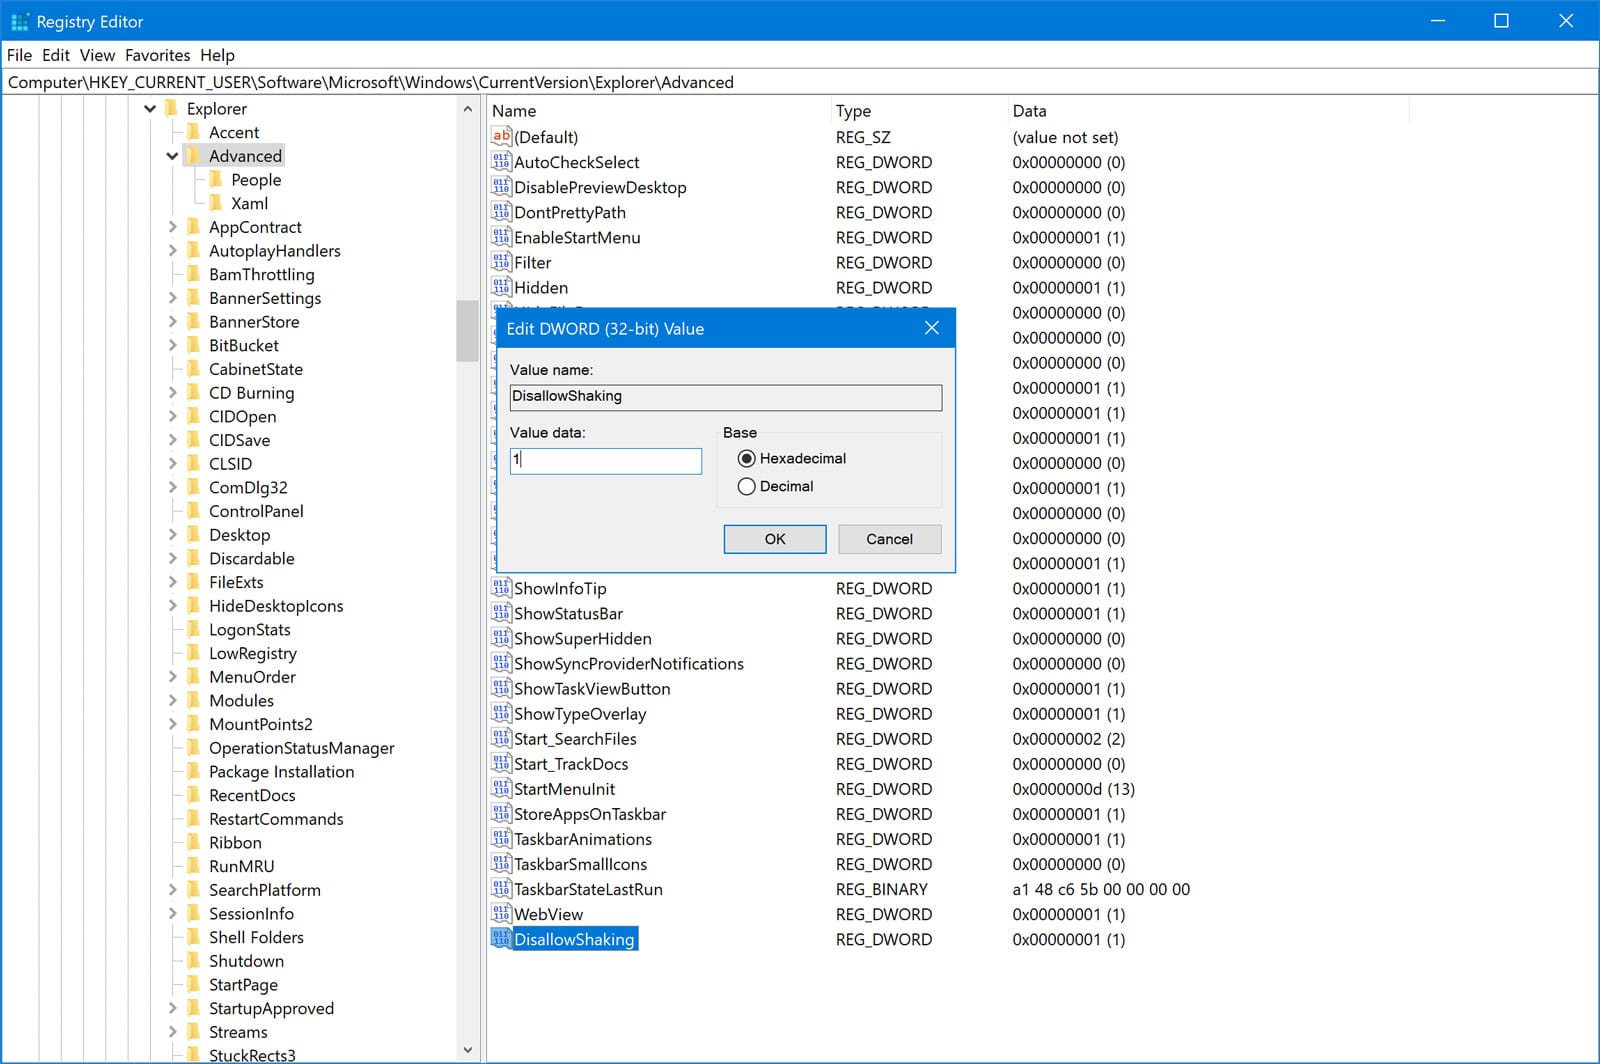
The change should take effect immediately. You can test it by again opening a few application windows, grabbing one by the toolbar and shaking it. With Aero Shake disabled, the other windows should remain unaffected.
To undo this change and reenable Aero Shake, head back to the same location in the Registry and either delete the DisallowShaking DWORD or edit its Value data back to 0 (zero).


2 thoughts on “Disable Aero Shake to Stop Your Windows From Automatically Minimizing”