How to Disable HomeGroup in Windows 7 and 8

Microsoft introduced HomeGroup, an ad hoc home networking service, as part of Windows 7. HomeGroup, which is also available in Windows 8, makes it easy for consumers and small businesses to share documents and files between compatible computers on their network. It’s a great simple networking feature for some users but, for those who don’t need it, HomeGroup consumes system resources and takes up potentially valuable space in the Windows Explorer sidebar. Here’s how to disable HomeGroup in Windows 7 and 8 with a few changes to Windows’ services.
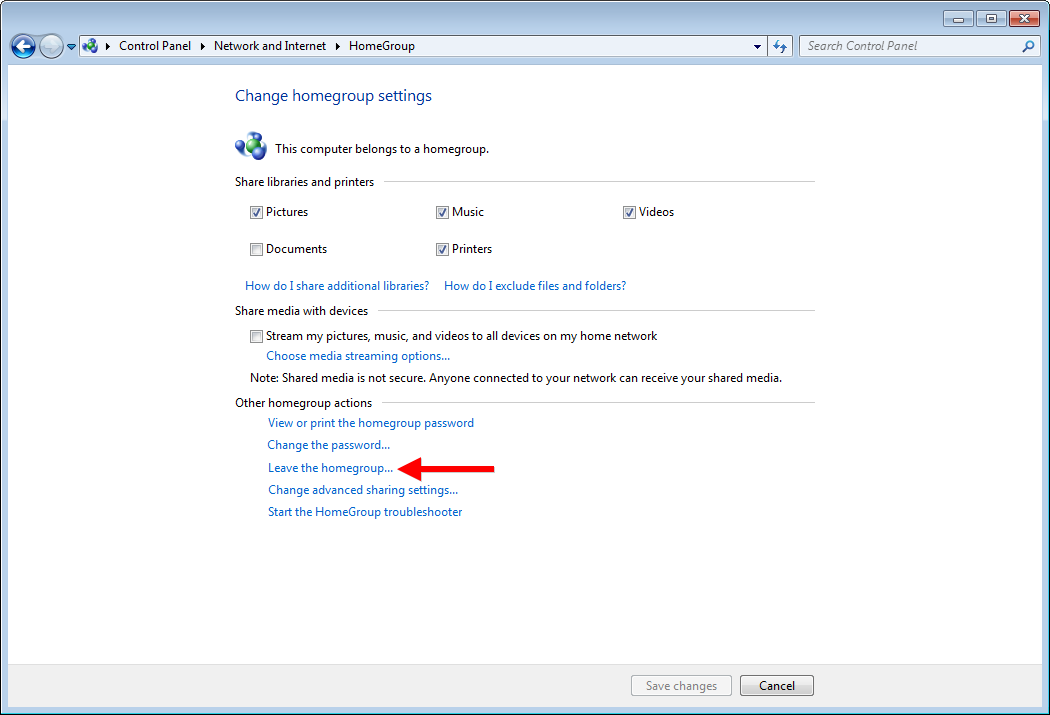
To disable HomeGroup, first leave any HomeGroups you may have already joined. You can do this by heading to Control Panel > Network and Internet > HomeGroup and clicking on Leave the HomeGroup. Windows will ask you to confirm your choice; select Leave the HomeGroup again to complete the process.
Now that you’ve left your HomeGroup, we need to disable the services that power it. Launch the Windows Services utility using the appropriate method below:
Windows 7: Click Start and then type “services” in the Start Menu search box.
Windows 8: Launch the Start Screen and begin to type “services” to trigger Windows 8’s Start Screen search feature. Select View Local Services from the search results bar.
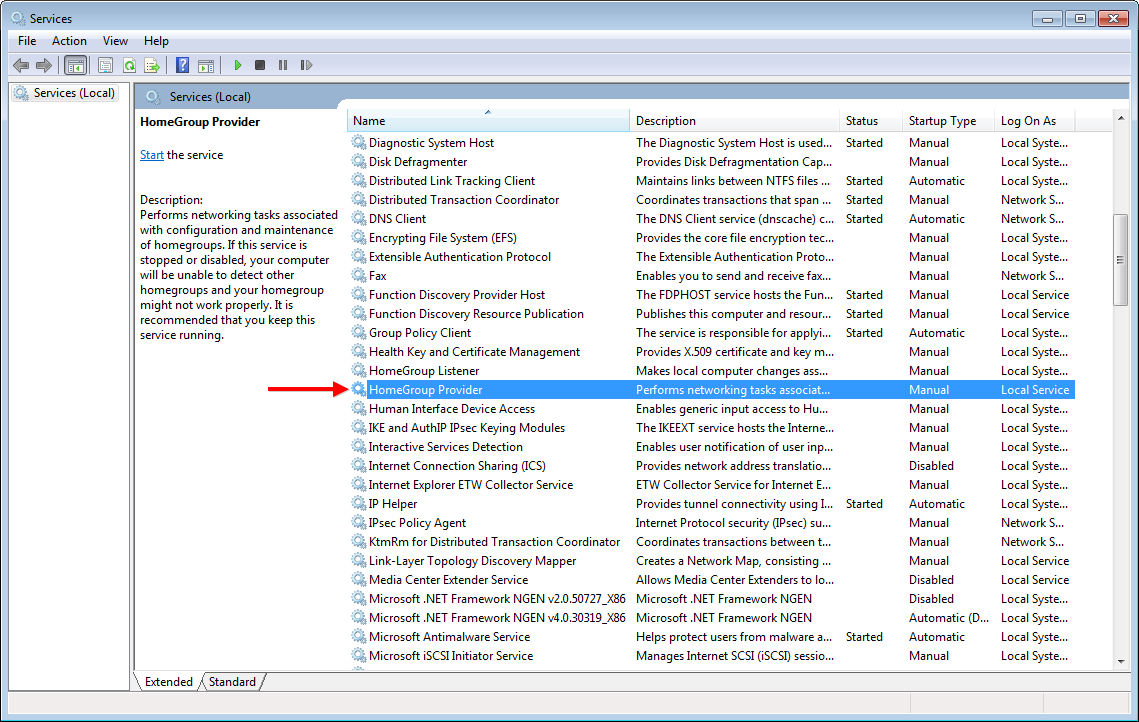
In the Services utility, find the entry for “HomeGroup Provider” from the list on right. Highlight it and click on the stop sign icon at the top of the window to stop the service. Alternatively, you can right-click on “HomeGroup Provider” and select Stop.
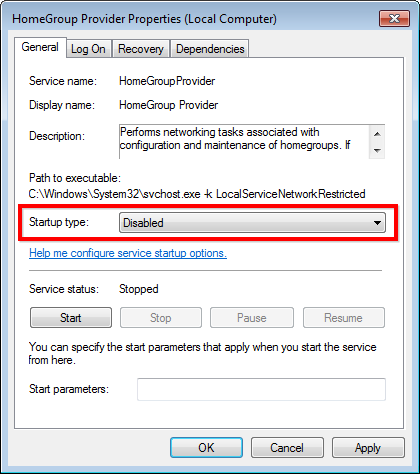
Next, double-click on HomeGroup Provider to launch the service’s properties window. Make sure you’re on the General tab, and then change the “Startup type” drop-down menu to Disabled. This will prevent HomeGroup from starting again once you reboot your computer.

Press OK to save your changes and close the window. Next, we need to perform the same steps for the “HomeGroup Listener” service. The HomeGroup Listener service should have been automatically stopped when you stopped HomeGroup Provider. If by some chance it’s still running, stop the service using the stop sign icon at the top of the window or right-clicking and selecting Stop. Then double-click on the HomeGroup Listener service and change the Startup type to Disabled.
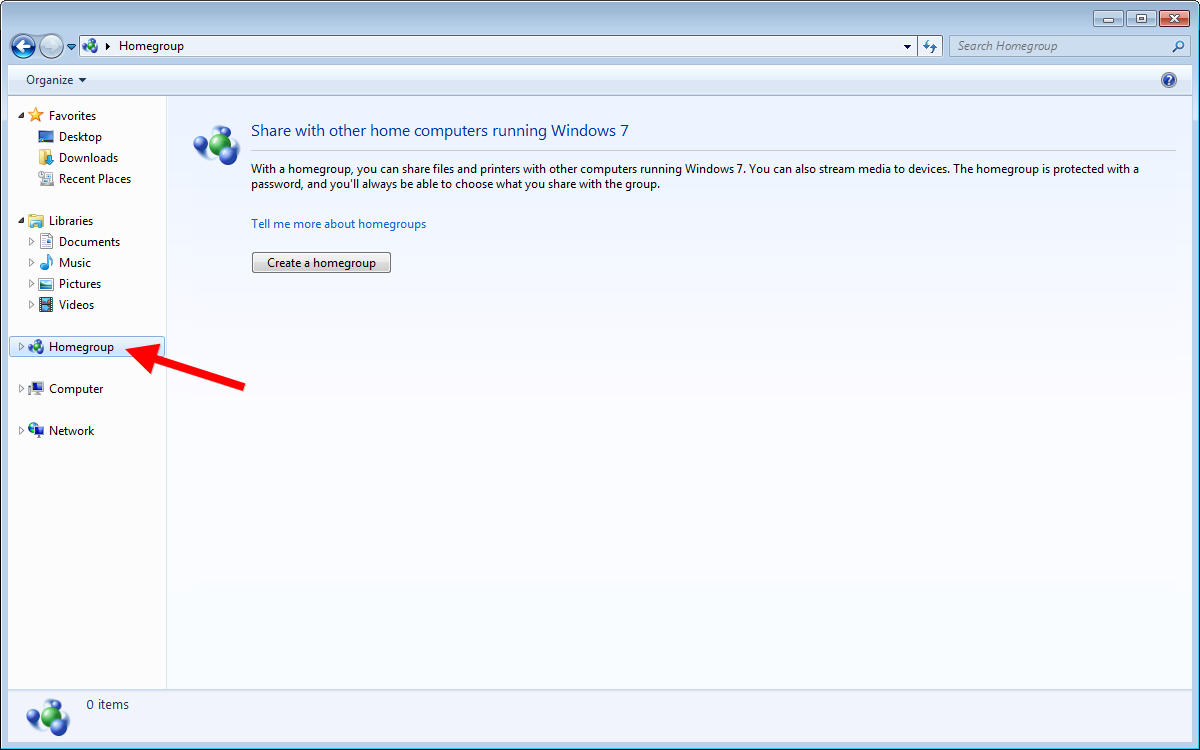
Close all the Services and Control Panel windows and launch Windows Explorer. You’ll now see that HomeGroup is absent from the sidebar, and by stopping the services it won’t continue to use any background resources. If you’re running a modern PC with relatively fast hardware, you shouldn’t expect to see a noticeable change in performance by disabling HomeGroup. But you’ll at least no longer be bugged by the presence of HomeGroup in the Windows Explorer sidebar, and you can take comfort that system resources, no matter how minor, aren’t being wasted by a feature you have no intention of ever using.


4 thoughts on “How to Disable HomeGroup in Windows 7 and 8”
Go into services and right click “Homegroup Provider” and look down on the first tab where it says “startup” click and disable it.