How To Enable Night Light for Windows 10
If you are a night owl and you spend too much time looking at the bright computer screen during late night hours, you may experience eye pain and disturbed sleeping patterns. It would be best to avoid looking at screens during this period, but sometimes you don’t have a choice.
Luckily, computer manufacturers became aware of the issue in recent years, and they have started applying the Night Light feature to their operating systems, including Windows 10.
But what is this feature exactly and how can you enable it and customize it? Read this article to find out.
What Is a Night Light?
Computer screens radiate blue light, which can cause eye problems if we look at it extensively. Blue light becomes an even bigger issue during the night, when it puts a lot more strain on the eyes.
This happens because our eyes struggle to adjust to the contrast between the brightness in front of us and the darkness around us. Besides eye problems, this can cause problems with your sleep.
Microsoft took note of the problem a few years ago and since early 2018, the Night Light feature has been widely available. This is a unique Windows display mode that switches the regular screen colors to their warmer versions. This reduces the amount of blue light emitting from the screen, and so it protects your eye health and general health.
How to Enable Night Light for Windows 10
Enabling Night Light via the Settings Menu
You can easily enable Night Light by accessing the ‘Settings’ menu. To do so, follow these steps:
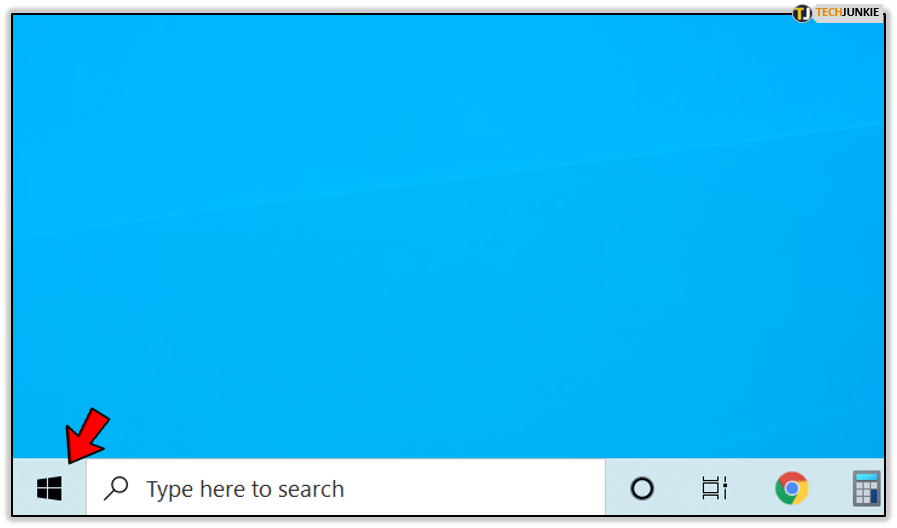
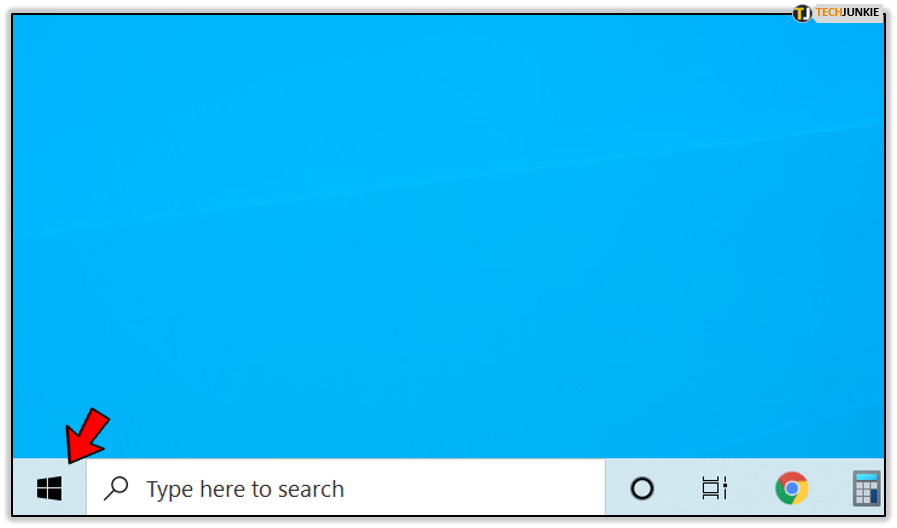
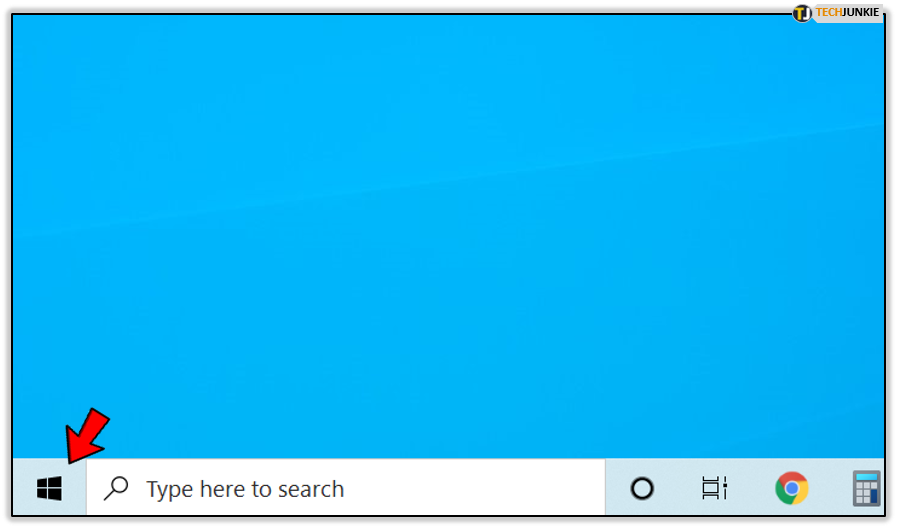
- Select the Start menu from on the left side of the Windows taskbar.

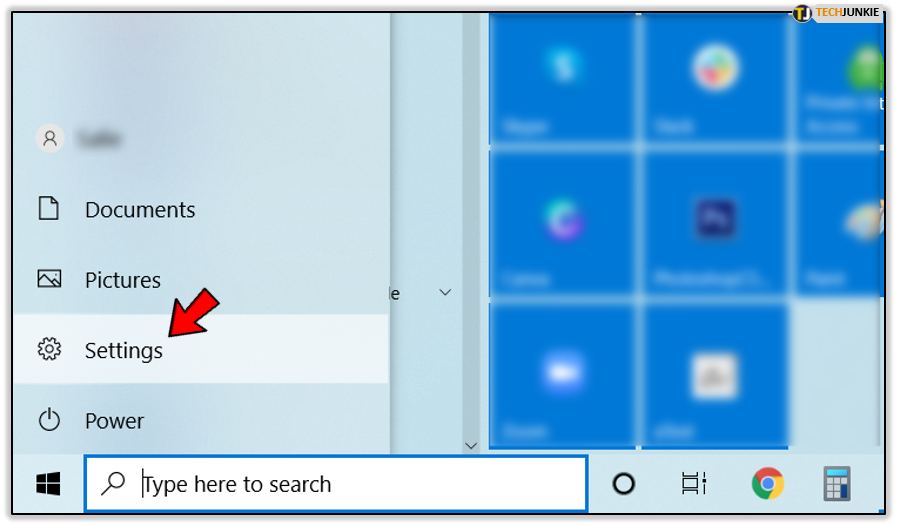
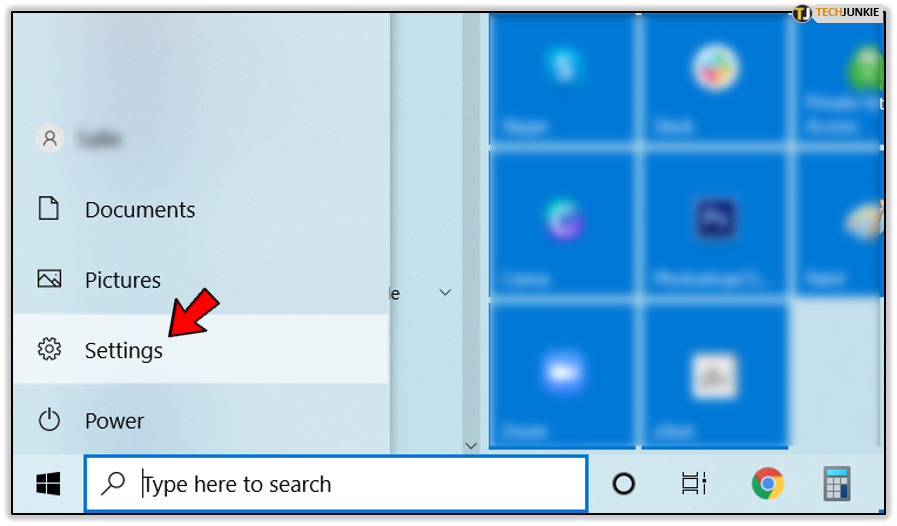
- Click on the ‘Settings’ button (gear icon) to the left of the menu.

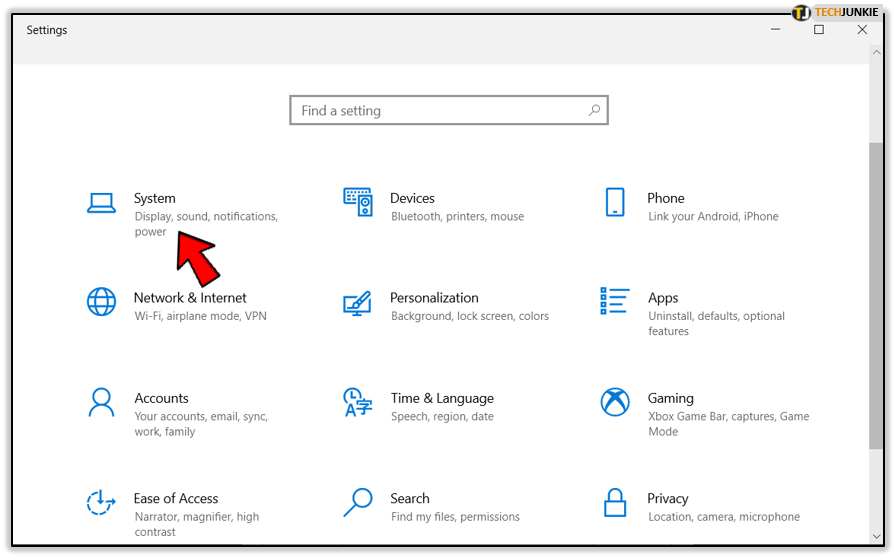
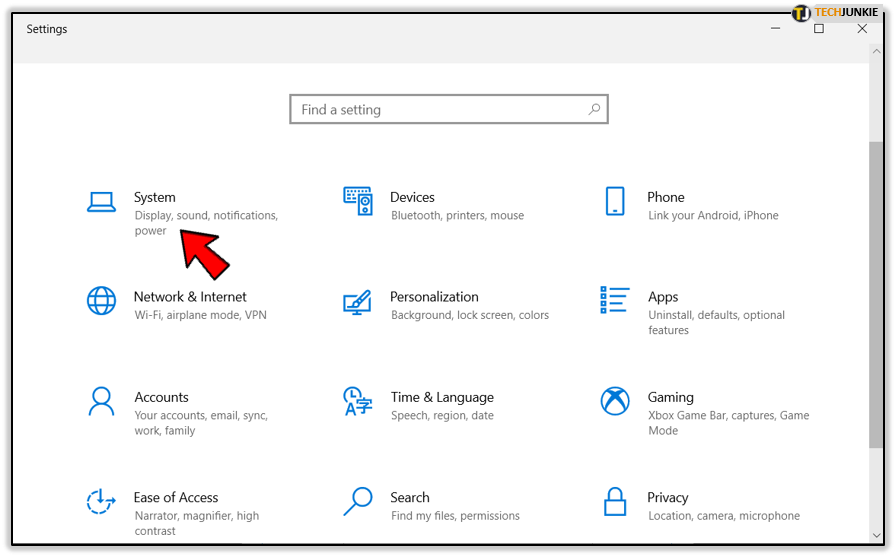
- Select ‘System’ (computer icon).

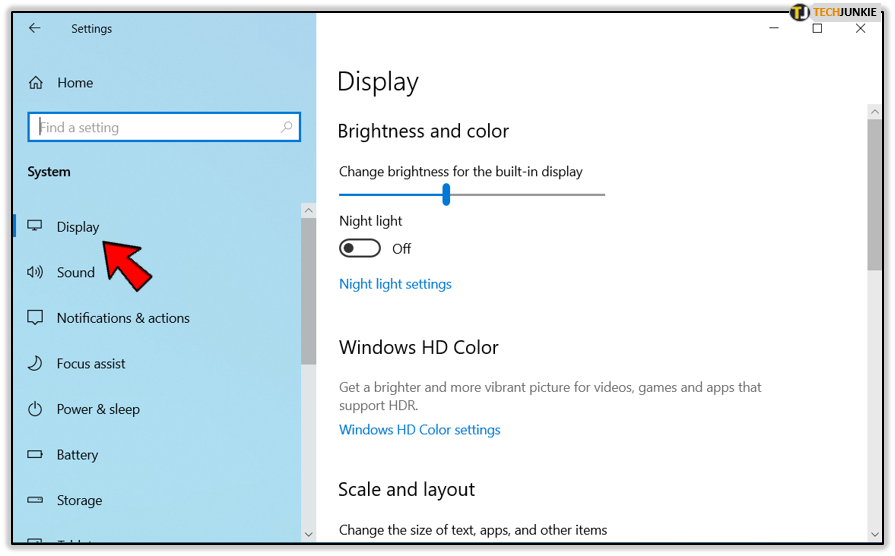
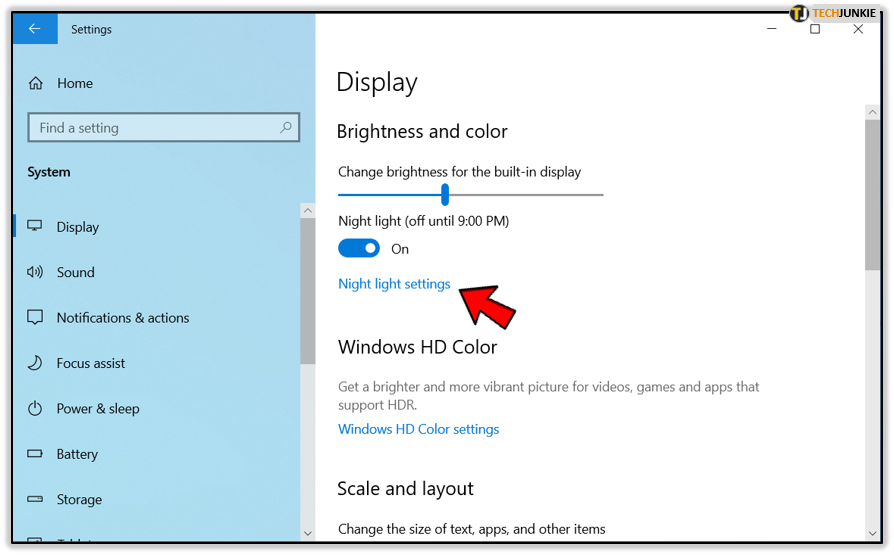
- Click on the ‘Display’ tab (monitor icon) on the left side of the ‘Settings’ window.

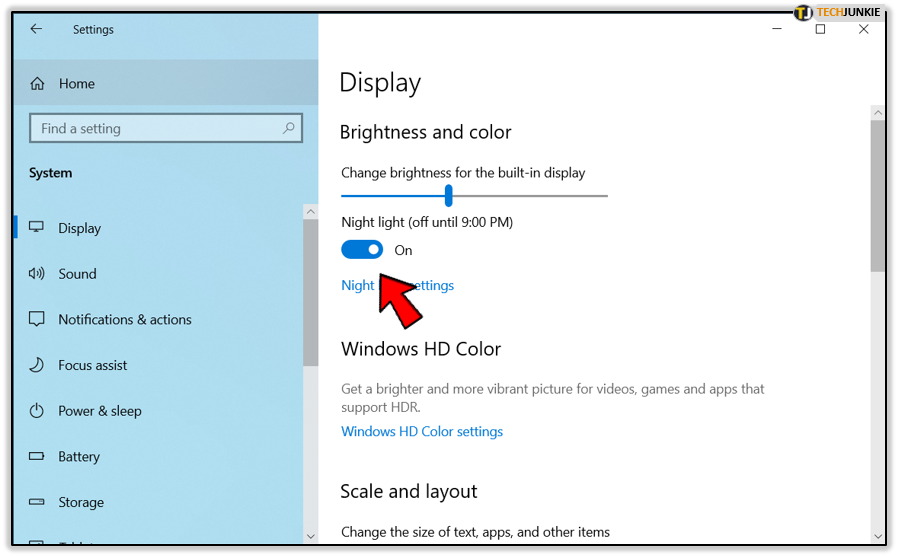
- Toggle the ‘Night light’ switch under the ‘Brightness and color’ section.

Enabling Night Light Through the Action Center
There is also a quicker way to toggle on the Night Light feature – you can go through the ‘Action Center’ menu. To access this menu, you should:
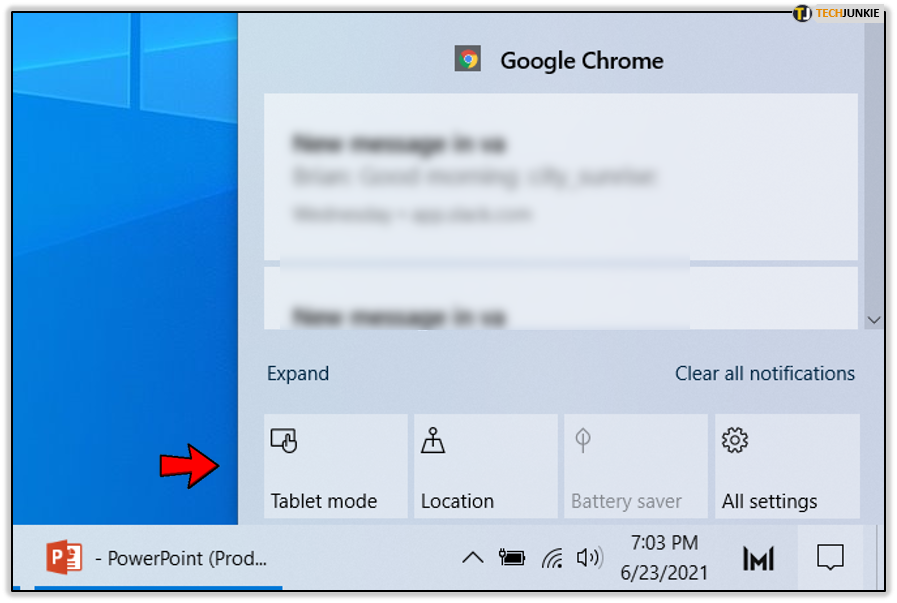
- Press the Windows key + ‘A’ on your keyboard to access the ‘Action Center’ menu. It should pop up on the bottom right of the screen.

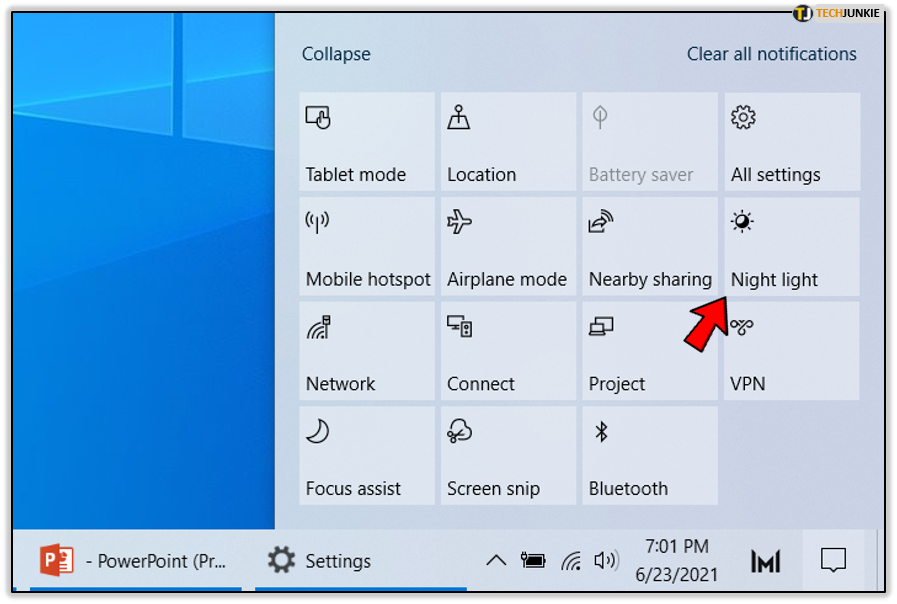
- Find the ‘Night light’ button.

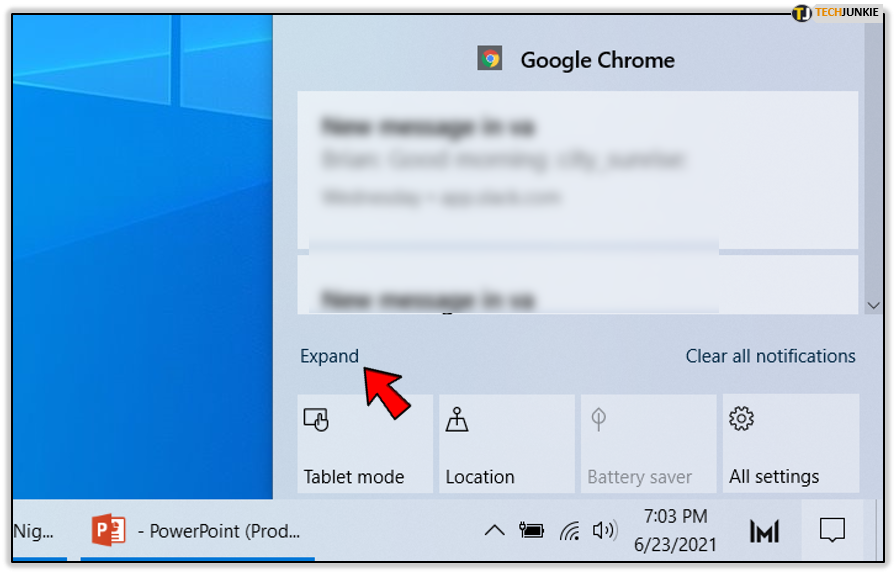
- If you don’t see the button, press ‘Expand’ on the bottom left of the menu, above the quick action buttons.

- Press the ‘Night light’ button.

- You can follow the same steps to disable the Night Light too.
How to Configure Night Light
If you want to adjust the warmth of Night Light colors or schedule particular hours to turn it on, you will have to configure its settings. To access the settings menu, you need to:
- Click on the Start menu.

- Select the ‘Settings’ button.

- Click on the ‘System’ icon.

- Go to the ‘Display.’

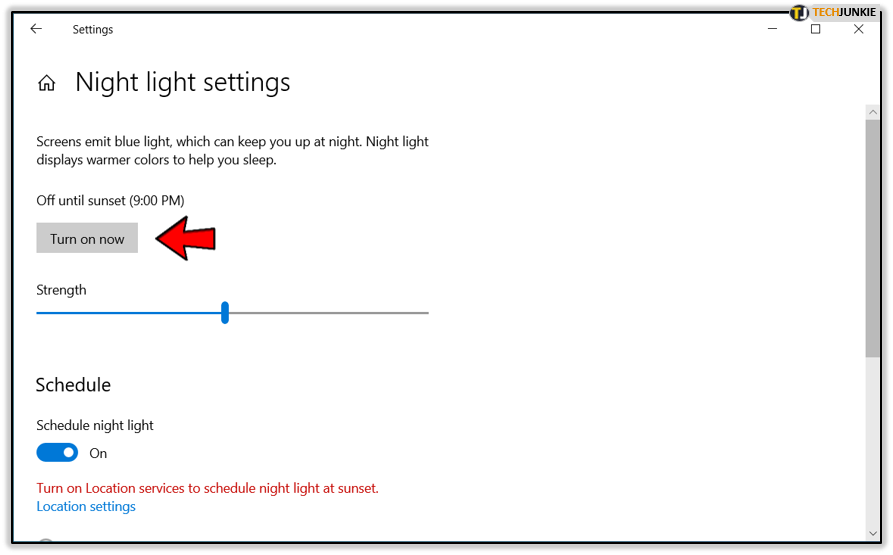
- Click on the ‘Night light settings’ under the ‘Night light’ switch.

- Press ‘Turn on now’ if you want to turn on the light.

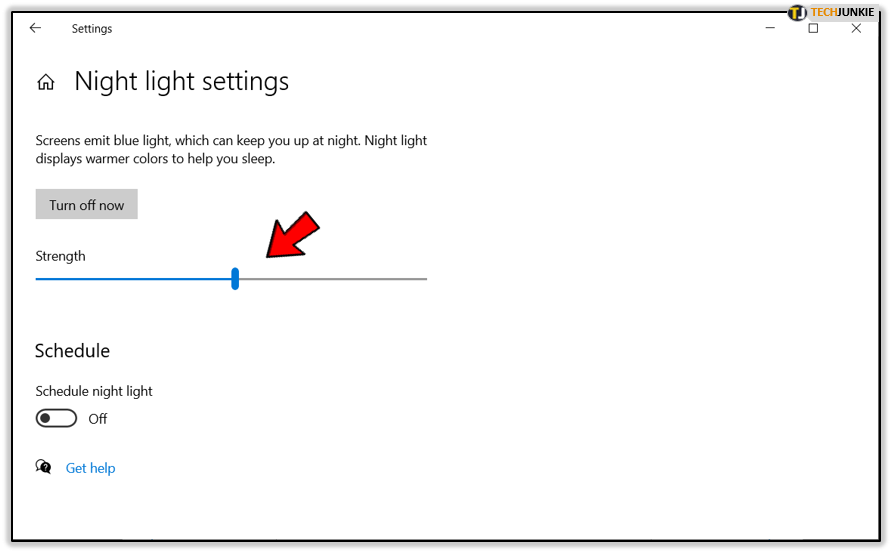
- Use the mouse to adjust the warmth under the ‘Strength’ bar. If you have trouble sleeping, you should adjust the warmth to the lowest possible point. Of course, if this hampers your user experience, change the settings to something that suits you.

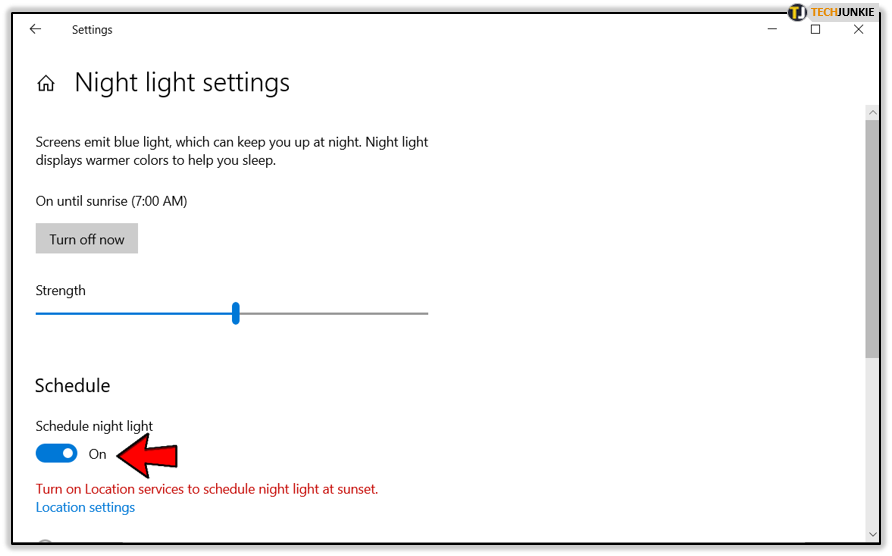
- Toggle the ‘Schedule night light’ option if you want the Night Light to display during a certain period.

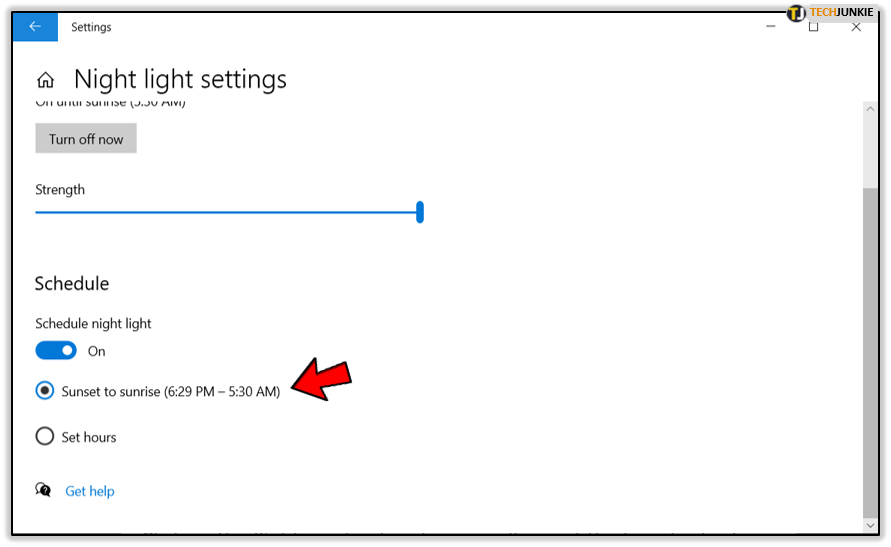
- If your location is turned on, you can customize the Night Light to switch on exactly when the sun sets.

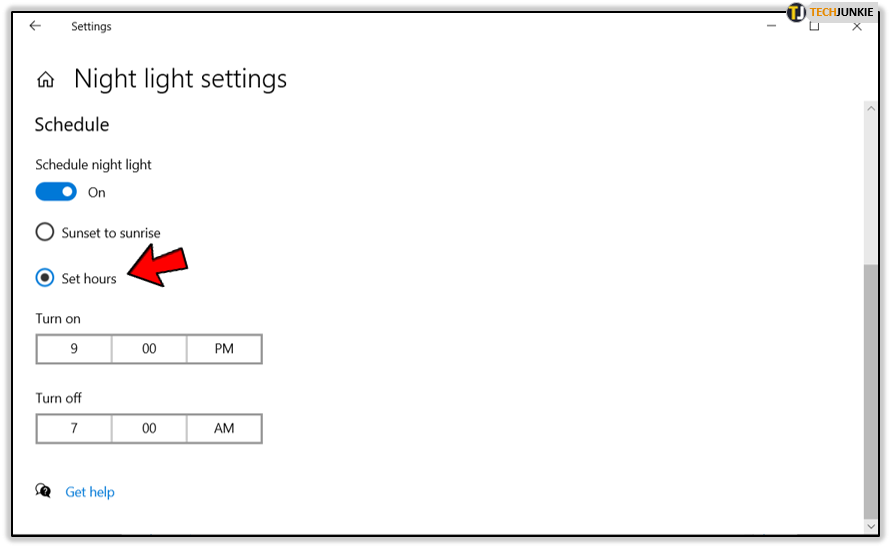
- Click on the ‘Set hours’ option to manually input the time to display the Night Light.

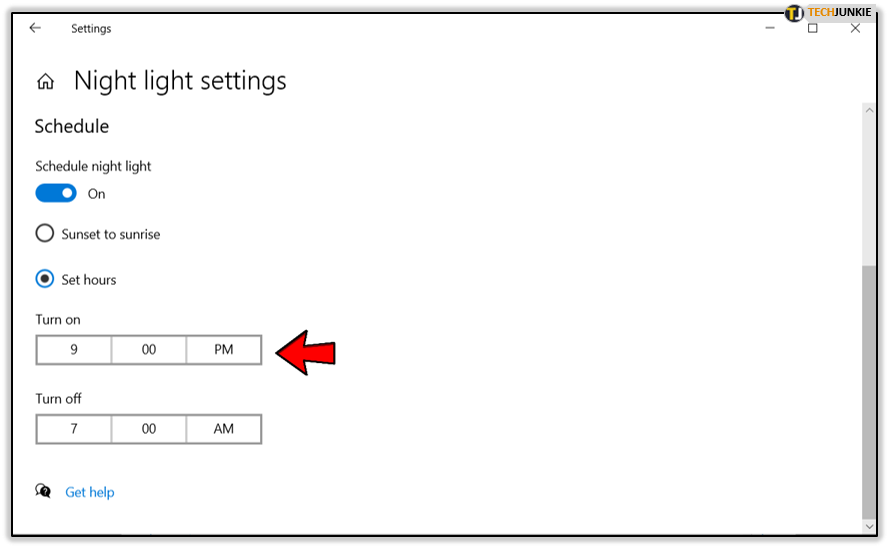
- Under the ‘Turn on’ option, type the exact hour and minute that you want the light to appear.

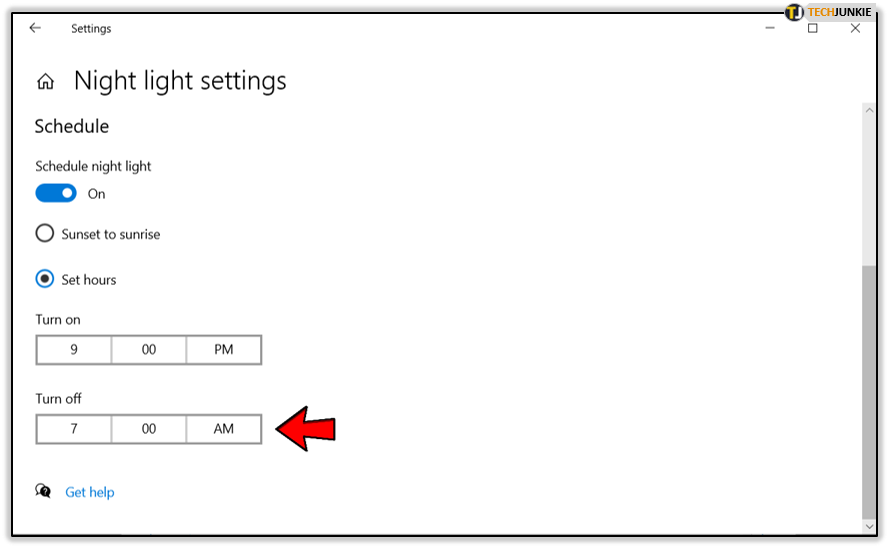
- Under the ‘Turn off’ option, type the hour when you want Night Light to switch off.

How to Fix Night Light
If you for some reason can’t enable the Night Light on Windows 10, you may have to solve the issue manually. The most common problem is an outdated video driver, which you can easily fix. To do this, you should:
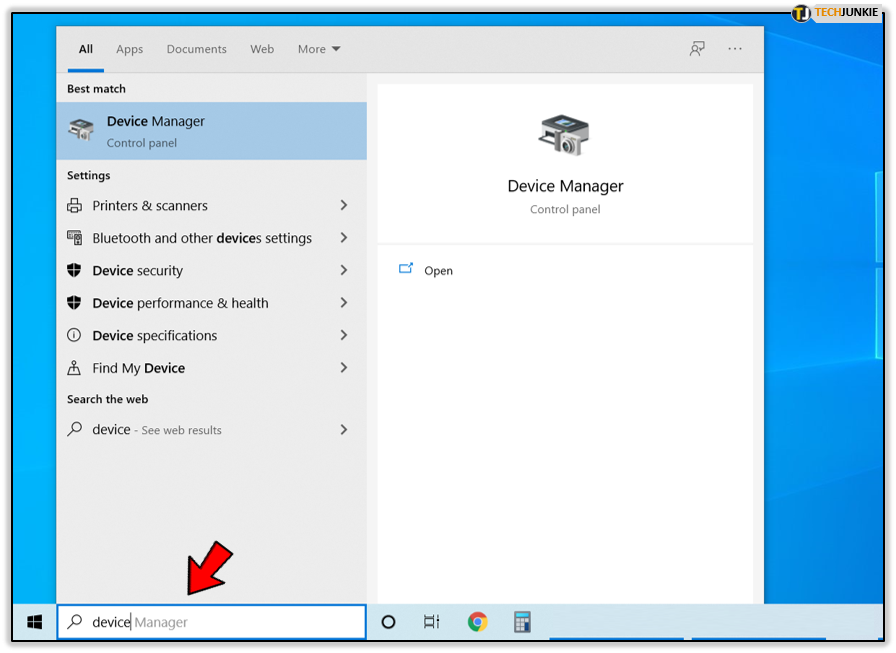
- Open the Start menu.

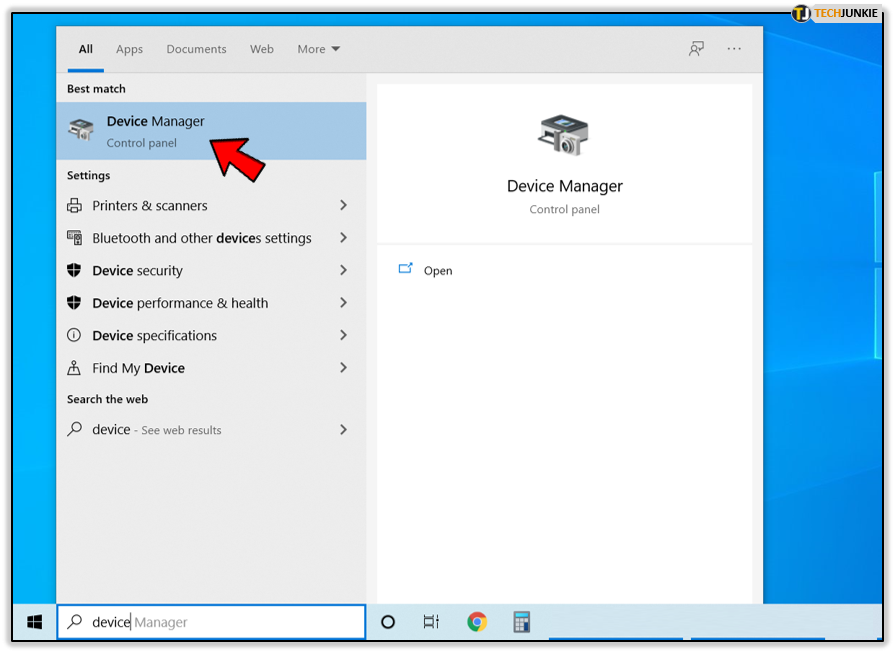
- Start typing ‘Device manager’ until the icon appears.

- Click on the ‘Device manager.’

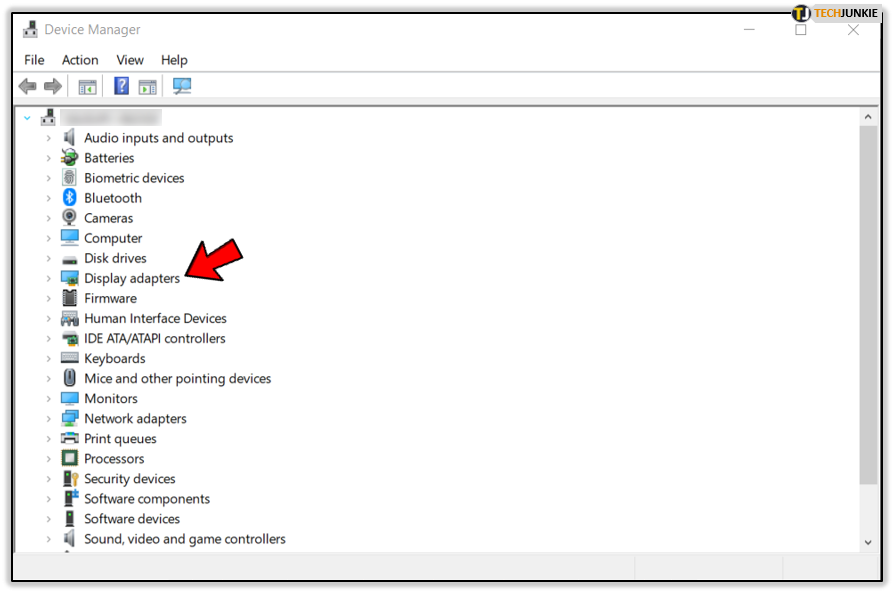
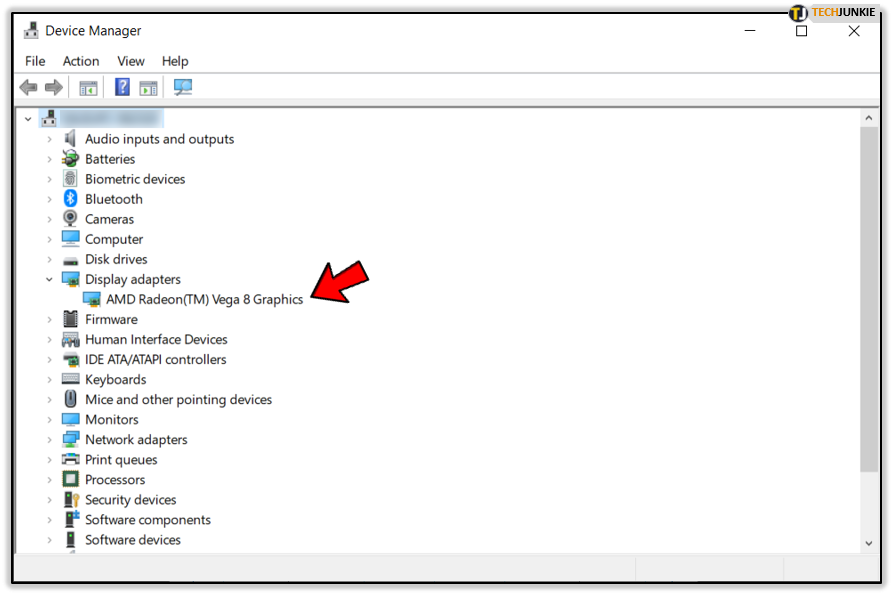
- Find ‘Display adapters’ from the list.

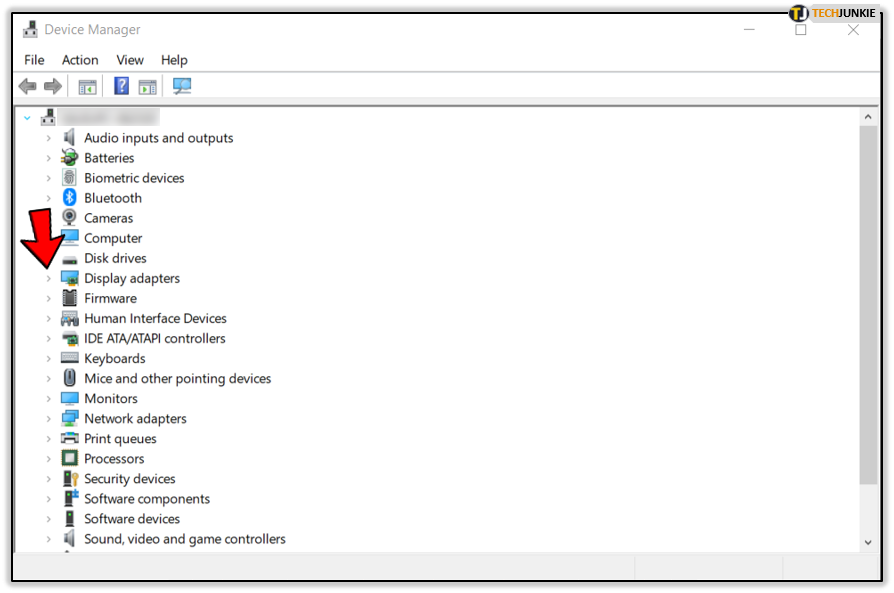
- Expand the menu by clicking on the arrow next to it.

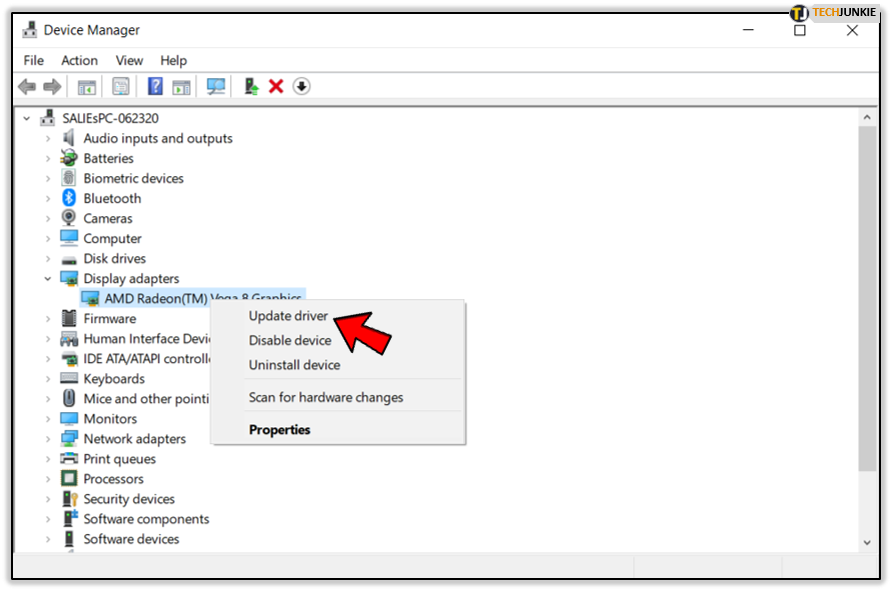
- Right-click on the name of your graphics card.

- Select ‘Update driver.’

This should update your graphics drivers. You may need to restart your Windows 10, and then you should be able to customize the Night Light.
Protect Your Eyes
Since you have an option to turn on the Night Light feature and protect your eyes, you should put it into practice as soon as possible. Using the Windows Night Light will significantly reduce the risk of reduced eyesight and pain, while also improving your sleep.
During which hours do you enable this mode? Have you noticed any improvement in your sleeping patterns? Share your experiences in the comments below.


