How to Enable Windows 10 Auto Login

Windows 10 has a login screen where you usually need to enter a password to log in to an account. However, this probably isn’t an essential thing to have for most; and what if you forget your password? To ensure you can always log in to Windows 10, switch on auto login so that Windows bypasses the login screen.
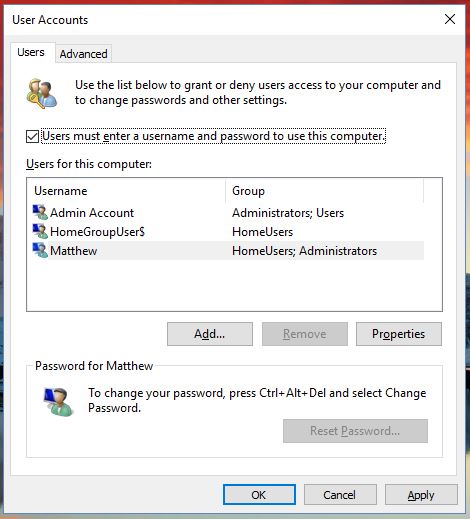
First, press the Win key + R to open Run in Windows 10. Then you should enter ‘netplwiz’ into the Run text box and press OK. That will open the window below.

That window lists all your user accounts. It also includes the option Users must enter a user name and password to use this computer. That check box will be selected by default.
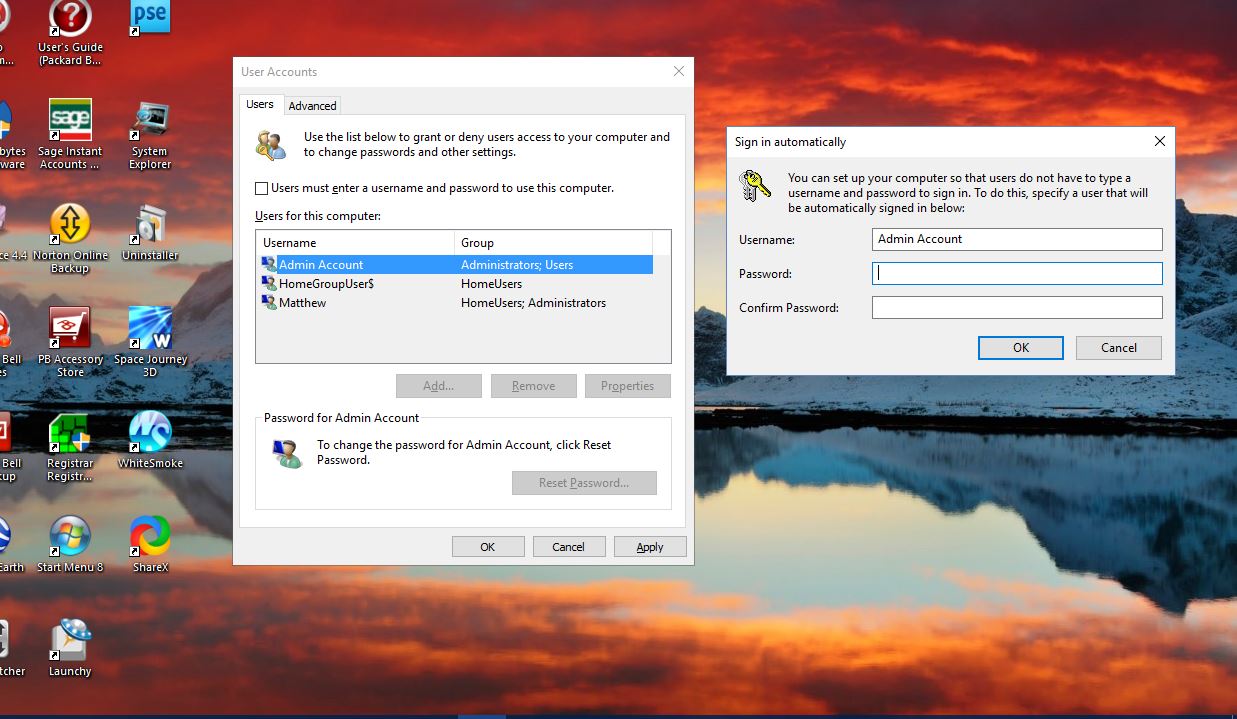
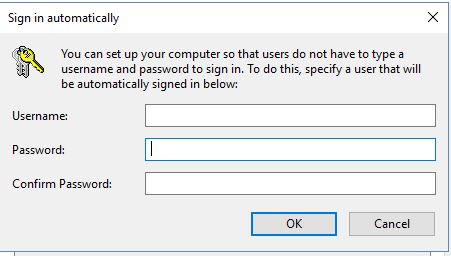
As such, uncheck the option Users must enter a user name and password to use this computer so that it isn’t selected. Then press Apply to open the Sign in automatically window shown below.

Type in a general password for all accounts to log in with automatically. It really doesn’t matter what you enter there with auto login activated. Then press the OK button to close the windows.
Then you won’t need to enter a login password for any user account. You can also configure it so that the auto login works only for one selected user account. To do that, first select the Users must enter a user name and password to use this computer option and then click one of the user accounts listed to add the auto login to.
Next, you’ll need to uncheck the Users must enter a user name and password to use this computer check box. Press Apply to open the Automatically sign in window again, which will now include something in the Username text box. Then enter the same password twice into that window and click OK.

So now you can log in to Windows 10 without entering password. This can speed up the Windows 10 startup quite a bit.


