How to fix the Windows 10 Cortana Search Tool

Cortana is the search tool that you can find files, website pages, system windows and more besides with. If its search box is not working as it should, there are a few ways you could feasibly fix it. Here are three potential fixes for the Windows 10 search tool.
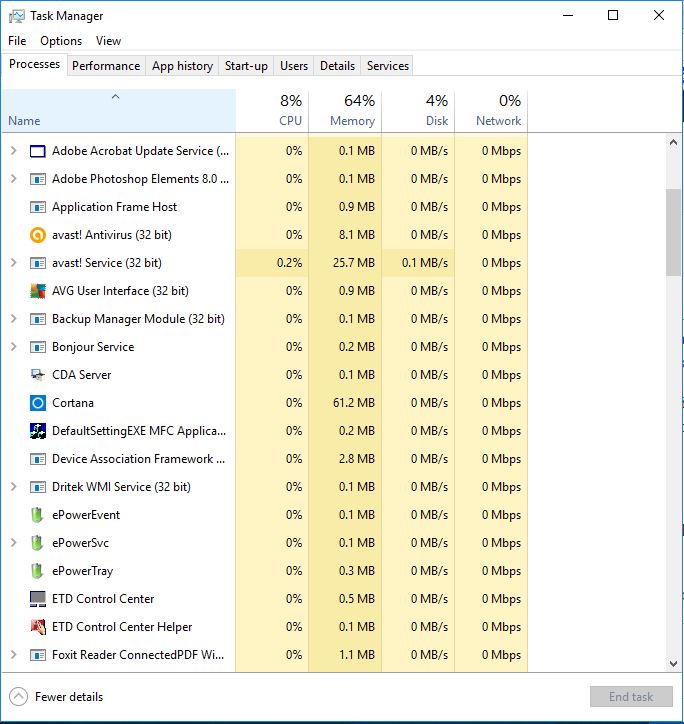
First, you could try a quick fix by restarting Cortana search processes. You can do that with the Task Manager. To open the Task Manager window below, you should right-click the taskbar and select Task Manager. Then select the Processes tab.

Scroll down to a Cortana or Search process. Then you should right-click Cortana and select End Task. This will restart Cortana, which might be enough to fix it.
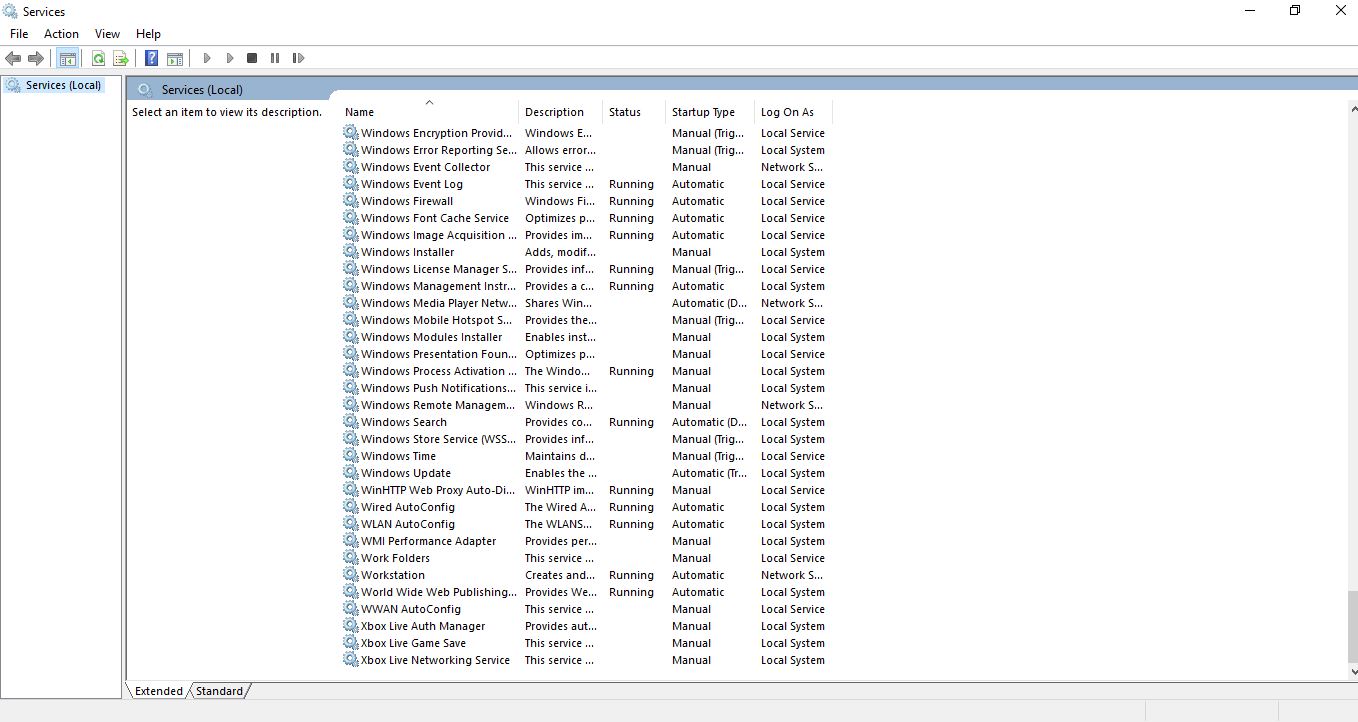
If that doesn’t do the trick, check the Windows Search service. First, open the window in the snapshot below by pressing the Win key + R. Input ‘services.msc’ into the Run text box and press OK button. Scroll down to Windows Search listed on that window.

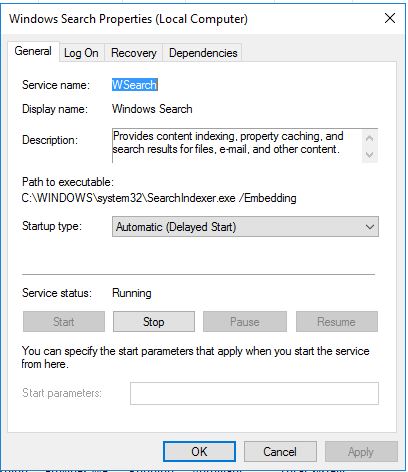
Double-click Windows Search to open the window below. That includes a Startup type drop-down menu with which you can configure Windows Search. Click that drop-down menu and select Automatic. Press the Apply and OK buttons to confirm the new setting.

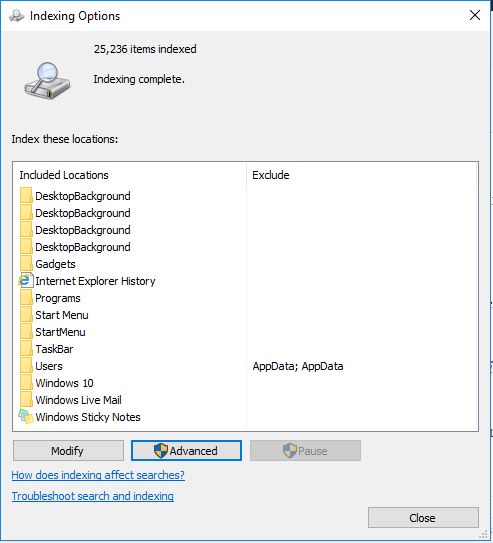
If Cortana search still isn’t working, you can rebuild the search index. To do that, enter ‘control panel’ into Run and click OK. Select Indexing Options to open the window shown below.

That includes a list of your indexed folders. Are there notable folders missing from the index? If so, click Modify to open Indexed Locations. Then you can select to add more folders to the index from there.
Press the Advanced button on the Indexing Options window. Then you can fix the index by clicking the Rebuild Index button. Note that it can take a while for Windows to rebuild the index.
So that’s how you can fix Cortana’s search tool in Windows 10. Try the quick fixes first, and if they don’t do the trick then rebuild the search index.


One thought on “How to fix the Windows 10 Cortana Search Tool”