How to Change Your Password in Garena
Enhanced security is a major trend nowadays. Everybody is looking to offer ways to increase the security as much as possible, especially on the websites where users have their own accounts and which might store some valuable user data. Garena, the gaming and social platform created for the Southeast Asian market, is a good example.
Changing or resetting a password in Garena is no big deal at all. Additionally, changing the password is not the only way to increase your security or the only thing that can be reset if forgotten. Keep reading to see what else you can do to improve your account’s security.
The Thing You’re Here For
Changing the password is quite simple, as all you need to do is go to Garena’s website and do the following:
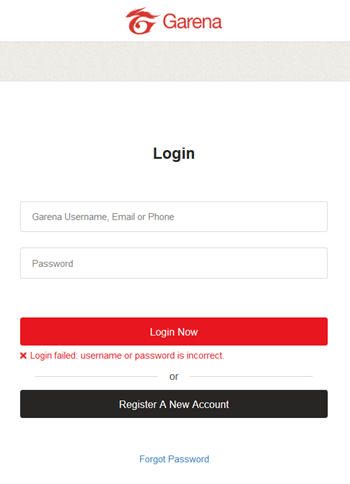
- If you’re not logged in, you can click the Login button. Otherwise, click the “Account” button to go to the “Account” menu. Clicking any of these buttons will trigger a popup window that requires you to type your login information unless you are logged in already.

- When you’re finished, click on the “Login Now” button. If you’ve clicked the “Account” button previously, you’ll be taken to the “Account” menu. If not, go there by clicking the said button.

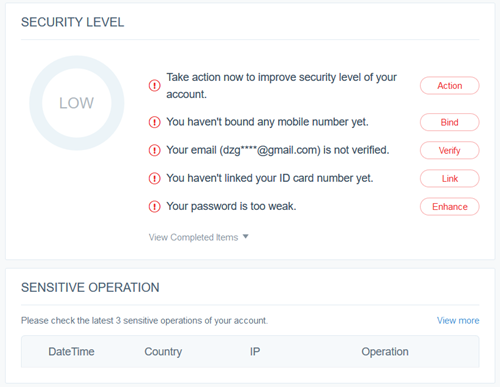
- You will be taken to the Garena’s Account Center. As soon as you open it, you’ll see that there’s a security level indicator. If it says that the password is too weak, click on the “Enhance” button next to that message.

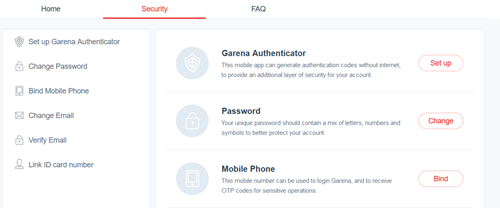
- This will take you to the password change interface. Another way of reaching this menu is by clicking on the “Security” tab, and then clicking on the “Change” button in front of the “Password” option. Type in the required information, and then click on the red “Change” button.
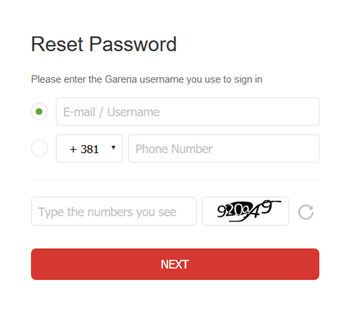
 Note: You can click the rounded arrow next to the numbered code to change it if you’re having difficulties reading the current one.
 - The website will show you a notification message, saying that you have successfully changed your password. It will then take you back to the settings by default within a few seconds.
Changing the Email Address
The Account Center also lets you change your email. The information you need to enter is the same information required for a password change:
- The new mail address you would like to change to
- A confirmation of that same email address
- Your current password
- The verification code shown on the screen (to verify you are human)
Verifying Your Email Address
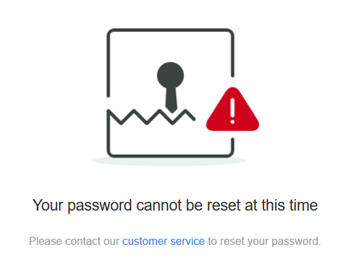
In Garena, verifying your email address allows you to reset your password at any time. If you try resetting your password from an address that is not verified, you’ll get an error message that says “Your password cannot be reset at this time.” That being said, you need to be logged in to Garena to verify your email address.
To verify your email address, you need to go to the Account Center and enter your email address. You should receive a verification code in an email if you’ve entered the address correctly. The verification code is there so you can enter it when requested. By typing the code, you will have your account successfully verified.
Setting Your Phone Number
By binding your phone number to your account, you can use it to access Garena and receive special codes that warrant increased security. Not unlike the email verification process, you need to type the number and then click the button on the following page to get your code via a text message. After you’ve received it, type it in and then enter your current password. After doing this, you’ll manage to bind your phone number and your Garena account.
Installing the Authenticator
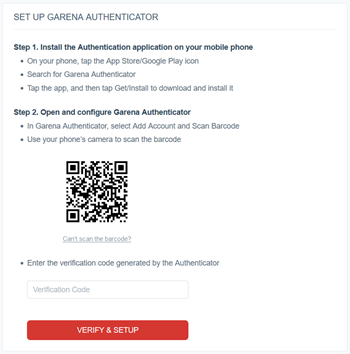
Garena has its own Authenticator app, which makes two-step verification possible. This is a well-known login method which makes use of both your computer and your smartphone each time you log in, thus allowing for increased security.
Before you decide to set up this app, you need to have your phone number and Garena account bound. If that’s already the case, find the Authenticator option in the Security app and request the verification code.
After doing this, all that’s left is to follow the prompts that appear on the screen. Note that you need to use both your smartphone and your computer to finish installing the Authenticator.
Setting the ID Card Number
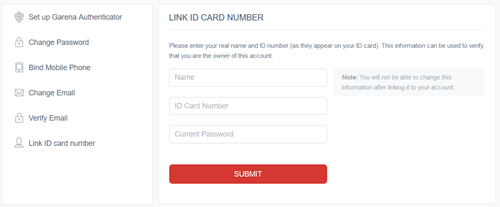
For the sake of increased security, you can link your ID card with your Garena account by entering the exact ID card information. Note that, once set, you cannot change this afterwards.
Security Tips
Security is a recurring issue nowadays, but fortunately, Garena is on top of the cybersecurity game. If you’ve forgotten your selected email or password or just want to change one or both of those, Garena makes all of this possible.
It is always best to come up with a strong password, one that has it all – upper and lower-case letters, numbers, and additional characters, such as dashes. However, no matter how strong your password is, you should also verify your email as quickly as possible so you can reset your password whenever you feel like it. Otherwise, you may have to contact customer service and ask them to recover your account if you lose or forget your password.
Have you ever forgotten a password? What was it like? What would you have done differently if that were to happen to you today? Share your thoughts in the comments below.


 Note: You can click the rounded arrow next to the numbered code to change it if you’re having difficulties reading the current one.




7 thoughts on “How to Change Your Password in Garena”