How to Automatically Forward Specific Emails in Gmail
In Gmail, creating email groups is just one way of making your life easier when it comes to messaging others. One little trick that’s often overlooked is auto-forwarding. With this feature, you can automatically have certain emails forwarded to a specific person without even pressing a button. If you want to save time forwarding emails in Gmail, you’ll definitely want to follow this guide.
How to Setup Automatic Forwarding in Gmail
You can automatically forward specific emails in Gmail with the help of email filters. The entire setup is long and confusing, but everything gets easier once you’re done. Let’s start with setting up auto-forwarding in Gmail first.
- Open Gmail on the web.
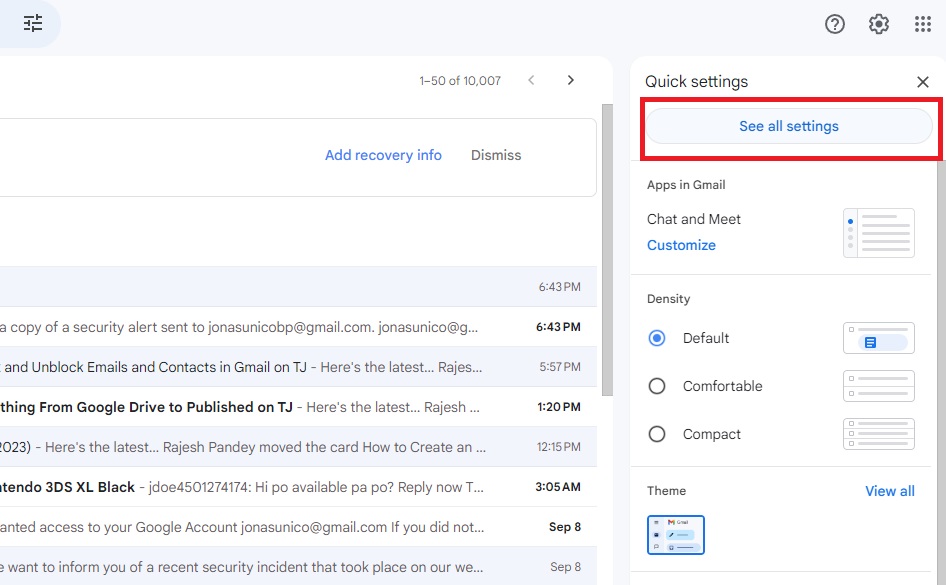
- Click the gear icon.
- Select See all settings.

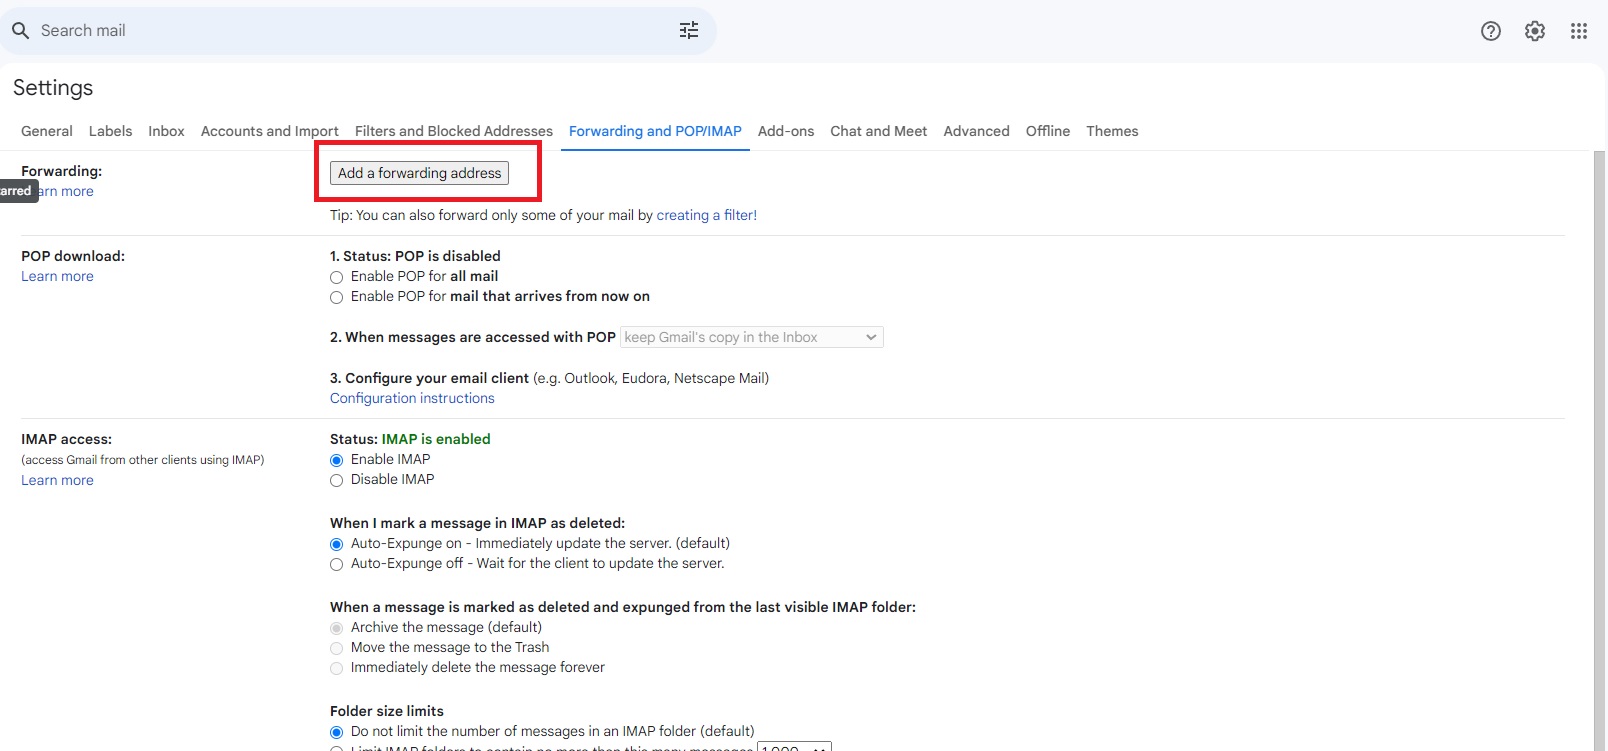
- Click Forwarding and POP/IMAP.
- Select Add a forwarding address.

- Type in the email you want to forward messages to and click Next.
- Confirm the email in the new window by clicking Proceed.
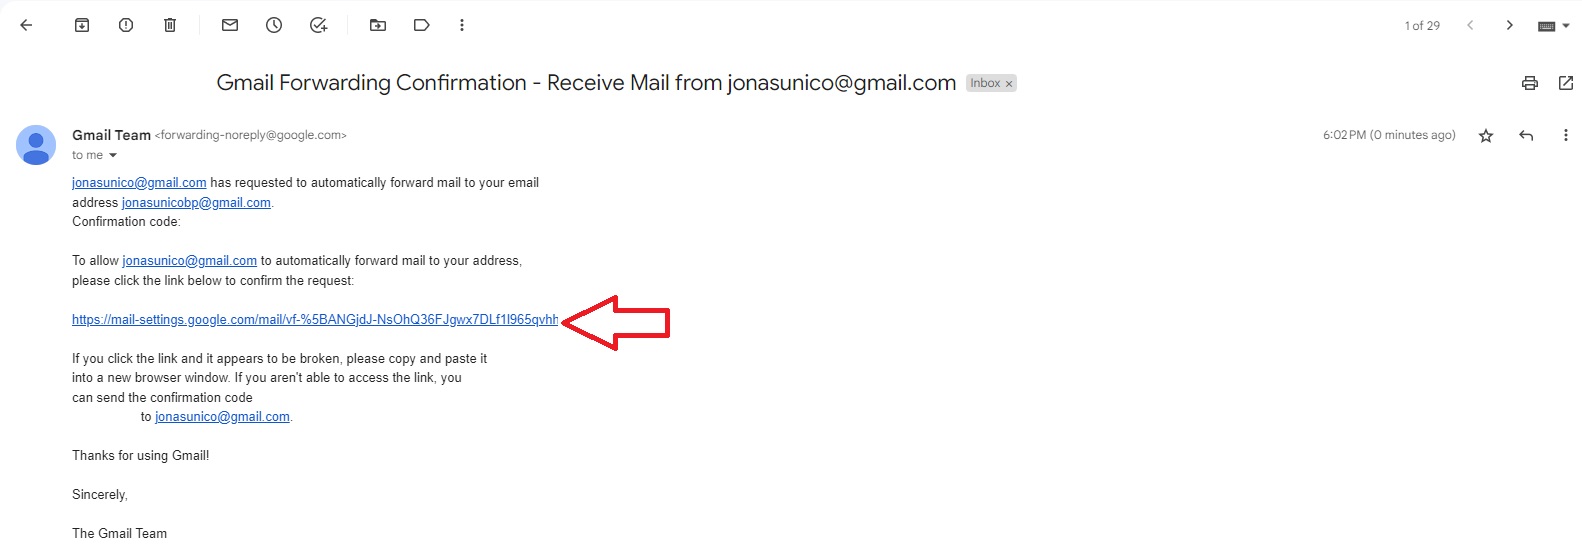
- Have the forwarding email accept the forwarding confirmation sent to their inbox.

After setting up automatic forwarding, you can archive all emails in Gmail for a cleaner inbox.
How to Automatically Forward Specific Emails in Gmail
Once the forwarding email has been set up, the next step is to create the right filters so that only specific messages are forwarded. Without this, every email you receive will be sent to your forwarding address.
- Open Gmail on the web.
- Click the gear icon on the top right.
- Select See all settings.
- Click Forwarding and POP/IMAP.
- Select creating a filter!

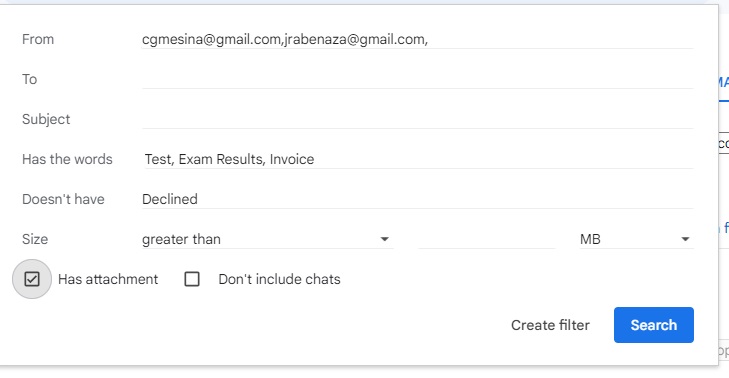
- Enter your filter criteria. You can put in as many of the criteria as you want to make it more specific, including the Sender email ID, Subject, size, and more.

- Once done, click Create filter.
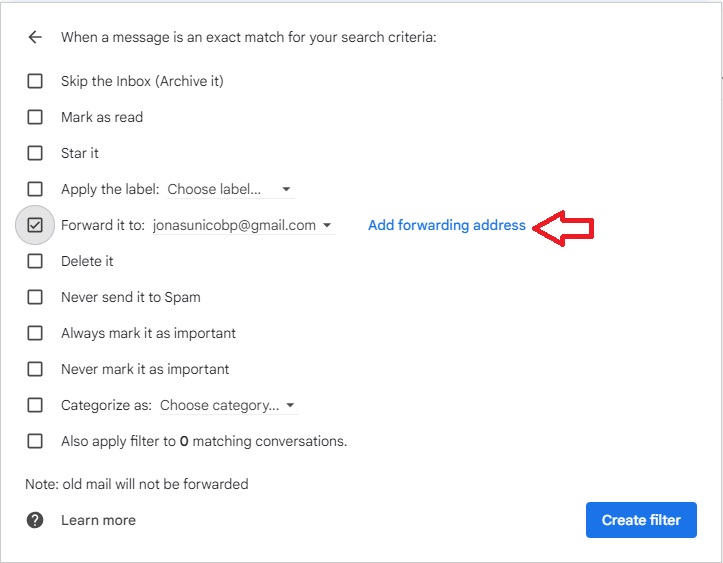
- In the new menu that appears, toggle Forward it to: and select your forwarding address.

- Click Create filter.
To better track forwarded emails, you can create a Gmail folder for them.
How to Edit or Remove Gmail Filters
The filters you make in Gmail can always be customized at a later. You’re free to make any changes or even delete it whenever you want to. Follow these steps.
- Open Gmail.
- Click the gear icon located in the top-right.
- Select See all settings.
- Click Filters and Blocked Addresses.
- Click either edit or delete.

How to Stop Email Auto-Forwarding in Gmail
Eventually, you might want to stop auto-forwarding your emails to another ID. If that’s the case, here’s what you’ll need to do.
- Open Gmail.
- Click the gear icon.
- Select See all settings.
- Toggle Disable Forwarding.

Become a Master of Gmail
There are several little-known features in Gmail that can make you more productive once you activate them. Being able to forward specific emails to certain addresses is one of them. Next up, you might want to learn how to fix queued emails in Gmail.
FAQs
A: You can only manage email forwarding using the desktop version of Gmail. You also can’t manage your filters using the mobile app.
A: The original copy and its contents will stay in your inbox like a regular email. The person receiving the forwarded mail will receive the exact copy, but they’ll know they aren’t the original recipient of the message.
A: No, they won’t be able to see it. Unlike being BCC’d or CC’d into an email thread, the original sender won’t be a part of the conversation in the case of a forwarded message.


