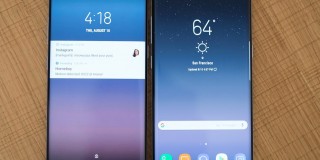
How to Backup and Restore Samsung Galaxy Note 9

If you are a proud owner of the Samsung Galaxy Note 9, then you deserve the biggest congratulations. The Galaxy Note 9 is widely considered to be one of the best smartphones that Samsung has ever launched. The smartphone is loaded with the coolest features that will appeal to a variety of users.
Whatever you are looking for in a smartphone, the Note 9 is odds on to provide you with it.
Smartphones can be likened to companions nowadays. The majority of our daily communications take place via our smartphones. Important contacts are always stored on our phones, and so are the text messages we receive from work, family, and friends. Call logs help us keep track of the people we have been in touch with.
Lots of memories that are translated to pictures are stored in our smartphones every day.
The simple truth is that our generation relies on the smartphone too much. The everyday smartphone does not just work as an ordinary handset. It also acts as a protector of our data. And to be honest, it is better to lose your smartphone than to lose your data that is stored on the device.
This is why it is very important to make sure that all the data on your smartphone is backed up. Backing up your data will help your restore all data if and when your data is deleted from your device.
Various scenarios can lead to loss of data on your device. Your phone could get stolen or fall from your pocket. Your Galaxy Note 9 could also experience a malfunction where you can lose data due to a factory reset. You could potentially lose data while you are updating your phone or a variety of unfortunate events could occur to your device.
Hopefully, none of this kind of scenarios plagues your smartphone because the Samsung Galaxy Note 9 is a very expensive device. Nevertheless, to make sure that your data does not get wiped away if something bad happens to your device, it is important always to back up your data beforehand.
With the best backup mechanism, you can back up your data based on your preference, ranging from a few hours to every few days. After purchasing your Galaxy Note 9, you should make it a priority to back up all data.
This guide is designed to help you learn how to backup and restore your Samsung Galaxy Note 9. The process of performing a backup and restore operation on your Galaxy Note 9 will be achieved by using the Smart Switch.
Smart Switch is designed to help users back up contacts, SMS messages, call logs, pictures, and all important files stored on your smartphone.
Although there are a bunch of backup applications usable on the Galaxy Note 9, the Smart Switch is the process we are using in this guide because it belongs to Samsung. It also happens to be the most frequently updated utility for Samsung Galaxy Note 9 owners.
Without further ado, here is a detailed guide on how you can backup files and restore data on the Galaxy Note 9.
How to Backup and Restore Samsung Galaxy NOTE 9
Users of the Galaxy Note 9 can use the Smart Switch function to back up Samsung Notes, Internet Browser Data, Samsung Health Data, Calendar, Contacts, Images, Reminders, Emails, Documents, Videos, Music, Home Screen settings, Soundcamp, Clock, Voice Memos, Messages, and the entire settings of the Galaxy Note 9.
Backup Galaxy Note 9
1. Download the Smart Switch app and install on your PC
2. Launch the Smart Switch app
3. Connect your Samsung Galaxy Note 9 to the PC
4. Allow any permission your Galaxy Note 9 requests for
5. Your Galaxy Note 9 should automatically show a Smart Switch screen
6. Once you have been connected to the Smart Switch on your computer, tap on the Setting gear icon > Preferences
7. Under the preferences option, click on the backup folder location
8. You can then select the Backup Items tab where you can choose the data that you want to back up. The best option is to click on all options
9. After choosing these backup items, tap the OK button to head back to the Smart Switch home screen
10. Tap on the Backup button and let the Smart Switch function work its magic
Restore Samsung Galaxy Note 9
1. Ensure that your data is properly backed up before you commence restoring
2. Whenever you decide to restore the data on your Samsung Galaxy NOTE 9, launch the Smart Switch program on your computer
3. Link your Galaxy Note 9 to your computer
4. On the Smart Switch program, select the Restore button, and it will immediately start restoring all data
The instructions highlighted below are all you need to follow to perform a backup of all the files on your Galaxy Note 9. To check the backup details, you can select the Preferences tab and click on the Details icon that is located in front of the device info.
Henceforth, you can check the details of all the backups that have been created by Smart Switch. You can select the View Folder option to access the backup folder. It is a good contingency plan to make a few copies of the folder to ensure that your data remains as secure as possible.


