How to Enable and Disable VSync With an Nvidia Graphics Card
By now, pretty much everyone should have VSync systems on their PCs, considering that the technology has been out for years. It allows you to work around monitors that can’t quite get the same framerate as newer graphics cards (especially for games where every frame matters). But for all the good it can bring, it’s far from a perfect solution for modern Nvidia graphics cards and more powerful monitors. Instead, the proprietary G-Sync system made by Nvidia should be your go-to if you want a visually pleasing environment.
To swap to the newer graphics setting, you’ll need to know how to enable and disable Vsync before you can turn on its more advanced version.
How to Enable and Disable VSync in Nvidia Control Panel
TPC users who have a dedicated Nvidia graphics card installed on their PC (and are using it as the main card for the monitor) should have Nvidia Control Panel available by default on their device. This software helps automatically fetch Nvidia drivers and customize the graphics card’s performance for both the operating system and individual apps.
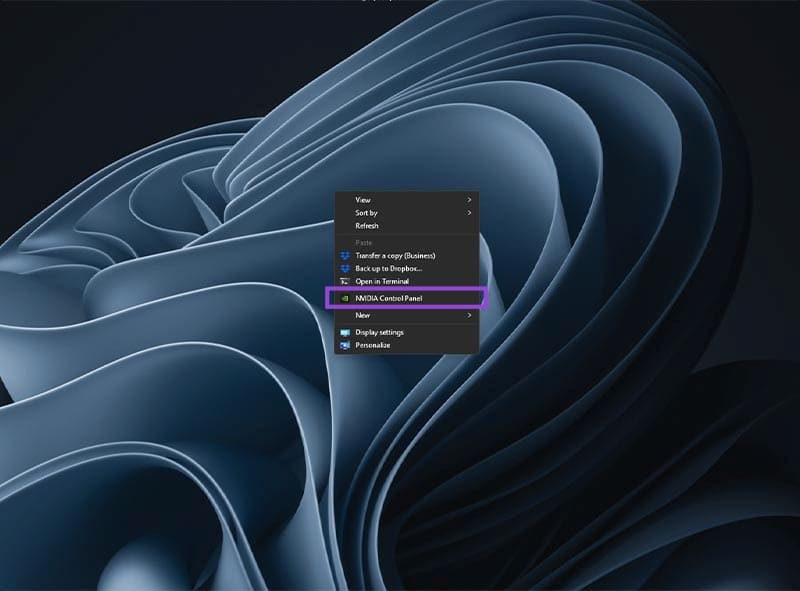
Step 1. Right-click somewhere on your desktop (so you’re clicking on an empty space) to bring up the main OS context menu.
Step 2. Select “Nvidia Control Panel” from the list. The panel will bring you to the main menu.
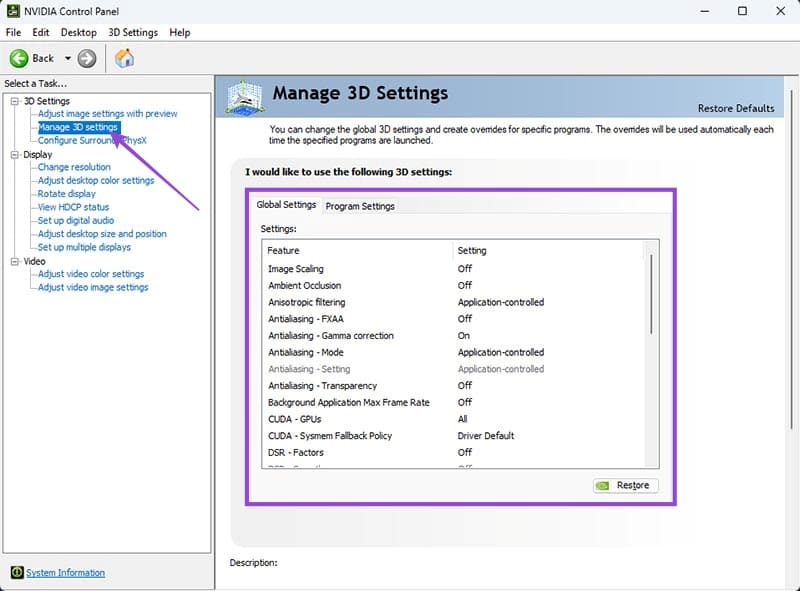
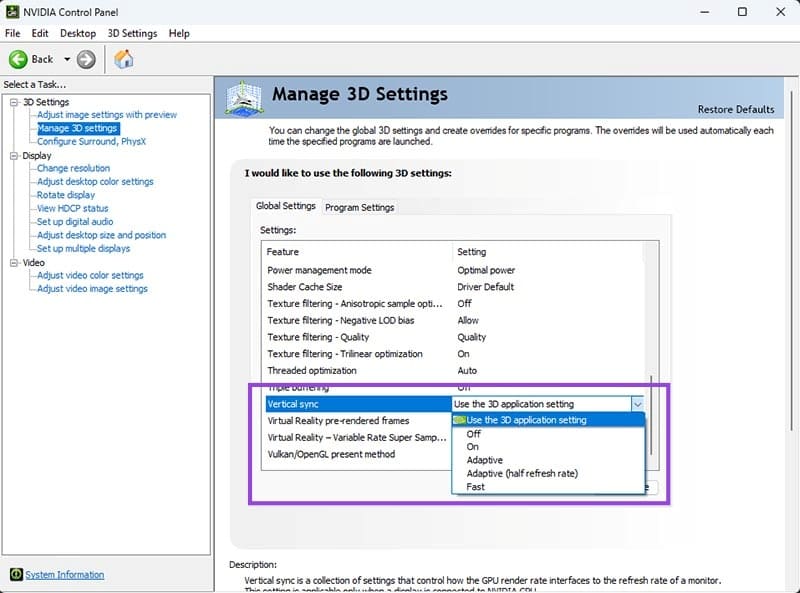
Step 3. On the toolbar on the left (“Select a task” pane), select “Manage 3D settings” under “3D Settings.” You’ll be brought to the global presets list, which contains a smaller panel with a scroll bar.
Step 4. Scroll through the settings until you reach Vertical Sync.
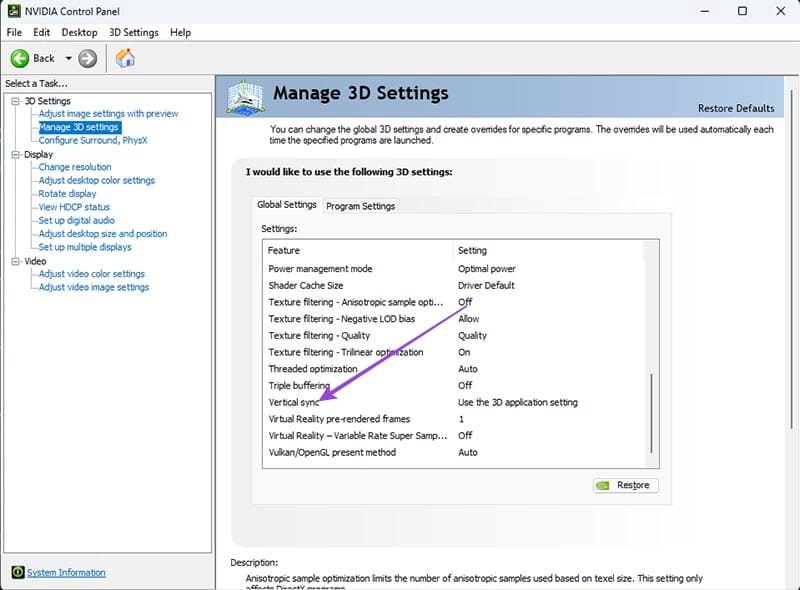
Step 5. Double-click on the value that’s showing to the right of “Vertical Sync.”
Step 6. To turn on VSync, put the value to “On.” To turn off VSync, set the value to “Off.”
Step 7. Click on “Apply” in the bottom-right corner and close the Nvidia Control Panel completely since it’s pretty heavy on benchmark performance.
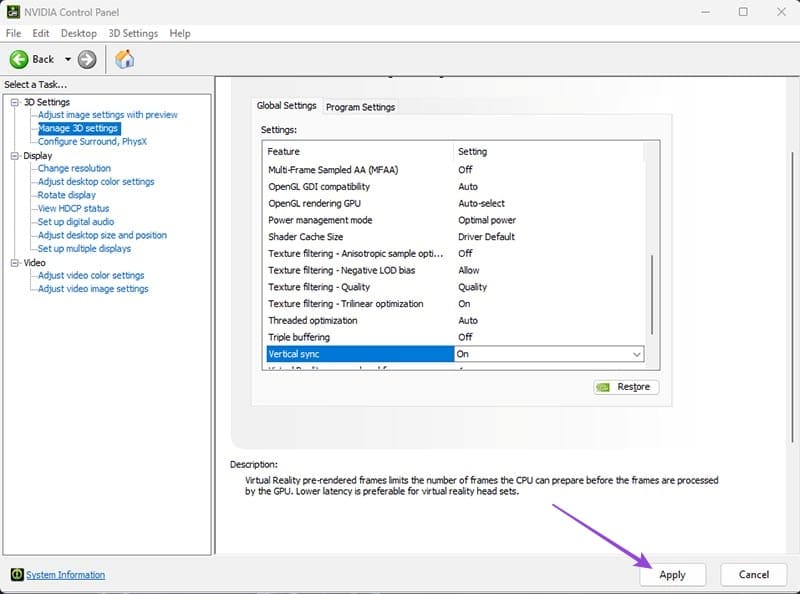
The default value “Use the 3D application setting” means the system will switch between using VSync or not based on the app’s general requirements, which might not be optimal.
How to Enable and Disable VSync in Nvidia App
If you’ve downloaded the dedicated Nvidia app for your device, you might’ve replaced the Nvidia Control Panel with the app for most or all default settings. Luckily, you can still enable and disable VSync through the app.
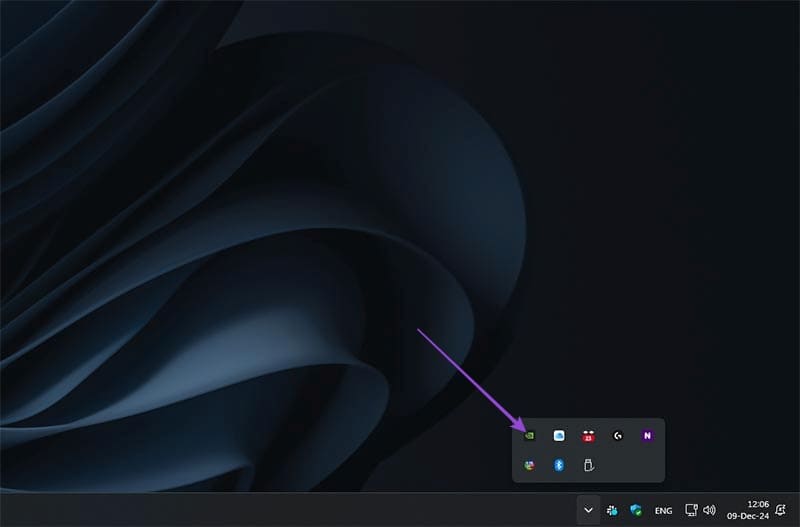
Step 1. Open the Nvidia app (it should be available in your taskbar on the right if it’s always running in the background).
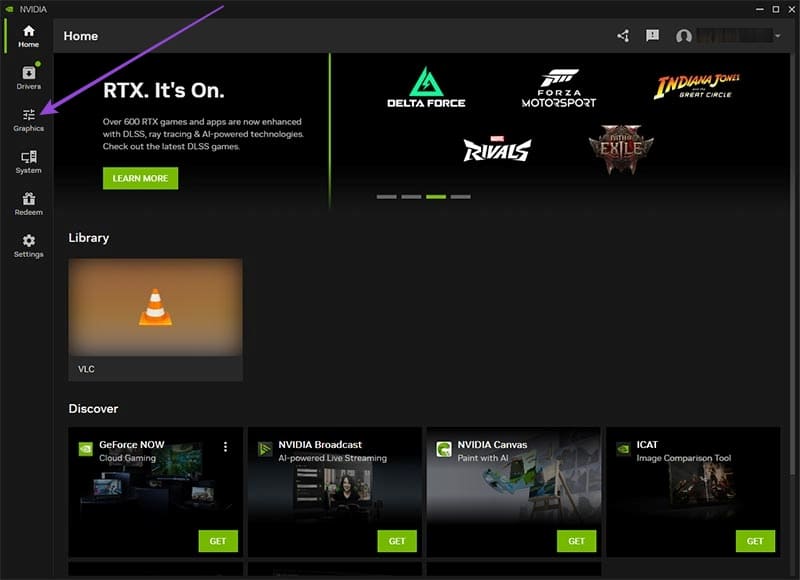
Step 2. Go to the “Graphics” tab on the vertical toolbar on the left.
Step 3. Switch to “Global settings.”
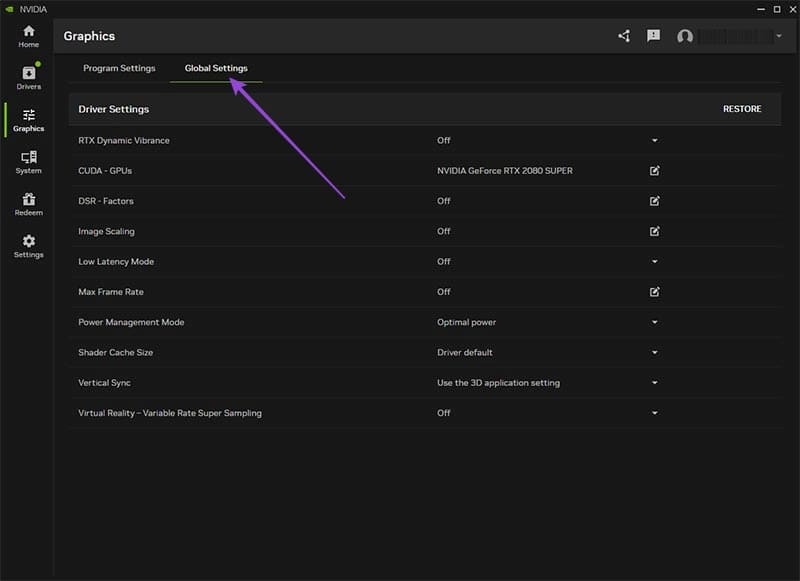
Step 4. For “Vertical Sync,” click on the drop-down menu on the right, then select “On” or “Off,” depending on whether you want to enable or disable VSync for the system.
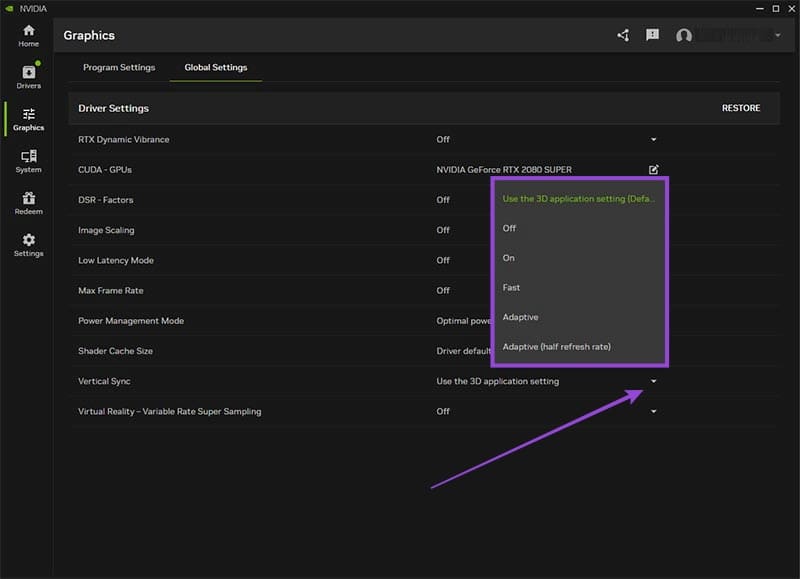
Step 5. Close the app and it should automatically apply the setting.
Should You Use VSync on Nvidia Graphics Cards?
For most newer monitors, the general VSync is obsolete compared to the proprietary G-Sync tool that Nvidia updates (the AMD equivalent is FreeSync).
VSync limits the output rate of your graphics card to match the monitor’s setting. For example, if your monitor works at 60 Hz, VSync will force the GPU to send only 60 frames per second at a fixed rate, even though the GPU is constantly processing newer ones. While the monitor is processing the image, it will discard any frames that were supposed to be sent after. When the next refresh interval comes, the monitor will accept the newest available frame and repeat the process.
However, when the GPU is significantly faster than the monitor, it can cause significantly more frames to get dropped than usual, causing stuttering. Conversely, if the GPU starts working too slow, it can cause a significant disconnect between the two systems which drops the app’s FPS further.
G-Sync essentially flips the concept around. Instead of limiting when the monitor accepts new frames, it will change the monitor’s refresh rate (within reason) to align it with the GPU’s output. As such, the monitor will attempt to display as many frames as it can whenever they are available.
Naturally, G-Sync only becomes effective at higher refresh rates and more powerful monitors, with at least 144 FPS required to see much of a difference. Below that, the differences become pretty minimal, but can sometimes be noticeable. But, if you see a lot of screen-tearing while using only VSync, it might be worth looking into either disabling it or switching to G-Sync. Additionally, VSync and G-Sync (and Freesync) implementation is done by the monitor manufacturer, rather than the graphics card provider. Most higher-end monitors will have at least VSync and one other option, but make sure to match your monitor to the graphics card.


