How to Fix Error 0x80070035 The Network Path Was Not Found in Windows
The Error Code 0x80070035 has many possible causes, but is most commonly related to network issues when accessing shared folders and files.
This article will clue you in on the possible reasons for this error code, and give you a range of ways to troubleshoot and hopefully solve it.
What Causes Error Code 0x80070035?
Some of the major reasons for the “network path was not found error” are:
- Incorrect path – Sometimes the error is straightforward: you’ve entered the wrong address, or the device you want to access has changed its name.
- Antivirus and firewall block – Your malware and network protection software might be limiting your access to certain network features and locations.
- Connectivity issues – There could be connection problems between your machine and the local network.
- DNS – DNS resolution is vital for translating domain names into IPs. Failure to resolve DNS correctly will prompt this error.
- Deactivated SMB and NetBIOS – The Server Message Block (SMB) is one of the protocols (along with the older NetBIOS) that allow computers to communicate and share files with each other. If they’re not working, then you’ll have problems.
- Network settings – There are many ways in which your connection settings might prompt this error, including incorrect permissions, disabled network discovery, and disabled sharing.
This is by no means an exhaustive list, but should give you some idea of the major issues that cause this error code. More important than knowing the cause of the problem, though, is knowing how to fix it.
Fixing the Network Pathing Error
Here are a range of possible solutions to help you deal with error code 0x80070035. It’s a good idea to start with the simplest solutions, and then progress to the more advanced fixes.
Fix 1: Enable Drive Sharing
Shared drives are usually enabled by default. But if, for whatever reason, they aren’t, here’s how to enable sharing again:
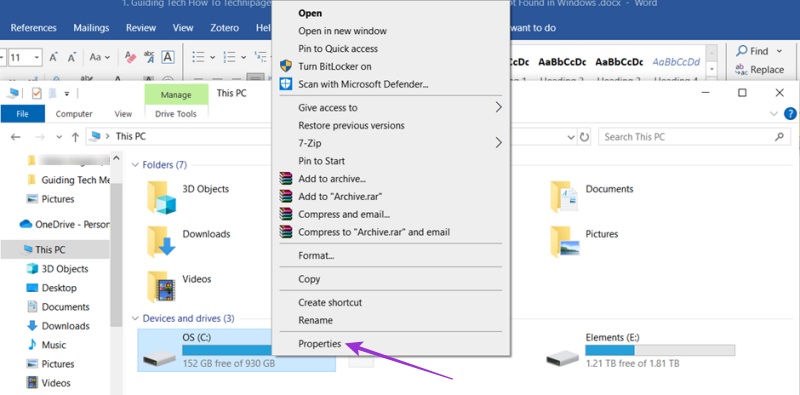
- In Windows Explorer (press Win + E on your keyboard), right click your drive and select “Properties.”

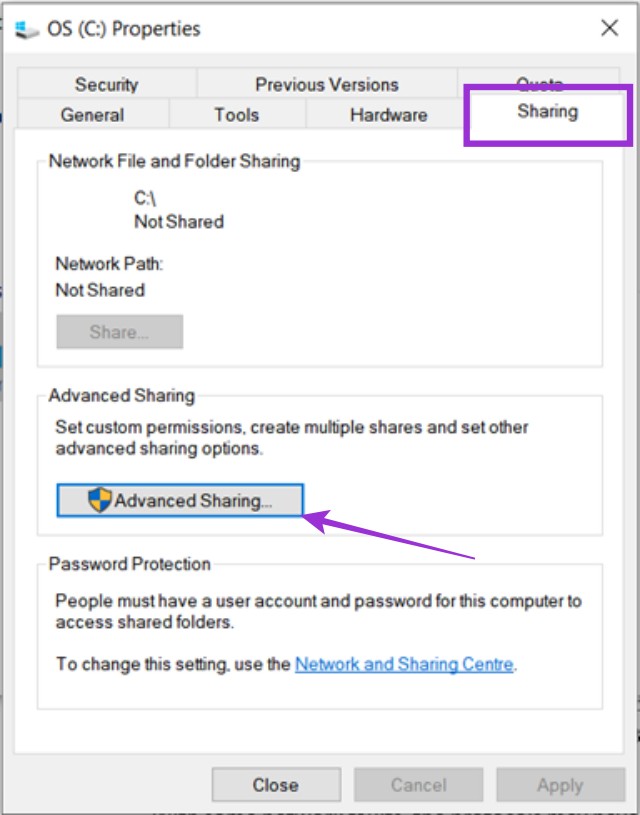
- Navigate to the “Sharing” tab and click the “Advanced Sharing” button.

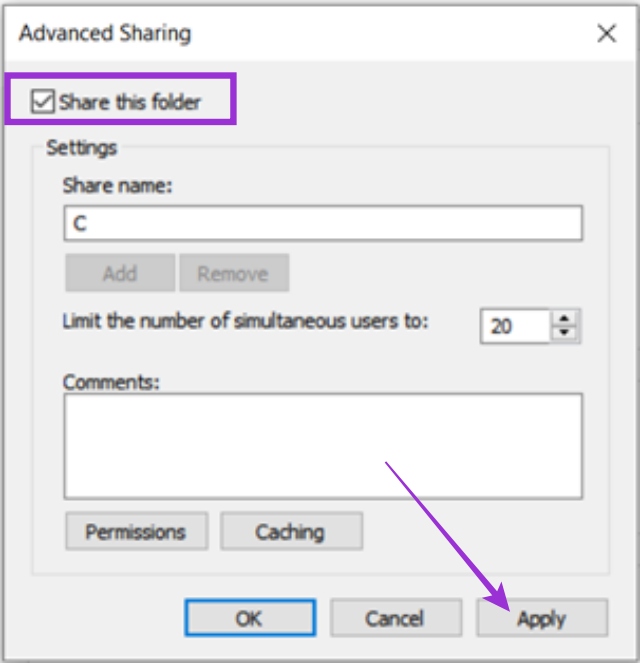
- Ensure that the “Share this folder” box is ticked, and then select “Apply.”

Fix 2: Activate NetBIOS
Another possible fix is to ensure that your sharing protocols are working properly. To check the status of NetBIOS, do the following:
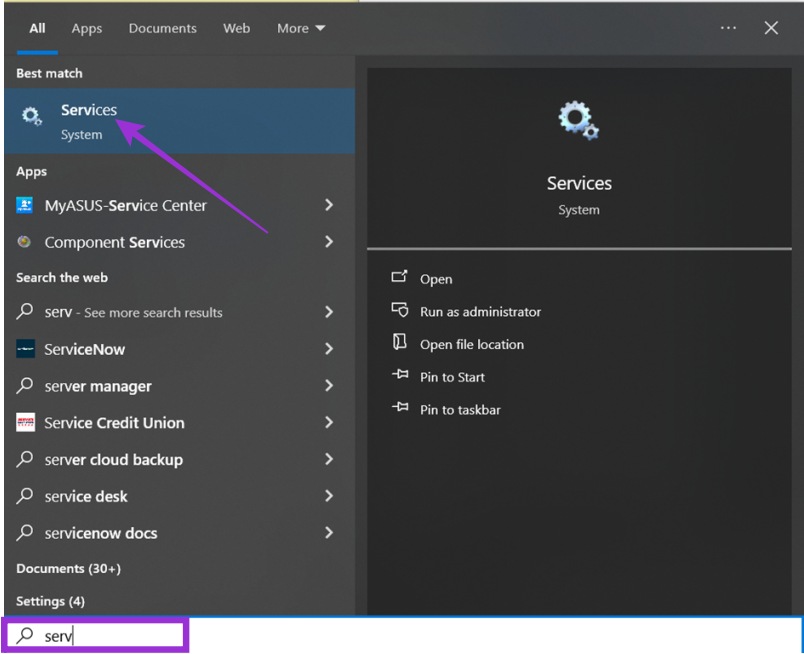
- Type “
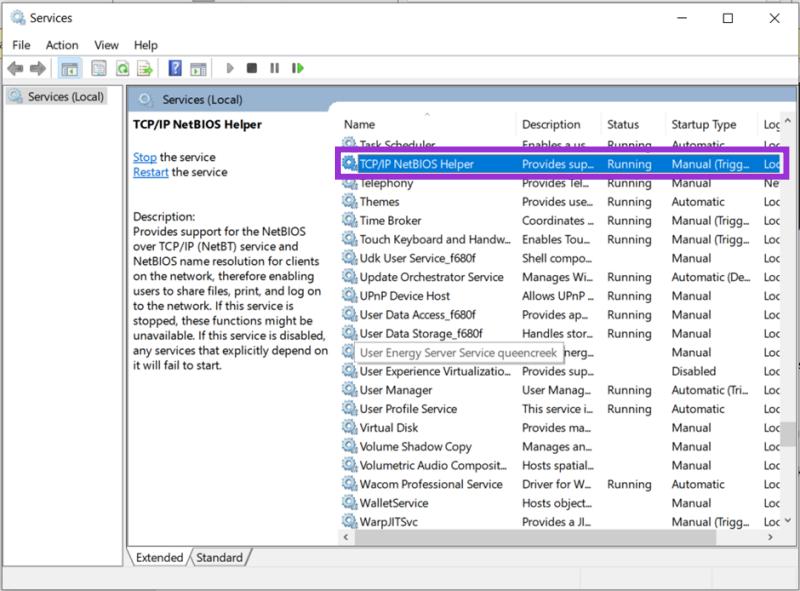
Services” into the search bar and open the app when it appears in the list.
- Navigate all the way down to “TCPIP/NetBIOS Helper” and check its current status.

- If the service is off, right click “TCPIP/NetBIOS Helper” and click “Start.”
Fix 3: Reset to NetBIOS
The reason for some network faults is that the protocols may have become muddled. You can reset your TCIP to NetBIOS to see if it helps. Here’s how:
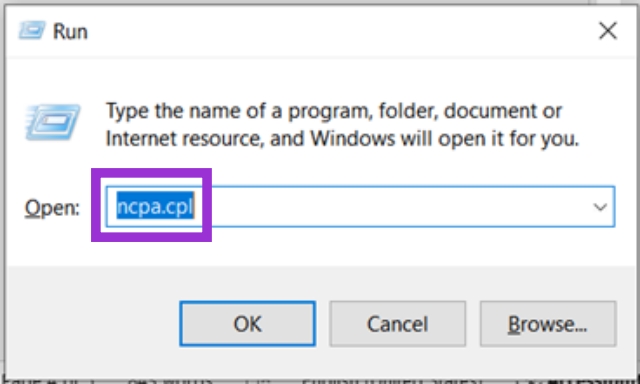
- Open “Run” (press Win + R) and type “
ncpa.cpl” in the command box.
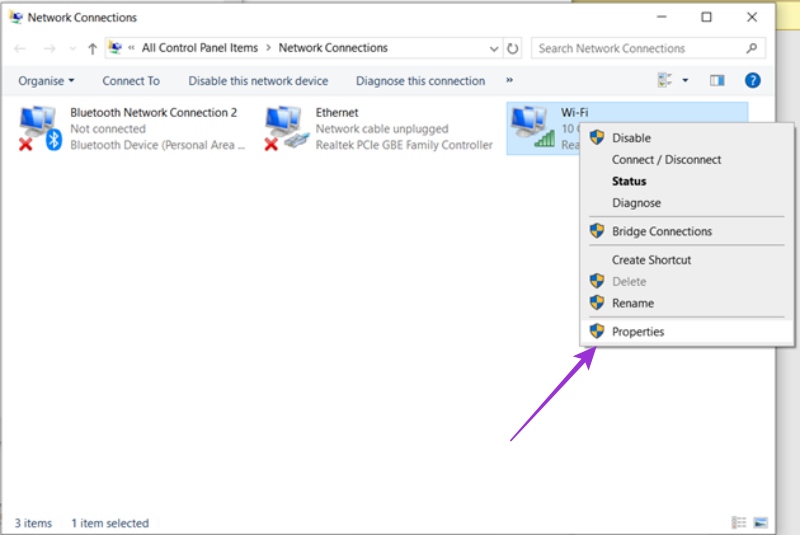
- Choose your network, in this case Wi-Fi, and right click to select “Properties.” You’ll need admin privileges to proceed.

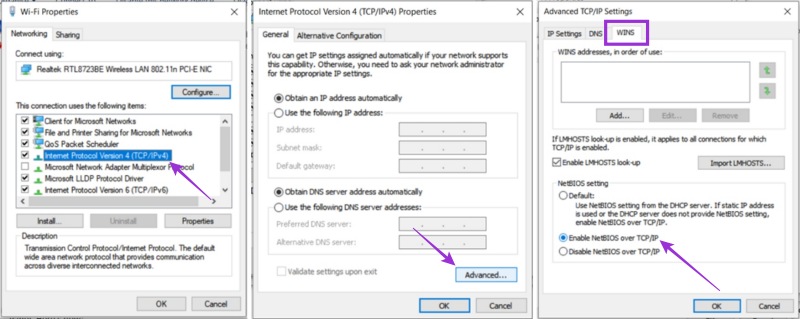
- Scroll down the list to find “Internet Protocol Version 4(TCP/IPv4)” and double click it.
- Hit the “Advanced” button at the bottom of the window.
- Under the “WINS” tab, manually enable NetBIOS by selecting “Internet Protocol Version 4(TCP/IPv4).”

- Click “OK” for the changes to take effect.
Fix 4: Enable SMB Sharing
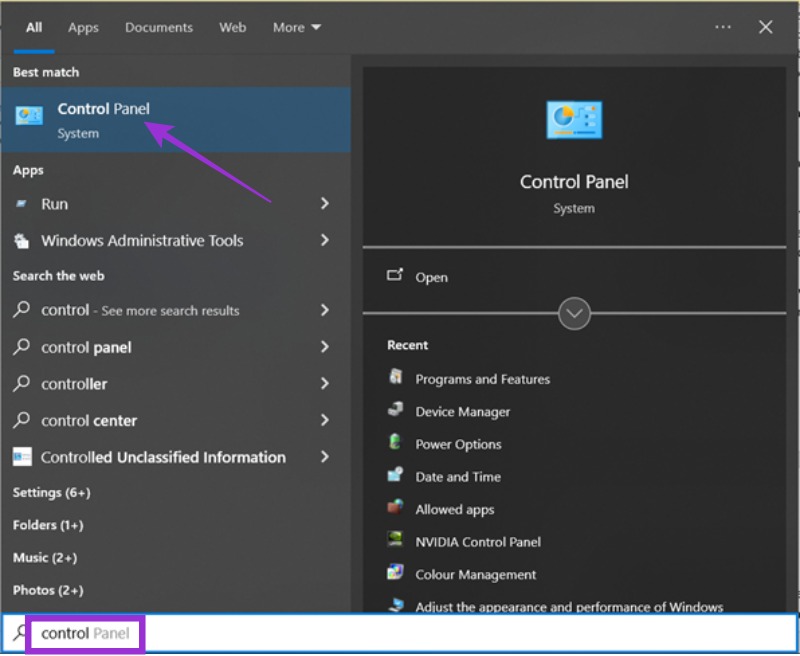
Another protocol to check is the Server Message Block, which can be accessed through the Control Panel. Here’s how:
- Open “Control Panel” by typing the term into the search bar.

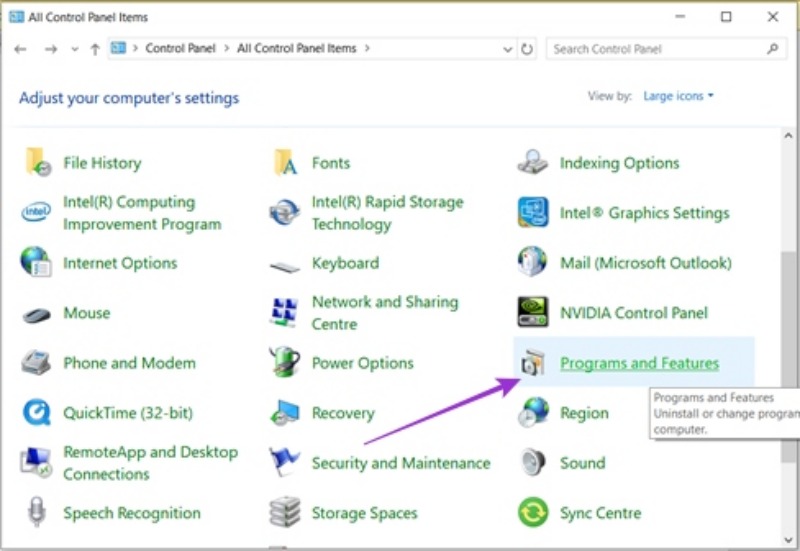
- Select “Programs and features.”

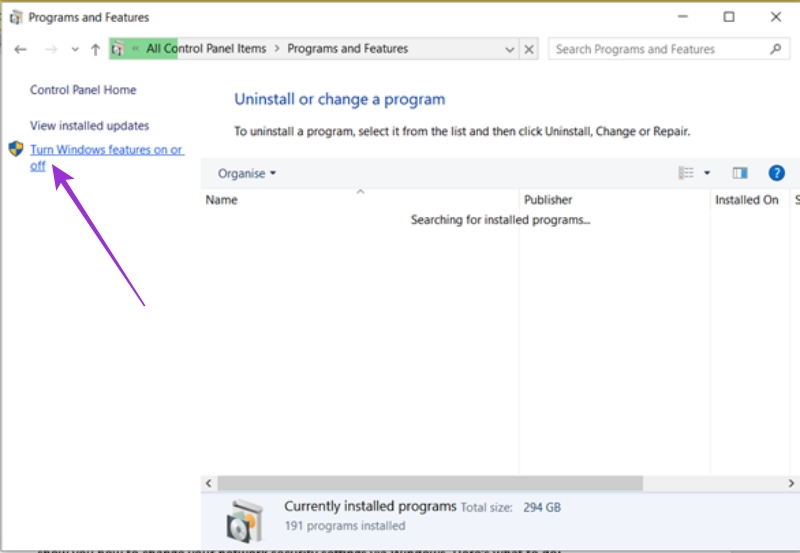
- From the side panel, click “Turn Windows features on or off.” You’ll need administrator privileges to do this.

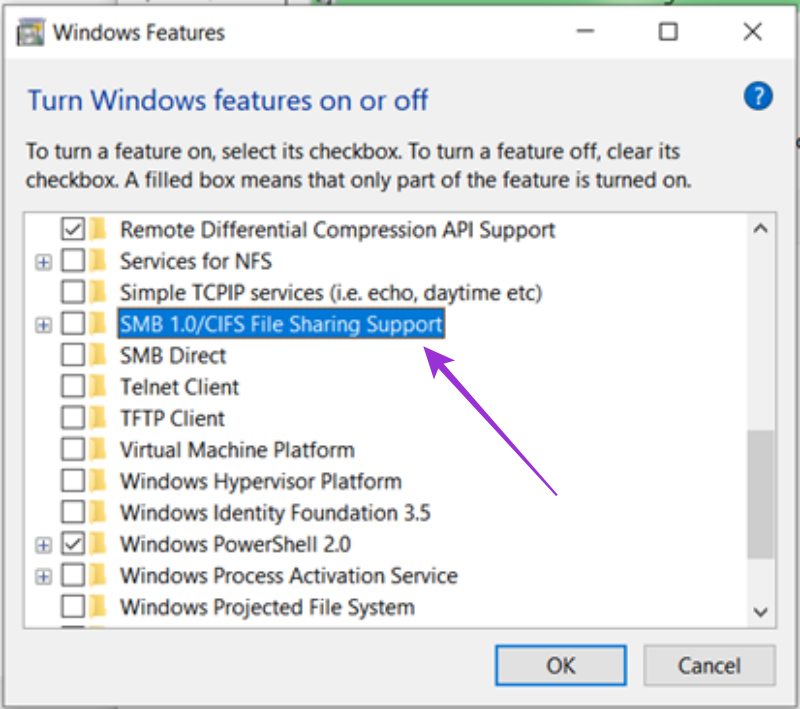
- In the window that opens, scroll down to “SMB 1.0/CIFS File Sharing Support” and check the parent folder.

- Click “OK.”
SMB file sharing should now be enabled.
Fix 5: Change Your Network Security
While every antivirus and firewall program approaches network security in a different way, you can still change your network security settings via Windows. Here’s what to do:
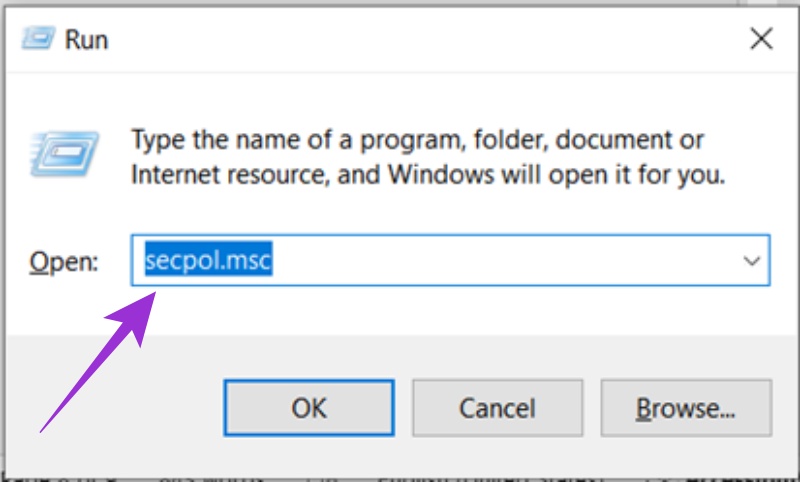
- Open the “Run” tool (press Win + R).
- Type in “
secpol.msc” and click “OK.”
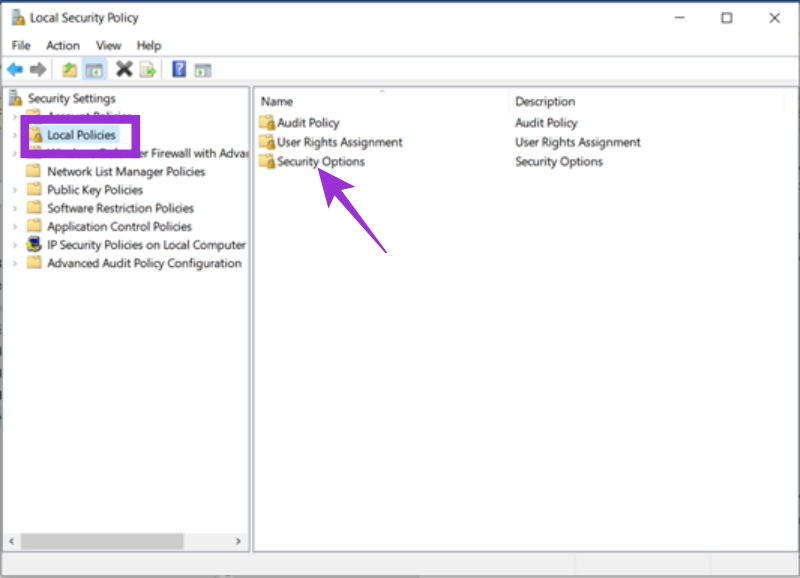
- In the side menu, select “Local Policies” and then the subfolder “Security Options.”

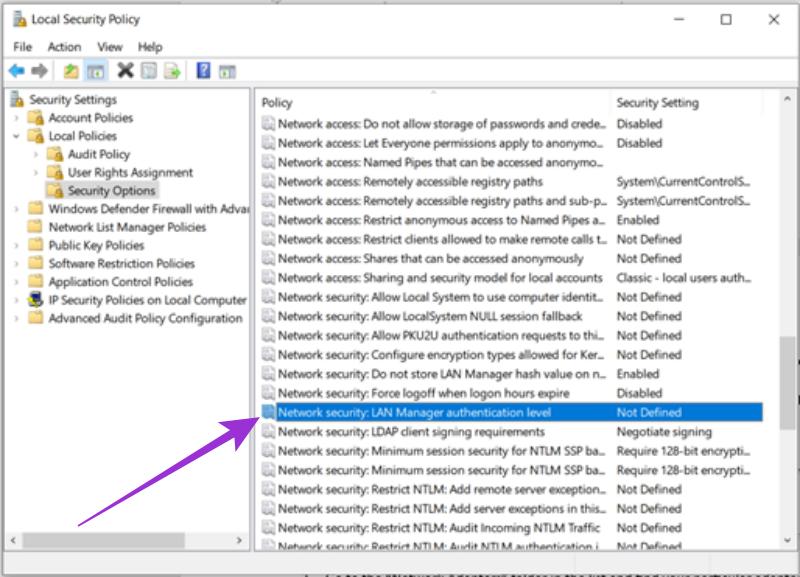
- Navigate to “Network security: LAN Manager authentication level” and double click it.

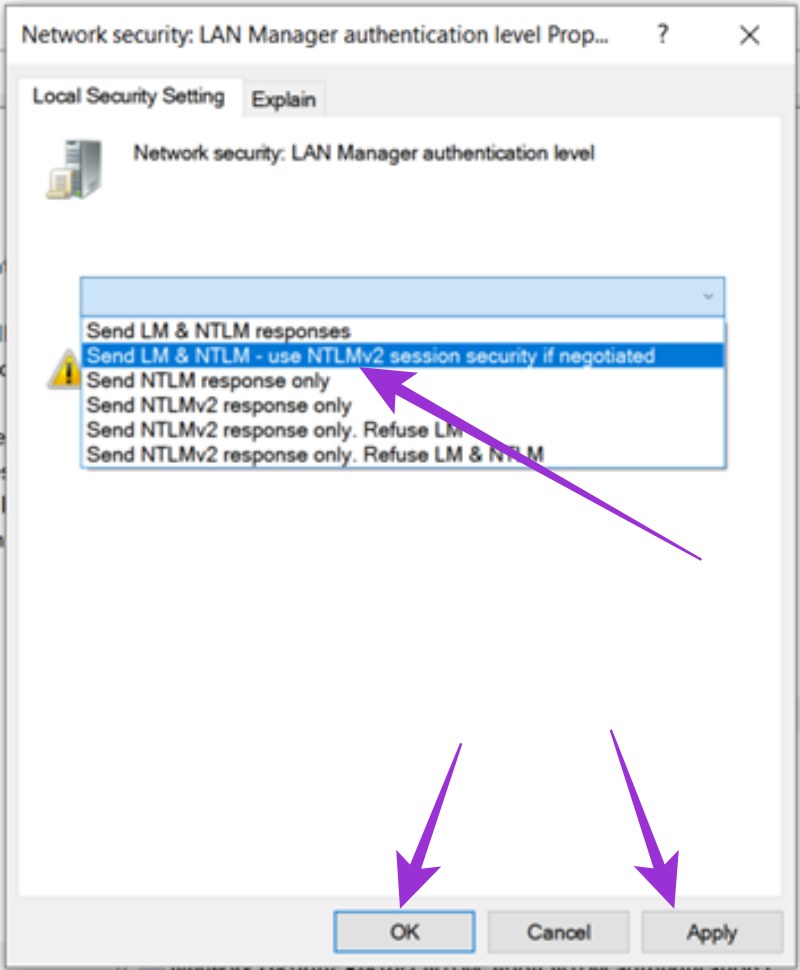
- From the dropdown menu in the popup, select “Send LM & NTLM-use NTLMv2 session security if negotiated,” then click “Apply” and “OK.”

Fix 6: Reinstall Your Network Adapter
If your network adapter is the root cause of this error, a reinstall might help. Here’s how to do it:
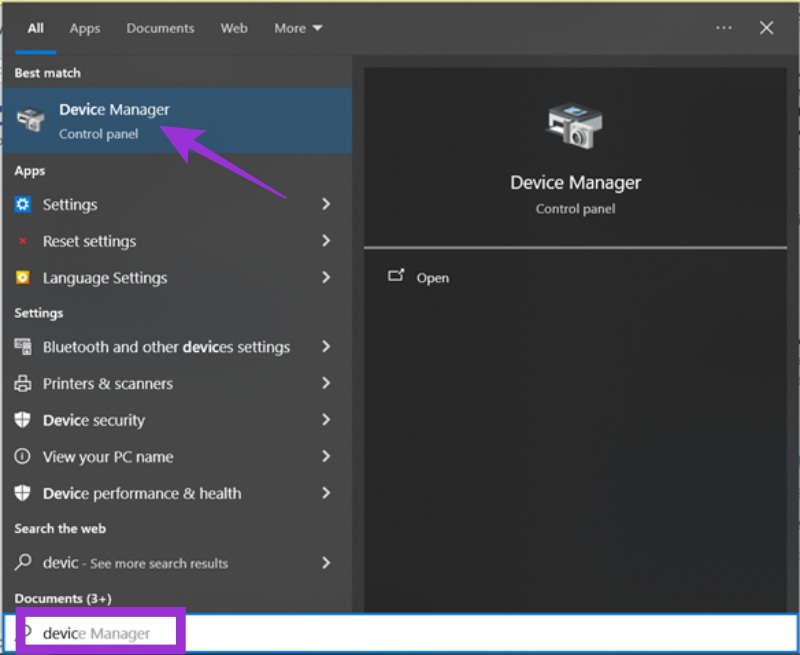
- Open “Device Manager” by typing the term into the search bar.

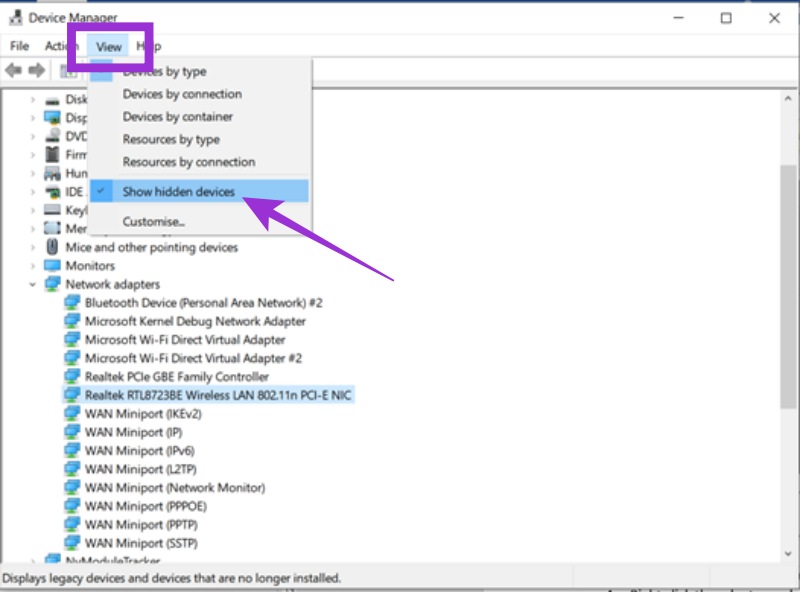
- If you don’t have hidden items set to be visible already, activate this feature by selecting “View” from the menu, followed by “Show hidden devices.”

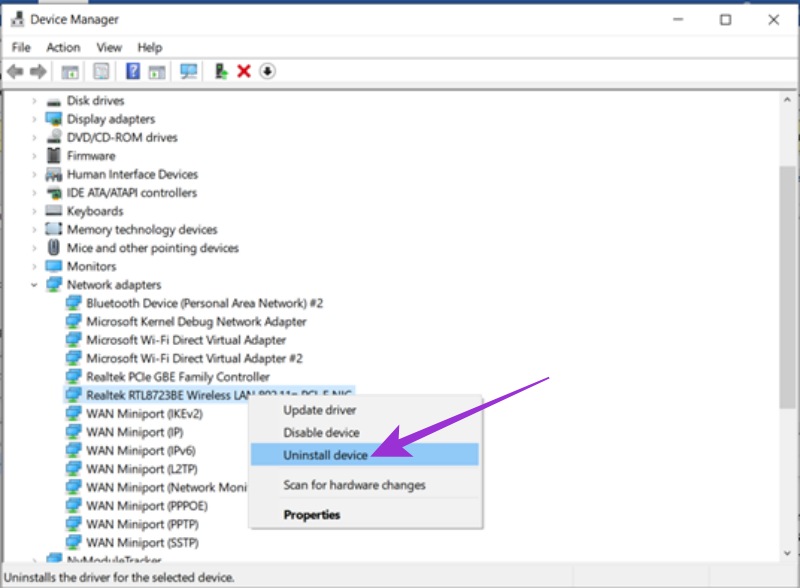
- Go to the “Network Adapters” folder in the list and locate your particular adapter.
- Right click the adapter and select “Uninstall device” from the popup menu.

- Reboot your machine and the adapter drivers will reinstall automatically.


