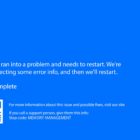
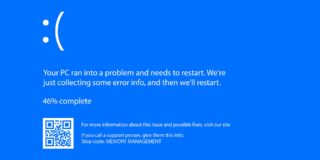
How to Fix Error Code 0xc1900101 on Windows 11 Installation Assistant

Upgrading from Windows 10 to Windows 11 unfortunately doesn’t always go smoothly. Some users encounter error codes, like error code 0xc1900101, which shows up almost at random when you’re using the Windows 11 Installation Assistant.
Let’s look at how to deal with error code 0xc1900101 Windows 11.
Why Does Error Code 0xc1900101 Appear?
When we are discussing error code 0xc1900101, we’re actually talking about a whole series of error codes that might appear when you’re trying to upgrade to Windows 11. Examples include “error code 0xc1900101 – 0x2000c” and “error code 0xc1900101 – 0x40021.”
So, if you see any error message that starts with “0xc1900101,” then it’s worth trying the fixes below.
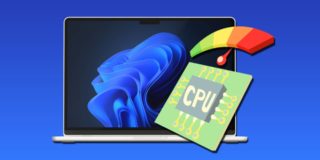
As to why these errors appear, it’s most often due to some sort of issue with your device’s drivers. The drivers might be out-of-date or corrupted. Or they might not be fully compatible with Windows 11. Many fixes for error code 0xc1900101 revolve around repairing or updating the drivers.
Fix Error Code 0xc1900101 Windows 11 Installation Assistant
Here are several fixes to try if you see error code 0xc1900101.
Fix 1. Disconnect Any Accessories
The most straightforward option you can try is to disconnect any external hardware or accessories connected to your device, e.g., headphones, game controllers, external hard-drives, and so on.
If you’ve got something plugged into your computer that isn’t entirely necessary for its operation, then try unplugging it. The device (and its drivers) might be interfering with the installation upgrade process. After unplugging, run the installation assistant once more.
Fix 2. Check Your Storage
Windows 11 needs at least 64GB of free space on your system to install correctly. You might get error codes like 0xc1900101 if you don’t have enough space. So, take a moment to check how much space you’ve got and free some up, if needed.
Step 1. Go to the “This PC” or “My Computer” page to see all your device’s storage drives and their status.
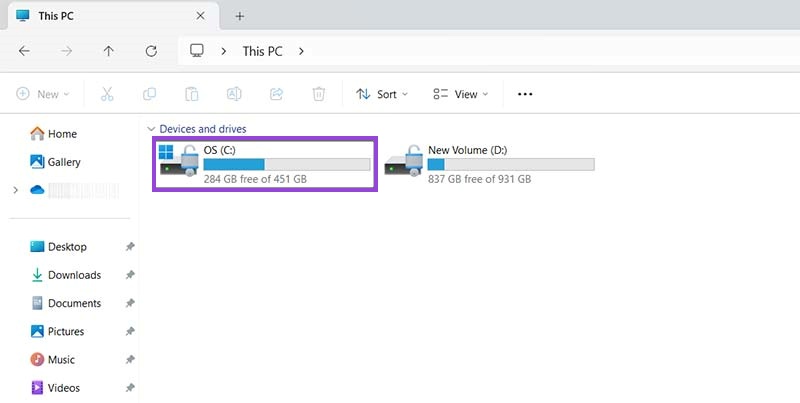
Step 2. If you have more than 64GB on your C drive, move on to another solution. But if there’s not enough space on it, you’ll have to go through your files and installed apps and either move them to another disk or delete them.
Fix 3. Update Your Drivers
As mentioned above, out-of-date or incompatible drivers often cause the error code 0xc1900101 Windows 11 to appear. Updating them may resolve it:
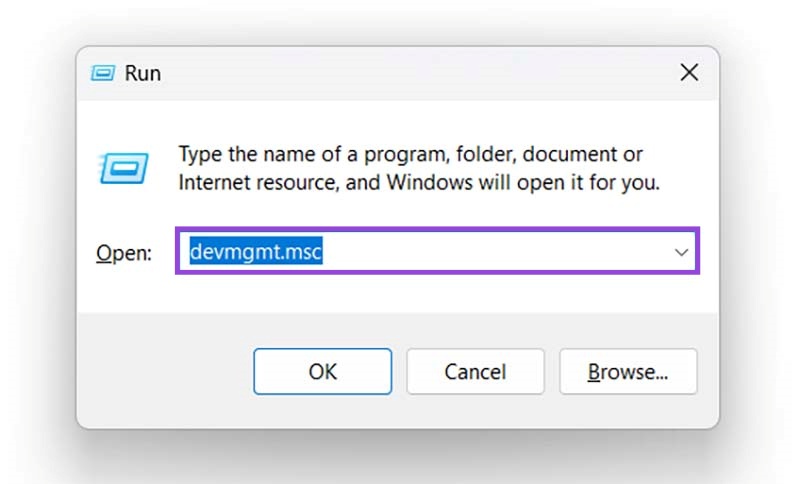
Step 1. Press the “Windows” and “R” keys together to open the “Run” window and type the following into it: “devmgmt.msc”. Then hit “Enter” to open the “Device Manager.”
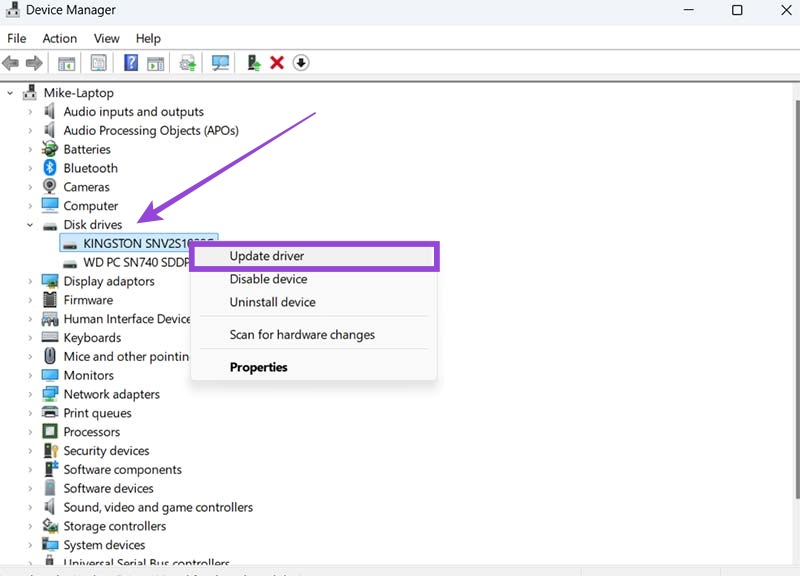
Step 2. Find “Disk drives” in the list of devices and click the arrow to see a list of your drives. Right-click on the one that’s causing problems and then select “Update driver.”
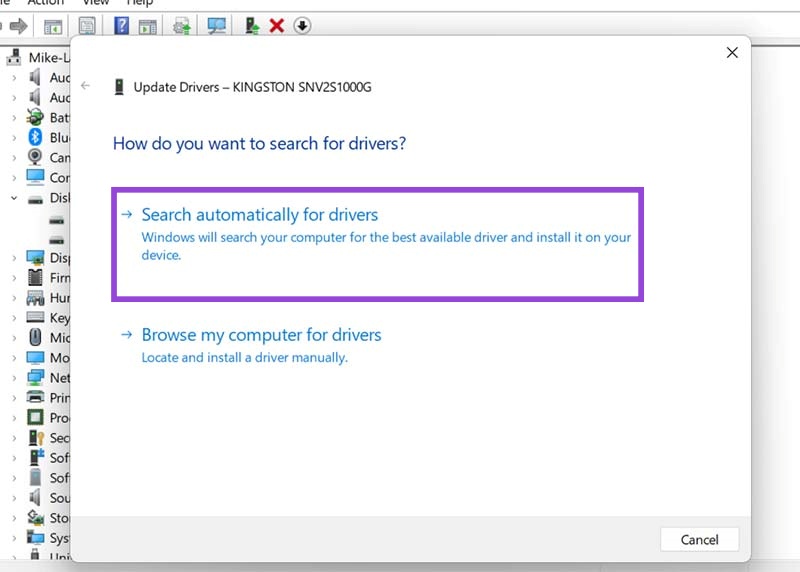
Step 3. Select the “Search automatically for drivers” option and let Windows locate and install the new drivers, if any are available. Then restart your computer and try installing Windows 11 once more.
Fix 4. Try the Troubleshooter
Windows also has built-in troubleshooter tools to resolve common issues. The Update Troubleshooter might help you fix error code 0xc1900101:
Step 1. Press “Start” and then go to “Settings.”
Step 2. Find the “Update & Security” menu and select “Troubleshoot.”
Step 3. Click on Additional troubleshooters.
Step 4. Find the “Get up and running” tab and click “Windows Update,” followed by “Run the troubleshooter.”
Step 5. Wait for the troubleshooter to scan your system for issues and fix them, then restart your computer and try installing again.
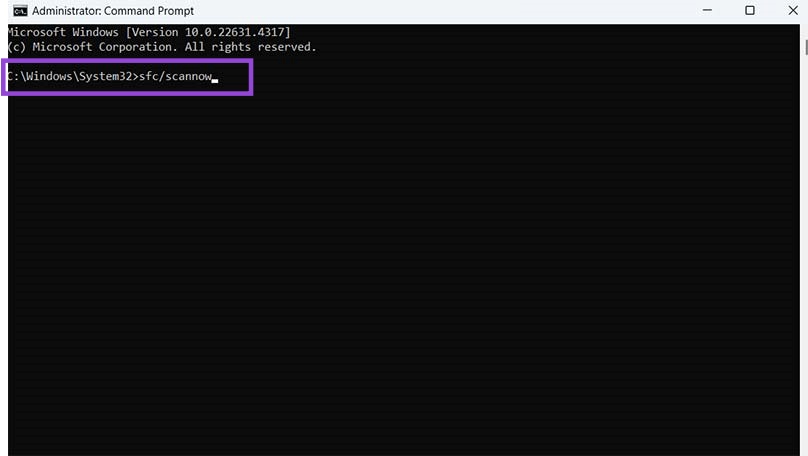
Fix 5. Try a System File Checker Scan
A system file checker might also fix your issues.
Step 1. Open the “Command Prompt” as an administrator. You can find it in the “Start” menu.
Step 2. Type in “sfc/scannow” and hit “Enter.” Then just let the scan go. If there are any detectable issues, it should find and fix them.
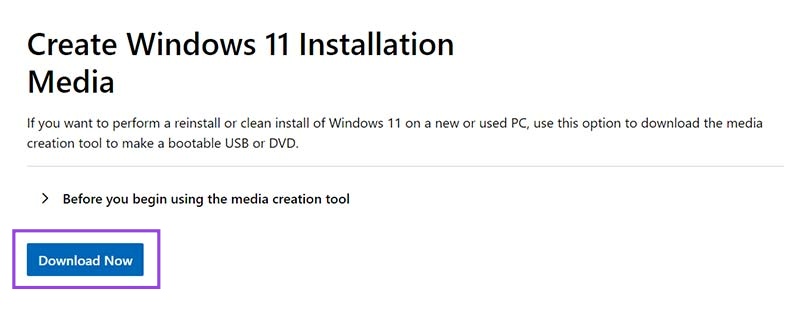
Fix 6. Install Windows from a USB Drive
Lastly, if all else fails, you could try abandoning the Windows 11 Installation Assistant entirely and installing Windows 11 from a USB instead.
Step 1. Go to the Windows 11 download page and scroll to “Create Windows 11 Installation Media.” Click “Download Now.”
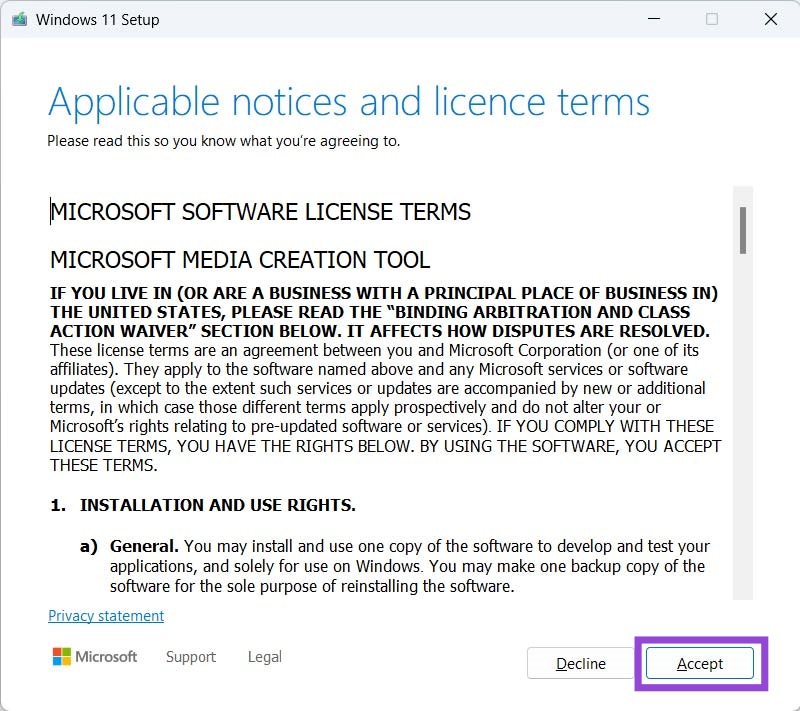
Step 2. Open the .exe file, accept the terms, and follow the on-screen setup instructions.
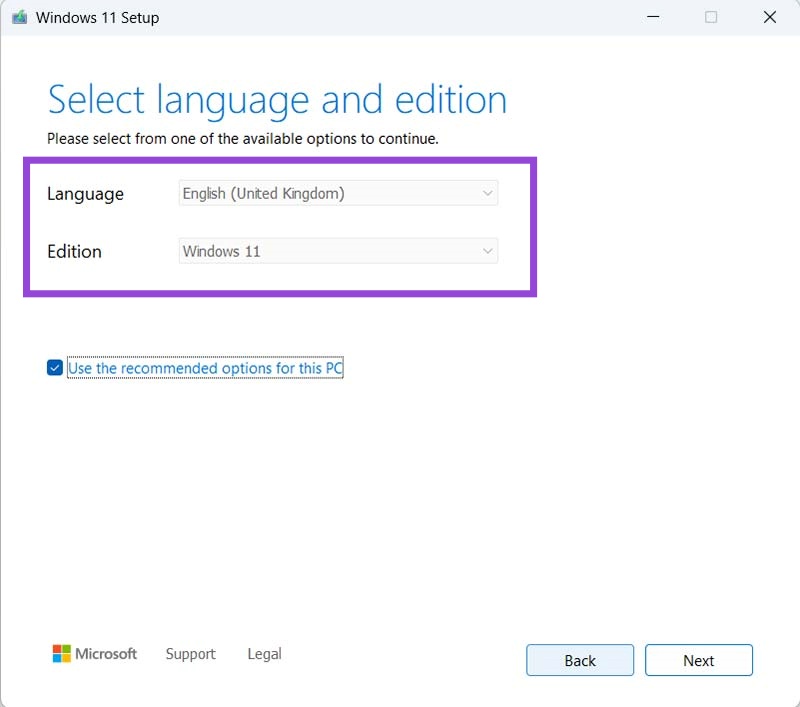
Step 3. Choose the language and version of Windows you want.
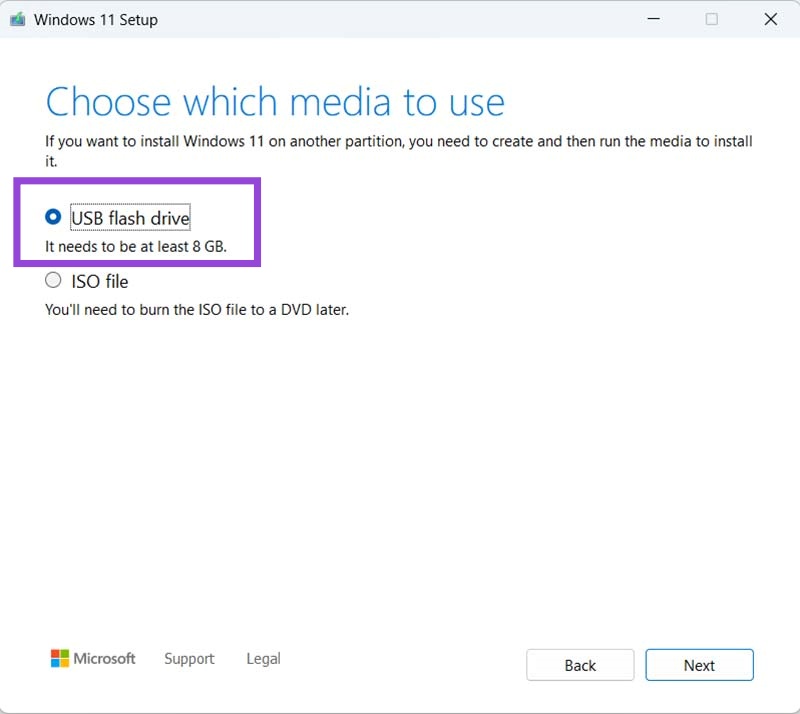
Step 4. Select “USB flash drive” as your chosen media option, and make sure you have a free USB drive with at least 8GB of space ready to go and plugged into your computer.
Step 5. Select your USB and wait for the process to finish. Once it’s all done, you can restart your computer and then boot from the USB (usually you need to press F12 while the PC is starting to access this option, but it varies from device to device) and set up Windows 11 from there following the on-screen prompts.