How to Fix Low Disk Space Error in Windows 11
Photos, videos, audio files, documents – the many files you create, download, and save to your device all take space, and they add up over time. Eventually, you may start to run out of room and find yourself facing a low disk space error in Windows 11.
Let’s take a look at how to fix this error.
Fix 1: Move Apps and Large Files to Another Drive or External Drive
If you’re encountering the low disk space error in Windows 11 for one of your drives (like the C drive), but have one or more other storage drives on your device with space available, one way to fix it is simply to move some stuff onto your other drives. Alternatively, you can connect an external storage drive, like a USB stick or external hard drive, and move your files over that way.
Step 1: Open the “File Explorer” and head to “This PC” to see your storage situation. You should see the drive that’s low on space and any other drives available.
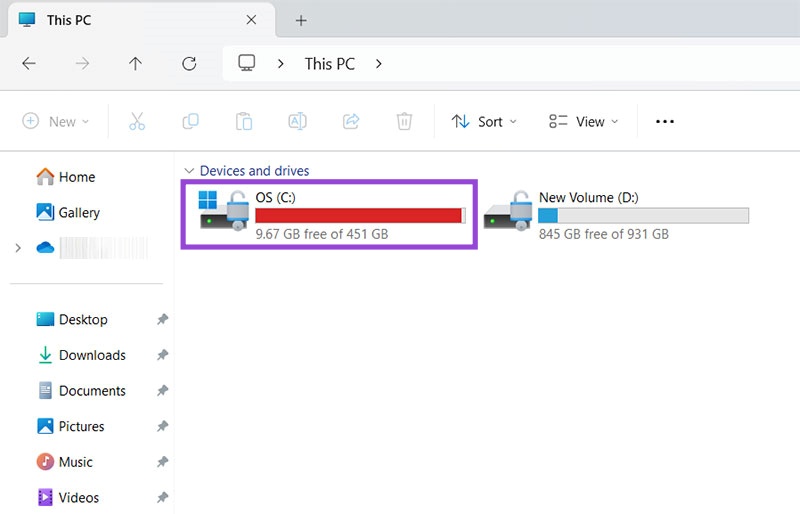
Step 2: Go through your files on the low storage drive and find some big items you can move over to another storage area. Right-click each item, then select “Cut” and then “Paste” it onto the other storage drive. You can also use “Copy” and “Paste” and then go back and delete the item from your original drive.
Fix 2: Delete Files and Uninstall Apps You Don’t Need
There may be large files or apps clogging up your Windows 11 drive that you no longer need. In that case, instead of going through the hassle of moving them to another drive, you can just delete them to free up some room.
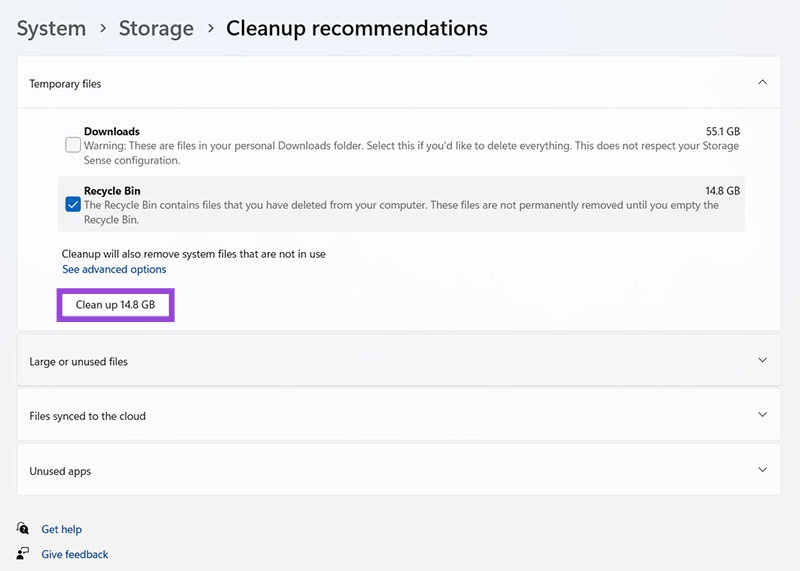
You can do this either by going through your various folders, one by one, in the “File Explorer,” or you can do it a little more conveniently using Microsoft’s “Cleanup Recommendations” feature.
Here’s how:
Step 1: Go the “Settings” menu, either by pressing “Windows” and “I” keys together or just finding “Settings” in your “Start” menu.
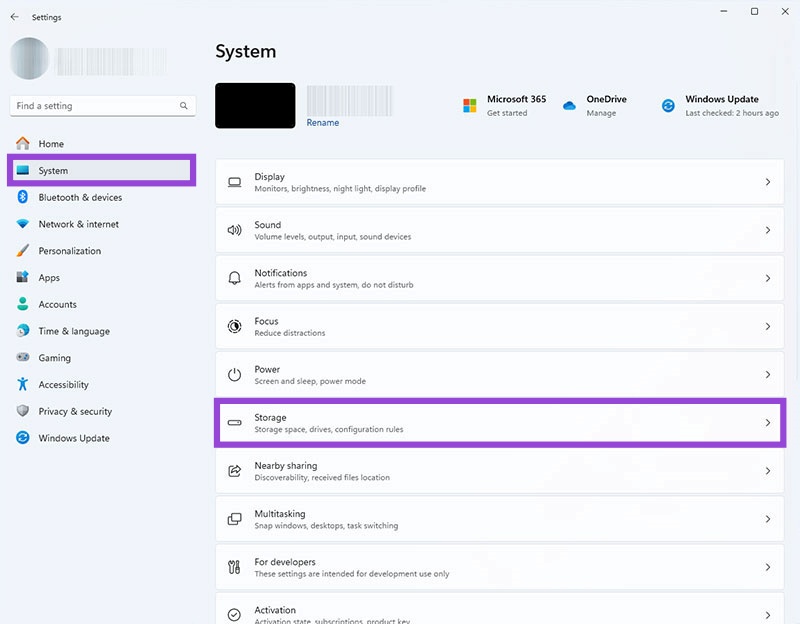
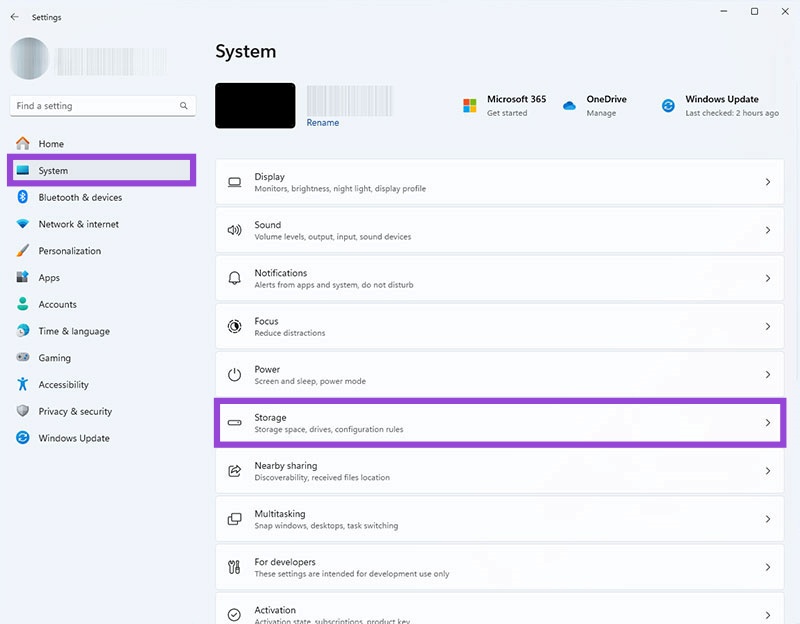
Step 2: Click on “System,” then “Storage.” This’ll take you to the “Storage” settings menu.
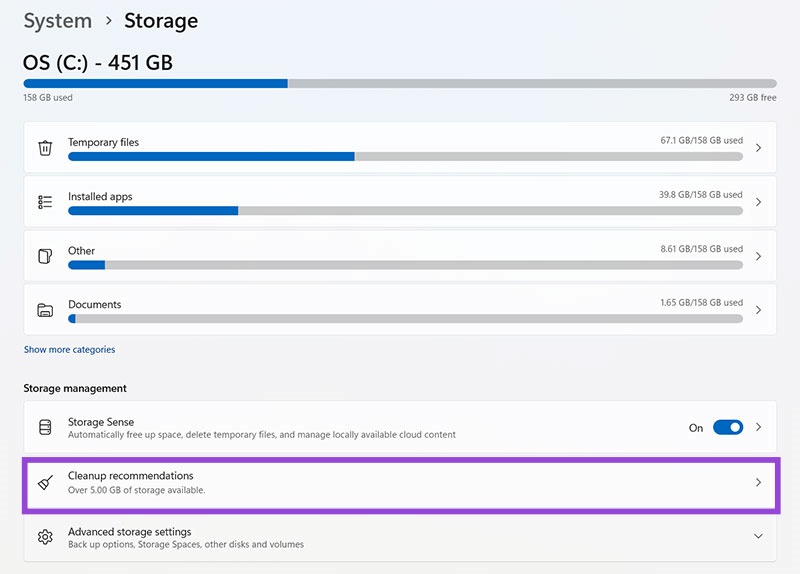
Step 3: Find and click on “Cleanup recommendations” in the lower menu. Here, you can go through the various sub-menus, like “Large or unused files” and “Files synced to the cloud” and select those you wish to delete. Then just press the “Clean up” button to get rid of them.
Fix 3: Use Microsoft’s Storage Sense to Clear Unneeded Files
Another handy Windows feature is Storage Sense, which can help you resolve the low disk error in Windows 11. Here’s how to use it:
Step 1: Access “Settings” either through your “Start” menu or just by pressing “Windows” and “I” together.
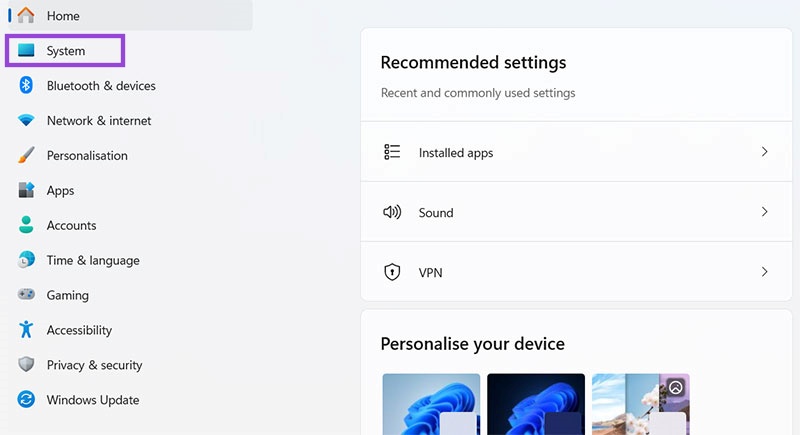
Step 2: Click “System” and then “Storage” to access the “Storage” settings.
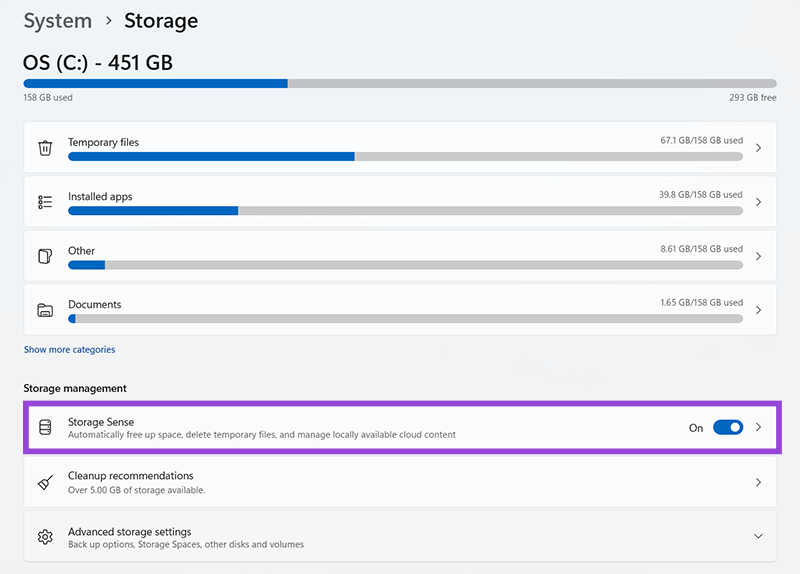
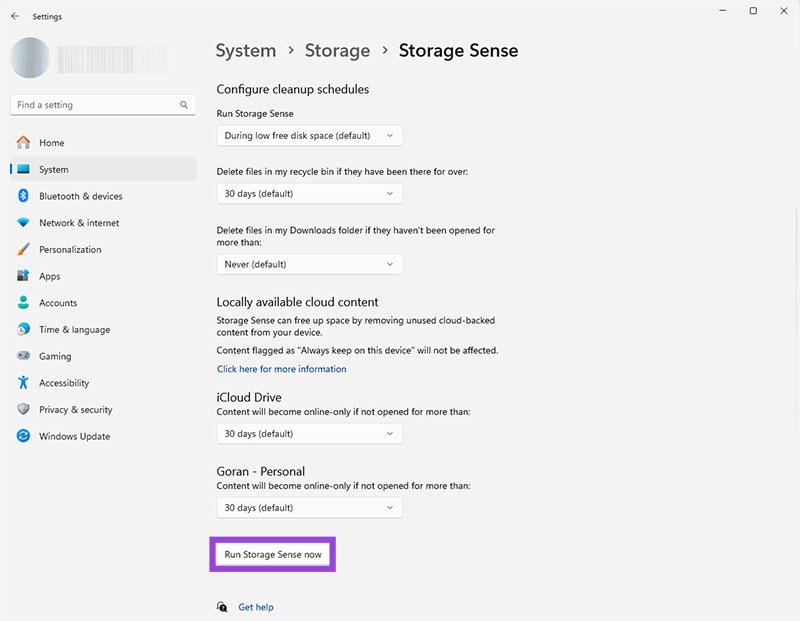
Step 3: Find the “Storage Sense” option and make sure it’s clicked “On.” Then click to open the “Storage Sense” menu, where you can adjust various settings and click at the bottom to “Run Storage Sense Now” and delete unnecessary files right away.
Fix 4: Use Disk Clean-Up to Make Space
You can also use Windows’ “Disk Clean-Up” tool to make some room on a drive that’s almost full.
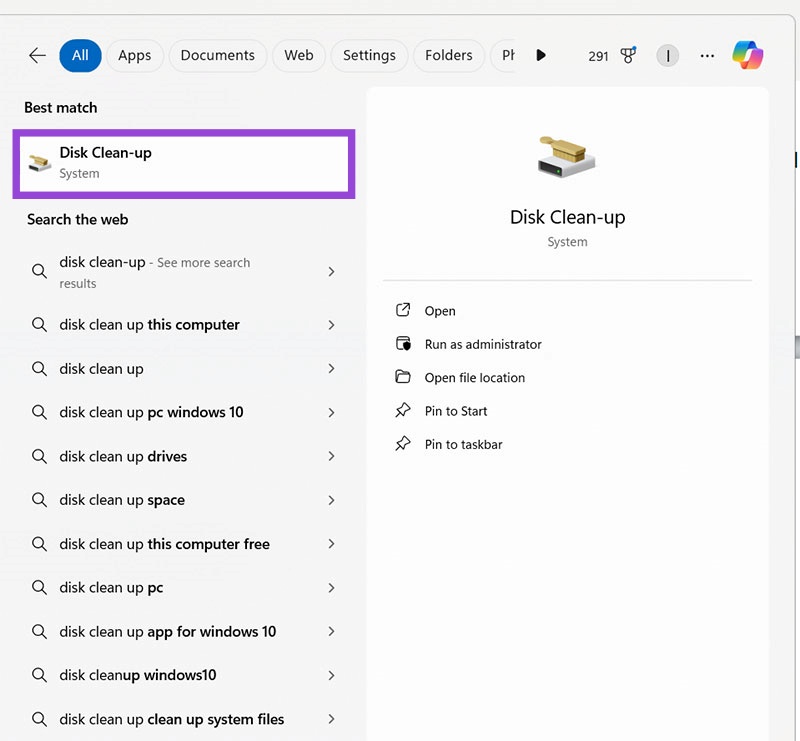
Step 1: In your search bar, type “Disk Clean-up” and click on the “Best Match” at the top.
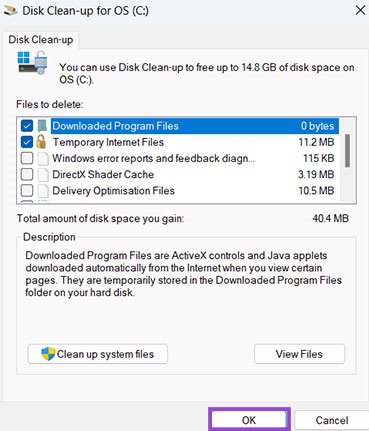
Step 2: Choose the drive you want to clean from the list provided. This’ll open up a new window where you can click to select various temporary files, cache files, error reports, and so on, and then just click “OK” to get rid of them.
Fix 5: Use a Cloud Storage Service
If you keep having issues with lack of storage on your device, another way around it is to start using cloud storage. There are numerous cloud storage services available these days, like OneDrive and Dropbox, many of which have free plans to start off with. You can sign up to one of these services and move some of your bigger files into the cloud and off your hard drive.


