How to Fix the Parameter Is Not Correct Error in Windows
Seeing the “Parameter is not correct” error? This mainly occurs when you’re trying to view or access the files on a storage device, like a USB stick or external drive. It’s quite a frustrating issue, as it makes you completely unable to view any of those files.
Let’s see how to solve it.
Fix 1: Try a Different Port
Before you do anything else, it’s worth checking your external storage device in a different USB port (if you have one available). It may be that the port you’re using is damaged somehow, which could be triggering the fault. If you try another port and get the same issue, proceed to test out the fixes below.
Fix 2: Run Check Disk
Using CHKDSK utility may fix this. Here’s how:
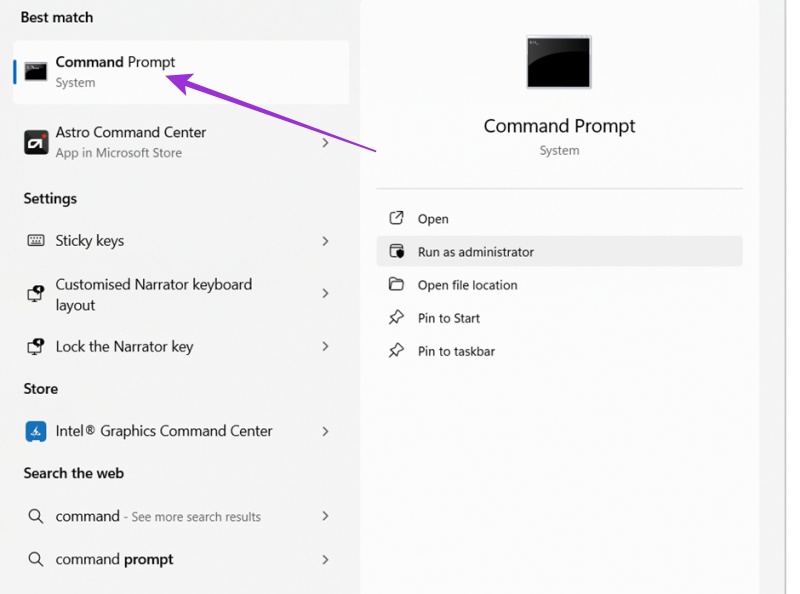
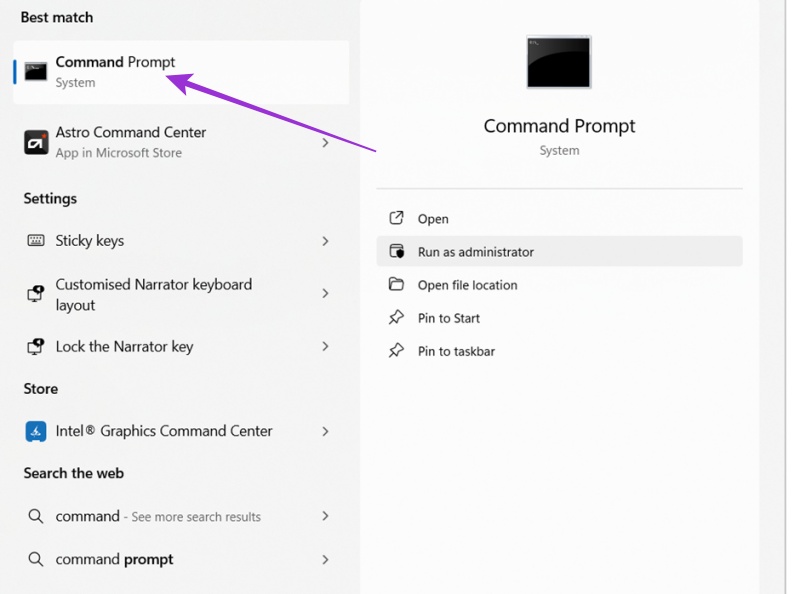
Step 1. Launch the “Command Prompt” as an administrator. You’ll find it via “Start” or by searching for “cmd” in the search bar.
Step 2. First type “chkdsk”, then the letter of the drive to scan. Then, type “/f” and “/r”. That’ll give you something like: “chkdsk E: /f /r”.
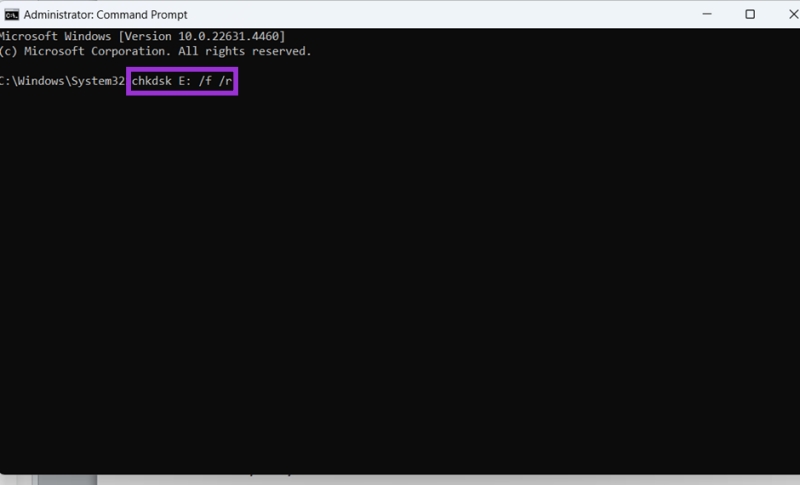
Step 3. Hit “Enter” and let the utility run. It can take a few minutes while it scans the affected drive.
Fix 3: Try a System File Checker Scan
A System File Checker or SFC scan is another built-in Windows utility to try when you get the “Parameter is not correct” error. It looks for corruption in the system and tries to fix it for you.
Step 1. Access the “Command Prompt” via the Start menu or search bar. Make sure you launch it as an administrator.
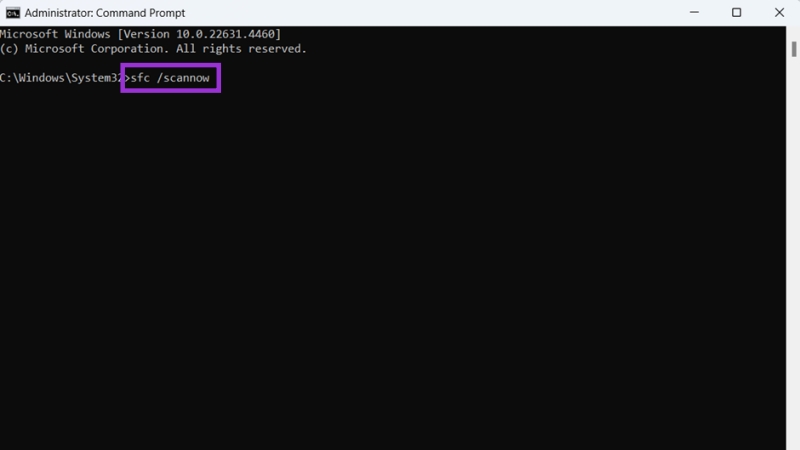
Step 2. Type “sfc /scannow” into the box and hit “Enter.” Wait for the scan to finish.
Fix 4: Run a Malware Scan
A virus might be the culprit behind the “Parameter is not correct” message. Your antivirus program may be able to sniff it out and remove it.
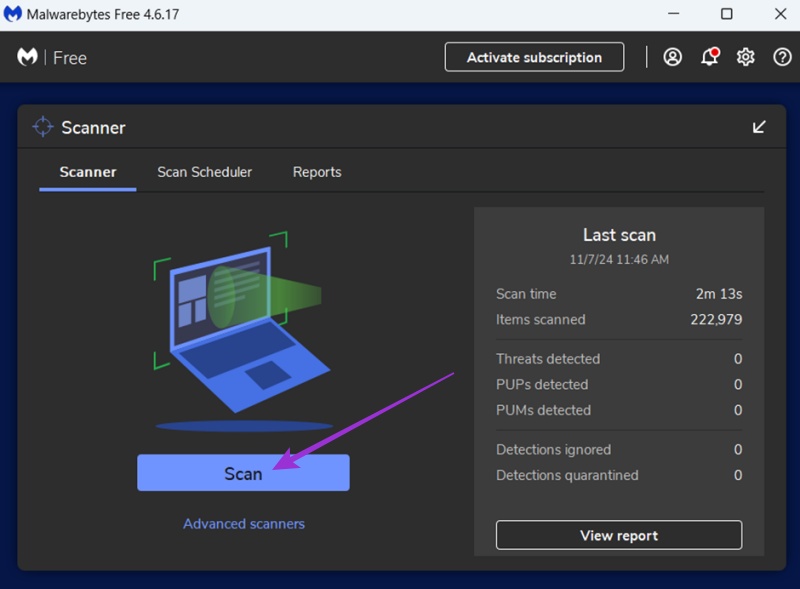
Step 1. Open up your antivirus software.
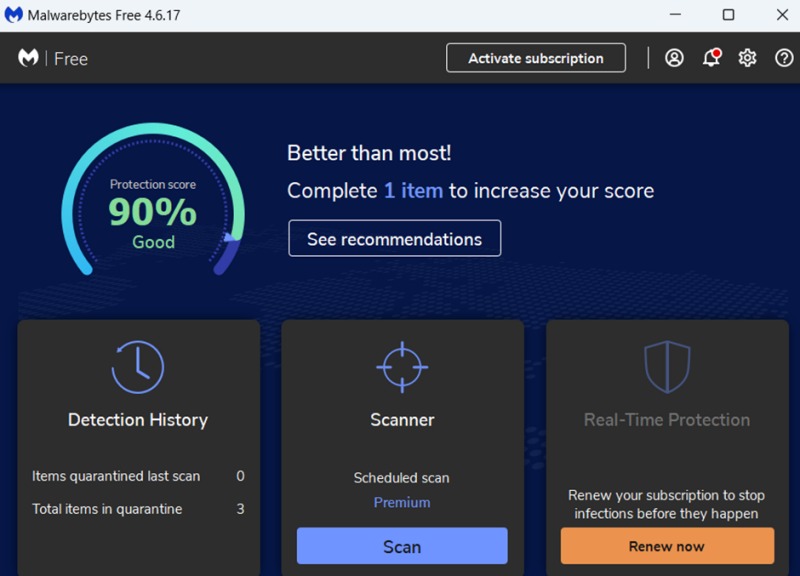
Step 2. Look for a button marked “Scan” or “Check for Viruses” or “System Scan” and click it. If asked, opt for a full-system scan, or, to save time, you can just scan the drive that’s having the error. Let the scan run and check if it finds anything. If it does, follow the on-screen prompts and recommendations from your antivirus software to remove or quarantine the threats.
Fix 5: Run the DISM Command
Yet another scan you can run is the Deployment Image Servicing and Management or DISM scan. Again, this is done through the Command Prompt.
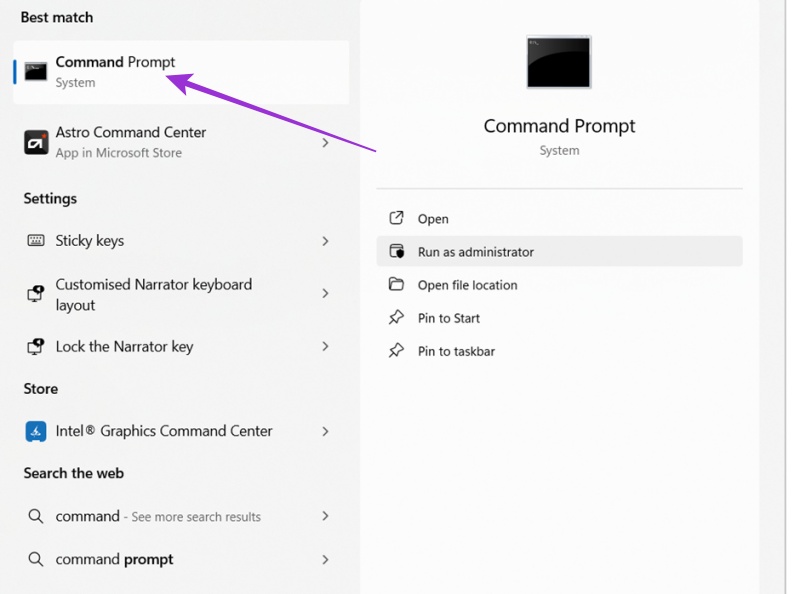
Step 1. Open the Command Prompt as an administrator. Just type “cmd” into the search bar to access it fast.
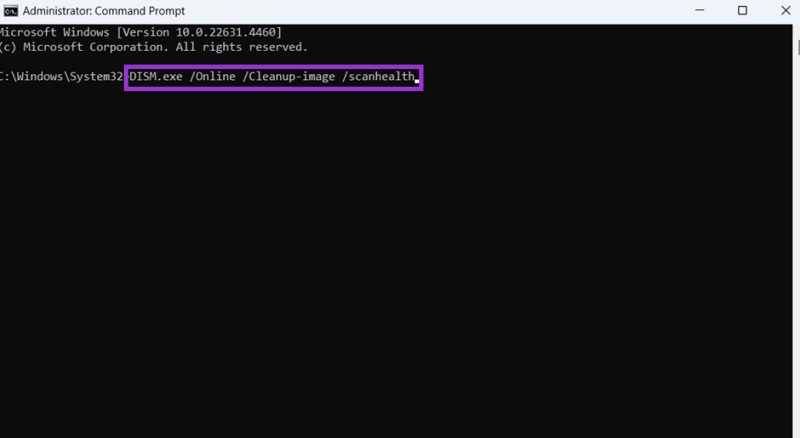
Step 2. Enter this command: “DISM.exe /Online /Cleanup-image /scanhealth”. Then, just wait for it to finish.
Fix 6: Update Your Drivers
Another explanation for the “Parameter is not correct” message is that the drivers responsible for allowing external devices to connect to your computer are outdated or corrupt.
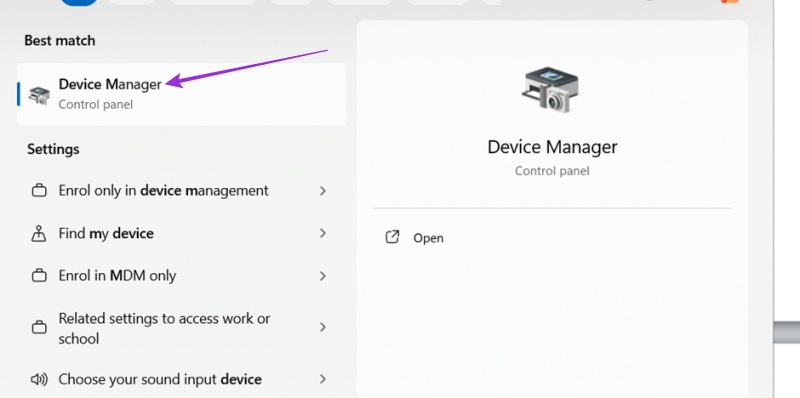
Step 1. Open the “Device Manager.” You can right-click the Start icon to access it in the pop-up menu, or type “Device Manager” into the search bar.
Step 2. You’ll see a long list of all the different devices and components that make up your computer. Look for the “Disk drives” section and expand it using the little arrow.
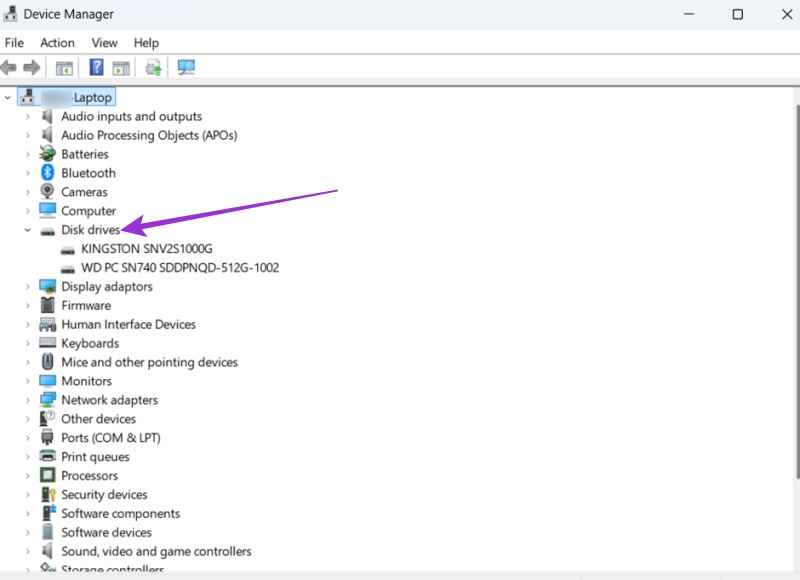
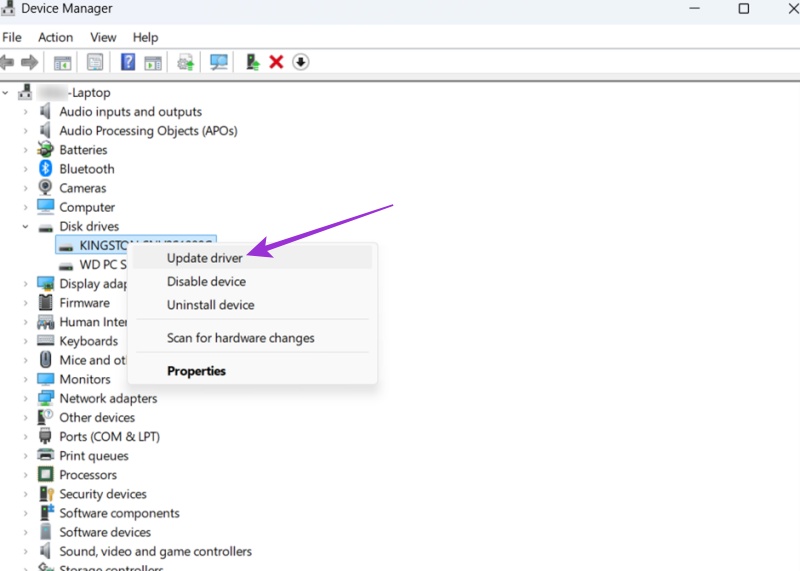
Step 3. Find the drive that’s causing you trouble in the list, right-click it, and select “Update driver.” When prompted, click on “Search automatically for drivers” and Windows will look for new drivers and install them automatically.
Fix 7: Adjust Your Decimal Settings
This is an unusual fix but one that may also resolve the “Parameter is not correct” error. It involves adjusting your device’s decimal format.
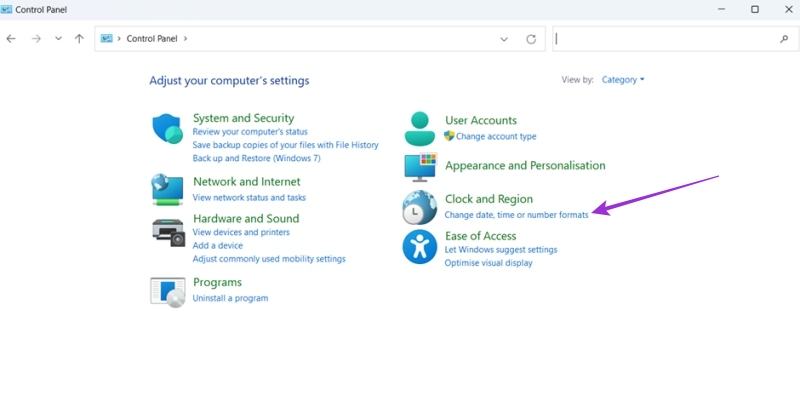
Step 1. Open “Control Panel” by using a shortcut in your Start menu or by typing “Control Panel” into the search bar and selecting the “Best Match.”
Step 2. Click “Change date, time or number formats” to make a new window open.
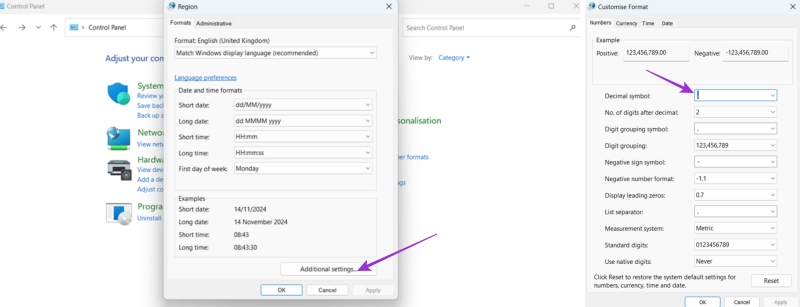
Step 3. Click on “Additional settings” and make sure the entry in the “Decimal symbol” box is a “.”
Fix 8: Reformat the Drive
This is the last resort fix. If all else fails, it may be that your drive is corrupt or simply incompatible with Windows in its current state. Formatting it should fix the issue, but it’ll also delete everything on the disk.
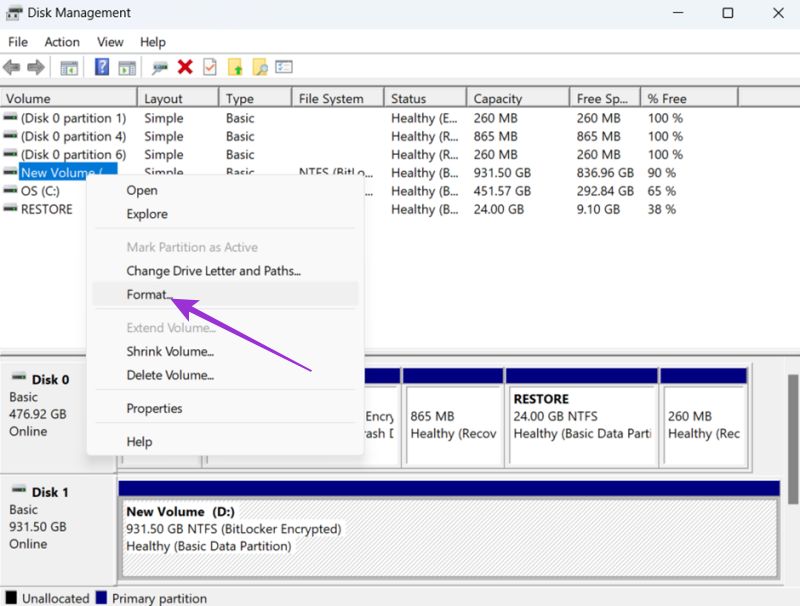
Step 1. Right-click the Windows icon and select “Disk Management.”
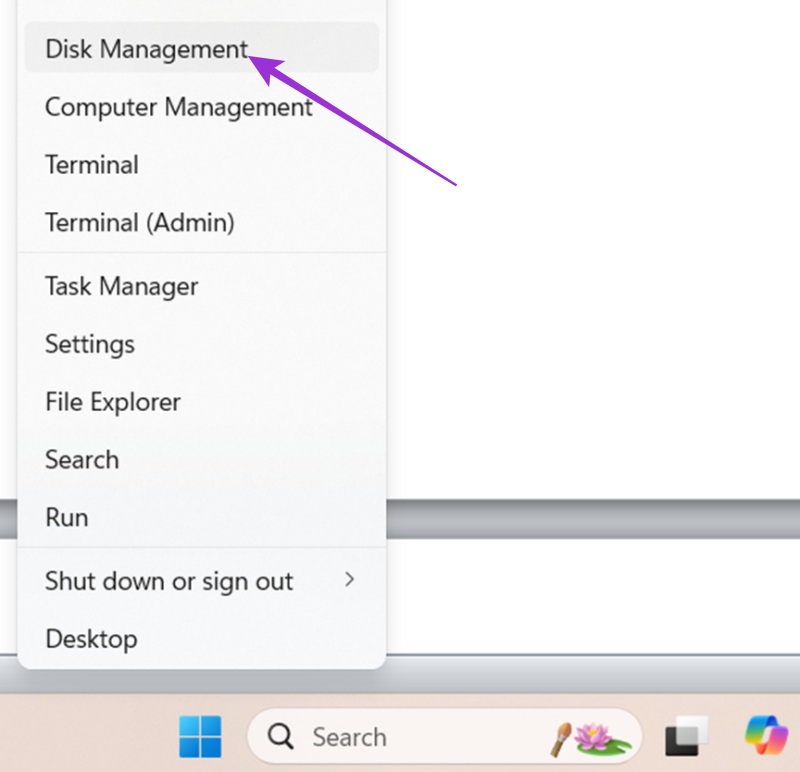
Step 2. Right-click on the drive that’s having problems and select “Format.” Configure the settings as desired, or leave them as they are by default, and press “OK” to format the drive.
