How to Lock Files on the Mac (And Why You Might Want To!)
Your Mac has a built-in way to prevent changes to files and folders, which is useful if you have a folder full of resources you need to protect, for example, or if you would just like to make sure that certain files don’t get accidentally edited.
If you lock a folder, anything within it can’t be changed or deleted (though you can move the entire folder to the trash if you bypass a warning when you try). If you lock a file, no changes can be made without unlocking it. So if this sounds awesome to you, here’s how you can protect your stuff!
Lock Files in macOS
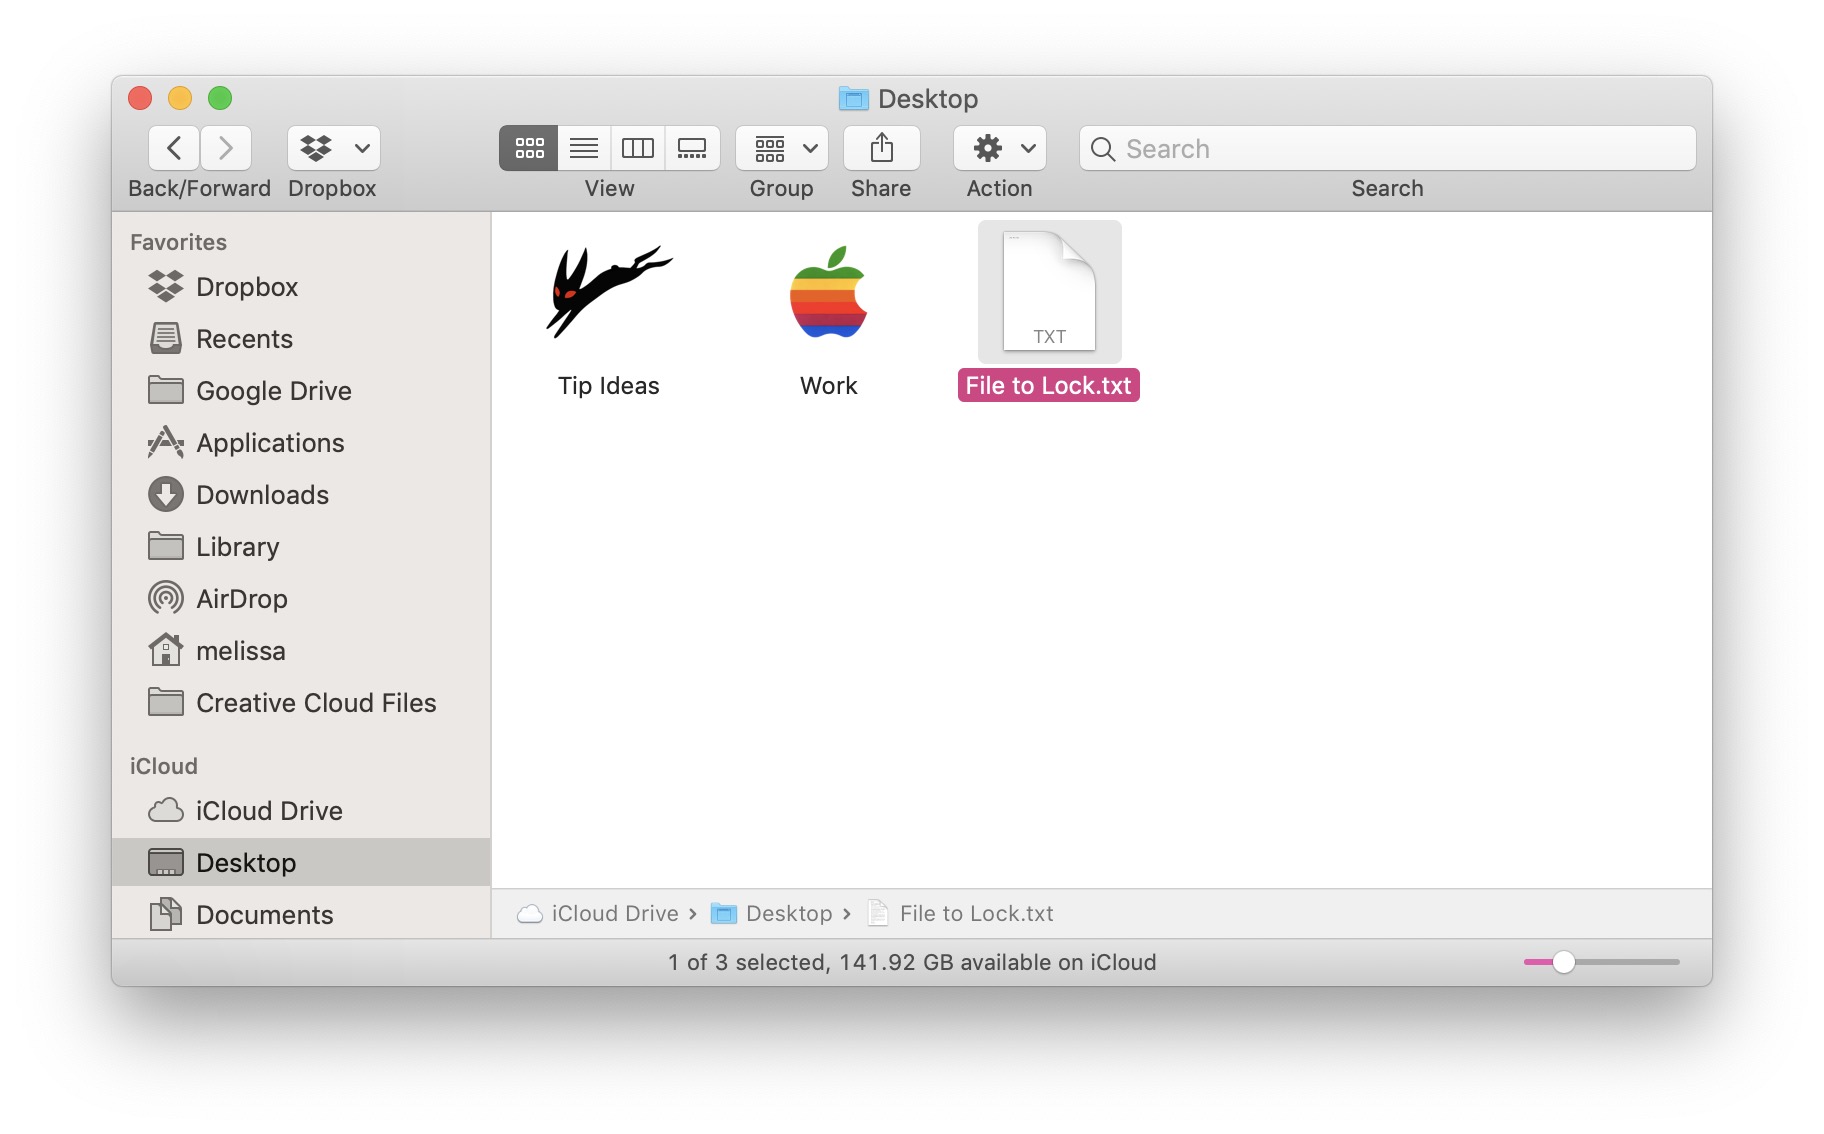
- Open Finder and navigate to the location of the file or folder you’d like to lock. Click on the file or folder once to select it.
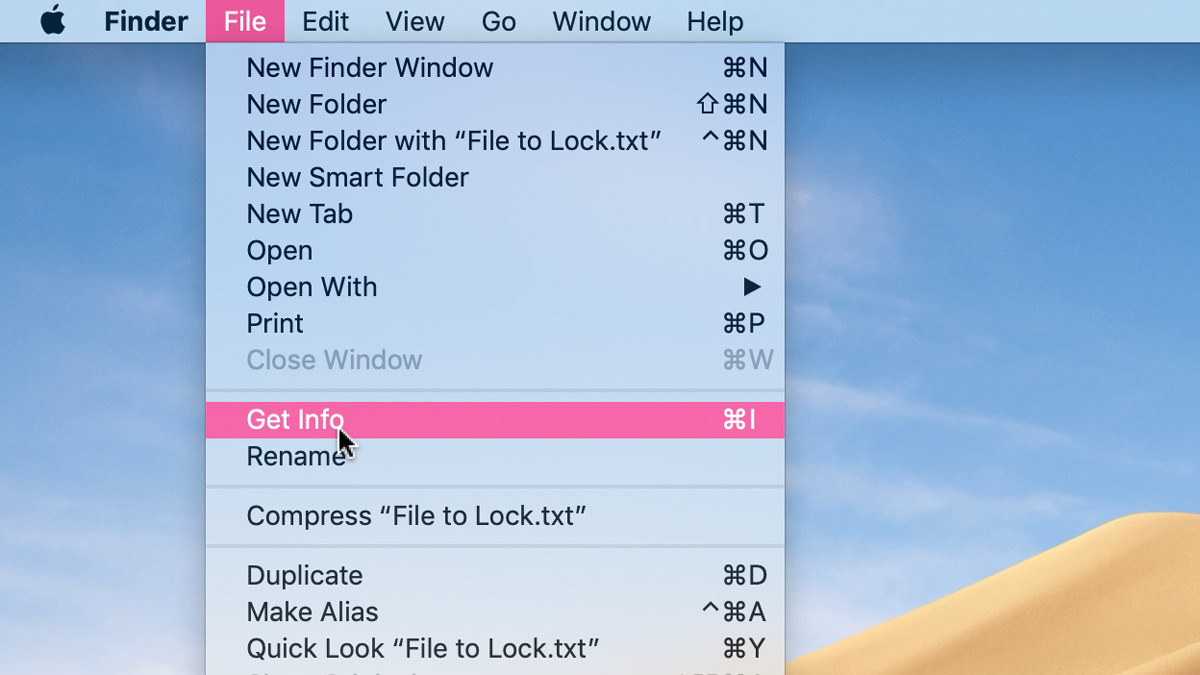
- With the file or folder selected, choose File > Get Info from the menu bar at the top of the screen. Alternatively, you can use the keyboard shortcut Command-I.
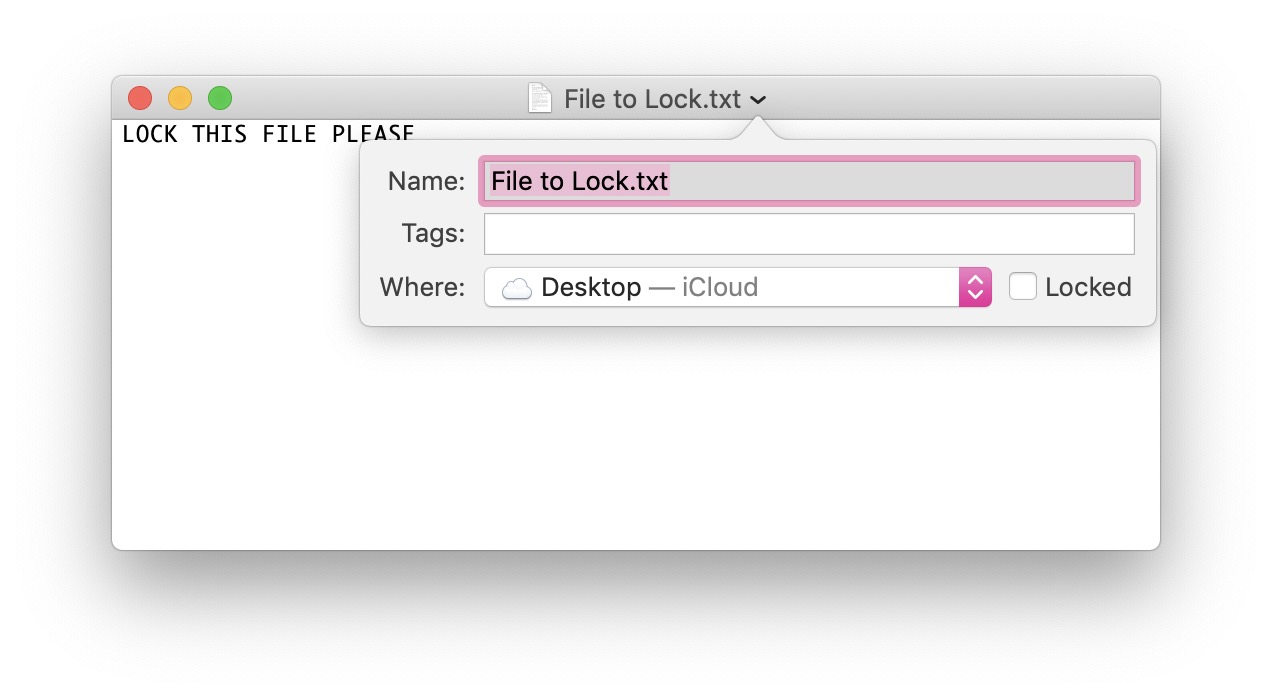
- Under the “General” section at the top of the window that’ll appear, look for the Locked checkbox, and toggle it on.
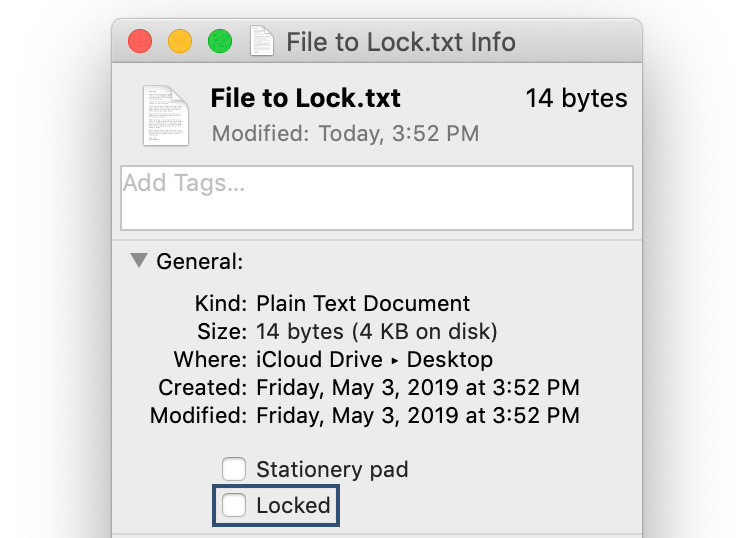
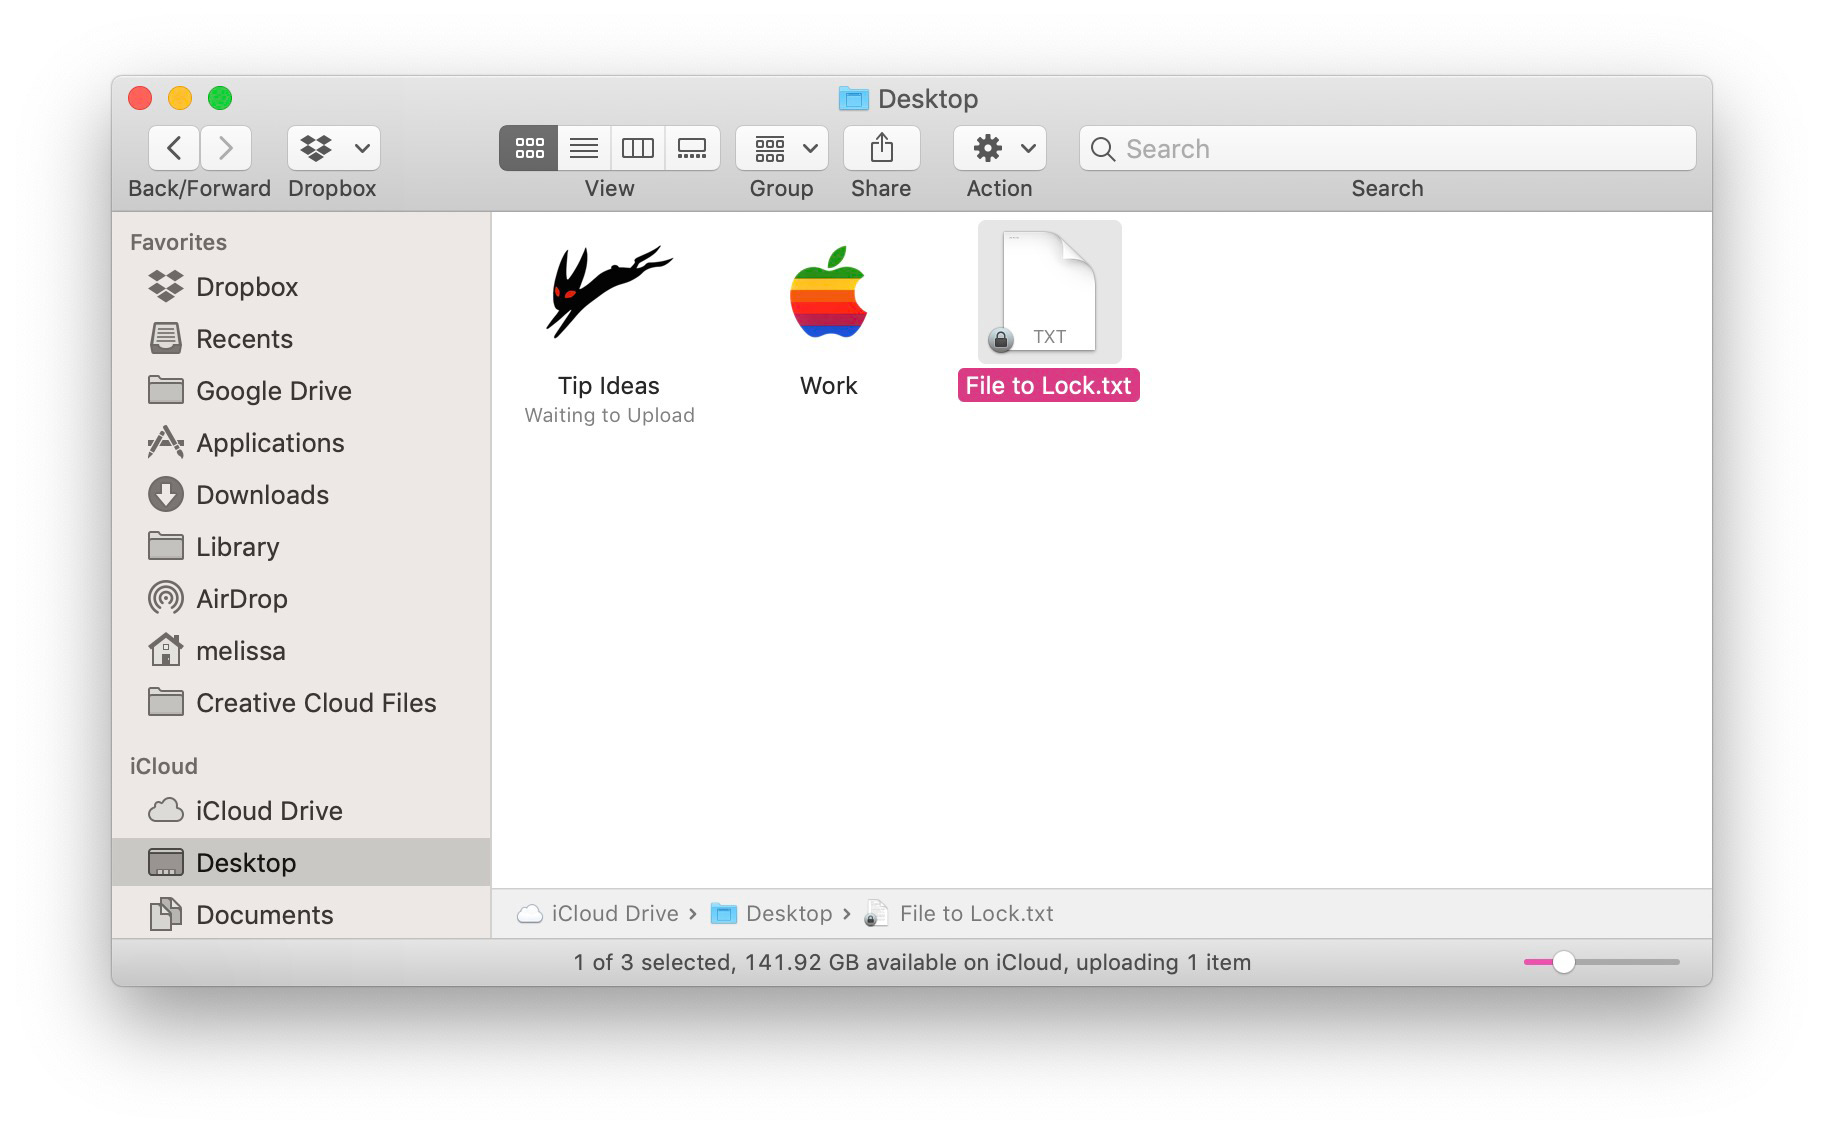
That’s it! Note, though, that if you don’t see any info under the “General” section, click the disclosure triangle to reveal it. And when you’ve locked your file, its icon will change to reflect its new protected status.
Locking Files Within an App
There is another way you can do this for some files while they’re open (depending on whether the program you’re using allows it):
- Look for the name of your file in the toolbar at the top of the window in whatever program your document opens into. Click the name, and a drop-down should appear.
- If locking is available for that item, all you have to do is select the Locked checkbox.
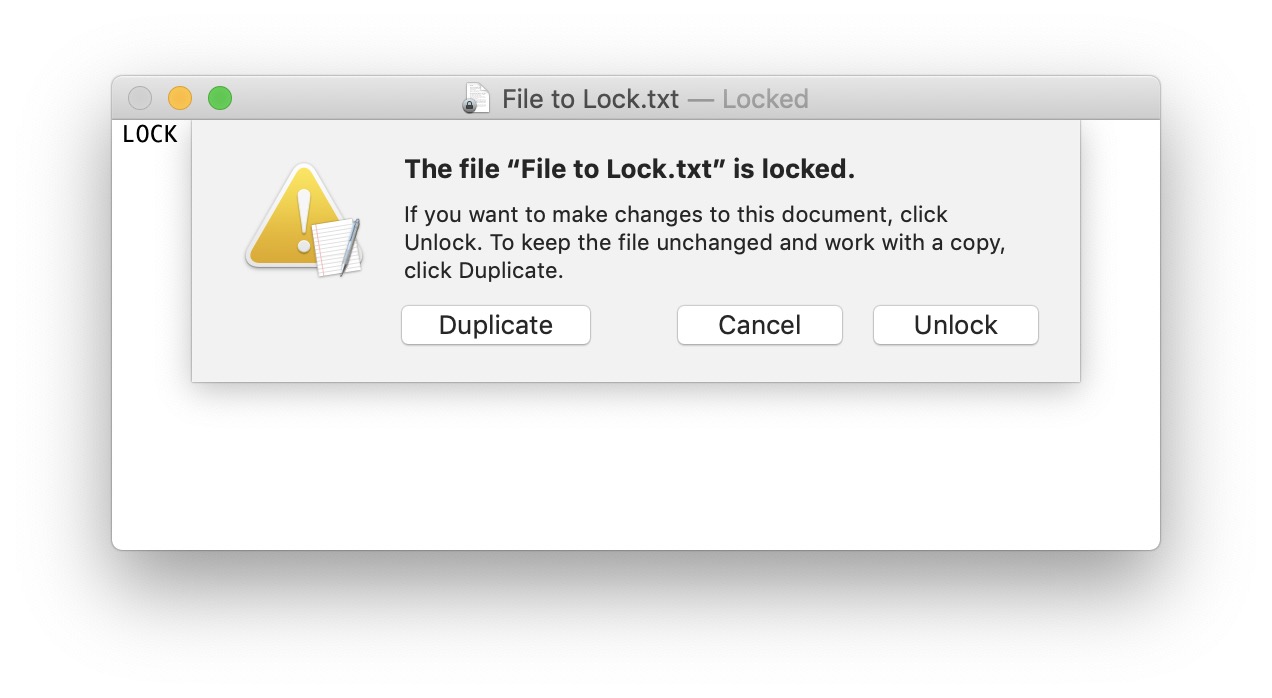
Regardless of the method you use to lock a file, attempting to edit that file will display a warning message. You must either unlock the file or create a duplicate in order to make any edits. You’ll receive a similar warning if you try to delete a locked file or folder.
So obviously this isn’t intended as a super-unbreakable security measure or anything since you can bypass it or disable it whenever you want. You’ll use this just to keep yourself (or anyone else who accesses the same files you do) from accidentally doing something goofy. At least a warning or two will stand in the way if you try!


