How to Schedule a Recurring Email in Gmail
Gmail makes sending emails a breeze. Plus, you can customize your emails by adding signatures to them. You can even schedule an email in Gmail to have it delivered to the recipient’s inbox at a specified time. But this handy feature lacks one important option: the ability to schedule recurring emails. This could have helped you save plenty of time. Thankfully, there are workarounds that enable you to schedule a recurring email in Gmail.
How to Schedule Recurring Email in Gmail
While scheduling emails in Gmail is easy, that’s not the case with recurring emails. Scheduling them is a bit more complicated, but once done, it will save you precious time.
1. Calendar Invites
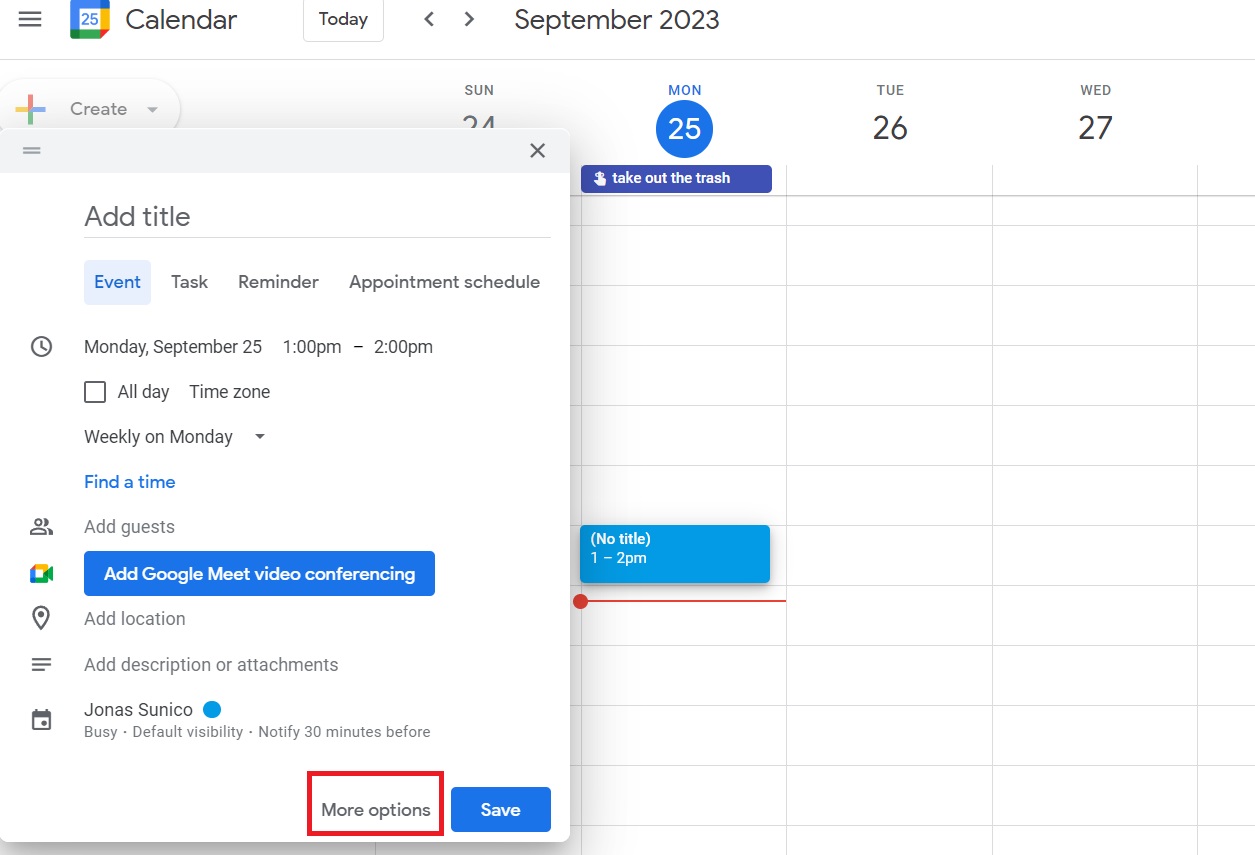
If the email you want to send after a specific time every day or week is for a meeting, it’s best to use Google Calendar for this. You can create a recurring event that notifies your team automatically at the set interval. Here’s how to do it.
- Open Google Calendar.
- Pick a time and day for the recurring event.
- Select More options.

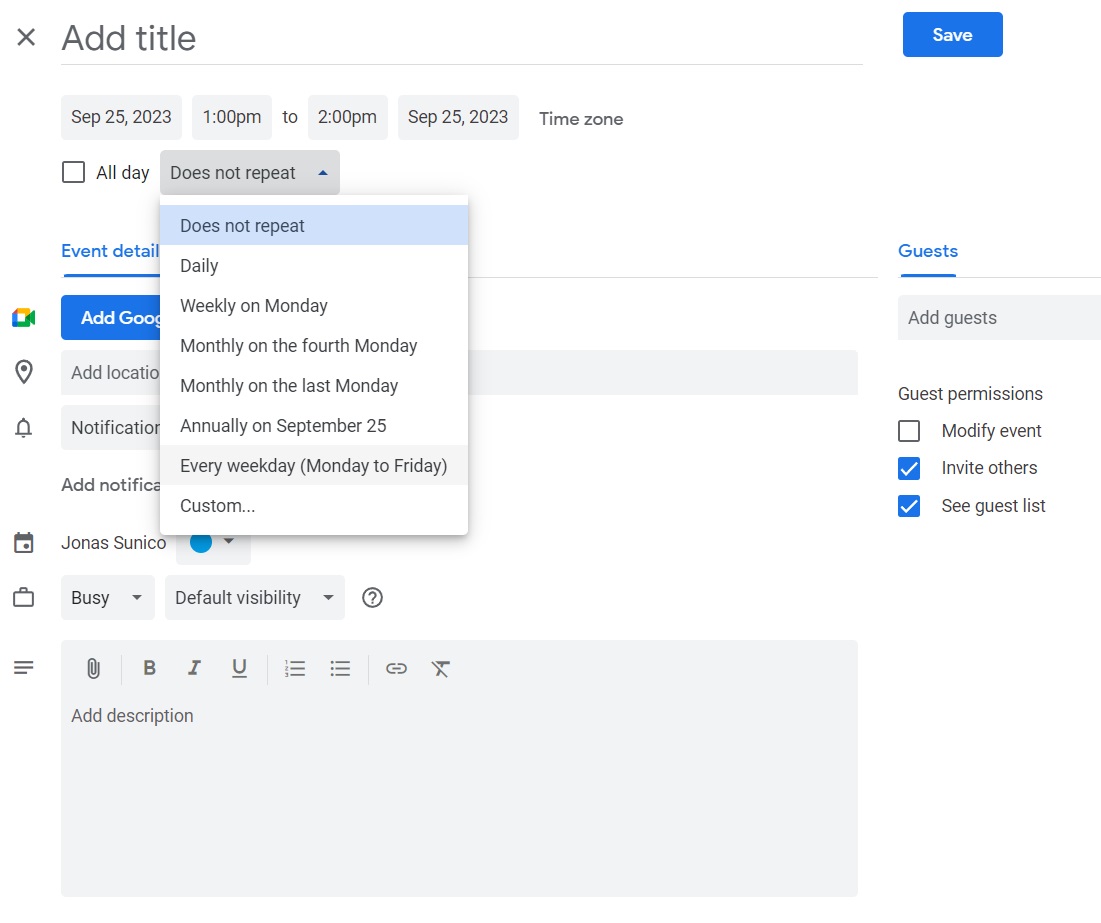
- Tick the box next to All day to send the message daily. Otherwise, select the event frequency by clicking the drop-down menu under Does not repeat.

- Fill out other details such as the guests (people you want to send the email to), and the event name, and add a Google Meet link if required.
- Once done, click Save.
You can have up to 730 recurring events in Google Calendar. Make sure to limit the number of people you bring into events, as Google can lock your account or prevent you from sending messages if it detects that you’re spamming people. And remember, your recurring emails can get you blocked on Gmail by your contact.
2. Chrome Extensions
A Google Chrome Extension is one of the best and quickest ways to schedule recurring emails. The Chrome Webstore has a few great extensions that will let you do this job. This method won’t work if you sync Outlook with Gmail and use the mail client instead.
Right Inbox
We recommend the Right Inbox Chrome extension for scheduling recurring emails in Gmail. It gives you access to all Gmail productivity features, including scheduling emails.
Although there’s a free version of the extension, you can access recurring emails with their Personal upgrade billed at $7.95/month. The subscription also unlocks more features to use on Gmail.
Recurring Emails for Gmail extension
If you want a free alternative, use the Recurring Emails for Gmail extension. It’s completely free and easy to use. Once you have the extension installed, here’s how to use it.
- Open Gmail.
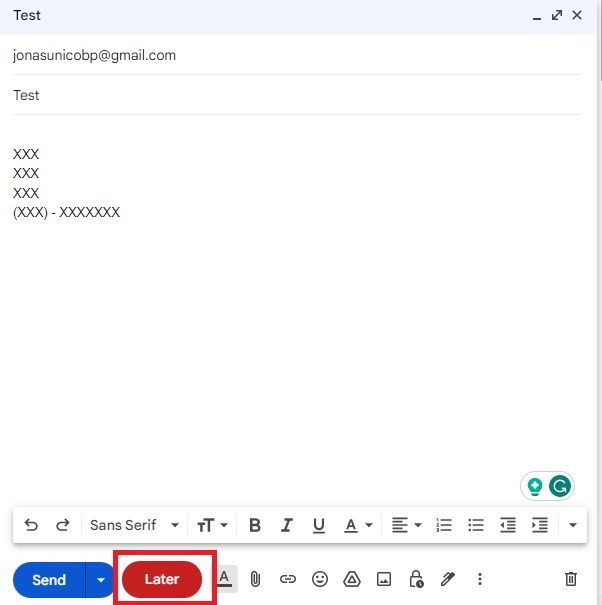
- Click Compose.
- Fill out your To, Subject, and Email body sections.
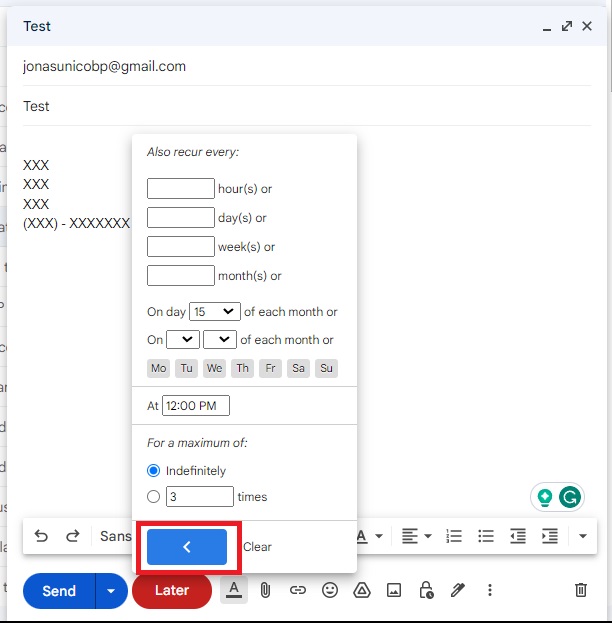
- Click Later.

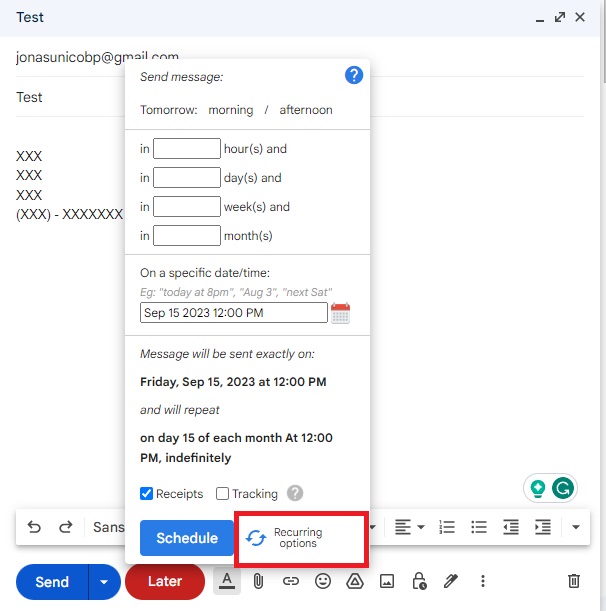
- Set the exact date for the email to start sending.
- Select Recurring options.

- Set the time when it will be sent.
- Toggle Indefinitely to have it sent continuously or set the number of times when the email will be sent on schedule.
- Click the arrow button at the button.

- Select Schedule.
→ Try Recurring Emails for Gmail
Boomerang for Gmail
If you want something outside of Google extensions, there are also third-party apps that you can use. One of the most popular is Boomerang Gmail. The app is free, but you’re only allowed 10 messaging credits on a free account. If you need to schedule more recurring emails, you can subscribe for as low as $14.98 per month/billed annually.
3. Automation Services
You can use automation software like Zapier, Mailchimp, Pabbly, and more for large-scale scheduling. These services are intended for businesses, so they come packed with other features for a monthly fee. Such automation services can be complicated, but they are also much more powerful. None of the above options mentioned in this guide will offer the same level of power as Zapier or other automation tools.
How to Schedule an Email in Gmail
While recurring emails aren’t a feature in Gmail yet, you’re still allowed to schedule single emails. Doing this for emails you need to send in the future is a good idea, so you avoid forgetting about it. Here’s how you can schedule an email via Gmail.
- Open Gmail.
- Click Compose.
- Fill out your To, Subject, and Email body sections.
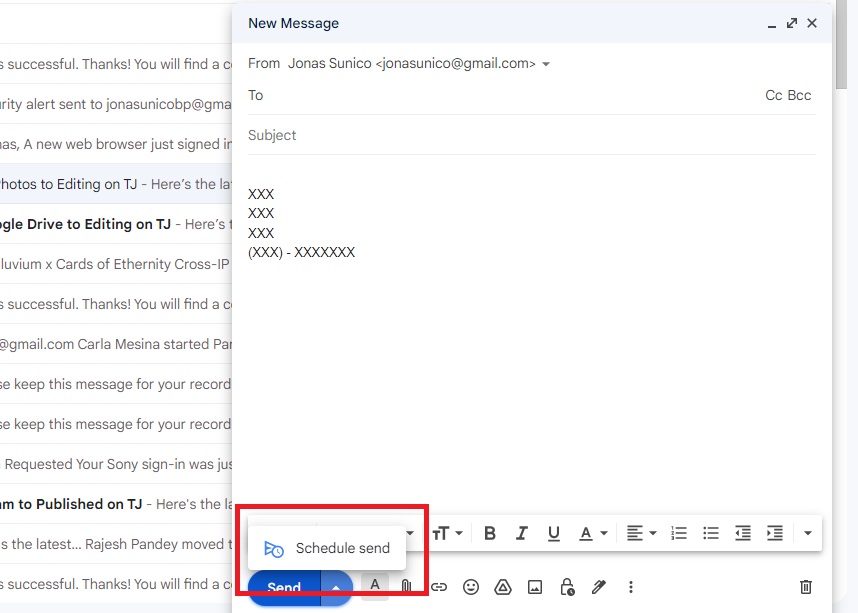
- Click the arrow button beside Send.

- Select Schedule send.
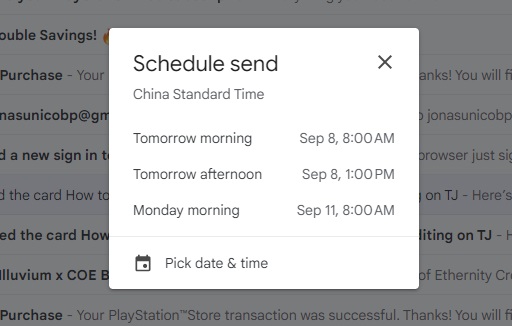
- Choose from one of the suggested dates. Alternatively, click Pick date & time to set your own schedule.

- Set your schedule and click Schedule send.
To change the schedule, click the Scheduled option on the left side of your Gmail home screen, select the email, and then edit the time.
Better Productivity With Recurring Emails on Gmail
Google is unlikely to add a native option to schedule recurring emails in Gmail. So, you’ll likely have to rely on third-party tools and extensions for this. But that should not stop you from scheduling recurring emails and saving precious hours doing an unwanted task. If you want more productivity tips, here’s how to send large files on Gmail.
FAQs
A: You can have up to 100 scheduled emails in Gmail at a time. There’s no way to add more unless you use third-party apps to extend the limit.
A: No, they do not, but this depends on what you’re using. Some apps create the email and send it when the scheduled conditions are met, so they don’t add up to your scheduled email limit.
A: Scheduled emails can be sent even if you’re not online, so connectivity isn’t the problem. Make sure to ask the recipient if they’ve changed their email, as this is likely the cause of why the email won’t be sent.


