How to Take and Manage Screenshots in Windows 8

Windows users have long known how to use the Print Screen key to copy a screenshot of their desktop that could be pasted into an image editing application. Or how to use the Snipping Tool to take more advanced screenshots. With Windows 8, there’s now an even easier way.
To take a screenshot and save the image directly to a folder, press the Windows and Print Screen keys simultaneously. You’ll see your screen dim briefly, emulating a shutter effect.
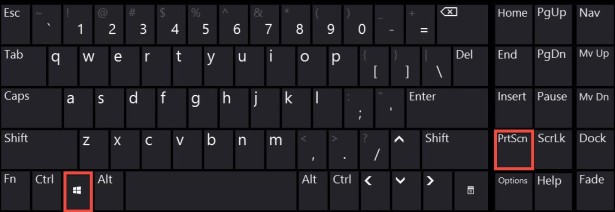
To find your saved screenshot head to the default screenshot folder, which is located in C:Users[User]My PicturesScreenshots. By default, images are saved as PNG files with the name “Screenshot” and a number designating how many screenshots have been taken.
If you’d like to store your screenshots in another folder, such as the Desktop for easy access, you can use Windows’ location mapping to redirect where the screenshots go when created. To do this, first enter Desktop mode and use Windows Explorer to navigate to the default screenshot folder, listed above. Right-click on the folder and select Properties > Location.
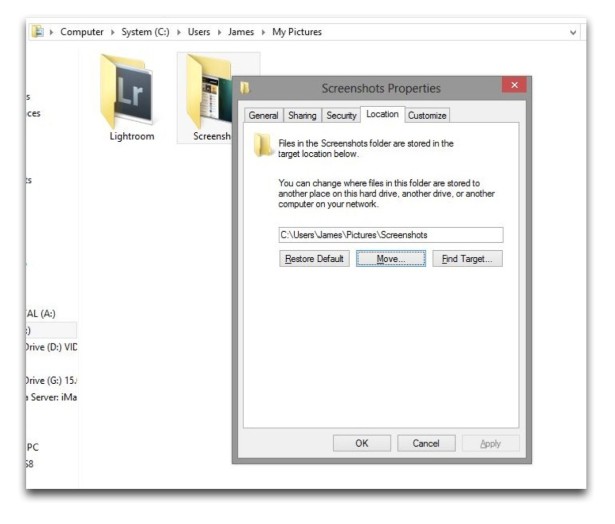
The path displayed here is currently set to the default screenshot location. To change it, click “Move”, navigate to your desired new destination, and choose “Select Folder” at the bottom of the window. In our example, we’re moving the default screenshot location to the Desktop.
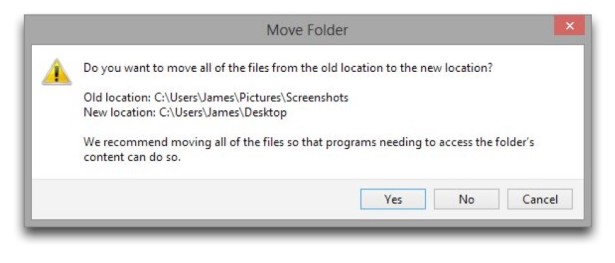
Once the new path is displayed in the Screenshots Properties window, press “Apply” to enable the change. Windows will ask you if you want to move any items currently in the old location to the new location. Click “Yes” to accept.
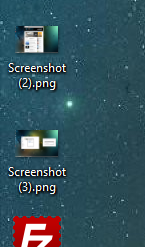
Screenshots are saved to the Desktop.
Next, if you’ve chosen a system folder as your destination, Windows will ask you to verify the redirection. Press “Yes” if you’re sure that you’d like your screenshots to go to the new location. Note that choosing a folder that contains other items, such as the Desktop, means that you won’t be able to revert to the default behavior or change the folder in the future without redirecting all of your Desktop items. In our case, we’re absolutely sure we want the screenshots to be created on our Desktop. If you’re not sure, create a “Screenshots” folder on your Desktop and use that instead.
Once you’ve made up your mind and you press “Yes,” you’ll see any screenshots that were in your default Screenshots folder appear on your Desktop (or in the location you chose in the previous steps). If you take additional screenshots with the Windows + Print Screen shortcut, they will also appear in the new destination.
As mentioned above, unless you’ve chosen a system folder such as the Desktop, you can always revert to the default location or move the folder again to a new location simply by starting with the current screenshots folder and repeating the steps above.





12 thoughts on “How to Take and Manage Screenshots in Windows 8”
Many people solved their problem, but some didn’t. If you can’t solve the problem either, you can use those screenshot tools which allow you to save the screenshot to any folder you like.
I think that since desktop is a system folder, you can’t do it as easily. Look at me, all late to the discussion and thinking I add something relevant. Oh well. Happy computing!
Screenshot Properties>Location>Documents.
It asked if I wanted to move all items to new location? I answered yes.
Now I can’t find any screenshots. Even new ones I have just now created. Where are they?
(are they in a clipboard?)