How To Use The Intel Processor Diagnostic Tool

Think you might need a new processor? Generally, out of all the components in your PC or laptop, processors are rarely the problem. However, they aren’t immortal either. Processors can die just like every other component, though it’s usually because of age, overheating, or an electrical surge. Thankfully, Intel offers a Processor Diagnostic Tool (IPDT) to help you nail down some of these issues, and we’re going to show you how to quickly use it!
What does the Intel Processor Diagnostic Tool do?
As per the Intel website, the IPDT “checks for brand identification, verifies the processor operating frequency, tests specific processor features, and performs a stress test on the processor.” If any of these checks come back as a failure, the tool will tell you that the test it performed on the processor failed, and you’ll probably need to look into getting a new processor sooner rather than later.
How do I run the tool?
You can download the IPDT from Intel’s website for free here. However, make sure you download the correct 32 or 64-bit version for your system.
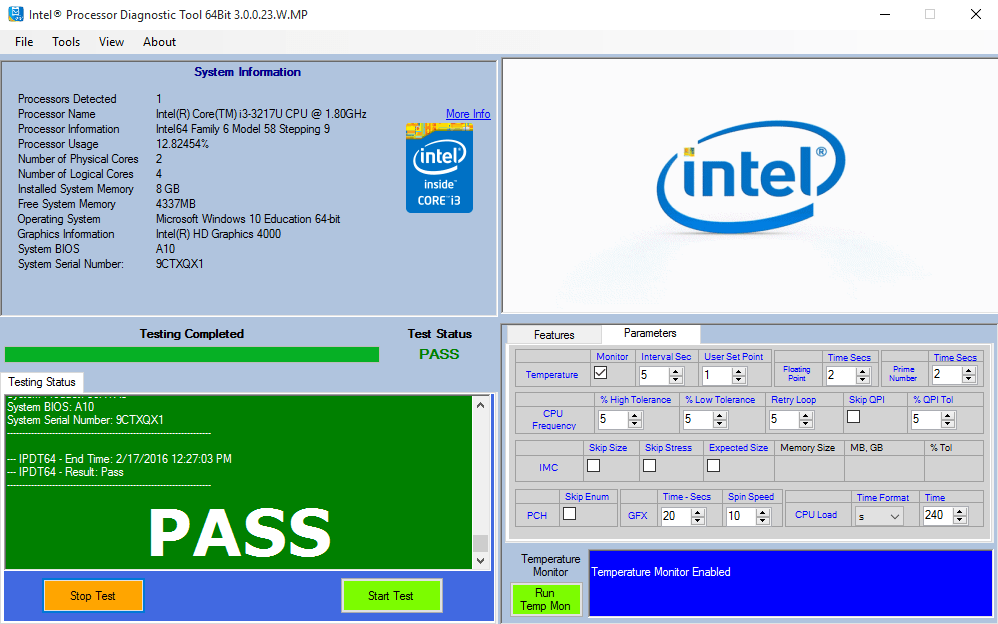
Once installed, the tool will begin testing your processor immediately. It’s recommended that you close all running programs before it starts this process. You can stop the test at any point in time and start it again when it’s more convenient for you.
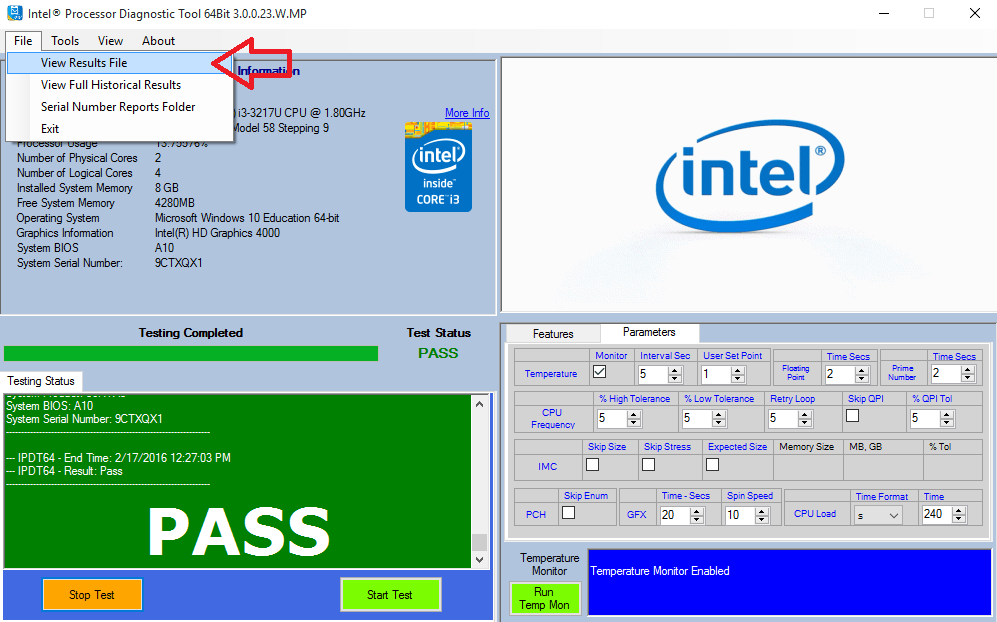
After the test completes, you can go into File > View Results File to see a better and more organized report on the tool’s diagnostics of the processor. In this file, under each individual test the tool performed, there will be a line telling you whether that test passed or not.
However, one of the most important things to look for is the processor’s temperature monitor. Again, this is something that you can view in real-time, but can also be found at the end of the Results File. This is where you’ll largely find an issue with your CPU. In my case, my processor was always 50 degrees or more under the maximum temp that the processor can handle.
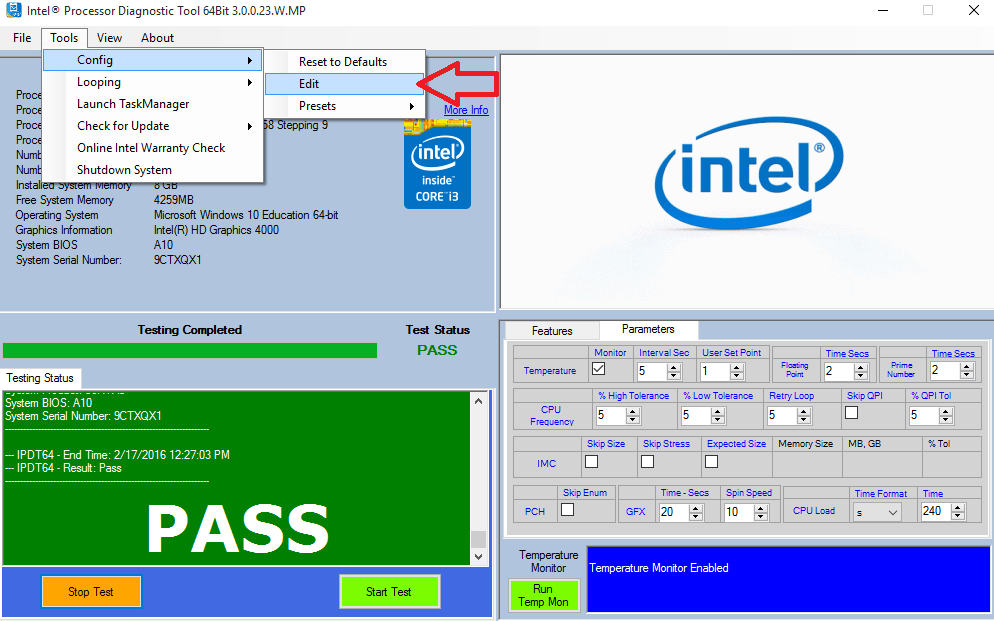
For more advanced users, Intel gives you the option to edit the test’s parameters. You can find this under Edit > Config. Keep in mind that you should only use this if you know what you’re doing or need to test, as it could net some odd results if not done right.
Intel also put together a great step-by-step tutorial for using the tool. You can find that here.
Closing
All in all, Intel’s Processor Diagnostic Tool is an easy route to helping you rule out issues with your processor, though if there’s still a problem with your computer, it could be something else. We recently put together a step-by-step guide on troubleshooting your motherboard, where we detail how to rule out many of your major components. It’s worth taking a look and could potentially help you finally nail down the computer problem you’ve been having.
Have you used Intel’s Processor Diagnostic Tool? Has it helped you? Be sure to let us know in the comments below, or join us over in the PCMech Forums!


