Paint.net: How to Get Rid of Background and Make it Transparent

Image editing software has come a long way in the last three decades. Older readers may recall the pre-Photoshop days, when editing an image meant opening MS Paint and adding a text label. Today, however, powerful and sophisticated image editing software is well within the reach of everyone, not just high-end graphics professionals. There are even free programs like Paint.NET which provide much of the power of Photoshop without costing users a penny.
One common task for image editing is the addition of elements from one image or photograph into another. In order to do that effectively, it’s necessary to remove the background from one of the images, isolating the element that you want to keep, so that you can place that element in another image. Removing the background is the first necessary steps. There are a couple of ways to do that with the freeware software package Paint.NET (which runs on Windows 7 or newer). If you don’t have Paint.NET, you can download it here. Paint.NET’s Magic Wand tool is essential for both methods. In this article, I’ll provide a simple tutorial on removing the background and making it transparent.
Remove the Background with the Magic Wand and Eraser
The Magic Wand tool is an automatic selector that seems to work as if by magic (really it works by looking for sharp differences between areas of an image file). Open the image file that contains the element that you want to preserve. Click Tools, and select the Magic Wand option. Your cursor should become a Magic Wand selector as below.
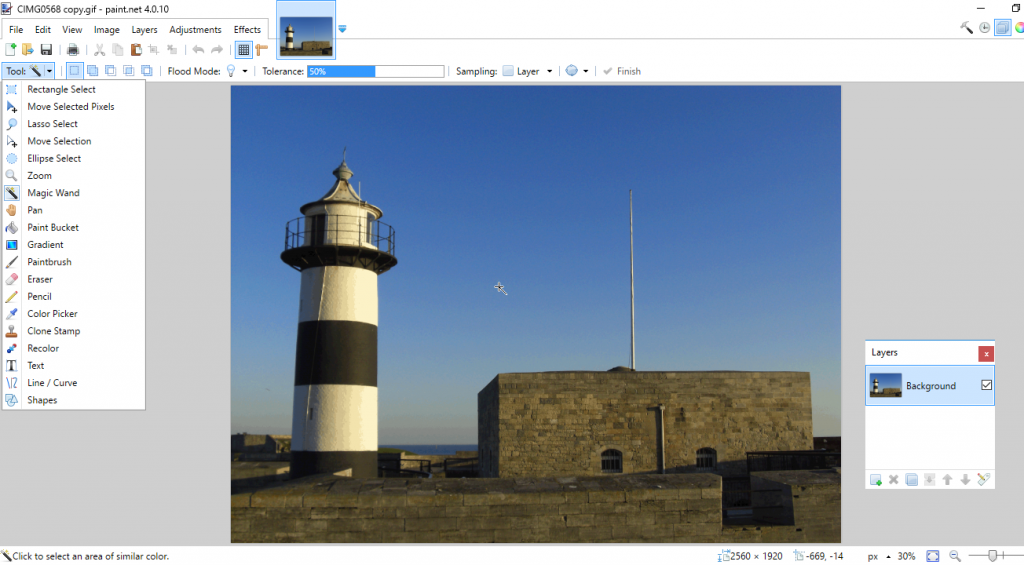
Now click an area of the image background to remove with the Magic Wand selector. It highlights the area with an animated black and white dashed line. If the selection includes some areas of the foreground that you intend to retain in the image, drag the tolerance bar further to the left; this effectively tells the magic wand to be a bit pickier about what it considers to be the same area of the image and it will select less. Dragging the bar more to the right will increase the number of color shades selected, so will most probably include some areas of the foreground if above 75%. You may need to play with the slider to get the tool to work well on your particular image, but in general the Magic Wand is very good at what it does.
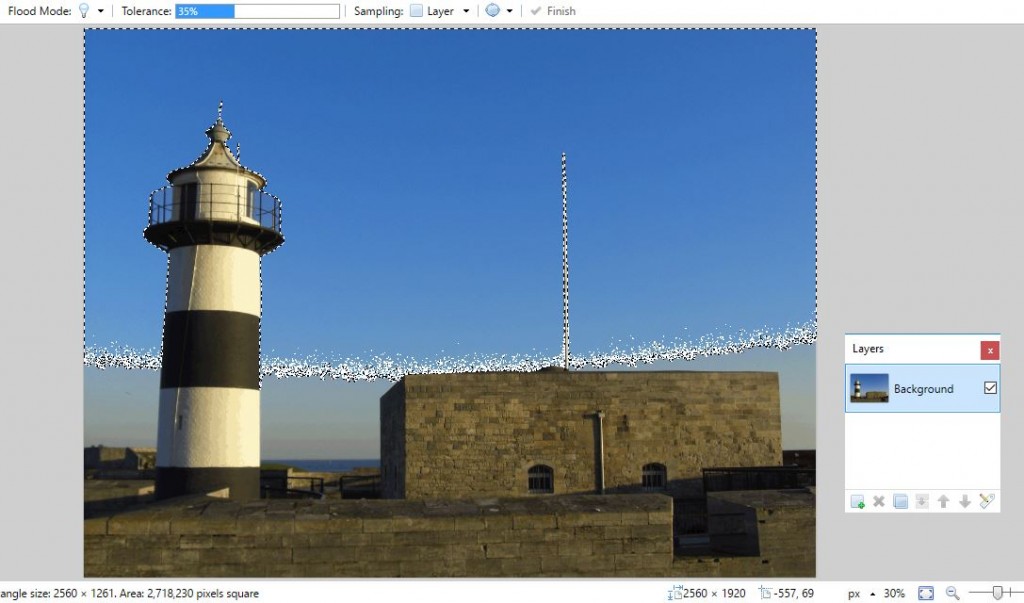
Press the Delete key to erase the selected area of the image, and it should be replaced with the grey and white checkerboard background. Keep on selecting areas of the background to erase with the Magic Wand tool, and press the Delete key until you’ve removed most of the background as shown in the snapshot below. To erase smaller areas, press Ctrl and + to zoom in and select them.
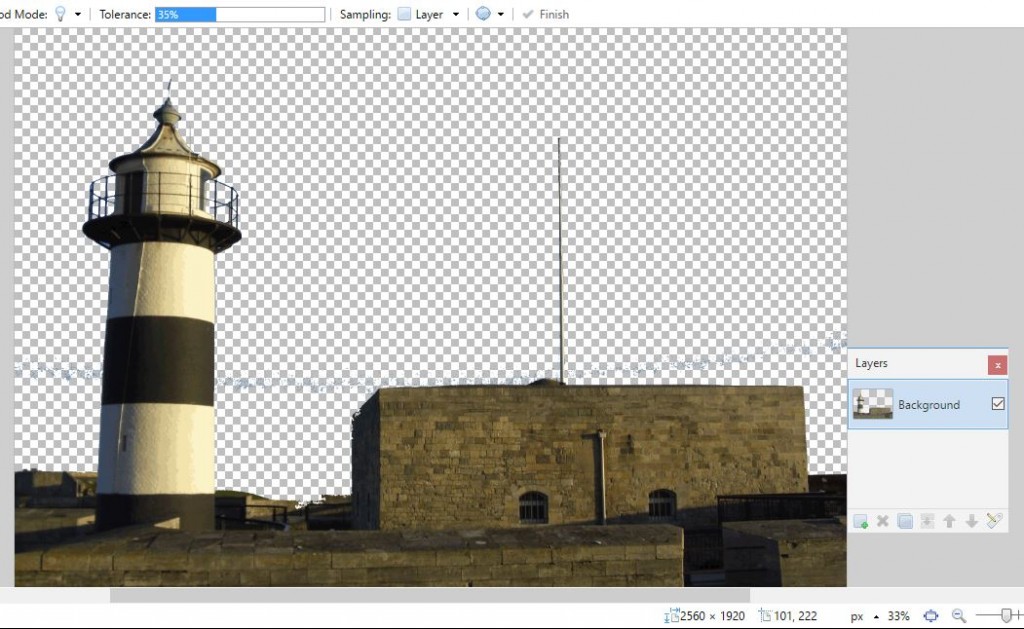
Now you might be left with a few small specs of colors scattered in the background. You can use the Eraser tool to remove left over backdrop colors. Click Tools > Eraser and then hold the left mouse button and move the cursor over the remaining background colors to remove them. Select a higher brush width to wipe the remaining color gradients off the background more quickly, which could then leave you with output comparable to that shown directly below.
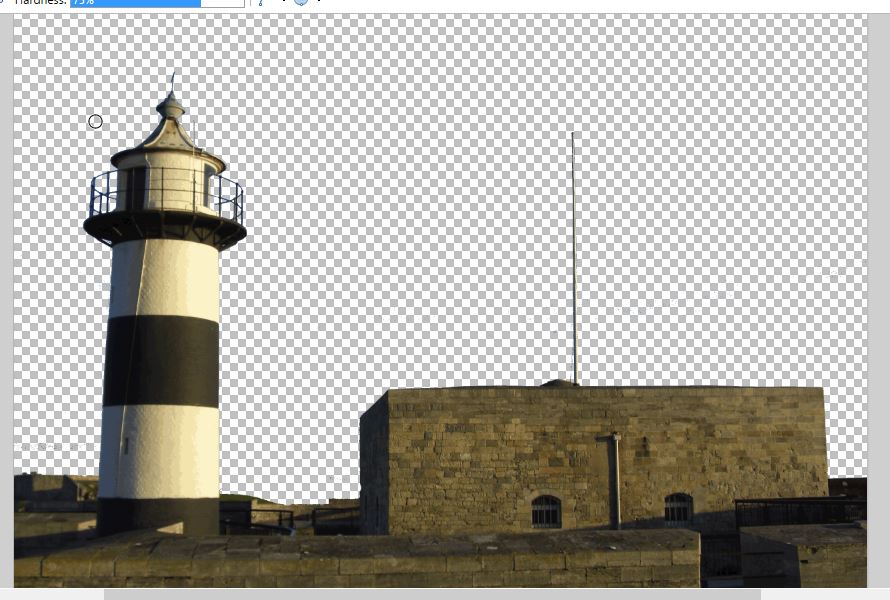
In the shot above, I’ve removed all background sky line from the picture, turning it transparent. Now you can fill the empty background with another picture or whatever color you’d like. Select Layers > Import From File and open another image to combine it with. Press F7 to open the Layers window shown in the snapshot directly below.
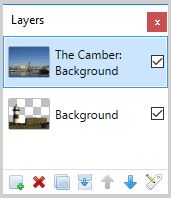
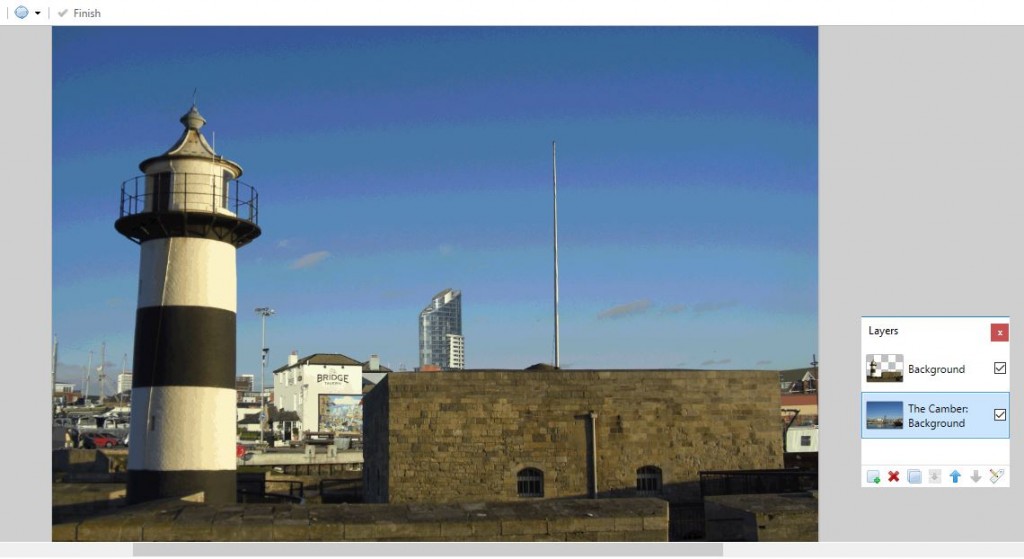
The image you just opened will be at the top of the stack. You need to move it below the one that includes the foreground to make it the background picture. So select it on the Layers window above and click Move Layer Down (the down arrow button). Then it will replace the backdrop of the foreground picture as shown below.
Remove the Background with Magic Wand and Paintbrush Tool
That’s one good way to remove backgrounds from images. However, it might not always be entirely effective if the foreground and backdrop have similar colors. Then the Magic Wand might also erase areas of the foreground that you want it to retain. If that’s the case, or you only need to keep a small amount of foreground in an image, it might be better to combine the Magic Wand option with Paintbrush or Line/Curve instead.
First, open the image you’re going to remove the background from. Then set up another layer on top of that. Select Layers > Add New Layers, and press F7 to check that they are stacked as shown directly below. The empty layer should be on top of the background one.
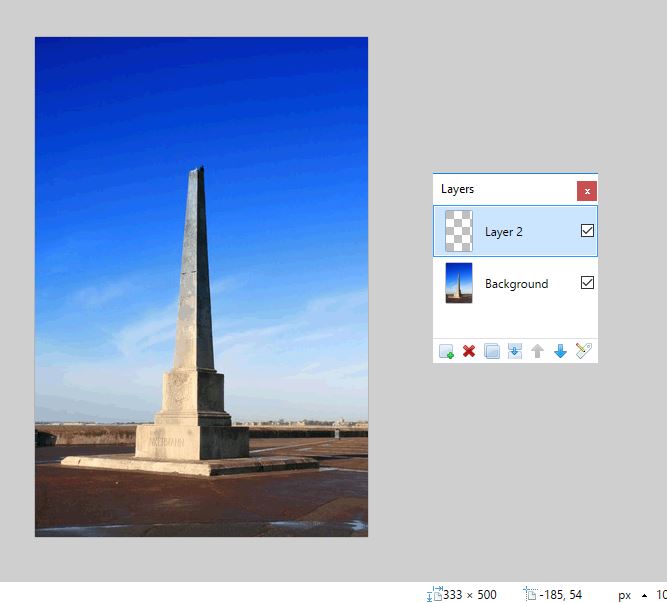
Select Tool > Paintbrush, and choose a small value from the Brush width drop-down menu on toolbar. Now trace around a foreground object or other detail that you intend to keep in the picture with the Paintbrush tool. Trace around the object’s perimeter cleanly, and make sure there are no gaps left in the outline.
If the object has lots of straight lines, the Paintbrush tool might not be ideal. The Line/Curve option could be a better alternative. That enables you to draw out straight lines. Select Tools > Line/Curve, and drag a straight line along the edge of the object and press Enter. Then drag more lines around the foreground object’s perimeter and connect them together without any gaps.
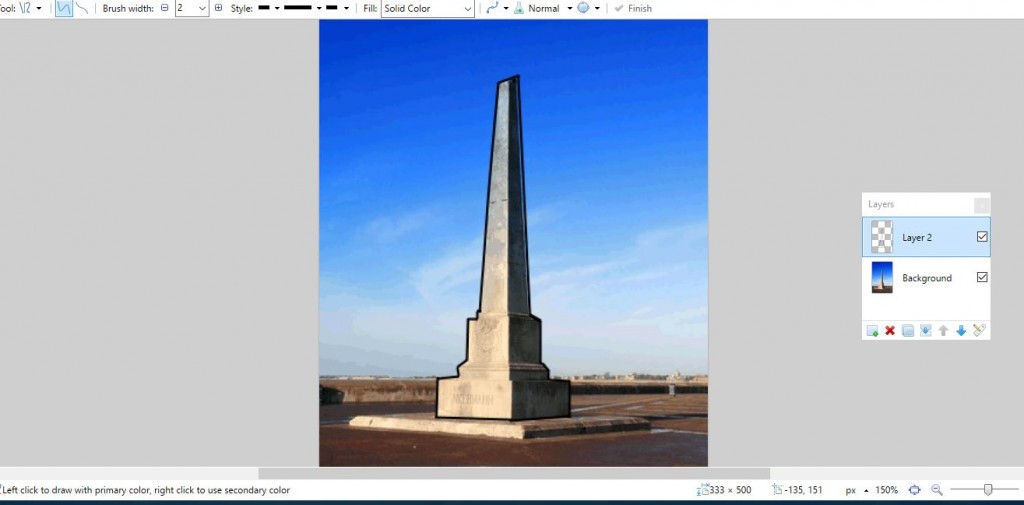
Now click the Magic Wand option, and select inside the foreground object’s border. The border selection should then be highlighted. Press Ctrl + I to invert it.
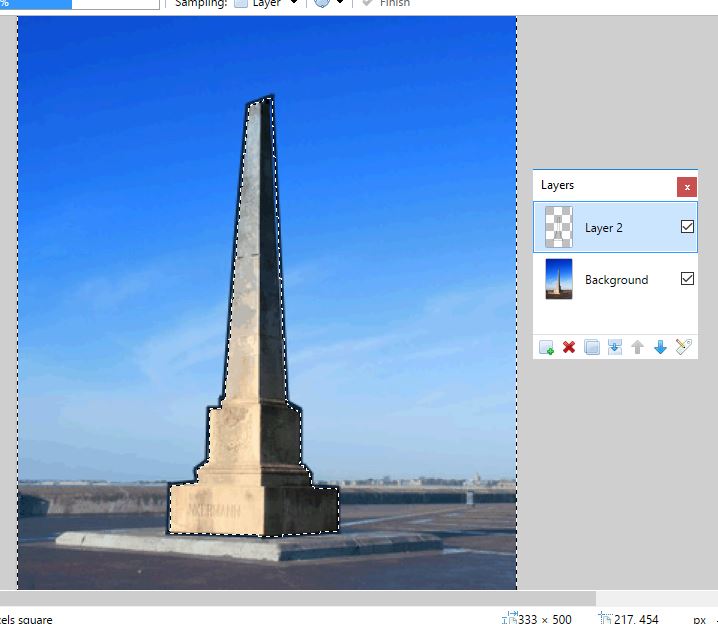
Next, select the background image layer and press the Delete key. Alternatively, you can also click the Cut button on Paint.NET’s toolbar. That will then remove all the background around the object’s border you traced out with the Line/Curve or Paintbrush tools as shown in the shot below.
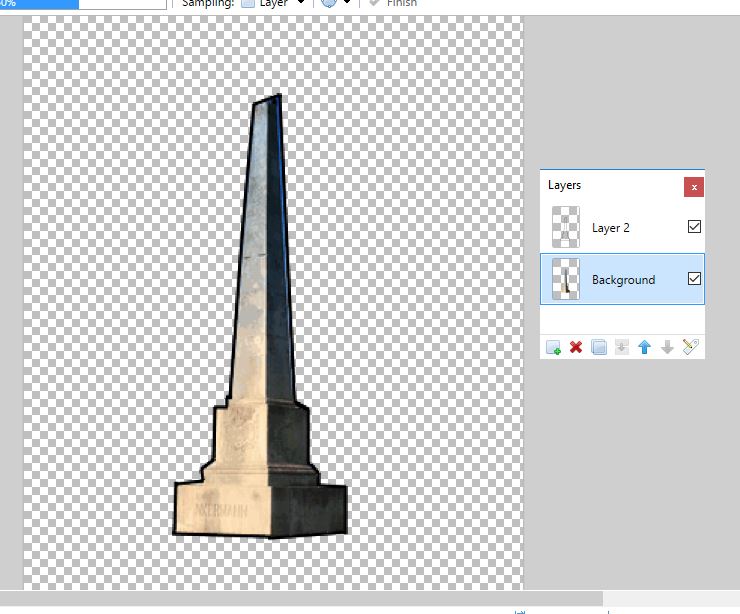
The foreground will still include the border you traced out. To erase that, select the top layer on the Layers window. Then press the X button to delete the layer. Now save the image by selecting File > Save.
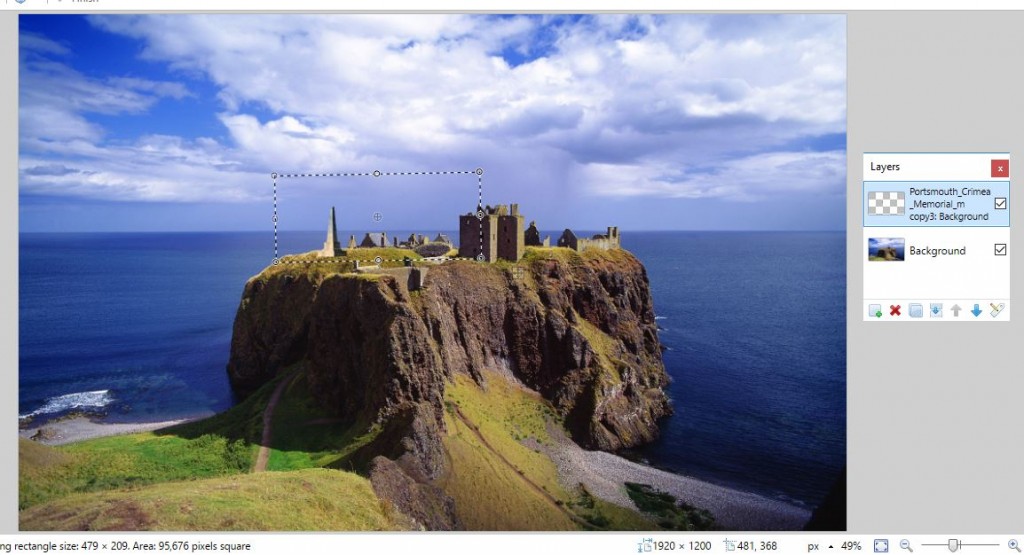
Now you can add a new background to the foreground detail. Open a new background image by selecting File > Open, and then click Layers > Import From File. Select the image you removed the background from as the new layer. Then the foreground object will overlap the background as below.

You can move the foreground object to new positions by selecting the top layer. Then click Tools > Move Selected Pixels. Left-click and hold the mouse button to drag it around the background image with cursor. Resize it by dragging the corners of the rectangular border around it.
The disadvantage of the Paintbrush method to removing backgrounds is that it’s not always easy to trace foreground details entirely smoothly. However, you can smooth out the tracing with additional options such as the Feather tool, which is a part of the BoltBait’s Plugin Pack. Click BoltBaitPack41.zip on this page to save its Zip, which should then be extracted to Paint.NET’s Effects folder. Then click Effects > Object menu > Feather to open the tool.
Alternatively, if some of the background is still around the edges of the foreground you could always use the Eraser tool to remove it. Select the foreground image on Layers window to edit it. Then zoom in with the Ctrl and + hotkey, select Eraser and brush over background to remove it.
And that’s it! From now on, you can get rid of image backgrounds and then add entirely new backdrops by combining them with other picture layers. Removing backgrounds with the Magic Wand option can transform your photos. Do you have any great suggestions for using Paint.NET to remove backgrounds from images? Share them with us below!




11 thoughts on “Paint.net: How to Get Rid of Background and Make it Transparent”
As with all software it takes time to learn the ropes and for assistance to others – I don’t need to select “Tools” to find the various tools. Along with the colour palette I have selected the option to keep the tools icons permanently and conveniently visible on my main Paint.net screen
Thanks again
Thank you!