My iPhone Won’t Accept My Passcode

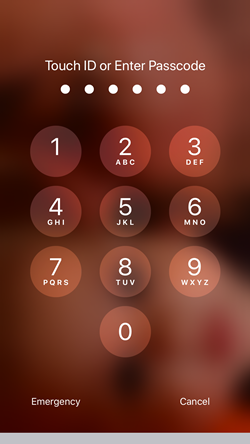
Facial recognition and fingerprint scanners (on older iPhones) are incredibly handy. Just take a look at your phone or touch the sensor and it unlocks. However, you might be prompted to use the passcode to enable Touch ID or facial recognition. Oftentimes, this happens when you want to access email or message notifications from the iPhone’s lock screen.
In theory, this two-step authentication should work like clockwork. Tap in the four-digit code and voila – you’ll get right to the notification or message you want to read. But what if it doesn’t? Are you permanently locked out of your phone? Keep reading to find the answer to these questions.
First Line of Defense
At the risk of stating the obvious, but are you certain you have typed in the correct passcode? For sure, you can type it blindfolded, though mishaps and typos happen. When you are in a hurry, the finger might slip and miss the digit.
To ensure this is not the case, press the Side button and try to unlock your phone again. If you wanted to access notification from the Lock screen, it’s best to leave it alone for now and just try to unlock your device. Hopefully, the face recognition or fingerprint scanner still works, so you’ll be able to gain access.
In fact, it would be best to try these unlock methods and avoid typing the invalid passcode a few times. Otherwise, the iPhone might prompt you to enter the code to enable the face ID/fingerprint scanner every time you try to unlock the device.
Change or Disable Passcode
Hopefully, you’ve entered the iPhone using a Face or Touch ID. If so, it would be best to navigate through the Settings and disable or change the passcode.
Launch Settings and swipe down to Face ID & Passcode (Touch ID & Passcode on older iPhones). This is where things become tricky. The following window requires you to enter the valid passcode to access the menu. Carefully type the code and hope you’ll get inside the menu.
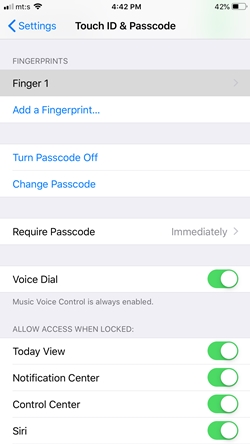
Once inside, select “Turn Passcode Off” or “Change Passcode.” If you choose “Turn Passcode Off,” a pop-up window appears to confirm the decision, and you need to provide your Apple ID password for the change to take effect. To change the passcode, type the old one, then the new one, and retype the new passcode to confirm it.
The “iPhone Is Disabled” Message
The worst-case scenario is that you enter the wrong passcode too many times and your iPhone gets temporarily disabled. This usually lasts between one and five minutes, and then you can try your luck again. However, should you enter an invalid passcode six times in a row, your iPhone may lock you out of the menus for much longer.
Trivia Corner: Some users have reported their device showing the following message: “iPhone is disabled, try again in 23 million minutes.” To save you the trouble of calculation, this is about 44 years.
The “iPhone is disabled” message is a good indicator you’ll need to restore your phone from a backup. Of course, you need to have the backup files in the first place. And this is one of the reasons you shouldn’t ignore all those “Your iPhone Hasn’t Been Backed Up in X Days” messages.
Long story short, here are the methods to restore your iPhone.
iTunes
Connect your iPhone to the computer you use for syncing. iTunes should immediately detect the device and launch automatically. Click on the small iPhone icon in the iTunes bar and select Restore iPhone.
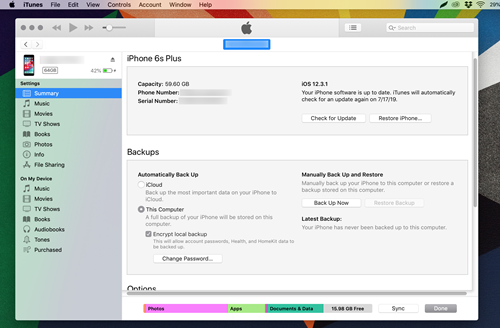
Next, just follow the on-screen wizard and your phone will soon be restored. However, this might not always be that easy. If you haven’t connected the iPhone to your computer for some time, a pop-up window will prompt you to select “Trust This Computer.” In this case, you’ll need the passcode to connect to iTunes. On the bright side, there are two tricks to work around this issue.
Recovery Mode
The exact steps to enter the recovery mode depend on your iPhone model. On the iPhone 8 and newer, turn off the phone and hold the Side button when you plug the phone into a computer. Keep holding until you see the “Connect to iTunes” screen on your phone (a cable and iTunes icon appears on your phone).
At this point, a pop-up window should appear in iTunes. Click Restore and your iPhone will restart when the restore finishes.
DFU Mode
DFU mode is like an extended version of the recovery mode and the method is pretty similar. Connect your iPhone to a computer, manually launch iTunes, and turn off the iPhone. Once it’s off, hold the Side and Volume down buttons simultaneously (on newer iPhones). After 10 seconds, release the Side button, but keep holding Volume down.
When the screen goes black, the iPhone is in DFU mode and iTunes should recognize it. Now you can proceed to restore the device.
Important Notes
If you just turn the iPhone off and then back on, it won’t help with the passcode problem. Remember, you are required to provide the passcode after the restart. When your iPhone gets disabled for more than 5 minutes, a reset from backup is the only way to regain control of the phone.
Was It Four Zeros?
You might stumble upon third-party apps that offer to remove passcode or allow you to change the password without restoring the phone. But you should refrain from using these apps on your phone because you might risk sharing more information than you’d be comfortable with.
That said, one of the methods in this article should have helped you regain control over your phone. So, which one was it? Do you know about some other way to regain access to your iPhone after you’ve entered the wrong passcode too many times? Share your experiences and tips in the comments section below.


