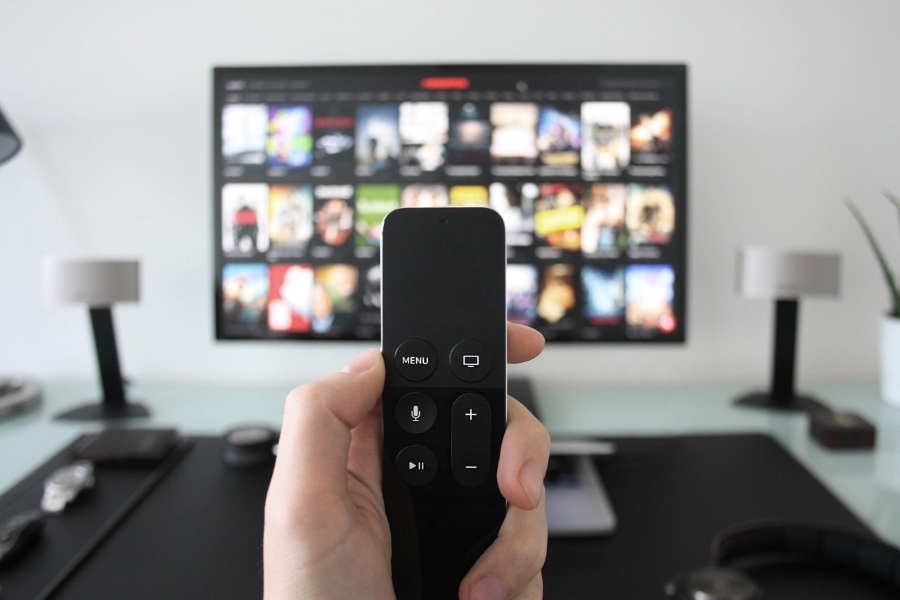
How To Use Kodi with Your Apple TV
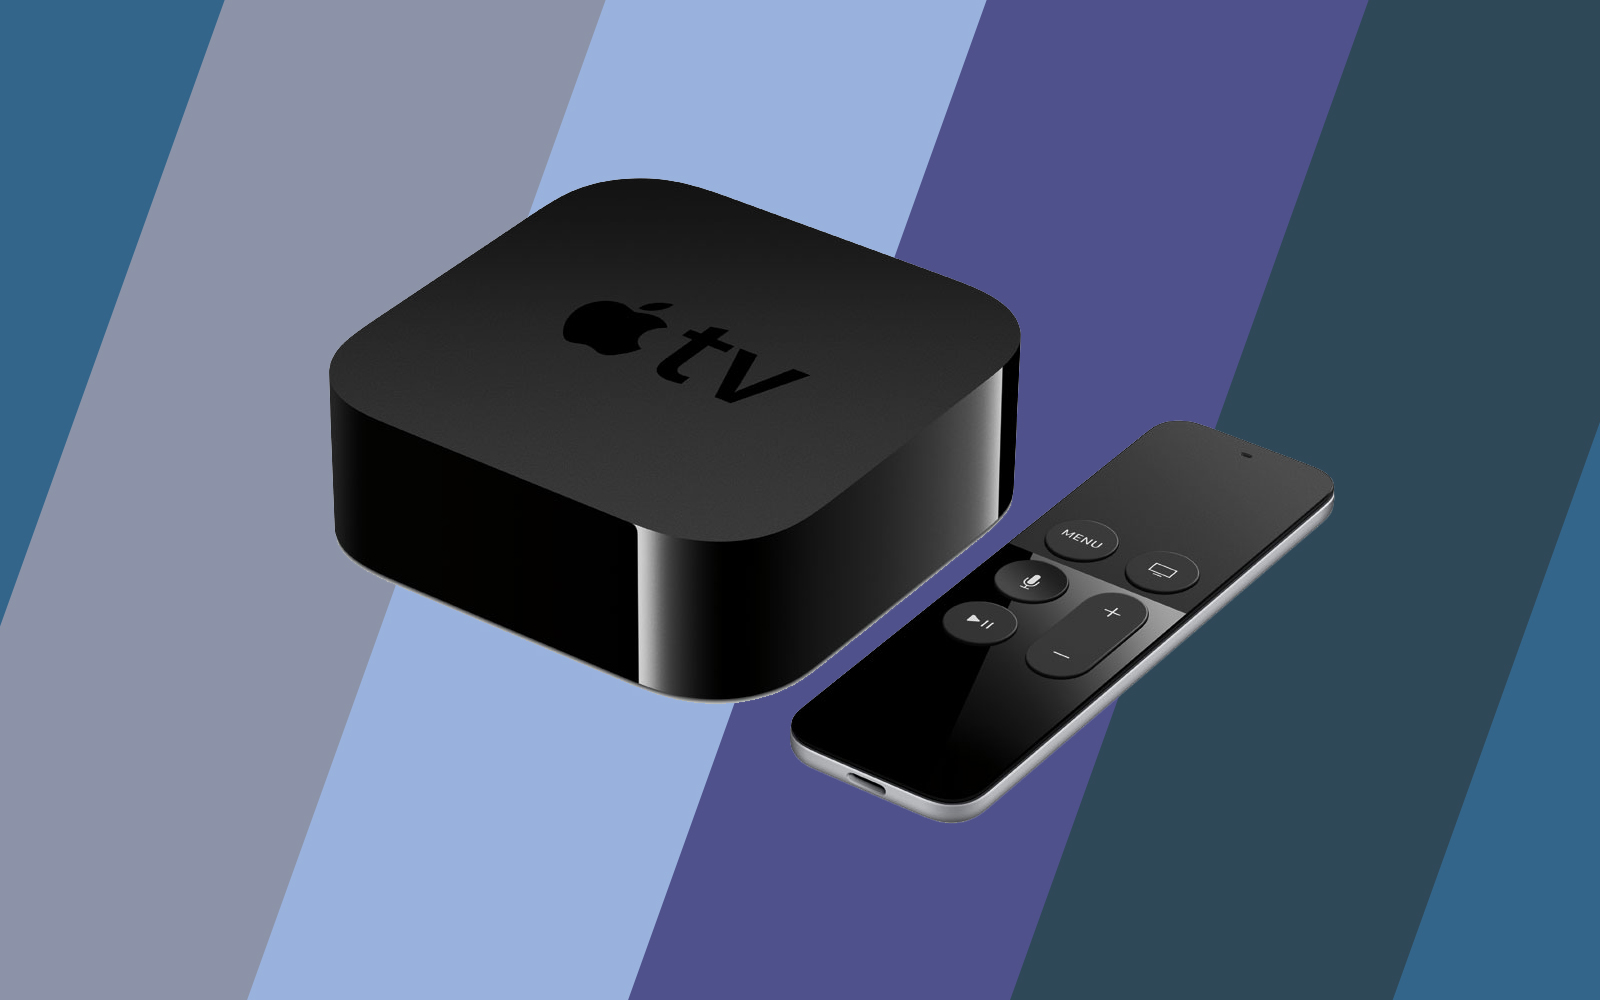
For years, Apple TV was designated as a “hobby” by Apple, a side project that was largely considered an experiment from the computer giant when the first model was unveiled and released in 2007. Though originally planned to be called iTV, by the time the Apple TV had come to market, the name had been changed to avoid a lawsuit from British television network iTV. The original model included a 40GB hard drive, though that model was quickly replaced with a 160GB hard drive for the same price just months later, and mainly focused on playing back your library of iTunes purchases. The most notable feature of the original Apple TV was its ability to sync your library over your network, at the time a major feature that wasn’t seen on other media streamers like the Xbox 360 or PS3, the latter of which had just started shipping months prior to Apple’s set-top box.
In 2010, Apple finally refreshed the Apple TV, introducing one of the most important features to the platform with Airplay, which allowed media to be streamed wirelessly directly from your iPhone or iPad. It was a major advancement, rivaled only by Chromecast from Google years later, and still stands as an important addition to the Apple TV platform. The fourth generation of Apple’s streaming box, released in 2015, seemed to finally take the platform from a hobby to a real focus in Apple’s lineup, with the addition of the App Store built directly into tvOS, the fork of iOS that powers the fourth and fifth generation of the Apple TV. Tim Cook, CEO of Apple, said at the time that the future of TV was apps, and while perhaps the Apple TV craze still hasn’t quite caught on, Cook wasn’t incorrect with his claims. All of Apple’s competitors in the arena—Amazon and Roku especially—have robust app markets built into their platforms, and leveraging the dedication of iOS developers against their rivals was a smart idea. Two years later and tvOS has built a solid foundation of applications. With the release of the fifth generation of the Apple TV, now including support for 4K and HDR playback, Apple seems more confident than ever to jump into the set-top box arena against Google, Amazon, and Roku.
When you’re looking to purchase a $200 streaming box, you’ll want to make sure you can get the most out of your device. To that end, Kodi (née XBMC, or Xbox Media Center) is a great solution for users looking to access content outside of the Apple App Store. You won’t find Kodi downloadable through the App Store on your device, but with some hard work on your end, you can get Kodi up and running on your favorite media streaming box. While installing Kodi on an Apple TV isn’t quite as easy as installing the app on Amazon’s Fire TV Stick, you should be able to get your favorite open-source media player running in no time. Let’s take a look at how it’s done.
What is Kodi?
Chances are you’re familiar with Kodi if you’ve come looking for tips on installing the app on your Apple TV, but if you’re unfamiliar with Kodi, you should know it’s one of the internet’s favorite open-source media players. Originally launched over fifteen years ago as XBMC, Kodi works as a media center and home-theater PC client, allowing you to stream and watch content anywhere from around the world. Kodi has a fantastic interface, a great theming engine complete with tons of options, preferences, and appearances, and the ability to add applications from multiple sources using software repositories. This makes Kodi one of the most powerful media streaming applications available online, especially in a post-Windows Media Center world, and if you’re looking for something with plenty of power behind it, Kodi is the app for you. The app is available on dozens of different platforms including Windows, macOS, iOS, Android, and even Raspberry Pi.
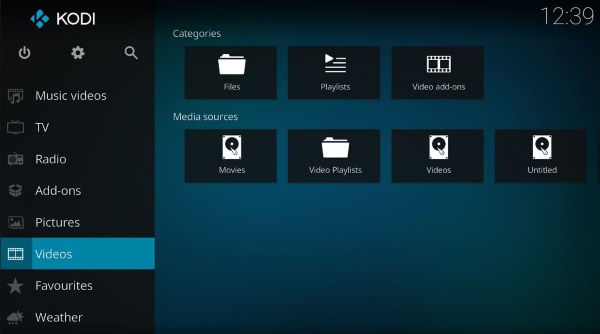
If you’re still not sure if Kodi is the right platform for you, let’s put it this way: Kodi allows you to access all your favorite content, both through Apple and through other means, on one device. You can access videos, music, podcasts, and more, all directly from the internet. Meanwhile, Kodi also makes it easy to play back media files from your local storage and over your network, making it easy to stream content wirelessly that Apple may not approve of streaming on their boxes. That said, with mainstream add-ons including Amazon Prime, Spotify, and YouTube, you can pretty easily use Kodi to replace the entirety of iOS and tvOS on your platform, making it easy to stream content on Kodi. We also have to address the elephant in the room: Kodi allows users to stream pirated content and TV streams, and while both Kodi and the writers at TechJunkie don’t support the use of a HTPC platform for illegal content, it’s a feature that millions of people use Kodi for all around the world.
Why Should I Install Kodi on my Apple TV?
Put simply, whether you have a large library of non-iTunes content or you’re looking to squeeze some extra content and use out of your machine, using Kodi on your Apple TV just makes sense to a certain kind of user. It’s one of those things that you’ll either see as a worthwhile hack or as a waste of time, but for the former group of people, they tend to be incredibly passionate about using Kodi on their full range of devices. And it makes sense—Kodi is a powerful platform, with thousands of homebrew apps developed for the device. For people who own older Apple TVs from 2010 to 2015, it makes even more sense to install the platform, since those devices don’t have App Store support out of the box. Installing Kodi can breathe a bit of new life into your older streaming boxes, saving you from having to buy a new, more expensive device, just to regain the ability to use apps.
Basically, whether you’re looking for a way to playback your local content stored on your computer or on a hard drive, or you’re looking to add apps and new abilities to your platform, installing Kodi can be a great idea to help gain some more functionality on your streaming box. That said, whether or not you can install Kodi on your Apple TV really depends on the model you own. With that said, let’s take a look at how to install Kodi on your device, based on which generation of Apple TV you own.
How to Get Kodi Running on my Apple TV
The first step to installing Kodi on your Apple TV is to find out the correct model of Apple TV you own. As we noted above, there’s been five different generations of the Apple TV since its launch over a decade ago, and in that time, each generation has seen its own features and abilities. Let’s start with the bad news first: if you own a first generation Apple TV—easily identifiable by its large size, silver color, and component cable connections on the back of the device, you won’t be able to run newer versions of Kodi on your device. That said, there is a build of Kodi you can find online for these devices, using modified and unofficial creations made by fans. The first generation of the Apple TV has largely dwindled in popularity, but if you still own one of those, you’re best off checking out the guide over at Kodi’s own wiki site for more information on how those unofficial builds work.
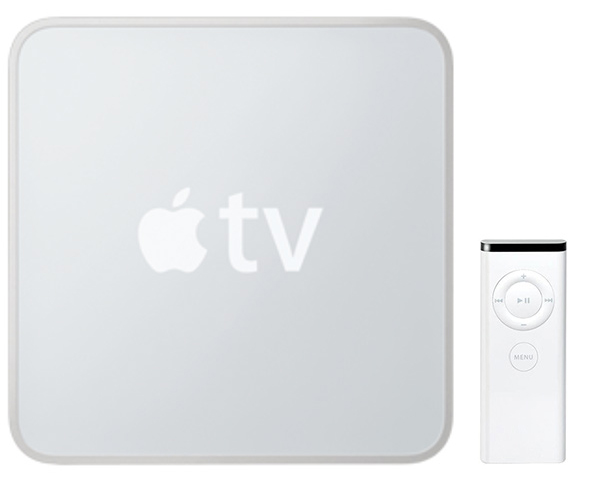
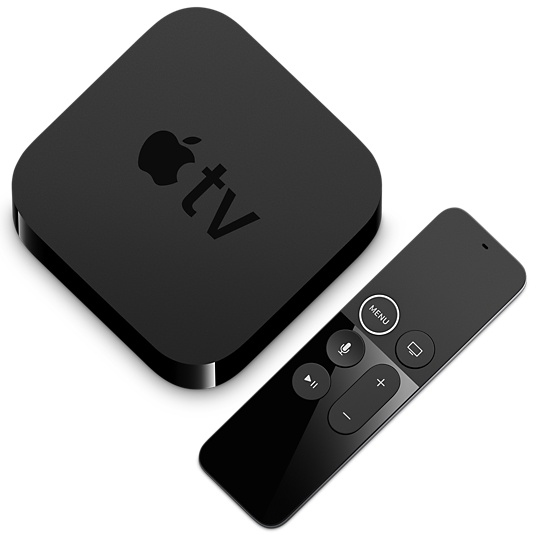
As for everyone else, it’s still fairly easy to determine which device you own just by looking at the external casing of the box. The second and third generation Apple TVs are nearly identical, hockey-puck shaped devices that differ only slightly on specs and the IO offerings on the back of the device. The fourth and fifth generation Apple TVs, meanwhile, are also identical in shape and size, adding 10mm to the height of the device while keeping the other dimensions the same. Like the second and third generation Apple TV devices, the fourth and fifth gen models differ primarily with different internal specifications. Basically, the fourth generation device cannot output to 4K, while the newest box can.
To determine which generation of box you own, diving into the about section of your Apple TV will help you out. Each Apple TV device has its own model number, making it easy to determine which model you have for sure. Here’s each individual model number for each iteration of the device:
- Second-gen Apple TV: A1378
- Third-gen Apple TV: A1427
- Third-gen Apple TV Rev A: A1469
- Fourth-gen Apple TV: A1625
- Fifth-gen Apple TV (Apple TV 4K): A1842
Once you’ve determined which generation of device you have, continue below to read each guide for installing the correct version of Kodi for your device.
Second Generation
If you still own one of the older Apple TV devices, we have good news for you. Not only is Kodi going to be beneficial to you, allowing you to install third-party applications on a device that doesn’t have access to the Apple App Store, but you’re also going to find that installing Kodi on your device is far easier than it is on later models. Like with the first-generation Apple TV, Kodi no longer officially supports the second generation device (which, despite the overall power of the platform, is still running on an A4 chip from 2010, the same processor that powered the original iPad, making it difficult to properly support the older platform). That said, the version of Kodi that is still accessible for the second gen Apple TV is a much-newer version than the one that is still able to be used on the first-gen Apple TV, so there’s no reason not to go along with the newer platform.
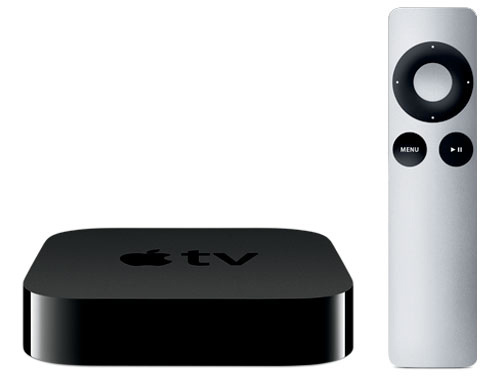
If you’re using a second-generation Apple TV, you’ll be able to install Kodi 14.2 Helix on the device. This is a solid version of Kodi, developed following the name change from XBMC, and will be able to support most of the applications and programs you would want to use on any other newer version of Kodi. In order to get Kodi running on your Apple TV, you’ll need the device itself, along with a MacOS or Windows-based computer, in order to run Terminal. Alternatively, if you have a Windows 10-based computer, you can use the SSH client of your choice, like Putty or Tunnelier, though this tutorial hasn’t been tested with those devices. This is a moderately advanced tutorial, so make sure you’re familiar with the ins and outs of Once you’ve gathered your supplies, follow along down below for the step by step instructions.
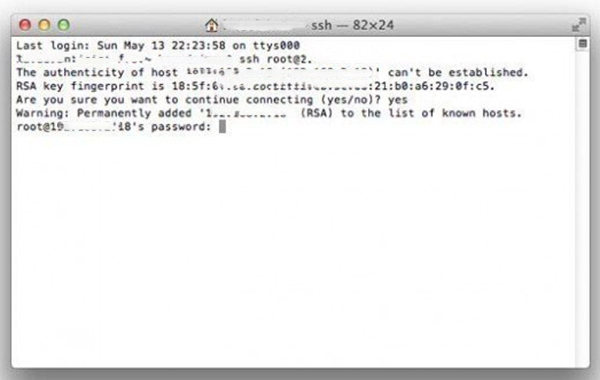
Unlike with newer devices, the second-generation Apple TV doesn’t require you to plug your device into a computer or to download any files or programs. All you have to do to get Kodi running on your device is simply enter some code into Terminal one line at a time. Make sure your Apple TV is plugged into your television and is connected to the internet. You’ll be pushing some commands to the device over your network, so make sure that your device is up and running in order to receive those commands. Once you’ve opened Terminal (or Putty or Tunnelier on Windows), you’ll be good to go. Start by typing the following phrase into your Apple TV, though replace “YOUR.ATV2.IP.ADDRESS” with the IP address of your Apple TV. You can find this information in the preferences menu of your device.
ssh root@YOUR.ATV2.IP.ADDRESS
Once you’ve entered the password for your device, hit return or enter on your keyboard. You’ll be prompted to enter a password; unless you’ve changed the default password for your device, the password will be “alpine.” If you have changed the password for your device, enter your custom password. Following this, you’ll gain access to controlling your device online. This will allow you to begin pushing commands to your Apple TV, which will get your program up and running on your device. There are seven commands total we need to push, so start pushing them one at a time, hitting enter or return between each step. Each line of code will push a new piece of information to your device, so make sure to enter each line exactly as written and in the correct order. You can also copy and paste each line by right-clicking inside of Terminal or your own SSH application.
- apt-get install wget
- wget -0- http:// apt.awkwardtv.org/awkwardtv.pub | apt-key add –
- echo “deb http://apt.awkwardtv.org/ stable main” > /etc/apt/sources.list.d/awkwardtv.list
- echo “deb http://mirrors.kodi.tv/apt/atv2 ./” > /etc/apt/sources.list.d/xbmc.list
- apt-get update
- apt-get install org.xbmc.kodi-atv2
- reboot
Following that final command, your Apple TV device will begin to reset and restart, and will boot into Kodi 14.2. Keep in mind that this device can’t be updated to any newer Kodi versions, which means it may be missing some newer features that have been added to Kodi versions 15 through 17, but nevertheless, you’ll be able to use your favorite Kodi apps on your device.
Third Generation
While the second and third generation of Apple’s streaming set-top box might be incredibly similar in shape, size, design, and even specs, there is a major difference between the two: the third generation device cannot be made to run Kodi, no matter which method you try and use to allow Kodi to work. The third generation of Apple TV was never rooted and made to work with Kodi in anyway. Several videos around the web have claimed that the third generation device would work properly without providing actual evidence, and unfortunately, the sad truth is these methods are often lies or built on fake information.
So, if you’re the owner of a third generation Apple TV (one that has the model numbers A1427 or A1469), you’ll have to rely on using AirPlay to stream Kodi from the device of your choosing. There are methods available online that show how to do this, but essentially, all you’ll be doing is installing Kodi on your MacOS device, then using AirPlay to stream it from your Mac to your Apple TV. If you have a Windows device, you can use AirParrot to get the signal from your Windows device to your Apple TV.
Fourth Generation
So, while the third generation Apple TV products may have to sit out on the Kodi fun, the fourth generation Apple TV—the first device to run tvOS and feature a full-fledged app store of its own, along with more power than ever before—is capable of running the software locally, without having to use AirPlay or AirParrot. That said, unfortunately, installing Kodi onto your Apple TV isn’t nearly as easy as was with the second generation model, nor is it as easy as downloading an app from the built-in App Store. What’s worst: unlike with the second-gen device, you’ll need a device running MacOS to do this properly, along with some extra software and hardware to get going. You’ll need the following software to get started:
- Xcode 8 or later
- iOS App Signer for Mac
- The latest Kodi .deb file for tvOS
- Finally, a free active Apple Developer account, which you can sign up for from here.
In terms of hardware, you’ll need the aforementioned MacOS computer (a MacBook, iMac, Mac Pro, etc.), your Apple TV of course, and finally, a USB-C to USB-A cable that runs from a type-C port to a traditional type-A port. These are pretty easy to find around the house, especially if you have an Android device from 2016 or later nearby, but if you don’t, you can find them for pretty cheap online—a few dollars will pick you up a three foot USB-C to USB-A cable from Amazon. You can browse through them here, and you might also be able to find them in your local electronics store. Once you’ve got your components ready to go, we’ll get to work putting Kodi on your device.
The first step is to connect your Apple TV to your Mac or MacBook by using that USB-C to USB-A cable. The Apple TV has a USB-C port on the back, though it’s unsurprising if you never noticed it—it’s small. It’s also worth noting that the USB-C port has been omitted from the newer Apple TV 4K model, which we’ll discuss further down below. If you don’t see the USB-C port on the back of your device, you have the newer 4K Apple TV model, and this method won’t work for you.
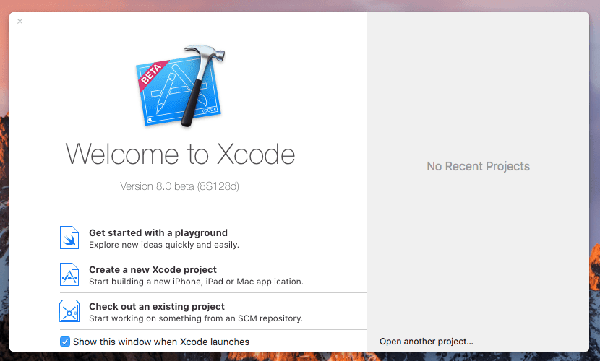
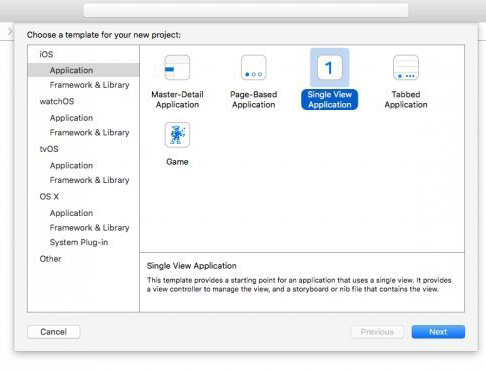
Once you’ve plugged the Apple TV into your computer, open the latest version of Xcode installed on your device. When the menu appears, select “Create a new Xcode project” from the list of settings in the app, and select “Application” under the settings for tvOS. You’ll find all this on the left-hand side menu display inside of Xcode. Once you’ve selected your new project, hit “Single View Application,” then click “Next.” This will bring you to a display to select your options for your Xcode application. Using the entry field, follow the steps to input both a “product name” and an “organization name” into the blank entry points. These can be made up, so enter anything into these fields to get past this step. You may also be asked to fill in a “Bundle Identifier,” which typically uses a domain-stylized name similar to Android application packages (like com.google.gmail, for example). Once you’ve finished filling out every field, click “Next” to open the save prompt on your computer. Save your project to the desktop so that you don’t lose track of your package, and you’ll receive an error message in the main Xcode window. This error states that the software package can’t find a matching provisioning profile to go with your project. Select “Fix Issue” on the prompt.
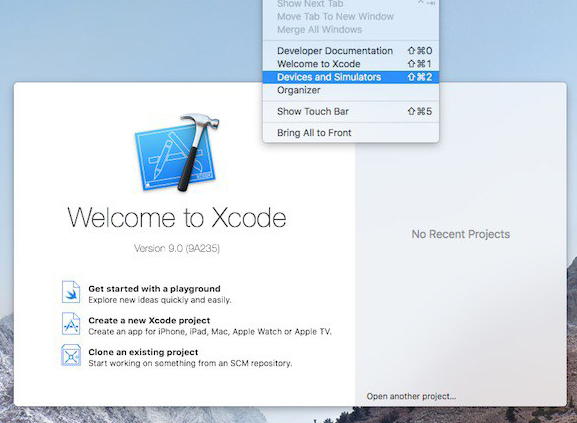
As expected, Xcode will ask you to enter the information for your Apple Developer account. You’ll have to sign in the with Apple ID used with your active developer account by clicking the “Add” button, which will reactivate Xcode and allow it to continue creating a tvOS project file. Once you’ve correctly entered your information into Xcode, the program should automatically complete compiling your project to this point. Now, when you’re been returned to the standard Xcode menu, select Apple TV from the dropdown menu along the top of XCode and open the iOS App Signer you downloaded earlier in the guide, which will give you a whole new menu of options. Select “Signing Certificate” from the dropdown menu inside of App Signer, and fill in the “Provisioning Profile” field, using whatever name you used inside of Xcode. When you reach the “Input File” field, browse to the Kodi .deb file saved on your computer, and within the “App Display Name,” input the word “Kodi,” or “Kodi TV”—whatever you want to name the app on your Apple TV.
Once you’ve finished these steps, click the Start button inside of App Signer, and your computer will create an IPA file (the file type used by iOS and its offshoots to install applications), which can then be pushed to your Apple TV as a dev application. Switch back over to Xcode, select the Window menu and choose your Apple TV from the Devices list. Click Add along the “Installed Apps” section of Xcode and locate the IPA file you created a moment ago. Select the file and your computer should automatically install the package onto your Apple TV. Eject your device from your Mac and replug it back into your home theater setup, and you should find a brand new Kodi application on your device, ready to be used for streaming.
This might seem a lot of work to get Kodi running on your Apple TV, and indeed, it is, complete with having to use Xcode, an app primarily designed to create iOS apps, to get the platform working on your system. There are alternate methods online, primarily by using Cydia, a popular jailbreak app store, to get Kodi working on your console, and indeed, these methods typically take far less time and effort than what using Xcode requires. That said, the improved ease of access by using Cydia over Xcode comes at a serious cost: you’ll have to reinstall Kodi using Cydia every seven days onto your device, and Kodi doesn’t carry your settings, preferences, and apps over. This makes it difficult to keep track of your media, and despite the extra setup time of using Xcode, you’ll save hours in the long run by avoiding the obnoxious task of having to reset your entire Kodi library.
Fifth Generation (Apple TV 4K)
Apple’s newest set-top box has been a long time coming. All of their competitors, including Google with their Chromecast Ultra and Shield TV, Amazon’s new Fire TV models, and the Roku Ultra all benefit from advancements offered by 4K and HDR, and Apple has been notably missing from the arena for a long time. So in September, when Apple finally unveiled their new Apple TV that supports 4K, fans of the product were understandably excited. Reviews of the box said that it was overall a solid experience, just as the fourth-gen Apple TV had been two years earlier, though some criticized the price and the HDR engine that made some pictures look muddy and washed out in certain places, particularly when playing outside of the Apple ecosystem. Still, for your money, it’s a solid box, especially if you mostly live in the Apple ecosystem and you’re looking for something to play content on your brand new 4K HDR television.
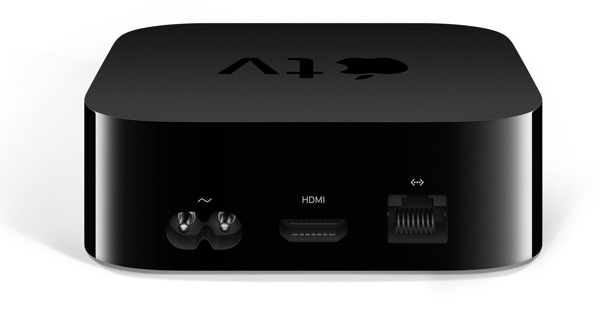
We mentioned it above, but in case you’re a new Apple TV 4K owner and you skipped to this part of the guide in a rush to see how to install Kodi onto your brand new streamer (understandable), we have bad news: Apple has removed the USB-C port from the back of the device that allowed it to connect to your computer in order to follow through with the guide we highlighted above. So, what does that mean for your chances of installing Kodi onto your brand-new device then? Well, we’re not sure quite yet. It’s the early days of this new generation of Apple TV—the product only released a few weeks ago, as of writing—so you should take anyone claiming the device can or can’t run Kodi with a grain of salt. As of right now, we’re not willing to commit to either side. Without the ability to plug the device into your computer, it seems likely the fifth-generation device will be locked to keeping Kodi off of its servers for life, similar to the third-generation device.
That said, there are several different websites online, similar to this one, promising to deliver you a Kodi application for the 4K-ready Apple TV for only a few bucks a month, or for a yearly subscription. It’s impossible to verify the authenticity of these websites without putting our own devices at risk, so if you choose to do this, do so while keeping in mind that this could easily be a scam. As of writing, we recommend that anyone who wants to use Kodi on their Apple TV steer clear of the fifth-generation model and make due with the fourth-gen 1080p device, still available from Apple to purchase for just $149. As always, keep in mind that you can use Kodi on your Mac and simply AirPlay the content to your television through
***
For some people—even those who live in the Apple ecosystem exclusively—need Kodi in order to watch and view their favorite movies, shows, and other content online. Kodi is a powerful home media virtual console device, and it makes sense that some users have fallen in love with the program. The Apple TV, meanwhile, is one of the best TV boxes you can buy today, especially with the prevalence of AirPlay and the ability to stream your favorite content to your television whenever you want. Since the Apple TV has an App Store, you’d expect to see Kodi make an official appearance on the platform. Yet it makes some amount of sense that it hasn’t: Apple typically operates as a walled garden, and Kodi is far more freeing than Apple could ever allow.
Second and fourth-gen Apple TV owners should rejoice in the ability to use workarounds to gain access to Kodi, even if the process for loading it onto the fourth-gen device isn’t easy in the slightest. As for owners of the third and fifth-gen 4K device, it’s unfortunate that Kodi seems inaccessible on both platforms, though time will tell for the 4K model. If you’re truly interested in buying a device just for Kodi, you should consider looking into purchasing something from the likes of Roku or Amazon, both of which have platforms where it’s far easier to get Kodi working on your device. Alternatively, you can build your own home-theater PC using old Windows hardware to get keyboard and mouse support. No matter which system you choose, there’s a platform for Kodi streamers out there. Just make sure to choose your platform wisely.


