How To Mark Content as Watched in Plex

We have covered Plex a bit here at TechJunkie as it is an excellent media center. This prompted a user to email us with a question. As always, we are happy to help where we can. The question was ‘How can I mark content as watched in Plex?’
I know from personal experience how useful having content marked as watched can be. With well over a thousand items in my own Plex Media Server spanning several years, I don’t remember what I have seen and what I have not. Having the system tell me with a glance saves me lining something up only to have to stop it once I recognize it. While a small thing, it is one of the many small features that makes Plex so powerful.
Plex is a very popular media center platform that helps manage all our digital content and stream it to any device anywhere. With a ton of cool features, simple setup and a free and cheap premium version, it is definitely a media center to try if you want to manage a large content library or want to stream content between devices.

Mark content as watched in Plex
The Plex Media Server is at the heart of Plex and does all the heavy lifting for the platform. It collects, arranges and organizes content into logical folders that make it easy to find what you want when you want it. You will need to organize these folders and add content to it when you set up Plex but once done, Plex manages everything for you.
If you have hundreds of movies or TV shows in your Plex library, knowing what you have watched and have yet to watch can be invaluable. We will remember some content but not others, so knowing at a glance whether to watch something save valuable time.
Plex will automatically mark something as watched once you have played 90% of the title but you can also manually mark content as watched in Plex. Here’s how.
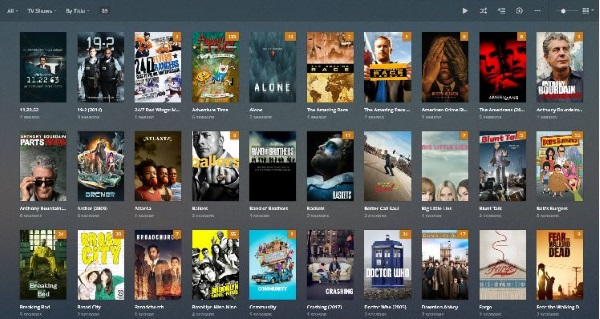
- Open Plex Media Player and open a library folder. Movies, Music or TV Shows usually.
- Select the title you want to mark as watched.
- Select the small eye icon in the top right of the screen.
- Confirm mark as watched if prompted.
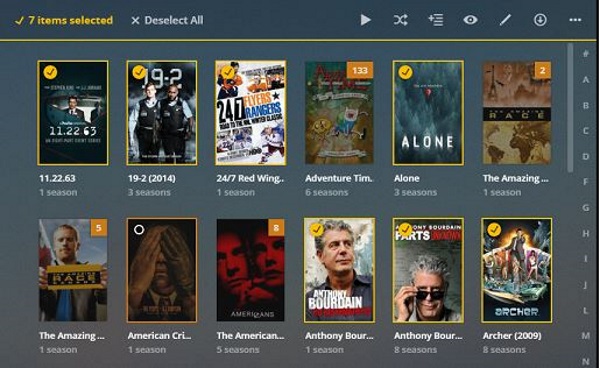
You can also mark multiple titles as watched in Plex.
- Select the titles you want to mark as watched by holding down Ctrl and selecting each.
- Select the small eye icon in the top right of the screen.
- Confirm multiple items being marked as watched.
If you’re using Plex Media Player on Windows, you can also select single or multiple titles and use Ctrl + W to also mark it as watched. You can also use Ctrl + U to mark it as unwatched too if you like.
If you’re using a smartphone app, select the small yellow tick in the top left of each title image you want to mark. Then select the eye to signify that they have been watched.

Managing multiple accounts in Plex
The Plex Media Server creates a database entry for each account you create in Plex. Each entry will manage data separately, so if you have two or more accounts within a single Plex Media Server, each account will mark items watched only within the account from which it was accessed.
So for example, you watch a TV show on your own Plex account and your sibling doesn’t. It will show as watched only on your account. Look at it using your sibling’s account and it will show as unwatched. It is a very neat platform that makes managing media very simple indeed.
Content not being marked as watched in Plex
If you notice titles you watch not being marked as watched, you may have a database corruption. This is rare as Plex uses SQL which is quite robust but it has been known to happen.
The first order or business is to check your Plex Media Server log file. This should be within the install location. Open the log file and look for errors, search for ‘ERROR’ if you have a large log file. If you see SQL errors and/or database corruption errors, this could be interfering with content not being marked as watched.
While it sounds serious, repairing a corrupt database is quite straightforward. Unfortunately, the process differs depending on what operating system or device you have Plex Media Server installed on. The Plex website has a great page detailing how to repair a corrupt database.
Follow the instructions carefully and good luck with it!


