How to Organize Bookmarks in Chrome
When we’re bookmarking the very first page in Chrome, we usually have no idea how messy it’s going to become soon.
We tell ourselves we’ll only bookmark the pages we consider important, the ones we’ll visit again for sure, but after a while… We start adding so many websites to our bookmarks that later we can’t find what we really need.
Well, you have two types of people – the ones who do this, and the ones who decide to organize their bookmarks. Bookmarks can help you get the most out of your browser so if you’d like to belong to this second group, here’s a guide!
How to Enable Bookmarks
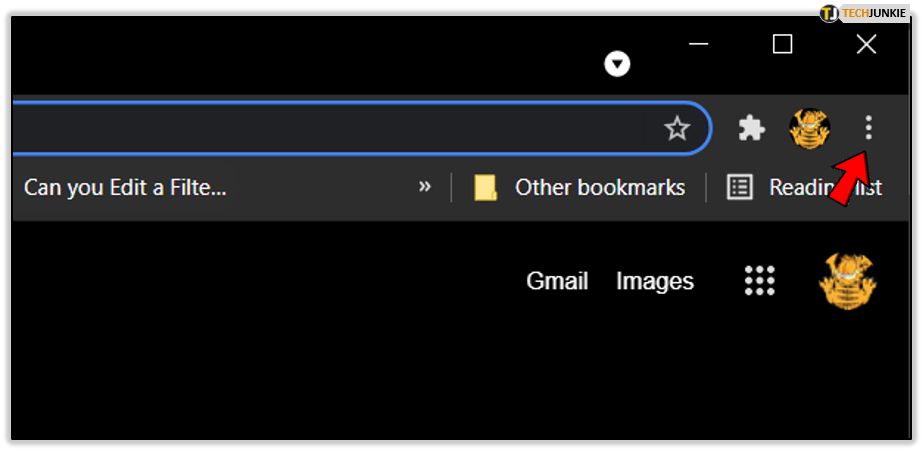
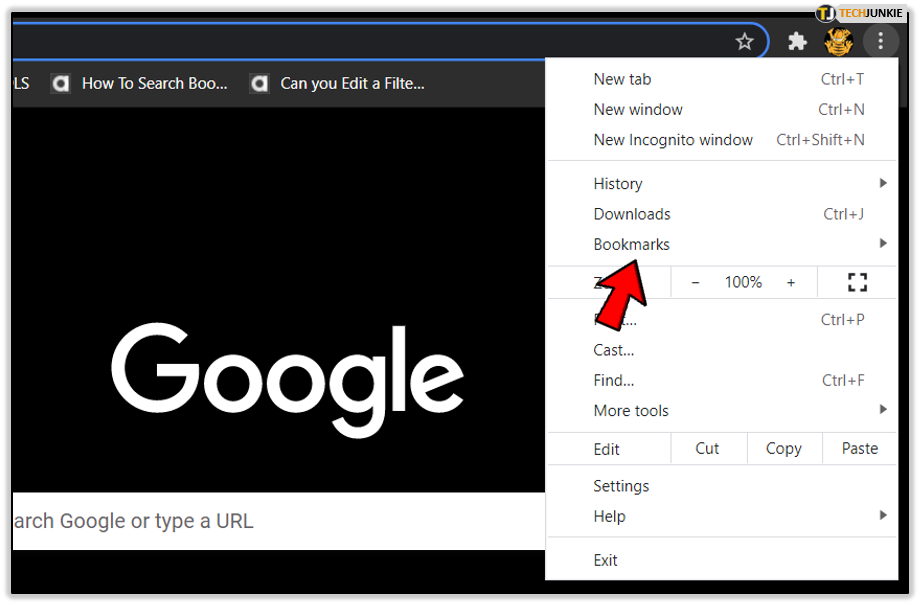
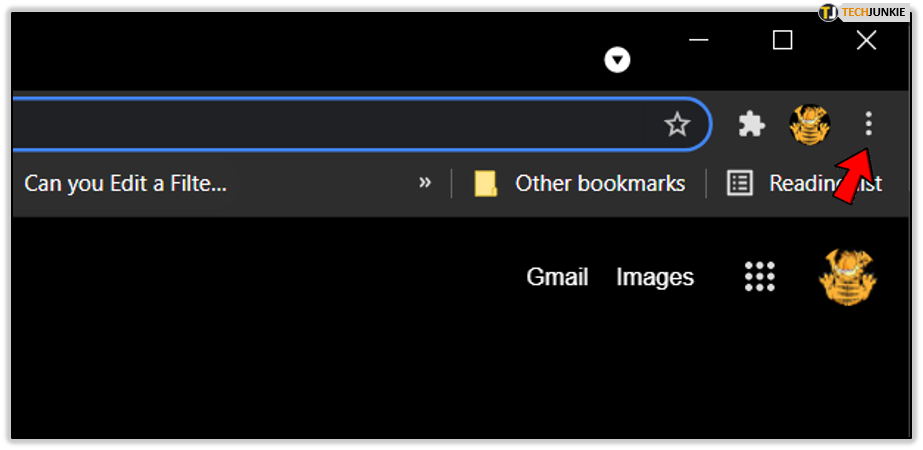
To use bookmarks in Chrome, first you have to enable this feature. Open Chrome and click on the Menu (three dots in the top right corner of the window). Then scroll to find Bookmarks. When you point to it, a new list will appear – click on Show Bookmarks Bar.
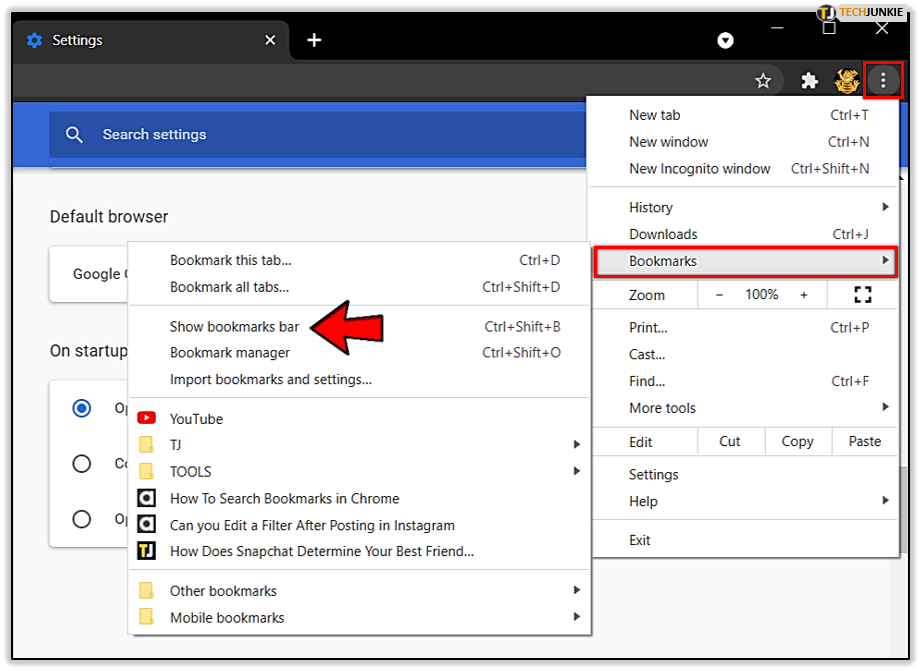
You can also do this more quickly by using your keyboard – Ctrl+Shift+B will show your bookmarks just below the search bar on top of the Chrome window.
How to Bookmark a Page in Chrome
It couldn’t be easier.
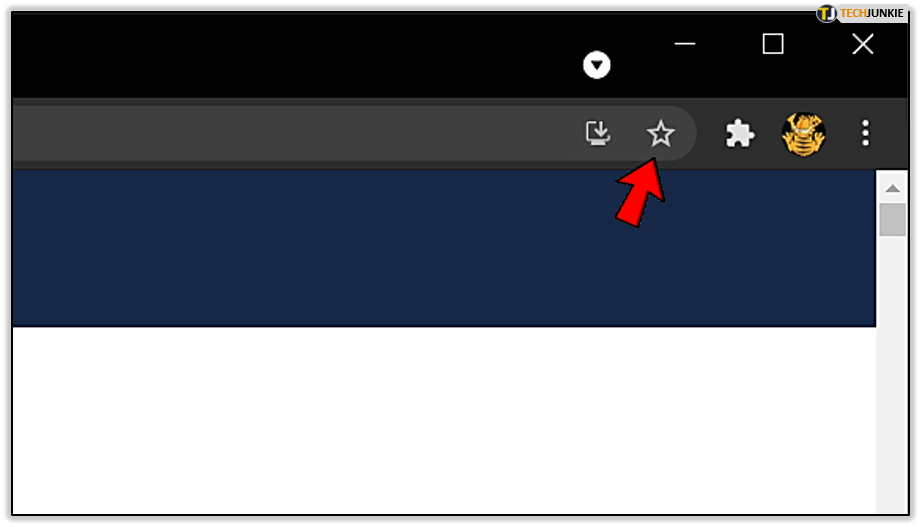
Click on the star at the right end of the search bar, where the page’s URL is. A new window will pop up, asking you to rename the bookmark or simply save it, so click Done when you’re finished. You can also add the page to a folder, but we’ll get to that later.
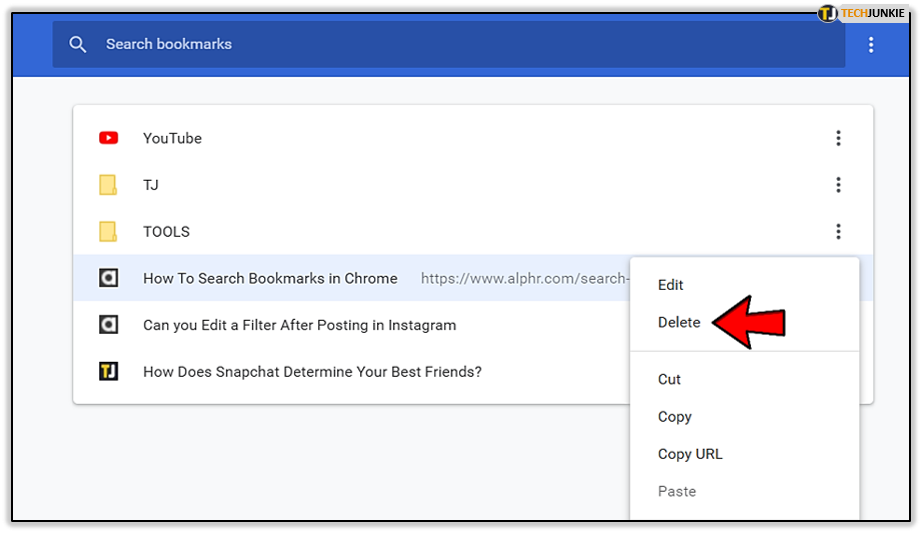
If you no longer wish for a page to appear in your bookmarks, you can easily delete it from the list.
Open Chrome and click on the Menu. Find Bookmarks. When a new list appears, find the page and right-click on it. Click Delete.
How to Import Bookmarks from Other Browsers
If you used some other browser in the past before switching to Chrome, you might be missing your old bookmarks. Chrome is smart enough to find your old bookmarks during the installation, but not always.
Don’t be alarmed if not – you don’t have to create them all over again. It’s enough to import them! If you’re wondering how, Chrome has just the right tool.
- Click on the Menu icon in your Chrome window.

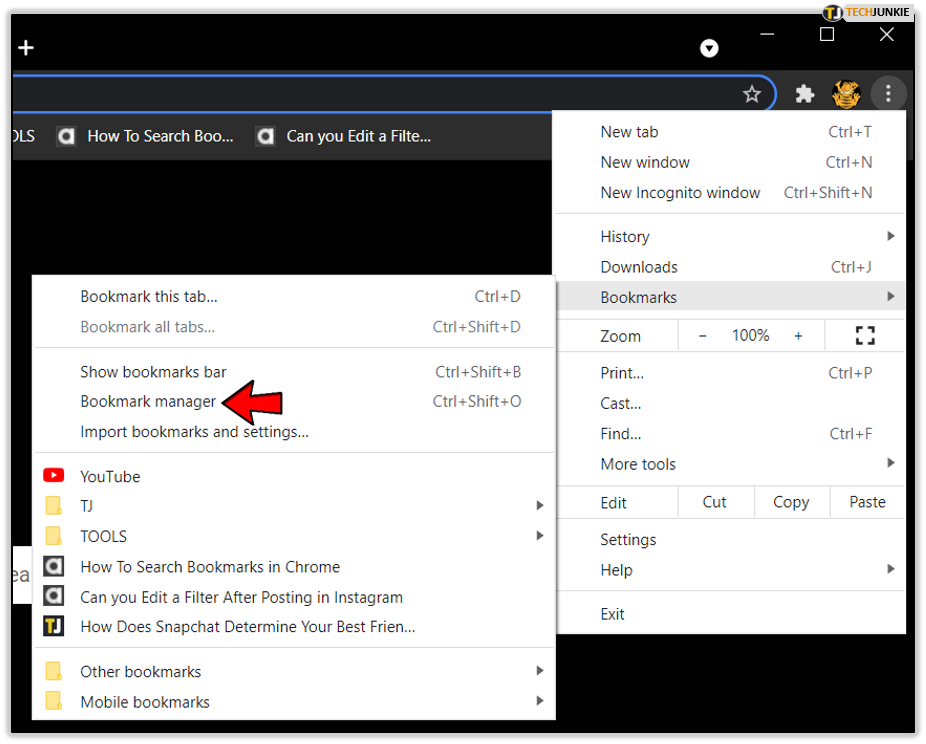
- Find Bookmarks and point to it.

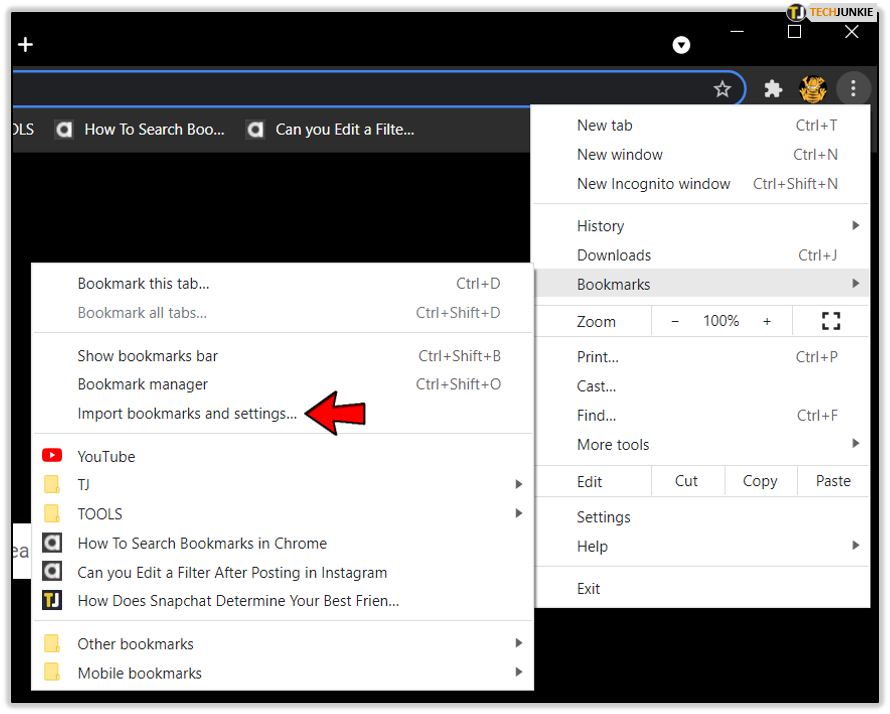
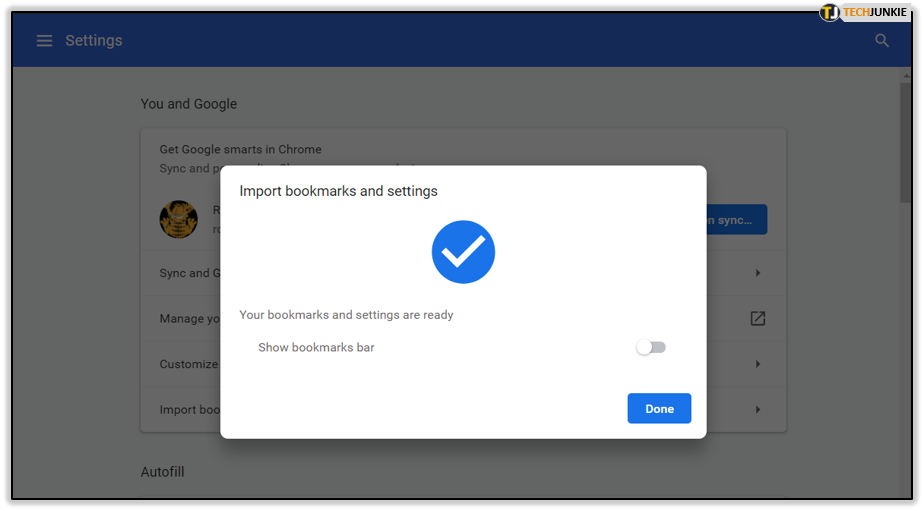
- When the new list opens, find Import bookmarks and settings and click.

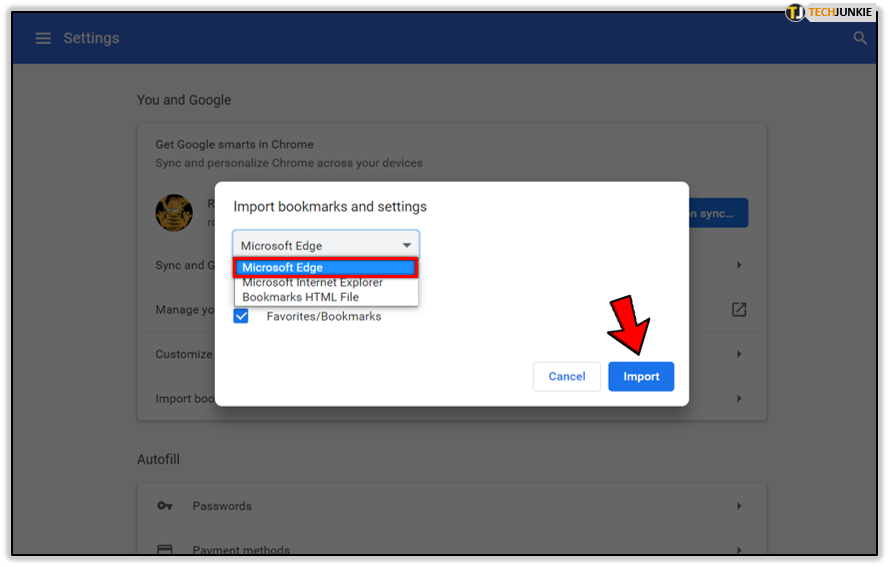
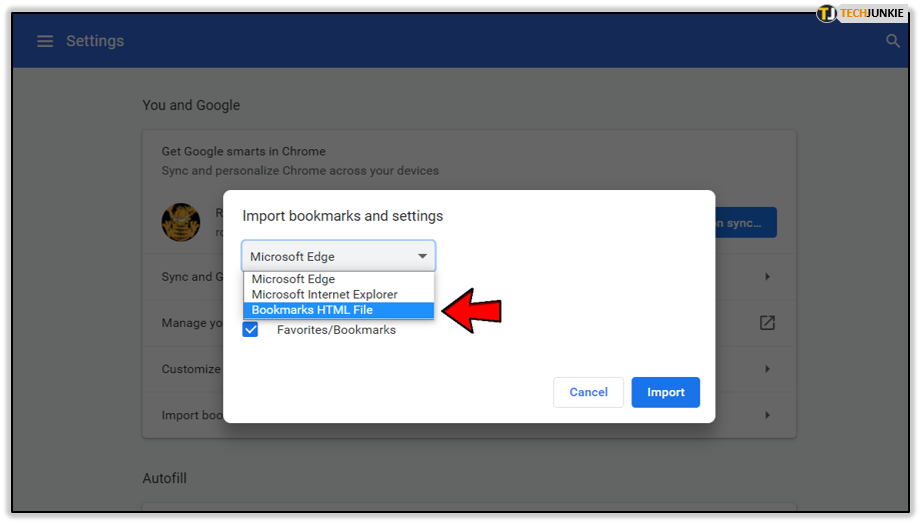
- Choose where you want to import the bookmarks from and click Import.

- Chrome will save the imported bookmarks in a folder on the Bookmarks Bar or in Other Bookmarks.

How to Back Up Your Bookmarks
If you want to make sure you never lose your bookmarks and you’re able to import them anywhere, backing them up is the best solution. It’s very simple and doesn’t take long.
- Launch Chrome and click on the Menu.

- Find Bookmarks and choose Bookmark Manager from the list that’ll appear. Another way to open the Bookmark Manager is to press Ctrl+Shift+O.

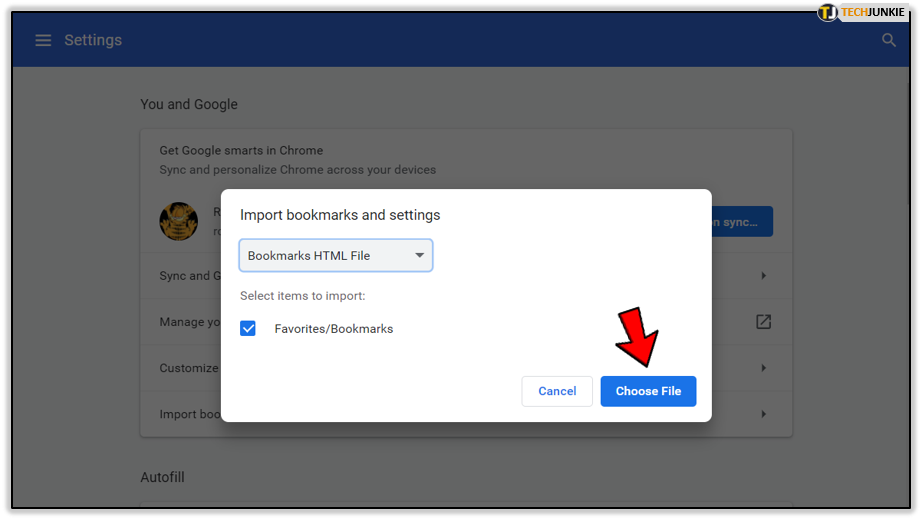
- From the pop-up window choose the Bookmarks HTML file option.

- Click on ‘Choose File’. A dialog box will open, where you can rename the file and choose the location to which you’ll save it.

- You can later access this file from the Bookmark Manager.
Ways to Organize Your Bookmarks
Just like how you’re more focused when your working space is neat, you’ll find things more quickly in Chrome if you keep it organized.
Here are some tips on how to organize your bookmarks so you don’t have to waste time scrolling through an endless list, never finding the page you need.
- First of all, organize a big cleaning. You’ve probably bookmarked a number of pages you thought would be useful or you’d read later only to never open them again. If you believe you won’t have time to do it any time soon, delete them. Hoarding entries in your Bookmarks won’t do you any good.
- Create folders for different categories. Here are some ideas: Read Later, Study Material, Useful Tools, Recipes, Must-Watch Movies, and so on. If you keep the bookmarks in separate folders, it’ll make it easier to find what you’re looking for.
If you don’t know how to create a folder, follow these steps:
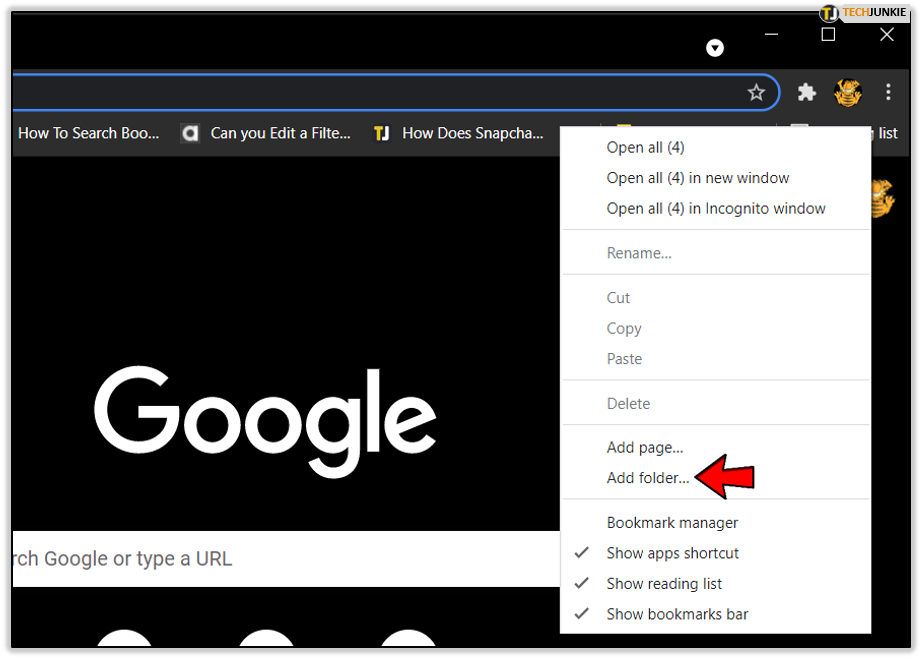
– Right-click on the Bookmarks Bar, somewhere between your pages.
– Click on Add folder.
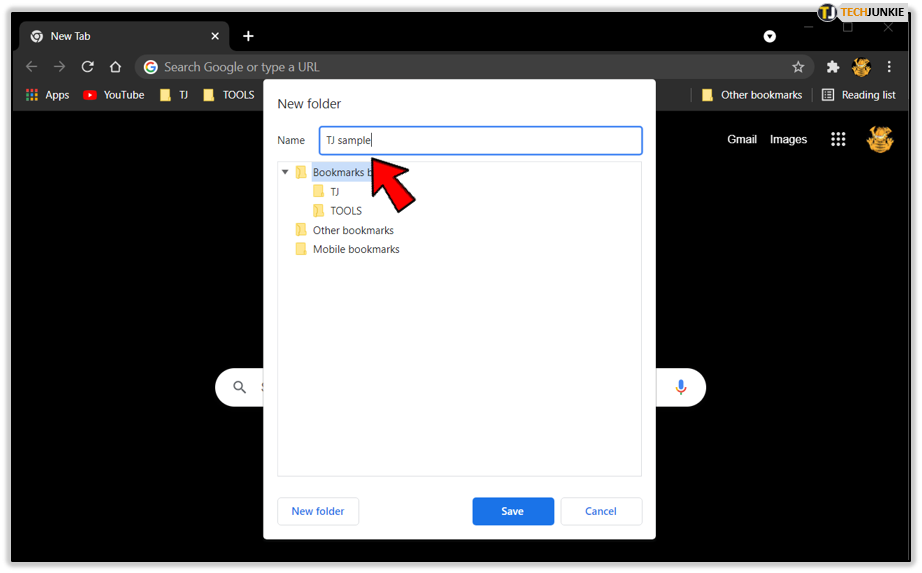
– Name the folder and choose where you want to save it.
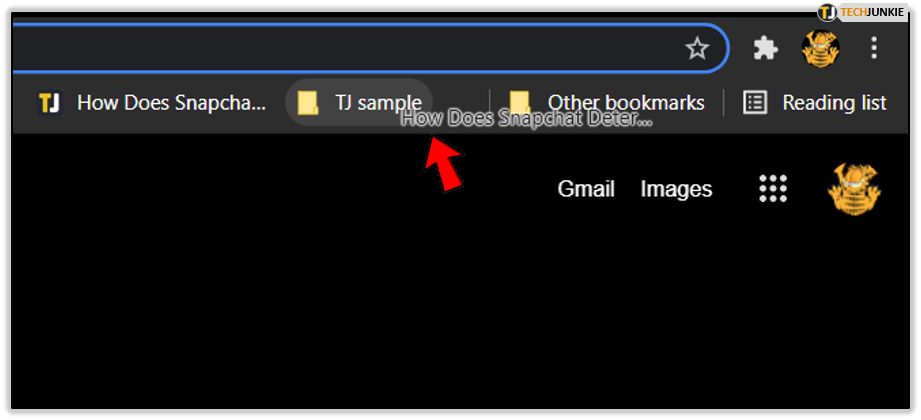
– Drag pages to store them in the folder.
- Remove any bookmarks that you have saved more than once. You can use a Chrome extension to do it, and it will also merge folders and leave your bookmark list tidy. Our choice is Bookmarks Clean Up.
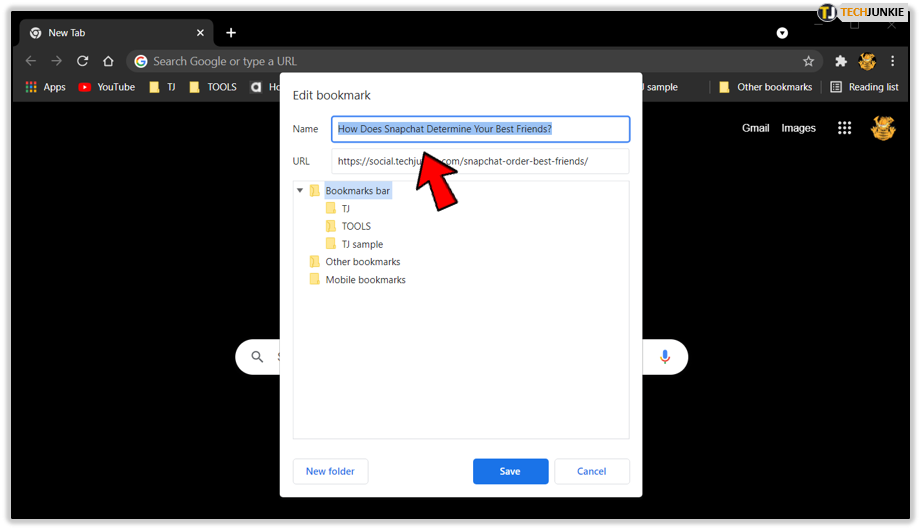
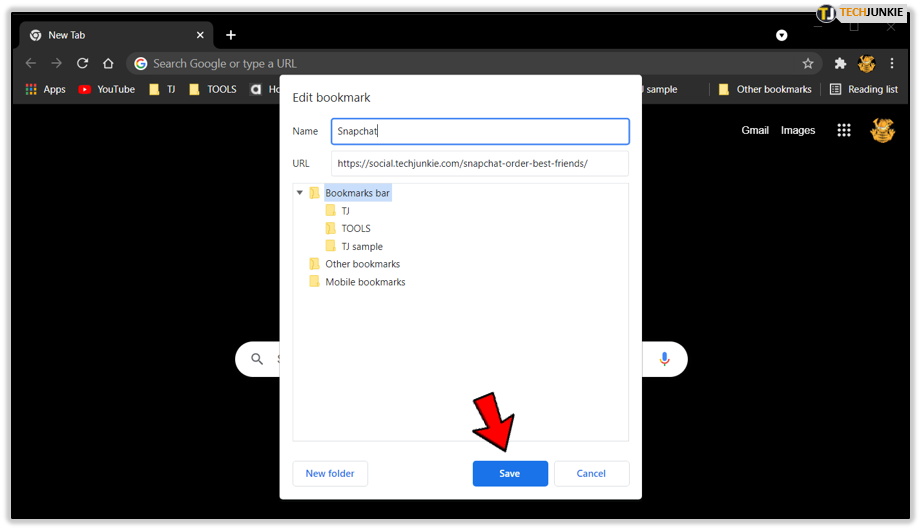
- Rename your bookmarks to make the Bookmark Bar look more compact. If you only leave icons (if the page stays recognizable without the name) or shorten the page’s name, you’ll have more space for other bookmarks on the bar. How do you do it?
– Right-click on the bookmarked page on the bar.
– Find Edit and click.
– Type in the new name for the page or delete all the text.
– Click Save.
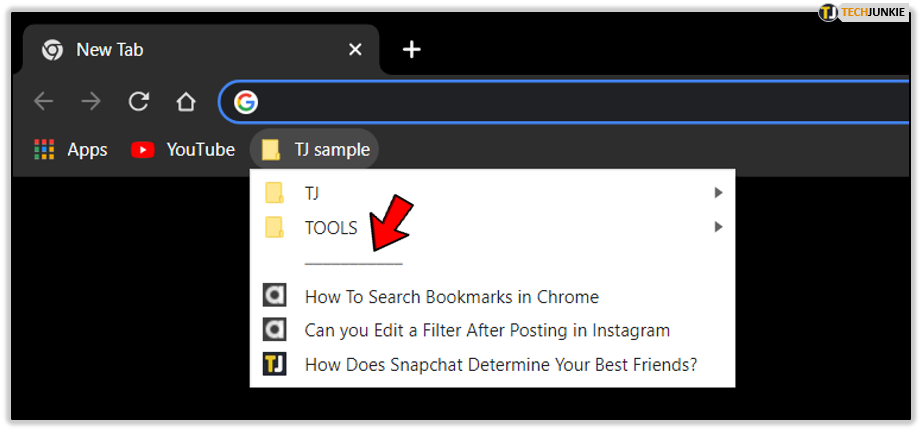
- Create separate sections to make it even easier to find pages in your bookmarks. Organize related folders by putting them in the same section. You can do this by using websites with vertical or horizontal dividers – they’re very simple to use and the effect is amazing.

Does It Mean That the Internet Is a Giant Book?
Cleaning up and organizing your bookmarks may seem like a small thing, but it can really enhance your Chrome experience. Especially if you use the Bookmark Manager daily and you like it when things are tidy – from your desk to your virtual office.
Do you keep your bookmarks organized? What’s your way to manage them? Let us know in the comments!





2 thoughts on “How to Organize Bookmarks in Chrome”